Table of Contents
Advertisement
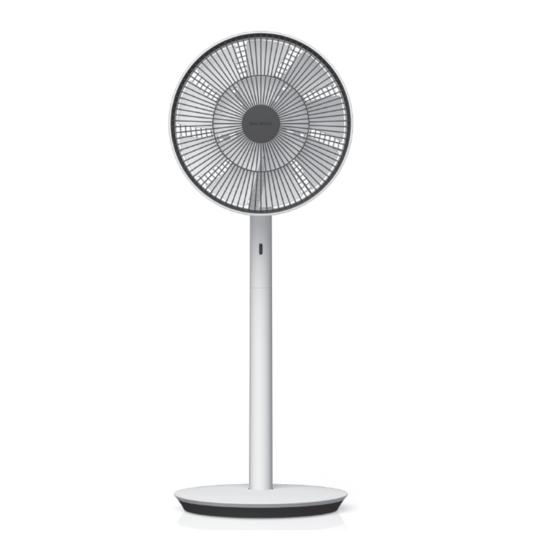
The Green F an
Electric Fan (for home use)
EGF-1600 Series
Instruction Manual
Warranty Included
Important
Thank you for purchasing The GreenFan.
Please be sure to read this manual,
especially "Safety Precautions" on pages 3-6 before using the product.
Also be sure to take note of content marked with a
This manual also includes the warranty.
Fill in the spaces for information such as date
and place of purchase, and keep this manual for future reference.
on individual pages.
Advertisement
Table of Contents

Related Manuals for BALMUDA EGF-1600 Series


Summary of Contents for BALMUDA EGF-1600 Series
- Page 1 The Green F an Electric Fan (for home use) EGF-1600 Series Instruction Manual Warranty Included Important Thank you for purchasing The GreenFan. Please be sure to read this manual, especially “Safety Precautions” on pages 3-6 before using the product. Also be sure to take note of content marked with a on individual pages.
- Page 2 Important Thank you for purchasing The GreenFan. Please be sure to read this manual, especially “Safety Precautions” (P.3-6), before using the product. Also be sure to take note of content marked with a [ ] on individual pages. This manual also includes the warranty. Fill in the spaces for information such as the date and place of purchase, and keep this manual in a safe place for future references.
-
Page 3: Table Of Contents
Table of Contents Safety Precautions Maintenance ‧‧‧‧‧‧‧‧‧‧‧‧‧‧‧‧‧‧‧‧‧‧‧‧‧‧‧‧‧‧‧‧‧‧‧‧‧‧‧‧‧‧‧‧‧‧‧‧‧‧‧ 18 Safety Precautions ‧‧‧‧‧‧‧‧‧‧‧‧‧‧‧‧‧‧‧‧‧‧‧‧‧‧‧‧‧‧‧‧‧‧‧‧‧‧‧‧‧‧‧‧‧‧‧‧‧‧‧ 3 Storing the Product ‧‧‧‧‧‧‧‧‧‧‧‧‧‧‧‧‧‧‧‧‧‧‧‧‧‧‧‧‧‧‧‧‧‧‧‧‧‧‧ 19 Special Cautions ‧‧‧‧‧‧‧‧‧‧‧‧‧‧‧‧‧‧‧‧‧‧‧‧‧‧‧‧‧‧‧‧‧‧‧‧‧‧‧‧‧‧‧‧‧‧‧‧‧‧‧‧‧‧ 4 Warning ‧‧‧‧‧‧‧‧‧‧‧‧‧‧‧‧‧‧‧‧‧‧‧‧‧‧‧‧‧‧‧‧‧‧‧‧‧‧‧‧‧‧‧‧‧‧‧‧‧‧‧‧‧‧‧‧‧‧‧‧‧‧‧‧‧‧‧ 5 Product Specifications ‧‧‧‧‧‧‧‧‧‧‧‧‧‧‧‧‧‧‧‧‧‧‧‧‧‧‧‧‧‧‧‧‧‧ 20 Caution ‧‧‧‧‧‧‧‧‧‧‧‧‧‧‧‧‧‧‧‧‧‧‧‧‧‧‧‧‧‧‧‧‧‧‧‧‧‧‧‧‧‧‧‧‧‧‧‧‧‧‧‧‧‧‧‧‧‧‧‧‧‧‧‧‧‧‧‧ 6 Troubleshooting Before Using Troubleshooting ‧‧‧‧‧‧‧‧‧‧‧‧‧‧‧‧‧‧‧‧‧‧‧‧‧‧‧‧‧‧‧‧‧‧‧‧‧‧‧‧‧‧‧‧‧‧‧‧‧‧ 21 Package Contents ‧‧‧‧‧‧‧‧‧‧‧‧‧‧‧‧‧‧‧‧‧‧‧‧‧‧‧‧‧‧‧‧‧‧‧‧‧‧‧‧‧‧‧‧‧‧‧‧‧‧‧ 7 Warranty and After-Purchase Service ‧‧‧‧‧‧‧‧‧‧‧‧‧‧‧‧‧... -
Page 4: Safety Precautions
Safety Precautions Please read the safety precautions and use the product correctly. The cautions herein are intended to help you use the product safely and avoid injury and property damage. The following classifications indicate hazards or damage that could result from improper use. Warning Indicates possibility of death or serious injury. -
Page 5: Special Cautions
To request an inspection of your fan, contact the BALMUDA Europe Service Center (P. 24). Do not insert fingers or foreign Do not place the fan on uneven Do not use any AC adapter other objects inside the Guard or or unstable surfaces. -
Page 6: Warning
Do not disassemble except for maintenance purposes. Warning Doing so may cause fire, electric shock, or injury. Do not use the cord or power plug if damaged or if incapable of being firmly inserted into the power outlet. Doing so may cause a short-circuit, electric shock, or fire. Do not damage, modify, bend, pull, twist, or bundle the cord. -
Page 7: Caution
Do not use the product in the following places. Doing so may cause electric shock or fire. Caution • Near a gas stove or open flame • Near flammable gases • Near water or rain Do not expose your body to the wind for an extended period of time. Excessive decreases in temperature can be harmful to your health. -
Page 8: Before Using
Package Contents The number in the parentheses indicates the number of products. ① ① ② Unpacking the Fan Guard Front Fan Guard (1) Fan (1) Rotate the Front Fan Guard (①) Side Guard (1) and pull (②) to remove. Motor Unit (1) Center Pole (1) Instruction Manual/Warranty (1) Remote Control (1) -
Page 9: Assembly Of The Head Unit
Assembly of the Head Unit Fix the Side Guard to the Motor Unit with the Secure the Fan using the Fan Holder. Guard Holder. * Match the Side Guard to the ●▲■ marks on the * Be sure to note the orientation of the Fan when attaching. Head Unit to attach. -
Page 10: Assembly
Assembly Connect the AC adapter plug. Insert the Center Pole Insert the assembled Head Unit into the Base Unit. into the Center Pole. Inserting the shaft joints into the holes Insert the thin shaft into the small hole. Connect the AC adapter to an outlet. Insert the thick shaft into the large hole. -
Page 11: Using In The Short Size
Using in the Short Size Re-Assembly This product can be used in the Tall Size as a stand fan, Press the Lock Release button Remove the Center Pole while or in the Short Size as a desk fan. to remove the Head Unit. pressing the Lock Release button on the underside of the Base. -
Page 12: How To Use
Operating Instructions Power Button Turns power on/off LED indicators Air Volume Button Select air volume Oscillation Button Turns oscillation on/off Air Volume Display Off Timer Button Indicates the air volume setting in green lights. Select time to turn off The air volume can be adjusted in 4 steps, from an extra-gentle breeze for sleeping to a strong circulator mode. -
Page 13: Manual Angle Adjustment
Manual Angle Adjustment In addition to automatic oscillation, the oscillation angle of the fan can be adjusted up, down, left, or right by hand. 19° upward Non-incremental adjustment 11° downward 75° to the left 75° to the right * Vertical adjustments are non-incremental. * Do not move the fan beyond the above angles when manually adjusting the angle. -
Page 14: Automatic Oscillation Angle Setting
Automatic Oscillation Angle Setting The automatic oscillation angle of this product can be set as desired. To set the angle, rotate the Head Unit to the left and right during automatic oscillation operation to set Point A and Point B. Once set, the fan will oscillate automatically between Point A and Point B. - Page 15 Point A has been set. * When the fan is turned off, the Head will move to the center automatically. Visit the BALMUDA homepage for a video on how to set When the power is turned back on, automatic oscillation at the previously the automatic oscillation angle.
-
Page 16: Using The Remote Control
Using the Remote Control The buttons on the remote control enable the same operation as the buttons on the fan. (P. 11) Signal Emitter Power Button Turns power on/off Air Volume Button Select air volume Oscillation Button Turns oscillation on/off Signal Receiver Off Timer Button Select time to turn off... -
Page 17: Replacing The Batteries
Read the following precautions on using the remote A battery is included inside the remote control when shipped from the factory. Pull the insulating sheet in the direction indicated by the arrow to use the remote control. control to ensure correct usage. •... -
Page 18: Using The Ac Adapter
Using the AC Adapter BALMUDA Multi-Plug AC Adapter The Plug Unit on the BALMUDA Multi-Plug AC Adapter can be plugged into an outlet in four ways, letting you choose the best fit for the outlet. Right Down Left Removal Attachment... -
Page 19: Maintenance
Maintenance BALMUDA recommends performing maintenance on the fan once every two weeks. When performing maintenance, be sure to disconnect the AC adapter before proceeding. ① ① Refer to P. 10 ② “Re-Assembly” for information on disassembly. Rotate the Front Fan Guard (①) and pull (②) to remove. -
Page 20: Storing The Product
Storing the Product Please store the product as shown below. ① ③ ② ③ ① ② ⑥ ④ ⑤ Packaging view from above ④ ⑥ • To prevent battery corrosion, remove the battery when the remote control will not be used for Lock ⑤... -
Page 21: Product Specifications
Product Specifications AC Adapter 100–240 V ∼ Product Name The GreenFan Input Voltage Max.0.9A Model EGF-1600 Series Input Current Voltage 12 V Frequency 50/60 Hz Power Consumption Max. 20 W Output Voltage 12 V Max. RPM Max.775 rpm Output Current Dimensions (W ×... -
Page 22: Troubleshooting
Troubleshooting After reviewing the suggestions in this section, if the problem persists, contact the BALMUDA Europe Service Center (P. 24). Problem Points to Check Possible Solutions Page ● Has a fuse blow or breaker been tripped in your home? ▶ Check your fuses and breaker. - Page 23 P. 9 before reconnecting. If the problem persists, check which LED indicators are flashing, and contact the BALMUDA Europe Service Center. P. 24 ● Has the fan not been operated for more than 1 minute? ▶ The LED indicator will dim after 1 minute if the fan is The LED indicator on the P.
-
Page 24: Warranty And After-Purchase Service
1. Please receive the warranty card from your dealer with the purchase date and the dealer name filled in. 2. The warranty is valid for 2 years from the date of purchase. For repairs, please contact the BALMUDA Europe Service Center or your dealer. -
Page 25: Disposal Of Waste Batteries And Electrical And
040-897 25 35 15 (* Call charge required) BALMUDA Europe Service Center Online Inquiries Please search the net with the keyword “BALMUDA,” 9:00-16:30, weekdays & business days only BALMUDA, or visit https://www.balmuda.com/de/support/. * Please check the product model before inquiry. -
Page 28: Warranty
Please request for a repair by submitting the warranty card 2 years from the date of purchase with the product at the BALMUDA Europe Service Center (see Instruction Manual P.24) or your dealer. Recycled parts compliant with our quality standard may be used for repair.
Need help?
Do you have a question about the EGF-1600 Series and is the answer not in the manual?
Questions and answers