Table of Contents

Related Manuals for TCL TKJ-F305B


Summary of Contents for TCL TKJ-F305B
- Page 1 TCL A Air Purifie er ER MANUAL DEL: TKJ‐F305B TKJ‐F315A ease read this use r manual carefully before use. And u use strictly in accor rdance with ...
- Page 2 D Disassembly and in nstallation method ds of the front pan nel........12 P Placement of air p urifier...................12 CONTE ENTS I Install battery into o the remote contr ol..............13 I Install filter net......................15 U Understand functi ons of the filter ne et......
-
Page 3: Safety P Precautions
Order p parts or accessorie es.............. ......44 Safety preca utions Fittings s........................44 ease be sure to pa ay attention to the e following safety p precautions, in ord der to avoid 7. Other i nformation................ ......45 mages or financial risks to you or oth her persons. Recyclin ng.................. ...... - Page 4 Please insert t the plug fully into o power socket b before starting th he air Attention purifier. ease turn off powe er of the machine if any of the follow wing conditions o ccurs: Electric sh hock or overheati ng, even fire acci dents may occur if the plug is not ...
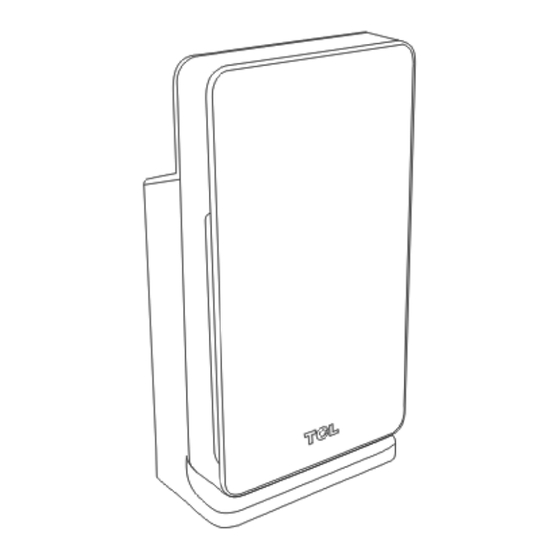
- Page 5 The room must t be ventilated wh hen using this air purifier together with Product intro oduction the electric hea ater. Or, carbon n monoxide poison ning may happen. Indicator ligh ht of air quality This air purifier is unab ble to eliminate car rbon monoxide. Prohibited to use this air pu urifier in the ro oom with fumig ation pesticides. Chemical residue may rema ain ...
- Page 6 nction description n of control panel Control pa anel Remote cont rol ON/O OFF button AUTO O button DE button SILEN NT button SPEE ED button TKJ‐F305 5B/TKJ‐F315A: The e Mode Button o of the remote cont trol can “ANION” fun nction.
-
Page 7: Before Use
Disassembly and installation methods of the front panel 3.Before use 1. Disassembly method of the front panel Record date of use on the label Hold groove at two sides of the front panel, pull out the magnetic door holder. Slightly Please record date on nameplate at back of the machine body before using this air lift up the bottom of groove to remove the front panel. purifier. Change filter net regularly in order to enjoy optimum performance of the air purifier. Nameplate and record 2. Installation method of the front panel To reinstall the front panel, align and insert the fixed groove, then exert pressure at top of the machine, and fix the front panel to be close to the magnetic door holder. Understand indicator light of air quality Indicator light of air quality reflects current air quality. Please refer to page 10 and page 24 to see the details. ... - Page 8 curtain. And please make sure space between air outlets and the back is at least 10 1. Press down battery tank hook ○ . Then dismount the battery tank hook from the cm. remote control ○ . Please keep 1 meter or more distance from the TV, radio. Please do not insert power plug of the machine with power plug of TV, radio or other into the same power socket. ...
-
Page 9: Operating Steps
2. Hold groove at two sides of the front panel, pull out the magnetic door holder. Install filter net Slightly lift up the bottom of groove to remove the front panel. Information: This air purifier is inclusive of all filter nets. Please remove packings of all filter nets before using this product. Please in accordance with the following instructions remove packings of all filter nets. Then put them into the air purifier again. 3.Remove the filter assembly inside the purifier. (Tips: Remove the filter assembly ... - Page 10 6.Install th he filter assembly. nderstand fu unctions of th he filter net mposition of the f ilter net ②, The activated ca Note: Whe n replacing The HEP PA efficient filter net arbon filter net③ an nd The Titanium + cold catalyst double e‐layer aluminum hon neycomb efficient co mpound filter net④ these ...
- Page 11 sorb volatile organ nic compounds, re move peculiar sme ell and chemical su ubstances in nano‐TiO2 2 employing TCL L patented titan ium technology, with high abilit ty of e air. sterilizatio on and viruses rem moval, And an effic ient formaldehyde e remover is painte ed on ...
- Page 12 , is known as "th he vitamin in the air", meaning o of this product wil l make your life ric ch in the same neg gative ions Yeast Virus Mycetic spore Mildew Mold Bacteria TCL intel ligent air purifier r could efficiently y remove the fo ollowing allergens and bacteria. ...
- Page 13 On and off of the air purifier 4. How w to use Function description of con ntrol panel ter plugged in the power, LED light a nd buzzer will con duct self‐checking g. The buzzer ON/OFF b button: long press 3 seconds to shut t down the machin ne. ves two sounds. LE D light is on after the second sound . The air quality in dicator light ANION bu utton: long press 3 3 seconds to shut d down the anion m mode. is o on in the order o of red→green→blu ue→purple. Then all ...
- Page 14 Under oth her working mode, , press AUTO butto on, the product en nters auto mode. ATTENTION: Under the e auto mode, the product will switc ch wind speed am mong the first gea r, the dicator light of the e air quality will b be automatically o n when opening t the ...
-
Page 15: S Silent Mode
be on. Ch ange order of each h gear: gear 1‐> ge ear 2 ‐> gear 3 ‐> ge ear 4‐> gear 1 e working mode yo ou need. Indicator light of each gear of wind speed: ATTENTION: Gear 1 ght mode only app plies to the conditio on that product w orks under auto m mode. ent mode Gear 2 Gear 3 Gear 4 ess SILENT button, and the product w will work under sil ent mode. Wind s peed will be ... -
Page 16: Maintenance And Cleaning Methods
5. Maintenance and cleaning methods ATTENTION: Condensed water may be formed on the air quality sensor when humidity in the room Pull out the power plug before cleaning. is extremely high. Therefore, indicator light of air quality will display poor air quality Please do not put the product in water or any liquid. even if the air quality is good. In this case, please clean the air quality sensor or use any of the manual speed set. Please do not use cleaning agents with high abrasiveness, corrodibility or 1. Use a soft brush to clean air inlet/outlet of the air purifier. inflammability (such as decolorizer or alcohol) to clean any part of this product. Only pre‐filter net could be washed. Compound filter nets cannot be washed. 2. Dismount protective cover of the air quality sensor. Clean the air purifier Clean inner side and outer side of air purifier regularly to prevent dust gathering. 3. Use wet cotton stick to clean air quality sensor, air inlet and air outlet. 1. - Page 17 perating steps: Clean p pre‐filter net t 1. T Turn off the power r to stop the air pu urifier. Informat tion To achiev e the optimum pe erformance, it is r recommended to w wash and maintai n the filter net e every two months (about 480 hours) ) after the initial u se. * Based o on use of the prod uct at home for 8 hours every day, a and 7 days one we eek in average. For exteri ior maintenance, wipe surface with h ...
- Page 18 4. Remove e the filter assemb bly. 7.In nstall the filter ass sembly. 5. Dismou unt the filter assem mbly. ease install the filte er assembly as follo ows. ② into The filter a ①, and put in Firs st put The HEPA e efficient filter ne ② assembly holder① e activated carbo on filter net③, a nd The Titanium + cold catalyst d double‐layer ...
- Page 19 o matter which fi lter need to be r replace, the corre esponding indicato or light will 9.Insert p ower plug. flas shes, the correspo onding filter needs to be replaced an nd you need to pre ess the Filter set button for 3 se econds or more to reset the machine e before the purifie er can work. e specific replacem ment operation is as follows ...
- Page 20 2. Turn th e power off to sto p the air purifier. T Then unplug the po ower plug. 5. D Dismount the filte r assembly. Filter assembly Filter assembl ly Dismounted 3. Hold gr roove at two sides of the front panel , pull out the magn netic door holder. 6. I Install the filter ass sembly. 4. Remove e the filter assemb bly. ease install the filte er assembly as follo ows. ...
- Page 21 7. Put the e filter assembly ba ack into the purifie er, and reinstall fro nt panel. ong‐term idlin ng plug the power pl ug. ( Power is cons sumed even under r ready mode.) oroughly wipe inte erior dry. (Equipme ent fault can be ca used by rustiness. ) t the machine in a a dry and ventilate ed place. (Placed fl lat or upside down n may cause ults.) uggested freq quency of rep placing the fi ilter net 8. Insert p power plug , turn t he power on. ...
-
Page 22: Fault Handling
6. Fault handling uneven surface. surface. This chapter lists out possible faults when using this product. If faults could not be Loose or foreign particles Contact customer service center or the resolved by using the following information, please contact TCL customer service are inside the machine. distributor. center or the distributor. Electric motor is loose. Contact customer service center or the ... -
Page 23: Warranty And Service
If y you want to chan nge parts or purch hase additional pa arts, please conta act your TCL area. stomer service cen nter or the distribu utor. Fittings ... - Page 24 Tita anium + cold catal lyst double layer Pre-filter r net alum minum honeycomb efficient filter net Activated ca arbon filter net HEPA filter net 7. Othe er informatio on Recyc cling Please do o not put this pro oduct ...
Need help?
Do you have a question about the TKJ-F305B and is the answer not in the manual?
Questions and answers