Table of Contents
Advertisement
Quick Links
Advertisement
Table of Contents

Subscribe to Our Youtube Channel
Related Manuals for Udirc SLRD40


Summary of Contents for Udirc SLRD40
- Page 1 SLRD40 Operations Guide...
-
Page 2: Charging Instruction For Drone Battery
Charging Instruction for Drone Battery 1. Connect the drone battery with USB cable first and then choose one of the method as below picture shown to connect with USB plug. 2. The red USB indicator light keeps bright when charging and the light turns green when fully charged. -
Page 3: Instruction For Drone And Transmitter
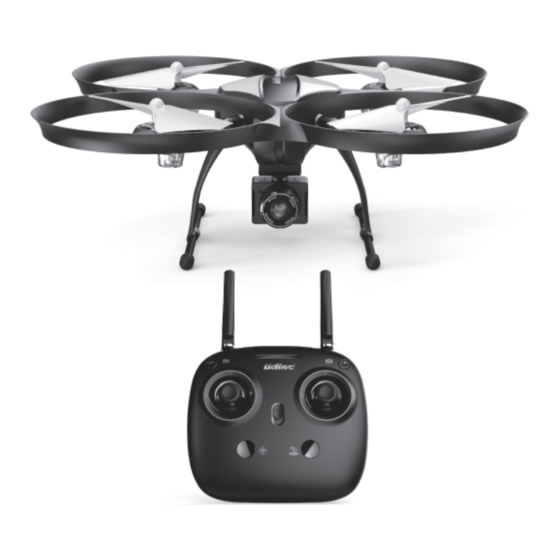
Instruction for Drone and Transmitter Drone Front A Propeller B Propeller Clockwise Counterclockwise Drone Cover Housing Left Right B Propeller A Propeller Counterclockwise Clockwise Rear Front Front Led Front Led (Green) (Green) Rear Led Rear Led (Red) (Red) Power Switch... -
Page 4: Exploded View
Exploded View Name Name Name Drone Cover Housing LED Cover Switch A Propeller B Propeller Receiver Board Holder Upper Motor Cover A Upper Motor Cover B Power Switch Board Transmission Gear Front Led Board(Green) Camera Adapter Board AL Main Shaft... - Page 5 Transmitter Power Switch Record Shutter Left Stick Right Stick One button Take Off / Heading Hold Mode Landing / Emergency Stop Button High / Medium/Low Trimmer Mode Button Speed Button Battery Cover Brief Introduction for Button Functions Move the Stick to forward / backward / left / right to fly the drone to up / down / Left Stick turn left / turn right.
-
Page 6: Battery Installation
Battery installation: Open the battery cover on the back side of the transmitter and put 4 alkaline batteries (AA, not included) into the box in accordance with electrode instructions as Picture 1(battery not included) ,close the battery cover(Picture 2). - Page 7 Battery Buckle Picture 11 3. Long press the power switch of the drone for 2s(Picture 10),put the drone on the flat surface, the drone body lights turn from flashing to solid bright, which indicates frequency pairing is successful. Important Notice: Please make sure the drone is placed on the horizontal position after powering on the drone, so that the drone can work well.
-
Page 8: Calibration Instruction
Calibration Instruction Please follow below steps to calibrate the drone if the drone becomes imbalance after crashing during the flight, and can not be adjusted by trimmer button and cause difficult operation. 1. Power off the drone, then turn off the transmitter switch. -
Page 9: Flying Control
Flying Control Notice: Every time before the drone take off, move the Left Stick and Right Stick at the same time as Picture 12 shown(45 degree inward) to start the motors. Push up the Left Stick slowly to fly up the drone or press down the one button to take off. -
Page 10: Functions Introduction
Forward and backward trimmer When take off, if the drone tilts forward, press down the trimmer button, and push the right stick backwards. Otherwise push forwards. Left and right side flying trimmer When take off, if the drone tilts to left, then press and hold the trimmer Trimmer mode button and push the right stick to right. -
Page 11: Recording Mode
Push the Left Stick up (down) to fly the drone up (down) at certain altitude and then release the Stick. The Stick will back to the center position (Altitude Hold Center) as Picture17 shown. And the drone will keep flying at current altitude. -
Page 12: Heading Hold Mode
Heading Hold Mode Drones generally have a front and rear indicated by LED lights or colored propellers. By default, the users are required to tell the front and the rear of the drone when flying. Under heading hold mode, the users can operate the drone without worrying about the orientation (left is left and right is right all the time, regardless of where your drone is pointing at).Heading Hold Mode is designed for... -
Page 13: Low Battery Alarm
Low Battery Alarm When the transmitter in low battery, the transmitter will beep “di-di” to remind the user to land the drone to replace the battery as soon as possible. Or the drone may be out of control. When the drone in low battery, the transmitter will beep” di.di...” constantly to remind the user to land the drone as soon as possible. - Page 14 Spare Parts Assemble and Disassemble Landing Gear Installation Diagram Install the landing gear into bottom housing, as picture 19 shown, then use the screwdriver to fix attached 4 screws in clockwise direction. Rear Landing Gear Landing Gear Picture 19...
-
Page 15: Propeller Installation Diagram
2. Then the another end of this Micro cable connect to drone bottom housing (Picture 23). Picture 23 Propeller Installation Diagram 1. Use the screwdriver to remove the screw in counterclockwise direction, pull up the damaged propeller and take it out (picture 24). -
Page 16: Battery Installation Diagram
Battery installation diagram When install, you need to squeeze up and down of the battery buckle(Picture 29) and then put the Lipo battery aim at the drone battery slot. Picture 29 Receiver Board Bonding Wire... -
Page 17: Spare Parts
Spare Parts For convenience, the spare parts are listed for you to choose, which can be purchased from the local seller. SLRD40-01 SLRD40-02 SLRD40-03 SLRD40-04 Drone Cover Housing Drone Bottom Housing A Propeller B Propeller SLRD40-05 SLRD40-06 SLRD40-07 SLRD40-08... - Page 18 SLRD40-17 SLRD40-18 SLRD40-19 SLRD40-20 Camera Adapter Front LED Board Rear LED Board Micro Terminator Board (Green) (Red) SLRD40-21 SLRD40-22 SLRD40-23 SLRD40-24 Drone Battery USB Cable Gear TF Card SLRD40-25 SLRD4026 Card Reader Transmitter Important Statement Our company's products are improving all the time, design and specifications are subject to change without notice.
-
Page 19: Troubleshooting Guide
Troubleshooting Guide Problem Problem Cause Solution 1. Low battery. 1. Replace the transmitter battery. 2. The battery positive pole and negative 2. Install the battery in accordance with the transmitter pole are in reverse order. user manual. indicator 3. Clean the dirt between the battery and the light is off 3. -
Page 20: Fcc Notice
FCC Note This equipment has been tested and found to comply with the limits for a Class B digital device, pursuant to Part 15 of the FCC Rules. These limits are designed to provide reasonable protection against harmful interference in a residential installation. - Page 22 Catalog Important Statement Safety Precautions Safe Notice for Drone Battery Charging Instruction for Drone Battery Check List Before Flight Instruction for Drone and Transmitter Pre-flight Operation Instruction Functions Introduction Spare Parts Assemble and Disassemble Spare Parts Troubleshooting Guide...
-
Page 23: Important Statement
If you have any questions about use, operation, repair etc., please contact the local distributor. * Please only use UDIRC’s attached spare parts or purchase the original version of UDIRC’s spare parts to replace the damaged parts. Or we undertake no liability for those accidents caused by replacement. -
Page 24: Safe Notice For Drone Battery
(4) Keep away from humid environment The drone inside is consisted of precise electronic components and mechanic components. Humidity or water vapor may damage electronic components and cause accident. (5) Safe operation Please operate the RC drone in accordance with your physical status and flying skill.
Need help?
Do you have a question about the SLRD40 and is the answer not in the manual?
Questions and answers