
Related Manuals for R.P.S. Corporation Magnum Series


Summary of Contents for R.P.S. Corporation Magnum Series
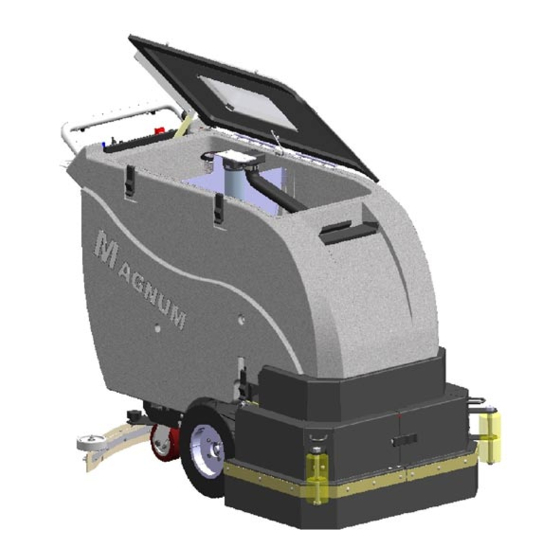
- Page 1 MAGNUM Operator and Parts Manual R.P.S. Corporation Phone: 1-800-450-9824 P.O. Box 241 Fax: 1-866-632-6961 Racine, Wisconsin 53401 Edition 1.4...
-
Page 2: How To Use This Manual
HOW TO USE THIS MANUAL This manual contains the following sections: The SAFETY section contains important information regarding hazard or unsafe practices of the - HOW TO USE THIS MANUAL machine. - SAFETY - OPERATIONS Levels of hazards are identified that could result - MAINTENANCE in product or personal injury, or severe injury - PARTS LIST... -
Page 3: Table Of Contents
TABLE OF CONTENTS PARTS BREAKDOWN ILLUSTRATION ACTUATOR LIFT ASSEMBLY PAGE 31-32 MACHINE INFORMATION FORM PAGE 1 CASTER FOOT ASSEMBLY PAGE 33-34 WARRANTY REGISTRATION FORM PAGE 2 FRAME ASSEMBLY PAGE 35-40 MACHINE SPECIFICATIONS PAGE 3 VAC MOTOR ASSEMBLY PAGE 41 COMMON WEAR PARTS PAGE 4 TANK BAFFLE ASSEMBLY PAGE 42... -
Page 4: Machine Information Form
This operator and parts manual should be considered a permanent part of the unit and should remain with the unit at all times. This operator and parts manual covers all the Magnum series scrubbers. You may find descriptions and features that are not on your particular model. The information and specifications included in this publication were in effect at the time of printing. - Page 5 R.P.S. CORPORATION P.O. BOX 368 RACINE, WI 53401 PHONE: 800-634-4060 Dealer: __________________________ Installed By: ______________________ Location: (City, State)_______________ Install Date: ______________________ Customer Information Name:________________________ Contact: _________________________ Address:_________________________ City/State:__________________Zip______ Phone Number :___________________ Fax Number: _____________________ Model Number:___________ Serial Number:______________ Hour Meter:____________...
-
Page 6: Machine Specifications
* HD STANDARD R.P.S. Corporation P.O. Box 368 Racine, WI 53401 Phone: (800) 634-4060 Fax: (866) 901-3335 Copyright R.P.S. Corporation 2006. All rights reserved. Since our policy is one of constant improvement, all specifications are subject to change without notice. PAGE 3... -
Page 7: Common Wear Parts
COMMON WEAR PARTS ITEM MODEL MODEL MODEL MODEL MODEL MODEL MODEL BRUSH TYPE 26"-DISK 30"-DISK 34"-DISK 24"-CYL 27"-CYL 30"-CYL 34"-CYL BRUSHES 15-421SS 17-421SS 13-421SS SUPER-GRIT 15-421S 17-421S 22-521S 25-521S 28-521S 32-521S TOUGH-GRIT 13-421S 15-421C 17-421C 22-521C 25-521C 28-521C 32-521C MIDI-GRIT 13-421C 13-421PS 15-421PS... -
Page 8: Safety Messages
SAFETY MESSAGES Your safety, and the safety of others, is very important, and operating this unit safely is an important responsibility. To help you make informed decisions about safety, we have provided operating procedures and other safety information in the manual. This information informs you of potential hazards that could hurt you or others. It is not practical or possible to warn you of all the hazards associated with operating this unit. -
Page 9: Safety Precautions
!! SAFETY PRECAUTIONS!! Always use the charger provided by WARNING: WARNING: Hazardous voltage. Shock, burns or the maufacturer to charge the machine. electrocution can result. Always disconnect the It is an automatic charger, specifically designed batteries before servicing machine. to charge at the appropriate rate. If you must use a different charger, disconnect the batteries Batteries emit hydrogen gases. -
Page 10: Machine Controls And Features
MACHINE CONTROLS AND FEATURES FIGURE 1. FIGURE 2. FIGURE 3. FIGURE 4A. FIGURE 4B. PAGE 7... - Page 11 CONTROLS AND FUNCTIONS SEE FIGURES (1-4) ON PAGE 7 SEE FIGURE 1 Turns the machine on and off. 1. MAIN POWER SWITCH: Controls the direction of the Traction Drive, Pull back for reverse. 2. FORWARD/REVERSE SWITCH (RED): 3. SPEED CONTROL KNOB: Controls the speed of the Traction Drive, Turn counter-clockwise to reduce speed.
-
Page 12: Machine Setup
MACHINE SETUP ATTACHING SQUEEGEE UNCRATING MACHINE Lower the squeegee mounting plate by Carefully check the crate for any signs of damage rotating the lift lever clockwise. and that the batteries are in the unit. To uncrate "A" (SEE BELOW ) the machine, remove banding from around the crate. -
Page 13: Adjusting & Removing Squeegee
ADJUSTING SQUEEGEE REMOVING SQUEEGEE 1. Turning adjustment knob "A" clock-wise 1. With the squeegee in the up position, (tightening) will lower tips & raise center. turn machine power off. (SEE PICTURE BELOW.) 2. Disconnect vacuum hose from squeegee "A" and loosen both knobs "B"... -
Page 14: Installing Disk Pad Driver Or Brush
INSTALLING DISK PAD DRIVER OR BRUSH Turn on machine power. Select the correct pads or brushes that best meet your cleaning application. Raise the scrub deck by depressing the brush Consult your local dealer for assistance. switch (O) to the up and off position and turn machine power back off. -
Page 15: Installing Cylindrical Brushes
INSTALLING CYLINDRICAL BRUSHES Turn on machine power. 7. Brush driver shown misaligned. (SEE BELOW) Raise the scrub deck by depressing the brush switch (O) to the up and off position and turn machine power back off. Disconnect batteries. 3. Remove side access door "D"... -
Page 16: Side Broom System
SIDE BROOM SYSTEM Your machine may come equipped 5. Brooms adjusted to low. (SEE BELOW) with the "optional" side broom system. (SEE BELOW) Flip side broom switch up to engage broom. (yellow toggle on left side of the control panel.) (SEE MACHINE CONTROLS ON PAGE 7.) 6. -
Page 17: Operation
OPERATION PRE-CLEANING CHECK LIST OPERATING HINTS Read and understand the safety section on pages 5 and 6 Observe the amount of solution the machine is before operating the machine. dispensing on the floor and adjust to the desired flow. To increase the solution flow rate, rotate the solution 1. -
Page 18: Vacuum Only
ONE PASS SCRUBBING SCRUB ONLY (SEE BELOW) (SEE BELOW) 1. Turn on machine power switch "A" , make sure 1. Turn on machine power switch "A" make sure the speed control knob is at it's lowest setting. is at it's lowest setting . "B"... -
Page 19: Adjust Solution Flow
ADJUST SOLUTION FLOW DRAINING SOLUTION TANK To drain unwanted cleaning solution from the solution tank, 1. Turn solution valve adjustment knob "A" perform the following steps. counter- clockwise to increase solution flow, (SEE BELOW) clockwise to decrease solution flow. (SEE BELOW) 1. -
Page 20: Open Recovery Lid
CLEAN "DRAIN SAVER" OPEN RECOVERY LID WITH RECOVERY LID OPEN & TANK FULLY DRAINED Release both latches on recovery tank lid. "A" Remove 2" squeegee intake hose from (SEE BELOW) "A" "Drain Saver" strainer "B" . (SEE BELOW ) Rotate lid fully open. Remove stainless screen, dispose of debris. -
Page 21: Tip Tank
TIP TANK SQUEEGEE UP Fully drain solution tank. To raise the squeegee off the floor rotate squeege lift lever counter- clock-wise "A" Fully drain recovery tank. all the way to the left. (SEE BELOW) 3. Remove squeegee. Unlatch tank latch "A"... -
Page 22: Deck Height Adjustment
DECK HEIGHT SOLUTION FILTER ADJUSTMENT o adjust deck height for brush clearance, 1. The solution system has a "INLINE FILTER" "A" to filter loosen jam nut on adjustment bolt turn "A", out cleaning solution prior to scrubbing. adjustment bolt clock-wise to raise deck, (SEE BELOW ) counter-clockwise to lower deck. - Page 23 BATTERY CHARGING CAUTION: The following instructions are intended for the 24v charger supplied with the machine. Do not use any other charger with this machine. CHARGER SPECIFICATIONS OUTPUT VOLTAGE OF 24 VOLTS. OUTPUT CURRENT OF 25 AMPS MAX (STANDARD). OUTPUT CURRENT OF 36 AMPS MAX (OPTIONAL). INPUT VOLTAGE OF 110 VOLTS/60 HZ.
- Page 24 ON-BOARD CHARGER RED INDICATOR LIGHT YELLOW INDICATOR LIGHT GREEN #1 INDICATOR LIGHT (CHARGE STATUS & FAULT INDICATOR) GREEN #2 INDICATOR LIGHT (AC PRESENT INDICATOR) OPERATING THE CHARGER The LED Function Chart below describes the charging process. NOTE: The LEDs discussed below in the table are the Charge Status LEDs. NOTE: The AC Present LED green#2 is lit at all times when AC is connected, and off when AC is not connected.
- Page 25 ON-BOARD CHARGER TROUBLESHOOTING Problem Cause Solution 1. Red LED stays on for 1. One or more defective or 1. Load test the batteries and replace if more than 18 Hrs. damaged cells. necessary. 2. Charger has reduced its output 2. Remove the source of the overload or voltage below the normal level due short.
-
Page 26: Daily Maintenance
MAINTENANCE DAILY MAINTENANCE MONTHLY MAINTENANCE Remove and clean pads or brushes. Never Check scrubhead and squeegee suspension cables use soiled pads when cleaning. Replace for wear and spring tension. pads when they become packed with residue. Check machine for water leaks and loose nuts or Remove and clean debris from the float bolts. -
Page 27: Preventative Maintenance Records
PREVENTATIVE MAINTENANCE RECORDS CUSTOMER INFORMATION CUSTOMER ADDRESS CITY STATE ZIP CODE MACHINE INFORMATION MODEL # SERIAL # WORK ORDER# HOUR METER: BATTERY CONDITION Cell #1 Cell #2 Cell #3 Cell #4 Cell #5 Cell #6 Battery # 1 Hydrometer Battery # 1 Water Condition Battery # 2 Hydrometer Battery # 2 Water condition Battery # 3 Hydrometer... - Page 28 Blade retainers & Hardware Squeegee Wheels Brush Skirts Brush Motor Brushes Brush or Pad Driver Condition Drive Wheel Condition Caster Condition COMMENTS Technician's Name Technician's Signature Date Customer's Name: Customer's Signature Date ©2006 R.P.S. Corporation continued from previous page PAGE 25...
-
Page 29: Lcd Screen Menu Displays
LCD SCREEN MENU DISPLAYS SCREEN # 1 SCREEN # 2 FIGURE A. FIGURE B. SCREEN #3 SCREEN #1 W/ERROR CODE FIGURE C. FIGURE D. *** USE GREEN MENU SELECTION BUTTON ON CONTROL PANEL TO CHANGE SCREENS*** FIGURES 47-50. - Indicates the energy level remaining in the batteries. (SHOWN ON ALL MENU DISPLAYS) BATTERY LEVEL INDICATOR SCRUBBING DECK DOWN PRESSURE GAUGE - Sets the down pressure on the brushes. -
Page 30: Troubleshooting Central Command
TROUBLESHOOTING CENTRAL COMMAND NOTE: This machine is operated by a sophisticated electronic "CONTROLLER" that has many fail-safes within it. The controller self-analyzes problems and flashes a four-digit numeric code of what is wrong in the LCD window. Most of these codes require a technician's attention. You should not attempt repairs you are uncomfortable with, especially if you are not used to working on electronics. - Page 31 TROUBLESHOOTING CENTRAL COMMAND The emergency stop button 5. 7900 AND 7901 ERROR. is out. You pressed the drive button 6. HIGH THROTTLE ERROR. before turning on the key. Turn off the key, release the drive button and try again. Low voltage warning. 7.
-
Page 32: Charging Batteries
TROUBLE SHOOTING PROBLEM CAUSE SOLUTION NO POWER, NOTHING OPERATES FAULTY POWER SWITCH CONTACT LOCAL SERVICING DEALER BATTERIES NEED CHARGING SEE CHARGING BATTERIES FAULTY BATTERY REPLACE BATTERY LOOSE BATTERY CABLE TIGHTEN LOOSE CABLE MAIN CIRCUIT BREAKER TRIPPED WAIT 5 MINUTES FOR AUTO RESET DETERMINE CAUSE AND CORRECT BRUSH MOTOR(S) DO NOT OPERATE GREEN BUTTON IS NOT DEPRESSED... - Page 33 TROUBLE SHOOTING PROBLEM CAUSE SOLUTION NO SOLUTION FLOW NO SOLUTION IN TANK FILL SOLUTION TANK SOLUTION SWITCH OFF TURN SOLUTION SWITCH ON SOLUTION SCREEN CLOGGED REMOVE AND CLEAN SCREEN FAULTY SOLUTION SOLENOID CONTACT LOCAL SERVICING DEALER FAULTY SOLUTION SWITCH CONTACT LOCAL SERVICING DEALER POOR WATER RECOVERY RECOVERY TANK IS FULL EMPTY RECOVERY TANK...
-
Page 34: Machine Parts
MACHINE PARTS SECTION INDEX In Order of Presentation Section Page Actuator Lift Assembly 31-32 Caster Foot Assembly 33-34 Frame Assembly 35-40 Vac Motor Assembly Tank Baffle Assembly Tank Assembly 43-46 Tank Lid Assembly 47-48 Squeegee Trail Arm Assembly 49-50 On-Board Soap 51-52 On-Board Battery Charger 51-52... -
Page 35: Actuator Lift Assembly
ACTUATOR LIFT ASSEMBLY PAGE 31... - Page 36 ACTUATOR LIFT ASSEMBLY Item Part Number Part Description H-70710 HN 1/4"- 20 SS 290-1233 3/8" ID, 1/2" OD, 1/4" LG BEARING H-71063 LW 1/4" SS H-NJ04C JNYL 1/4" - 20 SS H-70005 HCS 1/4"- 20 X 1" SS 253-1150 ACTUATOR ARM H-70732 HN 3/8"- 24 SS 190-1155...
-
Page 37: Caster Foot Assembly
CASTER FOOT ASSEMBLY PAGE 33... - Page 38 CASTER FOOT ASSEMBLY Item Part Number Part Description Optional P/N Optional Description 253-0130 5" CASTER, RED 253-3030 5" CASTER, GRAY 253-1380 CASTER FOOT 290-1233 3/8" ID, 1/2" OD, 1/4" LG BEARING H-70711 HN 5/16"- 18 SS H-70861 NYLOK 5/16" - 18 SS H-71016 FW 5/16"...
-
Page 39: Frame Assembly
FRAME ASSEMBLY PAGE 35... - Page 40 FRAME ASSEMBLY Item Part Number Part Description Optional P/N Optional Description 253-1000 MAINFRAME WELDMENT 253-1010 LIFT ARM SUPPORT BRACKET 253-1015 FRAME CURTAIN 253-1020 BAND, FRAME CURTAIN 253-1040 TANK STRAP SUPPORT 253-1050 TANK STRAP, 35" LG X 4" WIDE 253-1060 BOSS 253-3009 TRANS AXLE 32-0999...
- Page 41 FRAME ASSEMBLY REMOVE NYLOK NUT AT END OF BOLT. ATTACH SPRING TO THE BOLT. REPLACE NYLOK NUT. PAGE 37...
- Page 42 FRAME ASSEMBLY Item Part Number Part Description Optional P/N Optional Description 253-1000 MAINFRAME WELDMENT 253-1010 LIFT ARM SUPPORT BRACKET 253-1015 FRAME CURTAIN 253-1020 BAND, FRAME CURTAIN 253-1040 TANK STRAP SUPPORT 253-1050 TANK STRAP, 35" LG X 4" WIDE 253-1060 BOSS 253-3009 TRANS AXLE 32-0999...
- Page 43 FRAME ASSEMBLY ATTACH THIS END OF STRAP TO INSERTS ON UNDER SIDE OF TANK. DISK MACHINES ONLY. FOR MACHINES EQUIPPED WITH JAWS. RIGHT SIDE SHOWN, LEFT SIDE USE'S SAME PARTS. PAGE 39...
- Page 44 FRAME ASSEMBLY Item Part Number Part Description Optional P/N Optional Description 253-1000 MAINFRAME WELDMENT 253-1010 LIFT ARM SUPPORT BRACKET 253-1015 FRAME CURTAIN 253-1020 BAND, FRAME CURTAIN 253-1040 TANK STRAP SUPPORT 253-1050 TANK STRAP, 35" LG X 4" WIDE 253-1060 BOSS 253-3009 TRANS AXLE 32-0999...
-
Page 45: Vac Motor Assembly
VAC MOTOR ASSEMBLY Item Part Number Part Description Optional 190-1225 1.50 X 90 DEG STREET ELBOW Optional 190-1450 VAC BOX 190-2502 VACUUM FAN MUFFLER, 8" LG Optional 190-3002 VAC MOTOR GASKET 190-5250 VAC MOTOR, 3/4 HP, TANGENTAL 253-1505 LOADER VALVE 253-8006 CLEAR TUBE, 1/8"... -
Page 46: Tank Baffle Assembly
TANK BAFFLE ASSEMBLY Item Part Number Part Description 21-4028 SNAP GRIP CLAMP 21-4085 VAC SCREEN 21-7060 VAC BOX 253-1130 BAFFLE H-70858 NYLOK #10-32 SS H-72566 RPH #10-32 X 1" SS PAGE 42... -
Page 47: Tank Assembly
TANK ASSEMBLY DETAIL B DETAIL G DETAIL C DETAIL A DETAIL F DETAIL D DETAIL E PAGE 43... - Page 48 TANK ASSEMBLY Item Part Number Part Description Alternate P/N Alternate Description 170-8911 SCREEN STRAINER, 4-1/4" LG 190-1210 2.0" MNPT X 2.0" BARB, NYLON 190-1215 2.0" MNPT X 1.50" BARB, NYLON 190-5779 ELBOW, MALE 1/2" NPT X 1/2" TUBE OD, GLASS FILLED NYLON 190-7210 DRAIN HOSE, 1-1/2"...
- Page 49 TANK ASSEMBLY CONNECTS TO FILTER ON SCRUBDECK OR 3/4" MNPT OF QUICK CHANGE OPTION. SEE QUICK CHANGE PAGES. PAGE 45...
- Page 50 TANK ASSEMBLY Item Part Number Part Description Alternate P/N Alternate Description 170-8911 SCREEN STRAINER, 4-1/4" LG 190-1210 2.0" MNPT X 2.0" BARB, NYLON 190-1215 2.0" MNPT X 1.50" BARB, NYLON 190-5779 ELBOW, MALE 1/2" NPT X 1/2" TUBE OD, GLASS FILLED NYLON 190-7210 DRAIN HOSE, 1-1/2"...
-
Page 51: Tank Lid Assembly
TANK LID ASSEMBLY PAGE 47... - Page 52 TANK LID ASSEMBLY Item Part Number Part Description Alternate P/N Alternate Description Qty 190-1075 TANK CLEAR COVER GASKET 190-1410 VAC FORMED CLEAR COVER 253-1070 RECOVERY TANK LID GASKET 253-1400 TANK LID, S/S 253-1401 GRANITE FINISH 253-1450 RECOVERY TANK CABLE, 20" 32-8000 8"...
-
Page 53: Squeegee Trail Arm Assembly
SQUEEGEE TRAIL ARM ASSEMBLY PAGE 49... - Page 54 SQUEEGEE TRAIL ARM ASSEMBLY Item Part Number Part Description 190-1055 TUBE, 5/16" ID X 7/16" OD X 1-5/8" LG 21-7205 STAR KNOB 21-7570 BACK UP WHEEL (GREY) 253-7140 SQUEEGEE SWING PLATE 253-7150 SQUEEGEE TRAIL ARM 253-7220 SQUEEGEE TRAIL MOUNT 253-7610 SQUEEGEE TRIANGLE PLATE 253-7890 SQUEEGEE LIFT CABLE, 27-5/8"...
- Page 55 MAGNUM OPTION #253-29 ON-BOARD SOAP MAGNUM OPTION #253-30 ON-BOARD BATTERY CHARGER PAGE 51...
- Page 56 MAGNUM OPTION #253-29 ON-BOARD SOAP Item Part Number Part Description Comments Qty 253-1760 SOAP TRAY, SINGLE OPTIONAL H-70861 NYLOK 5/16" - 18 SS H-74429 CB 5/16"- 18 X 3/4" SS MAGNUM OPTION #253-30 ON-BOARD BATTERY CHARGER Item Part Number Part Description Comments Qty 253-2441 ON-BOARD BATTERY CHARGER OPTIONAL...
-
Page 57: Control Panel Assembly
CONTROL PANEL ASSEMBLY PAGE 53... - Page 58 CONTROL PANEL ASSEMBLY Item Part Number Part Description Options 21-4510 SOLUTION CONTROL KNOB, BLUE 21-4520 SPEED CONTROL KNOB, RED 253-2010 CONTROL PANEL BOX 253-2013 CONTROL PANEL TOP PLATE 290-234 KEY SWITCH 290-234A KEY SET (REPLACE) OPTIONAL 290-2891 LCD SCREEN 5-234 SWITCH, ROCKER, DPDT, ON/ON 5-300 EMERGENCY SHUT OFF...
- Page 59 CONTROL PANEL ASSEMBLY DETAIL A ATTACH SQUEEGEE LIFT CABLE HERE. DETAIL B PAGE 55...
- Page 60 CONTROL PANEL ASSEMBLY Item Part Number Part Description Options 21-2211 SPACER 1/2 OD X 1/4" 21-2230 MICRO SWITCH OPTIONAL 21-7100 LIFT ARM ASSY 253-2010 CONTROL PANEL BOX 253-2020 BRACKET, LIMIT SWITCH 253-2700 SPACER, 1-1/4" LG 290-1504 VERSION 3.0 DECAL 290-2020 BRACKET 290-2815 CIR.
- Page 61 CONTROL PANEL ASSEMBLY ITEM #34 ON PAGE 55. ITEM #5 ON PAGE 55. PAGE 57...
- Page 62 CONTROL PANEL ASSEMBLY Item Part Number Part Description Qty Options 253-2006 CONTROL PANEL COVER 253-7280 EXPLOSION WARNING PLATE 4-101 SERIAL NUMBER PLATE 5-728 DETERGENT WARNING PLATE H-1032HCN HCN #10-32 H-71009 FW #10 SS H-72565 RPH #10-32 X 3/4" SS PAGE 58...
-
Page 63: Handle Bar Assembly
HANDLE BAR ASSEMBLY ITEM #9 ITEM #10 PAGE 59... - Page 64 HANDLE BAR ASSEMBLY Item Part Number Part Description 253-1191 22 GA RED WIRE, 35" LG 253-1192 22 GA BLACK WIRE, 35" LG 253-1280 HANDLEBAR 7-228 SWITCH MOUNT PLATE 7-229 PUSH BUTTON SWITCH H-108 HEAT SHRINK H-71059 LW #10, SS H-72523 RPH #8-32 X 1/2"...
-
Page 65: 35" Squeegee Assembly
35" SQUEEGEE ASSEMBLY USE RED LOCKTITE ON STUD INTO SQUEEGEE BODY PAGE 61... - Page 66 35" SQUEEGEE ASSEMBLY Item Part No. Part Description H-70065 HCS 5/16"- 18 X 3" SS H-71015 FW 5/16" X 3/4" SAE SS 5-760B SIDE WHEEL (GREY) H-33371 5/16" ID SHAFT COLLAR H-70711 HN 5/16"- 18 SS H-71065 LW 5/16" SS 25-7170 SQUEEGEE BAND, FRONT H-72555...
-
Page 67: 38" Squeegee Assembly
38" SQUEEGEE ASSEMBLY PAGE 63... - Page 68 38" SQUEEGEE ASSEMBLY Item Part No. Part Description Qty, 28-7160 38" SQUEEGEE BAND, REAR 28-7170 38" SQUEEGEE BAND, FRONT 28-7181 38" SQUEEGEE BODY 28-754G 38 IN. REAR SQUEEGEE BLADE (GUM) 28-755G 38 IN. FRNT SQUEEGEE BLADE (GUM) 290-5786 STAR KNOB 5-760B SIDE WHEEL (GREY) 5-846...
-
Page 69: 45" Squeegee Assembly
45" SQUEEGEE ASSEMBLY USE RED LOCKTITE ON STUD INTO SQUEEGEE BODY PAGE 65... - Page 70 45" SQUEEGEE ASSEMBLY Item Part Nunber Part Description H-70065 HCS 5/16"- 18 X 3" SS H-71015 FW 5/16" X 3/4" SAE SS 5-760B SIDE WHEEL (GREY) H-33371 5/16" ID SHAFT COLLAR H-70711 HN 5/16"- 18 SS H-71065 LW 5/16" SS H-72555 PPH #10-32 X 1 3/4"...
-
Page 71: Cylindrical Door Assembly
CYLINDRICAL DOOR ASSEMBLY PAGE 67... - Page 72 CYLINDRICAL DOOR ASSEMBLY Item Part Number Part Description Optional P/N Optional Description 1-305 BEARING HOUSING 253-8241 IDLER BEARING 253-8370 CYLINDRICAL BRUSH IDLER 253-9010 CYLINDRICAL WIPER 253-9015 WIPER BAND 253-9022 DRIVE COVER 253-5022 DRIVE COVER, S/S 5-130 DOOR LATCH H-25382 SETSCREW, KCP, 1/4"-20 X 1/2" H-72682 FHP #10-32 X 1/2"...
- Page 73 LEFT & RIGHT TOWER ROLLER LEFT TOWER ROLLER RIGHT TOWER ROLLER PAGE 69...
- Page 74 LEFT & RIGHT TOWER ROLLER LEFT TOWER ROLLER Item Part Number Part Description 21-1127 ROLLER 253-1128 ROLLER BRACKET H-11333 HB 5/8"- 11 X 10" H-37038 JNYL 5/8"- 11 RIGHT TOWER ROLLER Item Part Number Part Description 21-1127 ROLLER 253-1128 ROLLER BRACKET H-11333 HB 5/8"- 11 X 10"...
-
Page 75: Cylindrical Hopper Assembly
CYLINDRICAL HOPPER ASSEMBLY PAGE 71... - Page 76 CYLINDRICAL HOPPER ASSEMBLY Item Part Description 24" P/N 24" P/N 27" P/N 27" P/N 30" P/N 30" P/N 34" P/N 34" P/N PAINTED STAINLESS PAINTED STAINLESS PAINTED STAINLESS PAINTED STAINLESS 24" HOPPER 253-9050 253-5050 253-9051 253-5051 253-9052 253-5052 253-9053 253-5053 HOPPER SPLASH SHIELD 28-9060 3 SPLASH SHIELD HOPPER STRIP 28-9070...
- Page 77 CYLINDRICAL DECK ASSEMBLY DETAIL B DETAIL C DETAIL A PAGE 73...
-
Page 78: Cylindrical Deck Assembly
CYLINDRICAL DECK ASSEMBLY Item Part Description 24" P/N 24" P/N 27" P/N 27" P/N 30" P/N 30" P/N 34" P/N 34" P/N PAINTED STAINLESS PAINTED STAINLESS PAINTED STAINLESS PAINTED STAINLESS BEARING HOUSING 1-305 SPACER 1/2 OD X 1/4" 21-2211 ADJUSTABLE SOLUTION FLOW VALVE 21-4500 HOPPER RAIL 22-8320... - Page 79 CYLINDRICAL DECK ASSEMBLY PAGE 75...
- Page 80 CYLINDRICAL DECK ASSEMBLY Item Part Description 24" P/N 24" P/N 27" P/N 27" P/N 30" P/N 30" P/N 34" P/N 34" P/N PAINTED STAINLESS PAINTED STAINLESS PAINTED STAINLESS PAINTED STAINLESS BEARING HOUSING 1-305 SPACER 1/2 OD X 1/4" 21-2211 ADJUSTABLE SOLUTION FLOW VALVE 21-4500 HOPPER RAIL 22-8320...
- Page 81 CYLINDRICAL DECK ASSEMBLY 41 61 PAGE 77...
- Page 82 CYLINDRICAL DECK ASSEMBLY Item Part Description 24" P/N 24" P/N 27" P/N 27" P/N 30" P/N 30" P/N 34" P/N 34" P/N PAINTED STAINLESS PAINTED STAINLESS PAINTED STAINLESS PAINTED STAINLESS BEARING HOUSING 1-305 SPACER 1/2 OD X 1/4" 21-2211 ADJUSTABLE SOLUTION FLOW VALVE 21-4500 HOPPER RAIL 22-8320...
- Page 83 DISK SCRUBDECK ASSEMBLY 24 38 PAGE 79...
- Page 84 DISK SCRUBDECK ASSEMBLY Item Part Number Stainless P/N Part Description Comments Optional P/N Optional Description 21-4500 ADJUSTABLE SOLUTION FLOW VALVE 21-5000 BRUSH DRIVER 253-0402 253-0405 DISK SCRUB DECK 253-1020 BAND, FRAME CURTAIN 253-1090 DISK DECK CURTAIN 253-1140 BRUSH MOTOR CAP OPTIONAL 253-1600 1/2"...
- Page 85 DISK SCRUBDECK ASSEMBLY PAGE 81...
- Page 86 DISK SCRUBDECK ASSEMBLY Item Part Number Stainless P/N Part Description Comments Optional P/N Optional Description 21-4500 ADJUSTABLE SOLUTION FLOW VALVE 21-5000 BRUSH DRIVER 253-0402 253-0405 DISK SCRUB DECK 253-1020 BAND, FRAME CURTAIN 253-1090 DISK DECK CURTAIN 253-1140 BRUSH MOTOR CAP OPTIONAL 253-1600 1/2"...
- Page 87 ATTACH DISK SCUBDECK & BANDEAU COVER PAGE 83...
- Page 88 ATTACH DISK SCUBDECK & BANDEAU COVER Item Part Number Part Description 253-1142 BANDEAU COVER, DISK H-25336 .312 ID X .375 OD X .50 LG BEARING SLEEVE 4 H-70103 HCS 3/8"-16 X 3/4" SS H-70861 NYLOK 5/16" - 18 SS H-71017 FW 3/8"...
- Page 89 ATTACH CYLINDRICAL SCUBDECK & BANDEAU COVER PAGE 85...
- Page 90 ATTACH CYLINDRICAL SCUBDECK & BANDEAU COVER Item Part Number Part Description Optional P/N Optional Description 253-1143 BANDEAU COVER, CYLINDRICAL 253-1144 BANDEAU COVER, SIDE BROOMS H-25336 .312 ID X .375 OD X .50 LG BEARING SLEEVE H-70103 HCS 3/8"-16 X 3/4" SS H-70861 NYLOK 5/16"...
- Page 91 26" DISK JAWS LEFT JAW, SAME PARTS AS RIGHT JAW EXCEPT WHAT'S INDICATED. PAGE 87...
- Page 92 26" DISK JAWS Item Part Number Part Description 21-1126 ROLLER BRACKET 21-1127 ROLLER 253-1160 JAW HINGE, INNER 253-1300 JAW WELDMENT RIGHT, 13" 253-1320 CURTAIN, JAW 13" 253-1330 BAND, JAW CURTAIN, 13" 253-1350 JAW LOCK 4-124 LATCH H-13327 HB 5/8"- 11 X 7.0" H-37018 NYLOK 1/4"-20 H-37038...
- Page 93 30" DISK JAWS LEFT JAW, SAME PARTS AS RIGHT JAW EXCEPT WHAT'S INDICATED. PAGE 89...
- Page 94 30" DISK JAWS Item Part Number Part Description 21-1127 ROLLER 22-1126 ROLLER BRACKET 253-1160 JAW HINGE, INNER 253-1350 JAW LOCK 253-1500 JAW WELDMENT RIGHT, 15" 253-1520 CURTAIN, JAW 253-1530 BAND, JAW CURTAIN, 15" H-13327 HB 5/8"- 11 X 7.0" H-37038 JNYL 5/8"- 11 H-70711 HN 5/16"- 18 SS...
- Page 95 34" DISK JAWS LEFT JAW, SAME PARTS AS RIGHT JAW EXCEPT WHAT'S INDICATED. PAGE 91...
- Page 96 34" DISK JAWS Item Part Number Part Description 21-1127 ROLLER 253-1160 JAW HINGE, INNER 253-1350 JAW LOCK 253-1700 JAW WELDMENT RIGHT, 17" 253-1720 CURTAIN, JAW 17" 253-1730 BAND, JAW CURTAIN, 17" 28-1125 ROLLER BRACKET H-13327 HB 5/8"- 11 X 7.0" H-37038 JNYL 5/8"- 11 H-70711...
-
Page 97: Battery Packs
BATTERY PACKS 24-V 24-V (2) 12-V BATTERY WIRING DIAGRAM (4) 6-V BATTERY WIRING DIAGRAM PAGE 93... - Page 98 Optional P/N Optional Description 2-271 BATTERY, CR-210, 12 V, 210 AH, 110 RC 2-272 BATTERY, 12-V, 185 AH, AGM 253-1480 MAGNUM SERIES BATTERY TRAY 253-1608 BLACK HOSE, 3-1/4" LG 250-2110 BATTERY 6 V 245 AH 250-2112 BATTERY, 6-V, 205 AH, AGM...
- Page 99 OPTION #253-10 SPRAYJET SYSTEM 10 12 CONNECT TO ITEM #3 CONNECT TO FILTER ON SCUBDECK CONNECT TO ITEM #5 OR 3/4" MNPT OF QUICK CHANGE OPTION. SEE QUICK CHANGE PAGES. DETAIL A CONNECT TO WYE OF TANK ASSEMBLY. PAGE 95...
- Page 100 OPTION #253-10 SPRAYJET SYSTEM Item Part Number Part Description 21-1601 1/2" BARBED ELBOW (PLASTIC) 253-1609 1/2" ID X 12-1/4 " LG WIRE REINF. CLEAR TUBE 253-1613 1/2" ID X 13-1/2" LG WIRE REINF. CLEAR TUBE 253-1614 1/2" ID X 24" LG WIRE REINF. CLEAR TUBE 290-8960 GARDEN HOSE 5-891...
-
Page 101: Optional" Sprayjet System
QUICK CHANGE OPTION - DISK SETUP CONNECT TO HOSE P/N 253-1605 OF TANK ASSEMBLY OR HOSE P/N 253-1604 OF "OPTIONAL" SPRAYJET SYSTEM. PAGE 97... - Page 102 QUICK CHANGE OPTION - DISK SETUP Item Part Number Part Description 21-4060 6" LANYARD 253-1030 3/8" ID, 1/2" OD, 3/8" LG, FLANGE BEARING 253-1045 PIN, 3/8" X 1-1/2", S/S 253-1611 1/2" ID X 7" LG WIRE REINF. CLEAR TUBE 28-8430 ADJUSTABLE LATERAL ARM 390-2572 CONNECTOR HANDLE...
- Page 103 QUICK CHANGE OPTION - CYL SETUP CONNECT TO HOSE P/N 253-1605 OF TANK ASSEMBLY OR HOSE P/N 253-1604 OF "OPTIONAL" SPRAYJET SYSTEM. PAGE 99...
- Page 104 QUICK CHANGE OPTION - CYL SETUP Item Part Number Part Description 253-1030 3/8" ID, 1/2" OD, 3/8" LG, FLANGE BEARING 253-1612 1/2" ID X 7" LG WIRE REINF. CLEAR TUBE 390-2575 175 GREY CONNECTOR WITH 1/0 CONTACTS H-02223 BHSCS 1/4 - 20 X 1" SS W/PELLET H-63003 SWIVEL ADAPTER, 3/4"...
Need help?
Do you have a question about the Magnum Series and is the answer not in the manual?
Questions and answers