SEFRAM DAS240 User Manual
Hide thumbs
Also See for DAS240:
- User manual (80 pages) ,
- User manual (80 pages) ,
- User manual (78 pages)
Table of Contents
Advertisement
Quick Links
Advertisement
Table of Contents

Related Manuals for SEFRAM DAS240


Summary of Contents for SEFRAM DAS240
- Page 1 RECORDER DAS240 USER’S MANUAL Edition October 2016 M240002E...
- Page 2 Thank you for buying a SEFRAM recorder and for your trust in our company. The main goal of our various teams (research department, production, commercial, after-sales…) is to meet your requirements as much as possible by designing or updating high tech products.
- Page 3 What to do in case of malfunction? In case of malfunction or for any problem of use, please contact the SEFRAM Instruments & Systems after-sales service. A technician will take your call in charge and will provide you any required information to solve your problem.
- Page 4 The metrological conditions of your measurement instrument are defined in the specifications of this notice. Climate and environmental conditions restrict the specifications of your recorder. SEFRAM checks the characteristics of each appliance one by one on an automatic bench during its manufacture. The adjustment and control are guaranteed under conditions of the ISO9001 certification by facilities in connection with the COFRAC (or equivalent in the context of ILAC reciprocity).
-
Page 5: Table Of Contents
TABLE OF CONTENT IMPORTANT INFORMATION ..............................1.1............................1.3 PECIFIC CAUTIONS 1.2........................... 1.3 AFETY INSTRUCTIONS 1.2.1. Conformity and limits of the appliance ......................1.2 PRESENTATION..................................2.1. GENERAL ..............................2.1 2.2. DESCRIPTION............................. 2.2 2.2.1. Electrical connectors of the main frame ......................2.2 2.3.1. - Page 6 6.2..........................6.2 YPES OF CALCULATIONS DATE ACQUISITION ................................7.1..............................7.1 AUNCH PAGE 7.2..............................7.2 ECORDING 7.3..............................7.4 ILE OUTPUT 7.3.1. F(t) display ................................. 7.4 7.3.2. XY display ................................. 7.5 FILE MANAGEMENT ................................8.1................................ 8.1 ENERAL 8.2.
-
Page 7: Important Information
In case of malfunction or for the maintenance of the appliance, only qualified personal shall be allowed to work on it. In such a case, it is necessary to use SEFRAM spare parts. Never open the appliance: there is live tension. -
Page 8: Conformity And Limits Of The Appliance
Ground: accessible parts linked to the ground of the appliance. 1.2.1. Conformity and limits of the appliance The DAS240 recorder is in conformity with IEC 61010-1 (2001-02). See chapter “Technical specifications”. §11.10 Attention: Never apply a higher voltage than the maximum authorized voltage between the channels and from the ground of the modules, Page 1.2... -
Page 9: Presentation
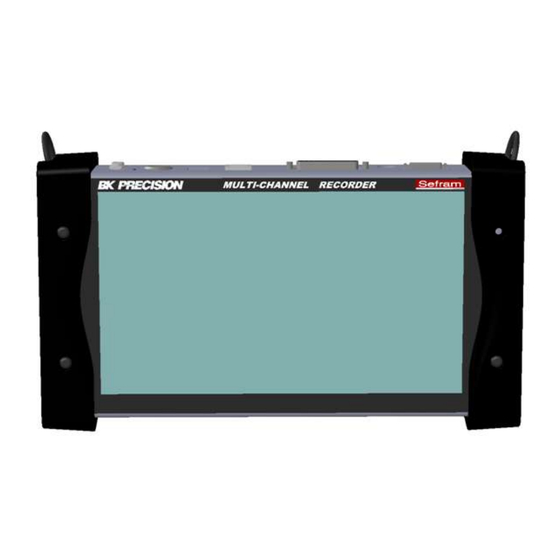
The recording is made directly on an internal 32 Go memory card. The DAS240 is composed with a main base frame and extension modules of 20 channels each. These modules are linked to the main frame with a cable up to 20m. -
Page 10: Description
2.2. DESCRIPTION 2.2.1. Electrical connectors of the main frame 1- Battery supply/charger 2- Battery charging LED. 3- ON/OFF switch and switching on indicator. 4- 2 USB connectors for (female) USB stick. 5- RJ45 connector for the Ethernet 10/100 Base interface. 6- SUB-D 25-pin connector for the 16 logical inputs and the alarm output. -
Page 11: Extension Module
2.3.1. Extension module: A module is delivered with the appliance with its 70 cm bounding cable and 20 external terminal blocks. Extension module Extension cord (70cm) 5.08 mm 3 contact step connectors. Page 2.3... -
Page 12: Set Up And Precaution Of Use
3. SET UP and PRECAUTION of USE 3.1. Switching on Before switching on the appliance, make sure that the extension modules are connected. Attention: Never remove or put the extension modules under voltage. You turn on the recorder by pressing the button at the top of the appliance. When the appliance is on, the ON/OFF button is lit in blue. -
Page 13: Use Of The Extension Modules
Then screw the plates with the adjacent modules. Stick the additional adhesive buttress. Connect the cable using unlocking levers (1) Connect the cable on the DAS240 (which must be powered off). Switch on the appliance. The appliance is delivered with a 70cm cable. -
Page 14: Switching Off
3.1.2. Switching off To switch off the recorder, press the ON/OFF key (see paragraph 2.2). The set-up will be saved, the current file will be closed and the appliance will be turned off. If the appliance is not switched off correctly, then press the ON /OFF button for 5 seconds. In such case, the set-up will not be saved. -
Page 15: Resistance Measurement
You can make current measurement by shunt between the + and - terminals of the relevant input. You will use either an external resistance or the SEFRAM shunt (ref 902406500 : 50Ω) In this case, select the “current” type among the parameters of the relevant channel. Connect the measurement wires to the shunt terminals. -
Page 16: Routine Maintenance
The internal software is updated regularly with the latest evolutions. These updates are available on our website. http://www.sefram.com/en/software-updates.html To update the software, copy the file that will be provided on an USB stick. Place it on the USB connector on the rear side of the appliance. -
Page 17: Battery
However, if the appliance has remained unused for more than one month, check its loading status and reload it if required. Attention: any intervention on the battery requires dismantling of the appliance and shall be made by a SEFRAM technician. Only use batteries provided by SEFRAM. Security advice: ... -
Page 18: Offset Calibration
3.6. Offset calibration You can easily calibrate the recorder inputs for the voltage and thermocouple offsets. This will remove any offset present on different channels. To do so: Let the appliance work for 20 minutes (ambient temperature 20-25°C). Enter the recorder main page and then press the “Set-up” key. ... - Page 19 3.9. Keypad lock You can also lock the recorder completely, no key will be accessible. Press the “Set-up” key. Press the “Additional Option” key. Press the “Locking the recorder” key. Confirm! The keypad lock will occur 10 seconds after you have pressed the confirmation key. All the keys of the appliance will be blocked.
-
Page 20: Use
4. USE The recorder is equipped with a capacitive touchscreen. You can use the provided pen or a USB mouse. 4.1. Description of the upper band Different areas on the screen: 1- Acquisition status (in progress, stop). 2- Battery status (if present option). 3- Direct access to display. -
Page 21: Description Of The Right Band
4.2. Description of the right band In this band, you directly have the instant value of the inputs, the functions and the logical channels. You can also access to the pages of the analog and logical channels. 1- Selection of the inputs to be displayed : you can display (by pressing the keys): ... -
Page 22: Set-Up Menu
4.3. Set-up menu General configuration of the appliance, monitoring of the alarm outputs, network address TCP/IP, calibration of the channels, update of the internal software. Language: selection of the language of the appliance. Screen intensity: adjustment of the delay (without or variable 1-30min) ... -
Page 23: Channels Menu
4.4. Channels menu By pressing the menu « channels », you access the table of all available analogic and temperature channels of your recorder. This table gives you a quick insight of the various adjustments of the channels. You can change these adjustments directly in this table by pressing the parameter you want to update. -
Page 24: Analogic Channels
4.5. Analogic channels 1- Number of the channel 2- Name of the channel: give a name to the channel (26 characters max.) 3- Type : choose the type of the measurement performed on the input Voltage, Current o Shunt value in current measurement (Automatic sensor 4-20mA): you choose the shunt resistance. - Page 25 8- Setting the diameter: the diameter is the measurement extent corresponding with the total height of the screen, where the channel is traced. 9- Setting the location : location of the zero on the screen from -100 to 100% : Max: 100 %: zero is at the top a.
-
Page 26: Additional Functions Between Channels
4.6. Additional functions between channels Supplementary channels calculation functions allow to make calculations between channels. Indeed, you can enable up to 4 additional functions per plug-in. Those functions are not recorded but calculated in real time with the channels. In order to see them in an acquisition, the X and Y channels must be recorded. -
Page 27: Logical Channels
Example : To calculate a power P=U.I. We will then have : ax*by)+ c with: X = voltage U1= voltage operator = * Y= I1 = current Unit = W a = 1 b = 1 c = 0 NB : We can choose any valid channels (of all plugs-in). 4.7. -
Page 28: Logical Channels
4.7.2. Logical channels The 12 logical channels might be recorded simultaneously with the analog channels. To set the logical channels, press on The « logical channels » menu on the main screen. or directly press on the section of logical channels present on the left band (you must however confirm the logical channels on the «... -
Page 29: Channel Validation
4.8. Channel validation You have the possibility to validate or not the channels to record through the different configuration menus of the recorder. In order to validate or not the recording of a channel, you have to check (to validate) or uncheck (not to validate) on the right of the bargraph of the channel. -
Page 30: Numerical Display
4.9. Numerical Display The numerical display is accessible via the main menu by pressing the “Numerical” key. The numerical page allows to have in real time all channels of the channels groups. (Plugs- in, personal group etc..) keys : allow to change groups and view other channels. For each channel, you view: ... -
Page 31: Xy Display
4.10. XY Display The XY mode is accessible via the main menu by pressing the XY key. The XY display mode allows to visualize the validated channels on the screen and in real time, relative to each other. One of the channel defines the excursion on the horizontal axis, the other channels give points on the vertical axis. -
Page 32: F(T) Key
4.11. F(t) key Visualization of measurements in real time on the screen. The oscilloscope is a scrolling mode, you choose time basis speed and you display the channels in real time. 4.11.1. F(t) Menu keys Setting the screen : Configuration of measurements display on the screen. ... -
Page 33: Numerical Window
Time basis : Allows to set the time basis per division. NB : We can have a rectangular visualization : for example, for a speed of 500 ms/div, if 100 channels are validated, the sampling period will be of 100ms, and we will have then 5 points per division and 50 points on the entire screen, hence the rectangular effect. -
Page 34: Trigger » Menu
4.12. «Trigger » menu Programming the conditions of start and stop of the data acquisition. Selection of the actions after data acquisition or plotting and validation of data save in real time. See the chapter about data acquisition for a more complete description (§10). Page 4.15... -
Page 35: Memory Output » Key
4.13. « Memory output » key Display on screen of the possible data acquisitions into files on the internal memory or an USB stick This function includes the same commands as the « Direct view » function. The « Read file » command allows you to select the file to display. When pressing this key, the following window shows up: ... -
Page 36: Record » Key
4.14. « Record » key This key has various effects according to the way you use it. Launching the data acquisition into a file and position of the appliance in a stand-by mode, waiting for the trigger condition Start. In any case, you can force the triggering and stop without fulfillment of the conditions inside the recorder by pressing (to force the record) and (to force the stop). -
Page 37: Triggers
5. TRIGGERS This chapter describes all possible triggers of the appliance. They are used by: the « configuration » menu, with the A and B alarms the « triggers » menu, with the start and stop parameters of the recording. ... -
Page 38: Analogic Channel Trigger
5.1. Analogic channel trigger By pressing Start or Stop, you open the set-up window for the trigger of the start or stop of recording. After selection of the trigger on Analogic Channels, the following line on screen allows you to set the trigger condition. It depends on the selection of single or multiple threshold. 5.1.1. -
Page 39: Multiple Thresholds
5.1.2. Multiple thresholds Trigger: Combination of analogic channels After selection of a trigger on a set of logic channels, the window allows you to set the trigger under several conditions. Then, by pressing the various thresholds in front of their respective channels, you open the threshold parameter window. -
Page 40: Trigger On Logic Channels
5.1.3. Trigger on Logic Channels After selection of the trigger on Logic Channels, the window allows you to set the trigger condition. The 12 logic channels can be used in the trigger word: either active at status 0 (less than 1.6 volt) ... -
Page 41: Mathematical Calculations
6. MATHEMATICAL CALCULATIONS You can apply mathematical calculations on your data acquisitions. You can access them with the « Direct display » function. 6.1. Definitions In « Screen set-up »: validate « Display Mathematical calculations » Then, press the « Mathematical calculations » key ... -
Page 42: Types Of Calculations
The display is made in windows above the diagrams, where are specified: the number of the channel (with its color) the type of calculation the value of calculation You can place this window anywhere on the screen (click/slide). Under «... - Page 43 Drawing Math function Calculation Observations The lowest negative Minimum tension bottom The highest positive Maximum tension peak Max – Min Peak to Peak The most frequent value below the median The most frequent High value above the median High – Low Amplitude ...
- Page 44 = 90% Amplitude Falling edge = 10% Amplitude – T fall Width of Measurement of the time of 1 positive positive pulse. It is measured at 50% of amplitude impulsion Measurement of the time of 1 Width of negative pulse. It is measured at negative 50% of amplitude impulsion...
-
Page 45: Date Acquisition
7. DATE ACQUISITION In the « Launch » page, you must first program the data acquisition. 7.1. Launch page Definition of the data acquisition file: Selection of the folder Selection of the name (beginning of the file name, the end is an incremental value) ... -
Page 46: Recording
Stop: no action Relaunch: a new file is relaunched waiting for the Start trigger View of the active channels, of the recording time, of the pre-launch… A message « Impossible » shows up when the saving possibilities are exceeded: reduce the sampling speed or the number of channels 7.2. - Page 47 When changing of menu page, you can return to data acquisition by pressing the "Record" key. For longer data acquisition times, you can zoom onto a part of the data or change of page. Keys of the « Display » menu: ...
-
Page 48: File Output
7.3. File output You can access the « Replay memory » mode by pressing Display of the available data acquisitions in files: 7.3.1. F(t) display 1- Read file: selection of the file to display. 2- Screen set-up: type of display, diagrams; see § Use. 3- Configure custom pages (in the pages Perso 1 and Perso 2) 4- Full screen 5- Math (if valid) -
Page 49: Xy Display
7.3.2. XY display 1. Selection of the channel for abscissa values X 2. Display of the cursors 3. Selection of the channel where to apply the cursor 4. Zoom between cursors 5. Manual change of the caliber/position of the channel 6. -
Page 50: File Management
8. FILE MANAGEMENT 8.1. General For all possible files, the appliance has an internal flash disk available and may accept an USB stick, which makes it possible: to save and load the total configuration of the recorder to save or restore a data acquisition. The names of the set-up files have a «... -
Page 51: Set Up File
8.2. Set up file The configuration file management page is linked to the « Set up» key. Their name bear the "cnf" extension. These commands are only available when the data acquisition is stopped. The available commands in the configuration window are: ... -
Page 52: Loading The Data Acquisition Files
8.3.1. Loading the data acquisition files The following window shows up: When selecting a file - you can only read data acquisition files (suffix .rec), you can: Copy it onto an external USB stick Erase it Read it. Select the place and name of the file to load and display on screen, then press «... -
Page 53: Inputs/Outputs
9. INPUTS/OUTPUTS 9.1. Additional Input/Output Connectors The connector is at the rear (female SUB-D 25pin). #pin Name of the signals Logic channel 1 Logic channel 2 Logic channel 3 Logic channel 4 Logic channel 5 Logic channel 6 Logic channel 7 Logic channel 8 Logic channel 9 Logic channel 10... -
Page 54: Logic Inputs
9.2. Logic inputs Inputs are according to the following circuit: Non-connected inputs are 0V potential (level 0). Number of logic channels: from 1 to 12. TTL level: 3.3V (protected up to 24V) To create a rising edge, you only have to place a connection between the power input and output of the connector. -
Page 55: Power Supply Output
9.4. Power supply output There is a power supply output restricted to 0.2A (see figure "connector"). The tension is the one of the 9-12V battery as a function of the charge and 15V is the charger is connected. The ground of this power supply is the mechanical ground. Thus, you can use this output to provide power to a sensor or an electronic circuit in order to manage the logic inputs. -
Page 56: Extension Box Input/Output Interface
9.5. Extension box input/output interface The extension box input/output interface option (code 984405500) makes it possible to: Convert an alternating tension (example 230V 50Hz) into a logic signal 1 Easy connection of the inputs of the 16 logic channels ... - Page 57 Link the box to the input/output connector of the appliance with the 25-pin connector provided as an option. Connect the logic channels to record with respect of the maximum acceptable tensions. Power supply / Alarms: DAS1600/800/8460 DAS20/30/40/50 DAS240 Ground Ground Ground 3.3V 3.3V...
-
Page 58: Extension Wire For Logical Channels
AL1-AL4 See below DAS240 Mark Logical function K1 Logical function K2 Logical function K3 Logical function K4 DAS1600/800/8460 DAS20/30/40/50 DAS240 Alarm A c1 Alarm C Alarm A c2 Alarm D Alarm B Alarm A Alarm A Alarm C Alarm B Alarm B Page 9.6... -
Page 59: Interface
10. INTERFACE 10.1. Ethernet Interface You can use the recorder remotely via its Ethernet interface with the TCP-IP protocol. Connect the recorder to your network with a straight-through cable onto the 10/100 BASE-T (RJ45) connector at the rear of the appliance. You can use the recorder on an Ethernet network 10 Mbit/s or 100Mbit/s. -
Page 60: Wifi Interface
Then, you only have to send the commands as per the following paragraphs to the recorder. 10.2. WIFI interface Use only the USB stick provided by SEFRAM. Turn the appliance on with the USB stick on a relevant port. In the « Set-up » menu, press the « Network » key. -
Page 61: Ftp Transfer
Changing the password In the « Set-up » page, press VNC. You can then change the password of VNC. The default password is « sefram ». 10.4.2. External software VNC Viewer You are submitted a link to easily download this software: http://www.realvnc.com/download/viewer/. - Page 62 On the VNC Server line: you must type the IP address of your recorder and the password (the default password is « sefram »), then click « Connect » You will be able to control your recorder from your computer.
-
Page 63: Viewing With Seframviewer
10.4.3. Viewing with SeframViewer You can transfer the data acquisition files to a PC computer for viewing. The SeframViewer software is provided on a CD-ROM with the appliance. You can use it to view the recorded files or convert it into xls or txt files. It works under WINDOWS with Framework 2.0. - Page 64 will create a .xls file C:\Program Files (x86)\SeframViewer\seframviewer.exe monfichier.rec /t will create a .txt file Excel@export will directly launch Excel in the browser. Page 10.6...
-
Page 65: Technical Specifications
11. TECHNICAL SPECIFICATIONS 11.1. General characteristics Number of inputs: 20 per module max. 20 modules Impedance: 1 MΩ max. acceptable tensions: between the 2 terminals of a channel : +100 V DC between 2 channels 100 V DC between a channel and the ground 100 V DC Installation category: overvoltage category: 100V cat. -
Page 66: Pt100/Pt1000 Record
11.4. Pt100/Pt1000 Record Current generator: PT100: 1mA PT1000: 100µA Domain of use: -200°C to 850°C 2 wires or 3 wires Correction resistance in 2-wire mode: max. 30Ω max. resistance in 3-wire mode: 50Ω ... -
Page 67: Additional Inputs / Outputs
11.7. Additional inputs / outputs 11.7.1. Logic functions Logic functions (K1 to K4) Same characteristics as the logic channels (see the following chapter) Pulse counter: o counter from 0 to max. 10000000 o Minimum impulsion : 10µs Frequency: o 10Hz to 10kHz o Accuraty : 0.1 % ... -
Page 68: Triggers
11.8. Triggers Date Delay Thresholds and combinations (or/and) of thresholds (2 per channel) Word on logic channel (and, or, edge, level) 11.9. Acquisition files Size of the internal flash disc min. 32Go max. file size ... -
Page 69: Power Supply - Battery
11.11.2. Power supply - battery External power supply: mains block 100/240 VAC, jack 5.5 mm, hole 2.1 mm output 15 V 4 A max Non-removable battery: lithium ion 10.8 V, 6.5 Ah (9 V at end of discharge) 200 cycles charge / discharge Battery life: with screen saver: 15h without screen saver: 10h... -
Page 70: Accessories
11.13. Accessories 11.13.1. Accessories provided with the appliance Battery charger 207195117 1 male 25-pin connector for logic channels 214200250 1 cover for connector 214299014 Extension box (with accessory set) 902401000 11.13.2. Accessories and options Transportation briefcase 902408000 Internal battery 902405000 Shunt 50Ω... - Page 71 12. APPENDS 12.1. Measurement accuracy for thermocouple The thermocouple measurements are treated as tension measurements. For a given range of temperature measurement, the software calculates the tension caliber the following way: * Let « T » the absolute value of the max. measurable value, in °C * Add 40°C to take the max.
- Page 72 The measurement accuracy Pm depends on the tension caliber of the appliance (see the previous paragraph) and on the slope of the thermocouple. You shall take the slope at 0°C while knowing that it will vary as a function of the temperature, but this variation is generally of the second order for the accuracy calculation.
- Page 73 EXAMPLE OF ACCURACY CALCULATION You make a welding between -50°C and +50°C with a J thermocouple with compensation of cold welding. Pt = Pl + Ps + Pm + Pd Pl = + 0.25°C (linearization accuracy) Ps = + 0.5°C (compensation of cold welding) Used caliber 10mV (see previous example) Accuracy for tension measurement 0.1%*10mV + 10µV = 20µV...
- Page 74 12.2. Accuracy class – class index This is one of the most important concepts of the CEI recommendation; it tends to shorten the list of specifications. To do so, it introduces the concept of PREDICTIVE CLASS that depends on the C CLASS INDEX. The normalized values of the class index are: C = 0.1, 0.25, 0.5 and 1.
Need help?
Do you have a question about the DAS240 and is the answer not in the manual?
Questions and answers