Advertisement
Quick Links
Advertisement

Summary of Contents for Prismatibro Prisma DI-5C
- Page 1 DI-5C M A N U A L I N S T R U M E N T...
-
Page 2: Instrument Overview
INDEX 1. Instrument overview Store documents 2. How to use the instrument Find stored documents Description Edit documents Display 2:10 Read documents On/Off & push buttons 2:11 Delete documents 2:12 Battery charge Settings 3. Data transfer to PC • Set date / time •... - Page 3 FACTS ABOUT PRISMA DI-5C TOLERANCE Prisma DI-5C has a tolerance of max. 1% in the range of +/- 1,000 mm and max 2% in the range of 1,000-2,000 mm. HOW TO ACHIEVE OPTIMUM RESULTS An accurate measurement result can be achieved if both transducer and the measured object (Crankshaft) are having the same temperature so that the transducer temperature is not changed during the measurement.
-
Page 4: How To Use The Instrument
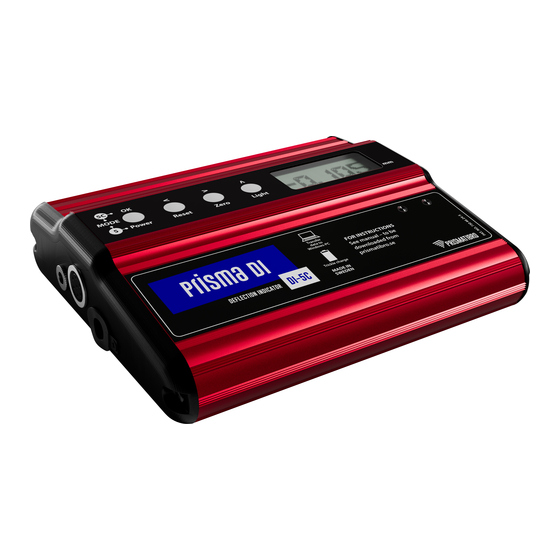
2. HOW TO USE THE INSTRUMENT 2:1 DESCRIPTION The importance of accurate crankshaft deflection measurement can´t be enough emphasized. The DI-5C series of instruments are designed to be both accurate, fast and user friendly. The complete instrument set is stored in a customized carrying case which includes Main instrument, Battery Charger, Transducer, Connecting cable, Extension bars, Measuring tip, Program Manual and User Manual. - Page 5 2:3 ON/OFF, PUSH BUTTONS < > To START the instrument, press OK. Used to Used to This button The OK button is used to accept change change allows you to throughout the step by step procedure. value or value or step backwards To SWITCH OFF the instrument, press and position...
- Page 6 2:5 MEASURING CRANKSHAFT DEFLECTION a) Make sure that the cable is properly connected to the instrument. b) Select and assemble the required extension bar(s) to achieve the correct length, tighten firmly by hand and screw into the fine adjustment end of the transducer. c) Push OK button.
- Page 7 NOTE Normally it is not necessary to release the locking ring. u) Accept a Reset with OK. Check that the display value is within +/ - 0.500mm, press OK to to set the instrument to ZERO (0.000mm). Continue with this procedure until all cylinders are completed. v) When the display reads ”MEASURING DONE”, press OK.
-
Page 8: Data Transfer To Pc
Pressing OK while measuring values A - E will automatically transfer the measuring data to the PC program. NOTE Remember to save the measurement data as a file in your PC. See the separate “Prisma DI-5C Software Installation Manual”... -
Page 9: Spare Part List
180 mm to 600 mm bore. Larger liners may be measured with additional extension bars supplied by PrismaTibro. 5. CALIBRATION OF INSTRUMENT Calibration of instrument is neccessary after change of transducer, done at PrismaTibro, Sweden – send an email to support@prismatibro.se CHANGE TRANSDUCER TIP 1. Remove adjusting... - Page 12 ITEM NO 488-8100 Cylinder liner maintenance. The Ovality Kit is an accessory to the Prisma DI-5C and Prisma DI-5. The method is simply giving 5 measuring points at each level of the liner. To compare the levels you will also see how much the wear of the liner is in the cylinder top.


Need help?
Do you have a question about the Prisma DI-5C and is the answer not in the manual?
Questions and answers