Advertisement
Quick Links
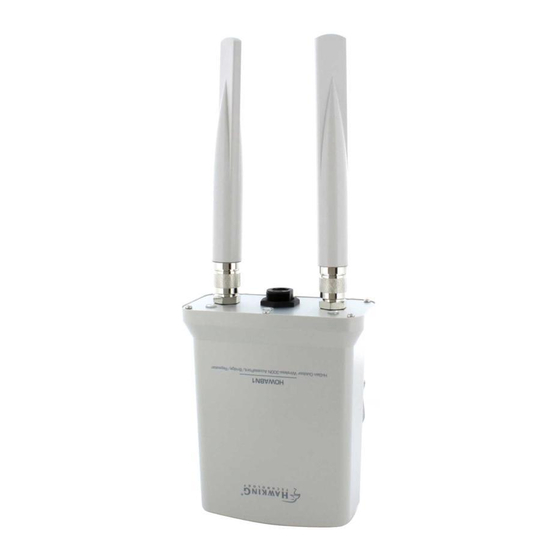
Hi-Gain
Model No. HOWABN1
Quick Installation Guide
Package Contents
• 1 x Hi-Gain Outdoor Wireless-300N
Multifunction Access Point
• 2 x Hi-Gain Outdoor Antennas
• 1 x PoE Adapter
• 1 x L-shape antenna connector
• 1 x Waterproof Gasket Kit for RJ-45
• 1 x Power Cable and Power Transformer
• 1 x Ethernet Cable
• 1 x Mounting Kit
• 1 x Setup CD-Rom
System Requirements
• Windows 2000/XP/7 or Mac 10.5~10.7 computer
or laptop w/ CD-ROM
• 802.11b or 802.11g or 802.11n Wireless Network
This QIG covers the 3 most popular modes: Access Point, Bridge-Client, and Universal
Repeater Modes. For additional modes, please refer to the User Manual located on the CD.
1
Choose your Operating System & Configure your Outdoor Access Point
!
You must complete the pre-configuration before this step. If you are installing your HOWABN1 with a MAC computer, proceed to the opposite page.
Begin by accessing the device through your Windows
Laptop or Desktop. Insert the included CD and run the
Setup Utility. When the Welcome page appears, click the
Setup Wizard option and follow the setup steps.
(note: your computer
must be connected to
the network wired or
wirelessly).
2
Select the operation mode
2A.
Access Point Mode:
In this mode, the
HOWABN1 converts a standard wired network to a wireless
network.
a. Select Access Point
Mode from the drop
down menu.
b. Click on the 'CONFIGURATION' tab. In the "Main
ESSID" field, enter a name for your wireless network.
Enter a security key for your network (recommended).
To do so, please enter a passkey in the
and select 'Apply'.
If you choose to
continue without
security settings,
simply click apply.
c. This page displays
your new settings,
please review and
select apply to
confirm your new
settings. (Note: you
must click "Apply", to
activate your new
settings.)
Post Configuration: Hardware Setup and Position Your Access Point
With the initial configuration complete, you may now mount your Access Point to your desired location. Mounting Instructions are located on the opposite page. Please follow the operational
diagram to correctly connect and position your Access Point. For more information, please refer to the User Manual or Website.
www.hawkingtech.com
Outdoor Wireless-300N Multifunction Access Point
TM
Log into the
HOWABN1> Click
Scan
to find your
AP/Bridge. Then
select the line with
IP address
'192.168.1.230'.
User Name: admin
Password: 1234
In the Device field,
please enter a name
for your
HOWABN1.
(Choose your mode from the options by selecting "Mode & Security" from the left hand side of the setup utility menu)
2B.
Universal Repeater Mode:
mode, the HOWABN1 can act as a wireless repeater. It
will use the Bridging function to connect to the wireless
source and the Access Point function to rebroadcast the
signal.
a. Select
Universal
Repeater
from the
drop down menu.
b. Select the
CONFIGURATION
Security Key
field
tab, fill in your
settings. Click on
"Select Site
Survey" and
select the
network you wish
to repeat. Type in
the wireless key if
your network is
secure. Click
Apply.
c. This page displays
your new settings,
please review and
select apply to
confirm your new
settings. (Note:
you must click
"Apply", to
activate your new
settings.)
Once configuration is complete, please disconnect your
repeater from your router and place it at a location for it
to repeat your WiFi signal.
Technical Support: 1.888.202.3344
You must connect your hardware according to the diagram below to run the
PRE-CONFIGURATIONS
the initial setup of the Access Point. After the initial setup is complete, you
Hardware Setup
may mount the Access Point in your desired location.
A. Attach the antennas to the antenna connectors (Note: the L-shape antenna connector is used to
establish signal diversity for more wireless range.)
B. Attach the Ethernet cable to LAN port of the Hi-Gain Multifunction AccessPoint and the other end
of the Ethernet Cable to the PoE Adapter
C. Attach the power adapter and power cable to the PoE Adapter
D. Connect an Ethernet cable between the PoE adapter and an Ethernet LAN port on your computer
Default
192.168.1.230
In this
© 2011 Hawking Technologies, Inc. All rights reserved.
E-mail: Techsupport@hawkingtech.com
Select an IP address for the HOWABN1. Select
Assign an IP Address from your Network
option). The Setup Utility will automatically detect the correct
IP address from your network settings.
If you choose to enter
your IP Address
Manually, you may do
so by selecting the
bottom option and
manually filling your
network information.
2C.
Bridge-Client Mode:
In this mode, the
HOWABN1 consolidates all your Ethernet devices, such us a
wired computer, TV or Game Console and connects them to
your wireless network.
a. Select
"Bridge-Client" from
the drop down
menu, and click on
the
'CONFIGURATION
'
tab.
b. "Click on "Select Site Survey" and select the network you
wish to bridge. Type in a wireless key if your network is
secured. Once you have selected your settings, click
"Apply".
If you do not know
the security key,
please contact your
network
administrator
c. This page displays
your new settings,
please review and
select apply to
confirm your
selections. Note: you
must click "Apply", to
activate your new
settings.
Once configuration is complete, please disconnect your
bridge from your router and hook it up to the devices you
wish to bridge.
Automatically
(recommended
Advertisement

Related Manuals for Hawking HOWABN1


Summary of Contents for Hawking HOWABN1
- Page 1 Choose your Operating System & Configure your Outdoor Access Point You must complete the pre-configuration before this step. If you are installing your HOWABN1 with a MAC computer, proceed to the opposite page. Begin by accessing the device through your Windows Log into the Select an IP address for the HOWABN1.
- Page 2 Version 2012.05.01 ©2012 Hawking Technology, Inc. All right reserved. Mac is a registered trademark of Apple Computer, Inc. Windows is a registered trademark of Microsoft Corporation. No affiliation is implied or expressed. © 2011 Hawking Technologies, Inc. All rights reserved.
Need help?
Do you have a question about the HOWABN1 and is the answer not in the manual?
Questions and answers