Advertisement
Quick Links
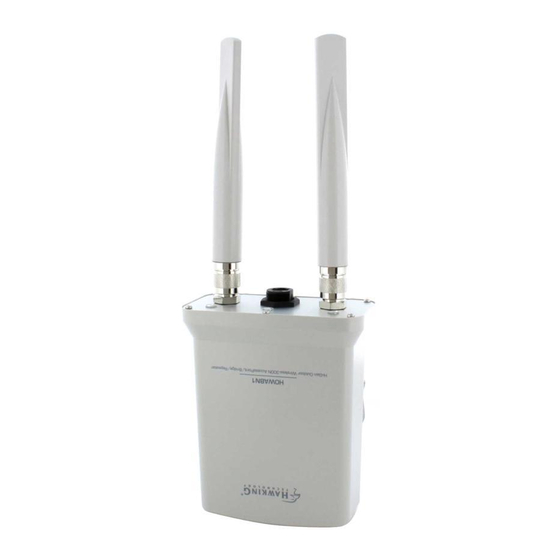
Part No. HOWABN1 : Hi-Gain
Start
Here
1
Choose your Operating System
If you are using Windows, please continue to the instruc-
tions below. If you are installing your HOWABN1 with a
MAC, proceed to the MAC version of the QIG included with
your HOWABN1.
2
Initial Configuration: Hardware Setup
3
Configure the Outdoor Wireless Access Point
a) Logon to your network from a PC. Insert
the included CD and run the Setup Utility.
When the auto-load page appears, click
the Setup Utility option on the right and
follow the Setup directions.
4
Select the operation mode of the Hi-Gain Multi-Function Access Point
Choose your mode from the six following options by selecting "Mode & Security", from the left hand side of the setup utility menu. Then, click on the appropriate entry from the drop down menu.
a) Access Point Mode
Once you select Access Point Mode from the drop down menu, click on the "configurations" tab. Ensure that your wireless network is selected as the "Main ESSID". Type in the network security passkey if you have an encrypted
network. If you do not know your network's security code, contact your network administrator. You can also configure security settings for your access point by clicking on the "configure" button. (If you choose to continue
without security settings, simply click apply.) NOTE: To activate your new changes you must click "Apply" under the "New Settings" tab.
b) AP Bridge: Point-to-Point
Once you select "AP Bridge-Point to Point" from the drop down menu, click on the "configurations" tab. You can also click "configure" to format your security settings. (If you choose to continue without security settings, simply click
apply.) Once you enter the "set security" menu, click the type of encryption you would like to use from the "encryption" drop down menu. Enter your chosen passkey. and select "apply".
NOTE: To activate your new changes you must click "Apply" under the "New Settings" tab.
www.hawkingtech.com
Outdoor Wireless-300N Multifunction Access Point
TM
b) Scan for your AP/Bridge by
c) Rename the Hi-Gain Multifunction
clicking the 'Scan' button.
Technical Support: 1.888.202.3344
Q
I
U IC K
d) Select an IP address for the Hi-Gain Multifunction Access Point
Access Point so you can easily
i. Automatically (recommended): The
identify the specific Hi-Gain
Setup Utility will automatically detect
Multifunction Access Point that
the correct IP address from your
you are configuring.
network settings
N S T AL L AT IO N
Check Package Contents
• 1 x Hi-Gain Outdoor Wireless-300N
Multifunction Access Point
• 2 x Hi-Gain Outdoor Antennas
• 1 x PoE Adapter
• 1 x L-shape antenna connector
• 1 x Waterproof Gasket Kit for RJ-45
• 1 x Power Cable and
Power Transformer
• 1 x Ethernet Cable
• 1 x Mounting Kit
• 1 x Setup CD-Rom
System Requirements
• Computer with Internet access and web browser
• 802.11b or 802.11g or 802.11n Wireless Network
Setup your hardware according to the diagram
above for the initial setup of the Access Point.
After the initial setup is complete, you may mount
the Access Point in your desired location.
A.
Attach the antennas to the antenna
connectors
(optional: the L-shape antenna connec-
tor is used to establish signal diversity
for more wireless range.)
B.
Attach the Ethernet cable to LAN port
of the Hi-Gain Multifunction Access-
Point and the other end of the Ether-
net Cable to the PoE Adapter
C.
Attach the power adapter and power
cable to the PoE Adapter
D.
Connect an Ethernet cable between
the PoE adapter and an Ethernet LAN
port on your network or directly to
your Router/ AP Source.
© 2008 Hawking Technologies, Inc. All rights reserved.
G
U ID E
WINDOWS version
ii. Manually: Enter an IP address
yourself
Advertisement

Related Manuals for Hawking HOWABN1


Summary of Contents for Hawking HOWABN1
- Page 1 • 1 x Power Cable and If you are using Windows, please continue to the instruc- Power Transformer tions below. If you are installing your HOWABN1 with a • 1 x Ethernet Cable MAC, proceed to the MAC version of the QIG included with •...
- Page 2 9. Omni-Directional Antenna (2 pcs) 10. RJ-45 Connector (1 pc) 11. Water Proof Gasket Kit for RJ-45 (1 pc) © 2009 Hawking Technologies, Inc. All rights reserved. All trademarks herein are the property of Technical Support: 1.888.202.3344 or techsupport@hawkingtech.com www.hawkingtech.com their respective owners.
- Page 3 • 1 x Waterproof Gasket Kit for RJ-45 If you are using a MAC OS, please continue to the • 1 x Power Cable and instructions below. If you are installing your HOWABN1 Power Transformer • 1 x Ethernet Cable with a Windows operation system, proceed to the Win- •...
- Page 4 11. Water Proof Gasket Kit for RJ-45 (1 pc) Technical Support: 1.888.202.3344 or techsupport@hawkingtech.com www.hawkingtech.com © 2009 Hawking Technologies, Inc. All rights reserved. All trademarks herein are the property of their respective owners. Apple and Mac are registered trademarks of Apple Computer, Inc. No affiliation implied or expressed.
Need help?
Do you have a question about the HOWABN1 and is the answer not in the manual?
Questions and answers