
Subscribe to Our Youtube Channel
Related Manuals for LiveU LU200


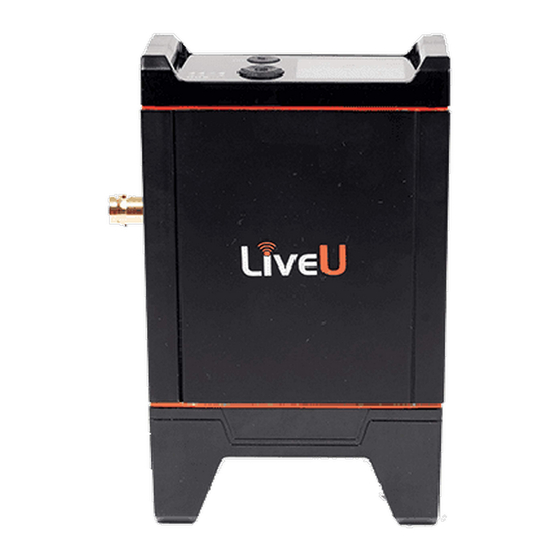
Summary of Contents for LiveU LU200
-
Page 1: About This Guide
LiveU LU200 User Guide Version 5.1 Part Number: DOC00126 Document Version: 5.1.0 November 30, 2015... - Page 2 • Chapter 4, Interrupted Feedback (IFB), page 49, describes the LU200’s IFB feature and how to set it up. IFB provides a unidirectional audio channel from the LU2000 to LU200 unit operators in the field. •...
- Page 3 About This Guide Intended Audience This user guide is intended to be used by operators of the LiveU LU200 unit. This user guide assumes that operators have basic computer knowledge and are familiar with any video equipment being used (cameras, microphones and so on) and the infrastructure to which these LU200 units are connected.
-
Page 4: Table Of Contents
LiveU Central ........................13 Chapter 2: Getting Started ..................15 Step 1, Connecting the Video Camera ..............16 Step 2, Powering On the LU200 Unit................18 Charging the LU200 ....................18 Step 3, Selecting a Channel ..................21 Virtual Groups ......................23 Step 4, Selecting a Profile .................... - Page 5 How do I know which SIM cards are supported in my country? ....57 What is the next step after inserting the SIM cards into the LU200 unit?..58 How do I know whether or not the LU200 unit is connected to the Internet? ........................
- Page 6 Figure 14: DC IN Connection ........................18 Figure 15: Power Switch ..........................19 Figure 16: LU200 Home Screen – Offline and Ready States ..............19 Figure 17: Battery Status Icon - Main Screen ....................20 Figure 18: LU200 Home Screen – While Streaming ..................21 Figure 19: Channels Screen...........................
- Page 7 Figure 42: Shutdown − 2 ..........................36 Figure 43: LU200 Main Screen ........................38 Figure 44: Accessing a Configuration Screen.................... 39 Figure 45: LU200 Main Screen – Arrows Indicating Additional Options ..........39 Figure 46: Configuration Options ......................... 41 Figure 47: S&F Settings ........................... 41 Figure 48: Prefix Screen ..........................
- Page 8 Tel: 1-(609)-997-0600 When contacting a support representative, make sure to have the last four digits of the LU200’s serial number available. This can be accessed by selecting the Unit Info option, as described in the Unit Info section on page 46.
-
Page 9: Chapter 1: Introducing The Lu200
This chapter introduces the LU200 unit and describes its hardware components. Overview The LU200 is a compact, lightweight unit that enables you to transmit high-quality HD/SD video from diverse locations, while adapting to dynamic network conditions. The LU200 supports two 4G (LTE)/3G cellular links, a WiFi link and a LAN link. -
Page 10: Figure 2: Lu200 - Right Side Panel
NOTE Figure 4: LU200 Inside Its Pouch The LU200 provides two internal cellular modems, as well as a WiFi and a GPS interface, both of which have internal integrated antennas. In addition, two external cellular modems can be connected via USB for a total of six interfaces on the unit. -
Page 11: Lu200 Front Panel
The LU200 front panel contains the unit’s LCD screen, a five-button joystick and the unit’s power button (see Figure 1). The LU200 has a color screen that is easily readable from a distance of approximately one meter when the LU200 is attached to a belt worn around... -
Page 12: Lu200 Menu Navigation And Operation
Pressing either of these buttons in the Home screen opens the Main screen. The LU200 power button turns the unit on and off and can also be used to toggle between starting and stopping streaming on the unit. For more details,... -
Page 13: Liveu Central
Introducing the LU200 LiveU Central LiveU Central is a web interface that enables you to access any LU unit you have, including the LU200. LiveU Central enables you to view an LU200’s status and to remotely configure an LU200 and an MMH instance (running on the LU2000 server). - Page 14 This screen provides the LU200 user with an indication that the LU200 is/was controlled remotely (and possibly that its configuration was changed). The LU200 user can press the Center (OK) button at any time to remove this message without affecting the remote control.
-
Page 15: Chapter 2: Getting Started
Getting Started This chapter describes how to get started using the LU200, including powering on, connecting the camera, selecting a channel, profile and delay and broadcasting (playing). The following is an overview of the workflow described in this chapter. Connecting the Video... -
Page 16: Step 1, Connecting The Video Camera
Step 1, Connecting the Video Camera The procedure for connecting a video camera to the LU200 is simple. The camera can be connected either before or after turning on the LU200. If you power on the LU200 before connecting the camera, then the message No Camera is displayed. -
Page 17: Figure 11: Opening The Screws On The Camera Mount Adapter
Getting Started To mount the LU200 on a camera, open the top and bottom screws on the camera mount adapter. Figure 11: Opening the Screws on the Camera Mount Adapter Position the LU200 on the adapter and tighten the top screw, making sure that the screw it tight and that the LU200 is firmly in place. -
Page 18: Step 2, Powering On The Lu200 Unit
► • Plug the AC Power Adapter into the DC IN connector on the LU200. It is good practice to keep the unit plugged into a power outlet when it is not in use in order to keep it charged and ready for operation. -
Page 19: Figure 15: Power Switch
Figure 15: Power Switch • The LU200 logo appears on the screen while the unit powers up. The unit displays the Home screen within approximately two minutes after power up. The LU200 is ready for transmission within approximately two minutes after powering it on. -
Page 20: Figure 17: Battery Status Icon - Main Screen
Figure 17: Battery Status Icon - Main Screen Lower Status Bar: Indicates the status of the unit, as follows: : The LU200 is not connected to the network or is attempting • to connect to the network. : The LU200 is connected to the network and registered. -
Page 21: Step 3, Selecting A Channel
The Home screen automatically shows a preview of the video feed during streaming. A full description of the user interface is provided in Chapter 3, LU200 User Interface on page 37. NOTE The Profile, Delay and Channel cannot be changed during streaming. -
Page 22: Figure 19: Channels Screen
LiveU LU200 User Guide Each LU200 uses a single channel for streaming over its interfaces to a specific LU2000. The LU2000 can service multiple channels (each channel is an LU2000 instance). The number of channels that it supports is dependent on the processing power of the machine on which the LU2000 is running. -
Page 23: Virtual Groups
Getting Started Virtual Groups The LU200 can stream to an output LU2000, as described on page 21, or to a Virtual Group. Streaming to a Virtual Group enables LiveU Central operators to preview the channel and then to control the destination to which the stream is ultimately directed and sent live. -
Page 24: Step 4, Selecting A Profile
• stores the video on the micro SD card, while simultaneously uploading the stored video at the highest quality. This profile can only be selected when the LU200 has a micro SD card inserted in it. Micro SD Card Slot... -
Page 25: Figure 21: Main Screen − Profile
Getting Started To select a profile: ► Navigate to the Profile option in the Main screen using the Up and Down buttons on the joystick. Figure 21: Main Screen − Profile Press the Right or Center (OK) buttons on the joystick. The Profiles screen displays, as shown below: Figure 22: Profiles Screen Use the Up and Down buttons on the joystick to navigate to the required... -
Page 26: Step 5, Setting The Delay
LiveU LU200 User Guide Step 5, Setting the Delay Live video is transmitted according to the delay defined. The default delay is 5 seconds, which provides the best of both worlds: low delay and high-quality video. The minimum delay is 1 second. The maximum delay is 20 seconds. -
Page 27: Step 6, Handling Interfaces
Getting Started Step 6, Handling Interfaces The Interfaces screen shows a list of all of the interfaces to which the LU200 is able to connect. The figure below shows a conceptual view of the interfaces that can exist on the LU200. - Page 28 WiFi network displays the icon. NOTE In the LU200 Phase 1, WiFi interfaces are only configurable using LiveU Central. • A LAN interface shows the static IP configured when DHCP is OFF or the DHCP-received IP address when DHCP is ON. In addition, it shows the used uplink throughput, in Kbps.
-
Page 29: Enabling/Disabling An Interface
IP (when DHCP is OFF). Enabling/Disabling an Interface You can enable or disable one or all LU200 interfaces, including cellular modems, WiFi and LAN interfaces. Each interface must be enabled/disabled separately. The examples below describe how to enable/disable cellular modem interfaces. These procedures are the same for all interface types... -
Page 30: Figure 26: Main Screen − Interfaces
LiveU LU200 User Guide To disable an interface: ► Navigate to the Interfaces option in the Main screen using the Up and Down buttons on the joystick. Figure 26: Main Screen − Interfaces Press the Right or Center (OK) buttons on the joystick. The Interfaces... -
Page 31: Figure 29: Disable Interface - 2
Getting Started Press the Right or Center (OK) buttons on the joystick to disable the selected interface. The following screen displays: Figure 29: Disable Interface – 2 Select Disable and press the Center (OK) button to disable the interface. The Disable button of the interface changes to Enable, indicating that the interface is currently disabled. -
Page 32: Configuring Wifi
Press the Right or Center (OK) buttons on the joystick to enable the selected interface. Configuring WiFi WiFi configuration can be performed directly on the LU200 unit itself or via LiveU Central. The status of a WiFi network is indicated, as follows: •... -
Page 33: Figure 34: Select Network
Getting Started The unit scans and displays the available networks. Figure 34: Select Network NOTE To rescan, press Scan. Select a network and press Connect. Figure 35: WiFi Network – Connect NOTE For encrypted networks, select the network, press Connect, enter the network password using the virtual keyboard, as shown below, and then press Done. -
Page 34: Configuring Lan Interfaces
LiveU LU200 User Guide Configuring LAN Interfaces Configuration of the LAN Static IP must be done in LiveU Central. The unit’s default value is DHCP. Configuration from the LU200 unit will be supported in a future release. Step 7, Going Live You are now ready to start transmitting the video to the channel that you selected. -
Page 35: Step 8, Handling Alerts
Step 9, Shutting Down To shut down the LU200: ► Hold down the Power button for 5 seconds until the LU200 shuts down. This action shuts down the unit’s software and then turns off the unit. Figure 40: Power Button... -
Page 36: Figure 41: Shutdown − 1
LiveU LU200 User Guide A popup message displays a progress bar for approximately four to five seconds while the unit is shutting down: Figure 41: Shutdown − 1 Once the progress bar shows 100%, a popup message displays, as shown below. -
Page 37: Chapter 3: Lu200 User Interface
LU200 User Interface This chapter describes the main LU200 screen and the options that it provides. This chapter contains the following sections: LU200 Interface, page 38 • Interfaces, page 40 • • Profile, page 40 Delay, page 40 • Channels, page 40 •... -
Page 38: Lu200 Interface
LiveU LU200 User Guide LU200 Interface The LU200 user interface is an LCD screen. When the LU200 is powered on, the Home screen displays, as described on page 19. The Main screen provides access to the various configuration options for the LU200. -
Page 39: Figure 44: Accessing A Configuration Screen
Main screen that is not seen on the screen. Figure 45: LU200 Main Screen – Arrows Indicating Additional Options NOTES Pressing the joystick’s Left button returns to the previous screen. -
Page 40: Interfaces
Interfaces The Interfaces option in the Main screen indicates the number of active interfaces out of the total number of interfaces on the LU200. For example, 3 /4 means that there are three active interfaces and four total interfaces on the unit, meaning that one of them is not active. -
Page 41: Configuration
Configure S&F Settings, page 41 • Enabling Auto Resolution, page 44 • Operate as a DataBridge, page 44 Figure 46: Configuration Options Configuring S&F Settings LU200 enables you to configure Store & Forward (S&F) settings for Store & Forward sessions. Figure 47: S&F Settings... -
Page 42: Figure 48: Prefix Screen
Figure 48: Prefix Screen Enter the prefix to be appended to the filename for the files streamed from the LU200, and then press Done. The prefix enables you to differentiate between files that were stored and forwarded. To use the keyboard, navigate through the keyboard characters using the Up, Down and Right buttons on the joystick. -
Page 43: Figure 51: Hd Quality Screen
LU200 User Interface To configure the S&F quality: ► Navigate to the S&F Settings option in the Configuration screen using the Up and Down buttons on the joystick. Navigate to the HD Quality option in the S&F Settings screen and press the Right or Center (OK) buttons on the joystick. -
Page 44: Enabling Auto Resolution
This feature is enabled by default. Figure 39: Auto Res. Setting Operating as a DataBridge The LU200 unit can operate as a DataBridge when working in DataBridge (DB) mode, as described in Chapter 5, DataBridge Operation on page 51. Files The Files option enables you to perform the following operations: Display S&F Files, page 45... -
Page 45: Displaying S&F Files
LU200 User Interface Displaying S&F Files The S&F option displays all the files that are currently being stored and forwarded. Figure 54: Store and Forward Displaying SD Card Files The SD Card option displays a list of the files on the SD card. -
Page 46: Displaying Usb Drive Files
The USB drive must be connected to USB port 1 or 2. Figure 58: USB Drive – Files List Unit Info The Unit Info option displays the LU200 unit’s name, serial number and software version. If required, you may contact LiveU support for more details. Figure 59: Unit Info Screen... -
Page 47: Figure 60: Main Screen
When contacting a support representative, make sure to have the last four digits of the LU200 unit’s serial number available. To view unit information: ►... - Page 48 LiveU LU200 User Guide Blank page for double-sided printing...
-
Page 49: Chapter 4: Interrupted Feedback (Ifb)
IFB Overview The IFB feature provides a unidirectional audio channel from the LU2000 to LU200 unit operators in the field. This enables the personnel in the master control room (MCR) to broadcast verbal instructions or information about events to LU200 operators. -
Page 50: Ifb Setup
LU200. No other setup or configuration is required on the LU200. Figure 62: Earphones/Headphones Connector If the earphones/headphones are connected after streaming starts, the LU200 operator cannot hear anything on the IFB channel. Be sure to connect them before starting to stream. During streaming, IFB has an 800ms delay. -
Page 51: Chapter 5: Databridge Operation
The DataBridge solution is a client/server solution where an LU, such as the Xtender, LU200, LU400, LU40 or LU500, that is configured to operate as a DataBridge unit, is the client and the DataBridge Gateway is the server. - Page 52 Performs Layer 2 bridging by learning Layer 2 source addresses and forwarding according to Layer 2 destination MAC addresses. An LU200 working as a DataBridge unit operates in DataBridge mode. For more details, see the DataBridge Mode section on page 53.
-
Page 53: Databridge Mode
DataBridge Operation DataBridge Mode The LU200 unit must be switched from Video mode to DataBridge mode in order to operate as a DataBridge. The LU200 continues to operate in DataBridge mode until it is switched back to Video mode. When switching between these two modes, the LU200 unit is rebooted. -
Page 54: Operating In Databridge Mode
Figure 66: After Switching to DB Mode In order for the LU200 to operate as a DataBridge, the unit must be connected to a DataBridge Gateway instance. Connection to a DataBridge Gateway occurs automatically, once a DataBridge Gateway instance is assigned to the LU200 unit by LiveU. -
Page 55: Figure 68: Changing To Video Mode From Db Mode
Figure 69: Back to Video Mode Navigate to the Switch option using the Up and Down buttons on the joystick and then press the Center (OK) button on the joystick to select it. The LU200 reboots and operates in Video mode (the default). -
Page 56: Figure 70: Changing To Video Mode From Db Mode
LiveU LU200 User Guide Displaying Unit Information Use the Unit Info option to display additional information about the LU200 unit. To display LU200 unit information: ► In the Main screen, use the Up and Down buttons on the joystick to navigate to the Unit Info option and then press the Center (OK) button on the joystick to select it. -
Page 57: Chapter 6: Faqs
This chapter answers various frequently asked questions about the LU200. Does the LU200 come with SIM cards installed? This depends on whether the LU200 was purchased (is provided without SIM cards) or leased (is provided with SIM cards). Where are SIM cards placed? For internal Cellular modems there are 2 slots to insert the SIM cards. -
Page 58: What Is The Next Step After Inserting The Sim Cards Into The Lu200 Unit
By default, the LU200 automatically configures the correct APN. • If the system fails to automatically configure the APN, then you may refer to the LiveU Central User Guide for a description of how to configure the APN. How do I know whether or not the... -
Page 59: The Lu200 Unit Does Not Connect To The Internet. What Is The Problem
FAQs You may refer to the LiveU Central User Guide for more information. It describes how to remotely manage and control LU200s and LU2000s on an LU2000 server through a standard Internet browser. The LU200 unit does not connect to the Internet. -
Page 60: Which Modems Can Be Used In The Lu200
Yes, this package can be purchased from LiveU sales. You may refer to the Support and Contacting Information section on page 8 for more information. 15 How many hours does the battery last? The LU200 has an internal battery that when fully charged enables up to two hours of standalone operation. -
Page 61: Why Can't I Hear Using The Earphones/Headphones
IFB Setup section on page 50. In addition, the IFB feature must be properly configured on the LU2000 server. For more details, see Appendix A, Interrupted Feedback (IFB) in the LiveU LU2000 Server User Guide. 17 Can I stream to multiple channels (LU2000s) at the same time? Currently, this feature is not available. - Page 62 LiveU LU200 User Guide Blank page for double-sided printing...
-
Page 63: Appendix A: Safety And Maintenance
Safety and Maintenance This appendix describes how to maintain the LU200 and how to handle potential hazards. This appendix contains the following sections: • Safety Information, page 63 • Potential Hazards, page 65 Safety Information CAUTION Do not disassemble this product. Do not remove its cover or its back. - Page 64 The product is definitely not designed to be used under water. • Only use the original LiveU backpack. Do not place the product in a non- LiveU bag. • If the LCD breaks, do not touch the glass.
-
Page 65: Potential Hazards
Safety and Maintenance Potential Hazards The LU Live Video Uplink unit contains cellular devices that should be operated according to the same rules and limitations as expected from normal cellular devices. Do not operate the LU Client Enclosure in an environment that may be susceptible to radio interference resulting in danger, specifically: •... - Page 66 LiveU LU200 User Guide • On an aircraft, either on the ground or airborne. In addition to FAA requirements, many airline regulations state that wireless operations must be suspended before boarding an airplane. Please ensure that the LU Enclosure is turned off prior to boarding aircraft in order to comply with these regulations.
-
Page 67: Appendix B: Limitation Of Liability And Warranty
LiveU product, even if the company has been advised of the possibility of such damages. - Page 68 LiveU LU200 User Guide Notice Required for the License Granted under Article 2.6 and for Sales to Codec Licensee customer(s). As a condition of the license granted under Article 2.6 and the license granted to a Codec Licensee to make sales to Codec...
-
Page 69: Appendix C: Fcc Compliance
FCC Compliance This appendix provides the FCC compliance information. Note: This equipment has been tested and found to comply with the limits for a Class B digital device, pursuant to part 15 of the FCC rules. These limits are designed to provide reasonable protection against harmful interference in a residential installation. - Page 70 US and International: 2 University Plaza Drive Suite 505 Hackensack, New Jersey, 07601 Tel: 1-(201)-742-5228 USA and the Americas: International: support@liveu.tv Tel: 1-(609)-997-0600...
Need help?
Do you have a question about the LU200 and is the answer not in the manual?
Questions and answers