
Related Manuals for ActionTec MWTV3TX


Summary of Contents for ActionTec MWTV3TX
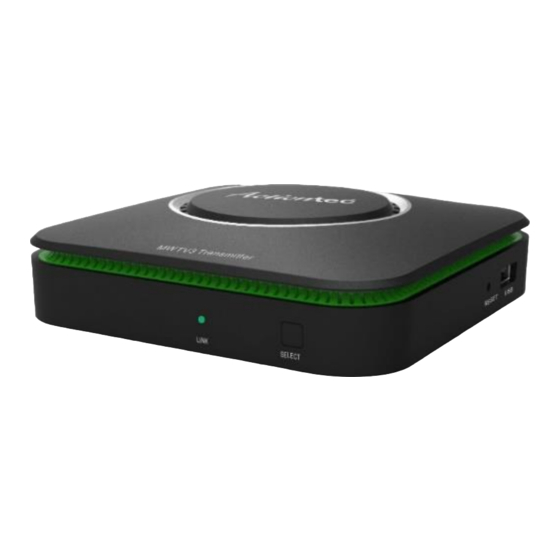
- Page 1 MyWirelessTV3 4K Wireless HD Connection Kit Model#: MWTV3TX & MWTV3RX User Manual...
-
Page 2: Table Of Contents
Table of Contents Part I. Introduction .......................... 1 1.1. Features ..........................1 1.2. Minimum System Requirements ..................1 1.3. Package Contents ......................2 1.4. Getting To Know MyWirelessTV3 ..................2 1.4.1. MyWirelessTV3 Transmitter ................2 1.4.2. MyWirelessTV3 Receiver ..................3 Part II. -
Page 3: Part I. Introduction
Part I. Introduction Thank you for purchasing MyWirelessTV3. This product will allow you to transmit 4K Ultra High Definition content from a set top box, gaming console, or other source with an HDMI port, to an HDTV monitor in another location, without lag or picture quality loss. It allows you to view movies and television programs in two different locations at the same time, without wires. -
Page 4: Package Contents
1.3. Package Contents Contents in the package are listed below: (1) Wireless HD Video Transmitter (1) Wireless HD Video Receiver (2) Power Adapter (2) High-speed HDMI 1.4 Cable (1) IR Blaster Cable (for Transmitter) (1) IR Receiver Extension Cable (for Receiver) ... -
Page 5: Mywirelesstv3 Receiver
MyWirelessTV3 Firmware" for more details. Power port. The 5V DC / 2A power port is used to connect the Transmitter to a power source. HDMI Input port. The HDMI Input port is used, via an HDMI cable, to connect the Transmitter to an HDMI source (set top box, Blu-ray player, gaming console, etc.). - Page 6 • It glows steadily in green when it has paired with the Transmitter. It blinks fast in orange while it is pairing with the Transmitter or when pairing fails. • It blinks slowly in red while it is being upgraded. And it glows steadily in red when the upgrade fails.
-
Page 7: Part Ii. Connecting Mywirelesstv3
Part II. Connecting MyWirelessTV3 Connecting MyWirelessTV3 consists of two parts: connecting the Transmitter to a source of high-definition video, and connecting the receiver to a high-definition television monitor. This chapter will take you through both procedures, as well as setting up the IR Blaster and IR Receiver to allow you to use the remote control of the source device in the location you are watching (or playing) your content. -
Page 8: Receiver
2.1.2. Receiver A typical connection for the Receiver is shown below: 2.2. Connecting the MyWirelessTV3 Transmitter You should install the Transmitter near the video source device (set top box, Blu-ray player, gaming console, etc.). Follow the procedure below to set up the MyWirelessTV3 transmitter: Select the source device (i.e. -
Page 9: Connecting The Mywirelesstv3 Receiver
2.3. Connecting the MyWirelessTV3 Receiver You should install the Receiver near the HDTV monitor where you intend to watch the content being streamed from the source device. Get the Wireless HD Video Receiver, HDMI cable and power supply. Go to the TV that you want to connect. -
Page 10: Connecting The Ir Receiver Extension Cable
2.4.2. Connecting the IR Receiver Extension Cable The IR Receiver Extension Cable receives signals from the source device remote control and sends them back to the source device. Get the IR Receiver Extension Cable from the MyWirelessTV3 kit. The IR Receiver Extension Cable has a green connector. -
Page 11: Configuring Mywirelesstv3
Configuring MyWirelessTV3 Part III. This chapter describes using the MyWirelessTV3 graphical user interface, which allows you to configure various aspects of MyWirelessTV3, including viewing system information, selecting a Wi-Fi channel. 3.1. Viewing System Information To access MyWirelessTV3's system information, press the MENU button on the Receiver when the Receiver has paired with the Transmitter. -
Page 12: Selecting A Wi-Fi Channel
3.2. Selecting a Wi-Fi Channel MyWirelessTV3 uses the 802.11ac protocol for wireless networking. If you encounter lagging or pixilation with MyWirelessTV3’s streaming video, you may be using a congested channel. Select a channel to have MyWirelessTV3 stream using a different channel, or select Auto (recommended) to have MyWirelessTV3 select a clean wireless channel automatically. -
Page 13: Updating Mywirelesstv3 Firmware
Follow the online instructions to download the latest MyWirelessTV3 firmware. Extract the file and copy “MWTV3TX.img” and “install.img” to a USB flash drive (FAT32 formatted). Go to your MWTV3 receiver (at the TV end), and power off the device. - Page 14 LINK LED blinks fast in orange (pairing). When this occurs, remove the USB flash drive from the device. Note: If firmware update fails, the LINK LED will glow steady in red for about 10 seconds, and then the device reboots. Go to your MWTV3 transmitter (at the source end) and power off the device.
-
Page 15: Appendix I. Troubleshooting
Appendix I. Troubleshooting This chapter describes some problems you may encounter using MyWirelessTV3, and possible solutions to those problems. Also included are frequently asked questions (FAQs), and the answers to the questions. FAQs Do I need to power off MyWirelessTV3 after watching TV? No. - Page 16 1. On a PC, go to http://www.actiontec.com/mwtv3. Browse to the support section and download the latest firmware. 2. Extract the zip file, and copy both MWTV3TX.img and install.img to the top directory of a USB flash drive. Upgrade the devices You must complete all steps for both the transmitter and receiver.
-
Page 17: Appendix Ii. Specifications
Appendix II. Specifications This chapter lists the specifications of the MyWirelessTV3 devices. Video: H.264 video compression Supports up to 4K resolution Audio: Non-compressed LPCM Pass-through 5.1 surround on Transmitter only A/V interface: Transmitter: One HDMI input & one HDMI pass-through ... - Page 18 Storage temperature: 0 ºC to 70 ºC (32 ºF to 158 ºF) Operating humidity: 10% to 85%, non-condensing Storage humidity: 5% to 90%, non-condensing Regulatory and compliance: FCC, UL Warranty: One (1) year limited...
Need help?
Do you have a question about the MWTV3TX and is the answer not in the manual?
Questions and answers