
Related Manuals for Olivetti d-Color MF2001


Summary of Contents for Olivetti d-Color MF2001
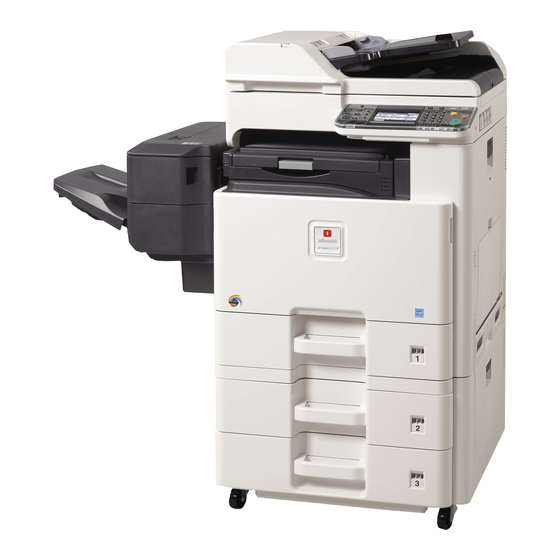
- Page 1 Multifunction Color d-Color MF2001 d-Color MF2501 INSTALLATION MANUAL Code: Y112990-2...
- Page 2 PUBLICATION ISSUED BY: Olivetti S.p.A. Gruppo Telecom Italia Via Jervis, 77 - 10015 Ivrea (TO) Copyright © 2011 Olivetti All rights reserved...
-
Page 3: Installation Environment
2KZ/2K0 1-2 Installation 1-1 Installation environment 1. Temperature: 10 to 32.5°C/50 to 90.5°F 2. Humidity: 15 to 80% RH 3. Power supply: 120 V AC, 12.0 A 220 - 240 V AC, 6.5 A 4. Power supply frequency: 50 Hz ±2%/60 Hz ±2% 5. -
Page 4: Unpacking And Installation
1-2 Unpacking and installation (1) Installation procedure Start Unpack Remove the tapes and spacer Install the other optional devices Connect the power cord Install the job separator tray Installing toner Release the scanner lock lever Output an own-status report Install the optional paper feeder (maintenance item U000) Load paper Exit maintenance mode... - Page 5 2KZ/2K0 Unpacking Figure 1-2 1. Bottom case 11. Upper pad R 21. Power cord 2. Bottom pad R 12. Upper pad L 22. Hinge joints 3. Bottom pad L 13. Toner container /YCM 23. Quick installation guide 4. Machine cover 14.
- Page 6 2KZ/2K0 Remove the tapes and spacer Tape 1. Remove four tapes. Tape Tape Tape Figure 1-3 2. Open the DP top cover. DP top cover 3. Slide two DP original width guides and then remove the pad. 4. Close the DP top cover. DP original width guides Figure 1-4 Sevice Manual...
- Page 7 2KZ/2K0 5. Open the DP. 6. Remove the protective sheet and paper. Protective sheet Figure 1-5 7. Remove the paper. 8. Close the DP. Paper Figure 1-6 Y112990-2 Sevice Manual...
- Page 8 2KZ/2K0 9. Remove the tape. Tape Figure 1-7 10. Peel off two protective sheets. 11. Remove the spacer. Spacer Protective sheets Figure 1-8 Sevice Manual Y112990-2...
- Page 9 2KZ/2K0 Install the job separator tray 1. Gently push the job separator tray into Left guide the machine along the guides. Right guide Job separator tray Figure 1-9 Release the scanner lock lever 1. Pull the scanner lock lever in the direc- tion of the arrow.
- Page 10 2KZ/2K0 Install the optional paper feeder 1. Install the optional paper feeder as required. Paper feeder Figure 1-11 Load paper 1. Pressing the paper width adjusting tab as shown, move the paper width guides to fit the paper size. Paper width adjusting tab Cassette Paper width guides...
- Page 11 2KZ/2K0 2. Adjust the paper length guide to fit the paper size. Paper length guides Figure 1-13 Paper 3. Align the paper so that it is abut with the right end of the cassette. 4. Insert the cassette size plate. 5.
- Page 12 2KZ/2K0 Install the toner container 1. Open the front cover. 2. Hold the toner container vertically and tap the upper part five times or more. Turn the toner container upside down and tap the upper part five times or more. Toner container Figure 1-15 3.
- Page 13 2KZ/2K0 4. Shake the toner container approxi- mately five or six times in the horizontal direction to stir toner. Toner container Figure 1-17 5. Gently push the toner container into the CLICK! machine. Push the container all the way into the machine until it locks in place.
- Page 14 2KZ/2K0 Switch the cassette heater switch 1. Release the hook and then remove the switch cover. Hook 2. Turn the cassette heater switch on. Note: When the cassette heater is used, it turns it on. 3. Refit the switch cover. Switch cover Figure 1-19 Install the other optional devices...
- Page 15 2KZ/2K0 Output an own-status report (maintenance item U000) 1. Enter 000 using the numeric keys and press the start key. 2. Select Maintenance and press the start key to output a list of the current settings of the maintenance items. 3.
- Page 16 STATO DI AGGIORNAMENTO UPDATING STATUS DATA PAGINE AGGIORNATE PAGINE CODICE DATE UPDATED PAGES PAGES CODE 03/2010 EDIZIONE - 1 EDITION Y112990-2...
Need help?
Do you have a question about the d-Color MF2001 and is the answer not in the manual?
Questions and answers