Advertisement
Quick Links
Installation Instructions
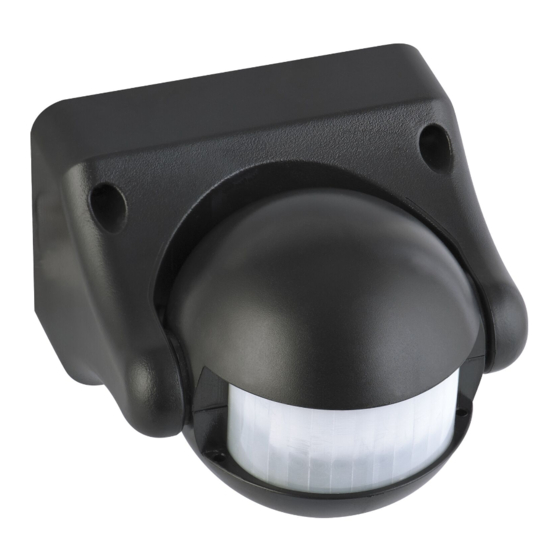
movement activated
compact sensor
HARDWIRE
INSTALL BY QUALIFIED ELECTRICIAN
Important! please read these InstructIons carefully.
CPIN002323/2
mal343
series 2
Where to fit your
security seNsor
To achieve best results for outside use the Arlec
Security Sensor should be mounted on a wall,
or under eaves of a building, generally used to
control an existing light fitting. Ideally the Security
Sensor should be mounted 2.4 metres (8ft)
above the area to be scanned (Refer Fig.1A).
Always mount with the adjustable controls for
LUX and TIME facing downward.
Figure 1. Side View
Sensor can be angled above animal
height to avoid nuisance triggering
2.4m
(8ft)
Ideal
mounting
height
12m
To avoid damage to the unit – do not aim the
sensor towards the sun. Sensor can be angled
above animal height to avoid nuisance triggering.
To avoid nuisance triggering, the sensor should
be directed away from heat sources such as
barbecues, air conditioners, other outside
lighting, moving cars and flue vents.
Do not aim towards reflective surfaces such
as smooth white walls, swimming pools, etc.
The Arlec Security Sensor scanning specifications
(approximately 12 metres at 180°) may vary
slightly depending on the mounting height
and location.
The detection range of the unit may also alter
with temperature change. Before selecting a
place to install the Arlec Security Sensor, you
should note that movement across the scan
area is more effective
Figure 2. Top View
than movement
directly toward or
away from the sensor
(Refer Fig.2A). If
movement is made
walking directly
180°
toward or away from
the sensor and not
across it, the apparent
detection range will
be substantially re-
duced (Refer Fig.2B).
Note for electriciaN:
Figure 2A
Best sensitivity
The security Sensor should be wired to its own
switch. Before installation/maintenance, the
electrical supply should be isolated. Switching
off the wall switch is NOT sufficient isolation to
prevent electrical shock.
LUX LeveL adjUstment controL
Figure 2B
Adjusts the light level at which the Security
Reduced sensitivity
Sensor operates. Adjust to
operate day and night. Adjust to , the unit
will operate only at night when movement is
detected.
time – time "oN" adjustmeNt
Varies the length of time the light will stay ON
from about 10 seconds to 7 minutes. Turn
anti-clockwise to increase ON-time – ideal
setting is about 2 o'clock position (approximately
iNstalliNg your
2 minutes). Whilst there is movement within
security seNsor
range of the unit, the light will remain ON. When
no further movement is detected, the light will
WarnIng: Must be installed by a licenced
switch OFF after the pre-set time has elapsed.
electrician or other person authorised by
legislation to work on fixed wiring of an electrical
Figure 5.
installation.
Time ON
1. Remove junction box base and position
Control
against wall or eaves.
2. Using the base as a template, mark and drill
the two holes for the masonry plugs or
screws. (More holes maybe needed for cable
entry and exists. Care should be taken to
avoid drilling into concealed electrical wiring.)
Figure 3.
Sensor
Brown
ImPortant: Be careful of electrical shock.
A
240 volt mains
Blue
supply via switch
Always remember that the light may not switch
N
Red
Load
ON during daylight or the light maybe in the
To new or
existing lighting
automatic OFF mode. Never touch live areas
unless fuse is removed or circuit breaker is in
3. Run the mains lamp cable through the rubber
OFF position at the switchboard main.
grommits located in the mounting base.
4. Add silicone around rear of base and cable
entry holes.
5. Mount the base using screws provided.
6. Terminate all wires in accordance with Fig.3.
For best results and operation the following
7. Re-assemble sensor and put plastic plugs
steps should be taken:
into assembly screw holes to weatherproof
1. Direct the sensor toward the desired area
the unit.
2
2. Turn the light level and time control knobs
fully clockwise.
3. Turn the wall switch ON, light will come ON
for 30 seconds and then go OFF, provided that
there is no movement in the 150° detection area.
4. Have another person move across the centre
of the area to be scanned and tilt the sensor
uNderstaNdiNg
until the unit senses the presence of the
the coNtrols
moving person, causing the light to switch ON.
5. Adjust time control (TIME ON) to required
setting.
6. Turn the light level control knob fully
, the unit will
anti-clockwise.
7. Your Security Sensor is now ready for use,
and will automatically operate when movement
is detected at night.
8. The wall switch should remain "ON" for
automatic operation.
automatic mode
Turn your wall switch ON. This will put the sensor
into 'automatic' mode and it will then start
sensing after dusk. The light will switch ON and
automatically switch OFF after the pre-set time
elapses and will then operate automatically
whenever heat movement is detected.
Lux Level
-
+
Control
maNual operatioN
TIME
LUX
(automatic override)
To override the automatic mode, the sensor must
be switched ON in the automatic mode. Now
switch wall switch OFF and back ON within one
second. Your Security Sensor will now hold your
light ON continuously just likes a normal light.
This override function can be selected during
daytime or night time. To return your sensor to
the automatic mode, switch your wall switch
OFF for at least 20 seconds, then switch it ON
again. To switch your security sensor and lights
OFF completely, switch your wall switch OFF.
settiNg the coNtrols
maiNteNaNce
To avoid dust build-up and ensure proper
functioning of the Arlec Security Sensor wipe
the lens lightly with a damp cloth every three
months. DO not use solvents or abrasive
to be scanned.
cleaners on any part of your Security Sensor.
3
Advertisement

Related Manuals for Arlec MAL343 Series 2


Summary of Contents for Arlec MAL343 Series 2
- Page 1 Before installation/maintenance, the 3. Turn the wall switch ON, light will come ON To achieve best results for outside use the Arlec electrical supply should be isolated. Switching for 30 seconds and then go OFF, provided that...
- Page 2 Probably unavoidable but relocating sensor may help. Arlec will assess any claim you may make on the Warranty in the above manner and if, in Arlec’s reasonable opinion, the Warranty applies, Arlec will at its own option and expense replace the specificatioNs 3.
Need help?
Do you have a question about the MAL343 Series 2 and is the answer not in the manual?
Questions and answers