Table of Contents
Advertisement
Advertisement
Table of Contents

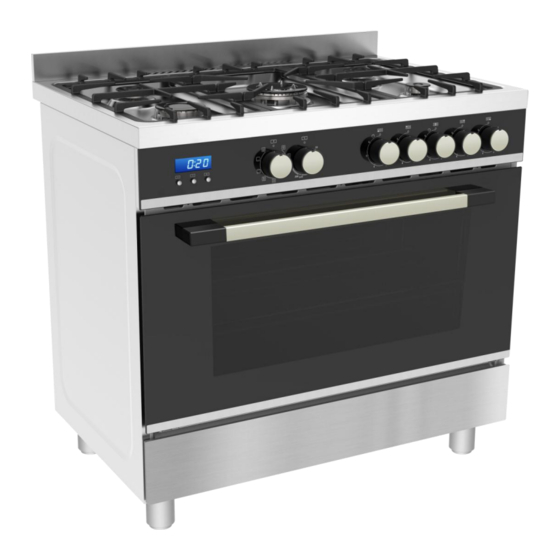
Summary of Contents for Midea MFS90GSS
- Page 1 Midea Gas/Electric Cooker Instruction MODEL : MFS90GSS SAVE THESE INSTRUCTIONS CAREFULLY Read these instructions carefully before using your cooker ,and keep it carefully. If you follow the instructions, your cooker will provide you with many years of good service.
-
Page 2: General Information
WHEN YOU CALL FOR SERVICE When you call for service or order parts for your unit, be RECORD HERE FOR EASY REFERENCE sure to give: Model Colour 1. MODEL 2. SERIAL NUMBER 3. COLOUR 4. PART NAME and/or description of problem Serial Number Installation Date 5. - Page 3 Clearances to combustible materials Fig. 1 A Any adjoining wall surface (side or rear) situated within 200mm of any hob burner must be a suitable non-combusti- ble material from the edge for a height of 150mm for the entire length of the cooker. Any combustible construction above the cooker must be at least 650mm above the maintop.
- Page 4 - It must not be kinked Fig. B Fig. C - It must not be in contact with hot surfaces. IT IS RECOMMENDED THAT A SERVICE TAP AND UNION BE FITTED ADJACENT TO THE APPLIANCE INLET TO FACILITATE FUTURE SERVICING. 5 burner models: set the burner pressure to 1kPa for Natural Gas and 2.75kPa for U-LPG with the wok burner operating a full rate'.
-
Page 5: Special Note
TAB. 1 The correct adjustment is obtained when the flame has a length of about 3 or 4 mm. Gas Type Jet mm ø Burners Power MJ/h For butane/propane gas, the adjusting screw must be Natural 1.00 1.20 Semi-quick screwed in tight. 0.90 Auxiliary Make sure that the flame does not go out turning quickly... -
Page 6: Multifunction Oven
- Always turn pan handles to the side or to the back of the hob. If they are left out into the room they can easily be hit or reached by children, knocking the pan off the hob. - Don’t let children sit down or play with the oven door. Do not use the drop down door as a stool to reach above cabinets. -
Page 7: General Instruction
Oven thermostat knob This method is ideal for all traditional roasting and baking. To obtain an oven temperature between 60°C and MAX°C, For sealing red meats, roast beef, leg of lamb game, turn the knob clockwise. bread, foil-wrapped food and flaky pastry. Mid shelf position is recommended. -
Page 8: Using The Grill
Preheating of the oven is recommended for 10-15 minutes or GUIDE FOR FORCED CONVECTION COOKING until the oven thermostat indicator light switches off to show (Back rolled electric element with fan) the selected temperature has been reached. The accessories provided with the oven can be slotted in at 5 positions: the following guide concerns cooking times and When using a baking tray it should be placed centrally on the thermostat settings using N. - Page 9 As shown in the picture, on-off control is used to control INSTRUCTION FOR USE OF CONTROL DEVICES heating components of oven, the left is power source which (Depending on model) can be connected under the 220V. Using the Cooking Programs 1 Time Adjustment after Starting up Main functions (for some models) When the power is on, it shows 12:00 and flashes.
- Page 10 over, it will automatically turn off the heating and the buzzer is Accessories buzzing to inform the user. Press twice to get into the continuous time setting mode under the common mode, press three times to get into the end time. When the continuous time setting is ok or the end time setting is ok, then press K2 to get into the other kind of automatic program time setting, "Auto-programming Icon"...
- Page 11 This page is special for models with rotisseries Hook the other end into the holder. Using the rotisserie Pour a little bit of water into the baking tray and slide this The rotisserie spit can be used to cook joints such as rolled into shelf position 1 to collect the run-off fat.
- Page 12 CLEANING Daily Regular wiping down directly after use prevents dirt from burning on. Clean the appliance with water and a detergent or Before cleaning the appliance, close the gas stopcock and all purpose cleaner. unplug appliance or disconnect power at the main circuit Avoid using too much water to prevent it entering the burner or breaker of the electrical system.
- Page 13 Cleaning the interior glass of the oven Removal of oven door The interior glass of the oven door can be removed: with the In-depth cleaning of the oven becomes more convenient if the door in the semi-open position, use both hands to remove the door is removed following the instructions below: glass.
- Page 14 OPTIONAL: ONLY FOR THE MODELS EQUIPPED WITH TELESCOPIC RAILS The oven is equipped with telescopic rails to position the pan and wire grid (Fig. 3d). You can change the position, depending on your personal taste and needs ofdifferent foods (Fig. 3e). Fig.
-
Page 15: Problem Solver
SOME SAFETY POINTS PROBLEM SOLVER Do not use the appliance as a space heater. Any of the following are considered to be abnormal operation and may require servicing: If you smell gas Yellow tipping of the hob burner flame. Open a window. Do not use any electrical switches. Sooting up of cooking utensils. - Page 16 FOR SPARE PARTS OR TO FIND THE ADDRESS OF YOUR NEAREST STATE SPARE PARTS CENTRE IN AUSTRALIA MIDEA HOME APPLIANCES AUSTRALIA PTY LTD Unit 11, 75 Lorimer Street, Southbank, VIC, 3006 After-sales service No.: 1800 88 60 10 P/N:16171100A24558...


Need help?
Do you have a question about the MFS90GSS and is the answer not in the manual?
Questions and answers