Table of Contents
Advertisement
Quick Links
Advertisement
Table of Contents

Related Manuals for Summa DC5


Summary of Contents for Summa DC5
- Page 1 User’s Manual Rev 003...
-
Page 2: Fcc Notice
DOC Notice The DC5 does not exceed the Class A limits for radio noise for digital apparatus set out in the Radio Interference Regulations of the Canadian Department of Communications. -
Page 3: Contact Information
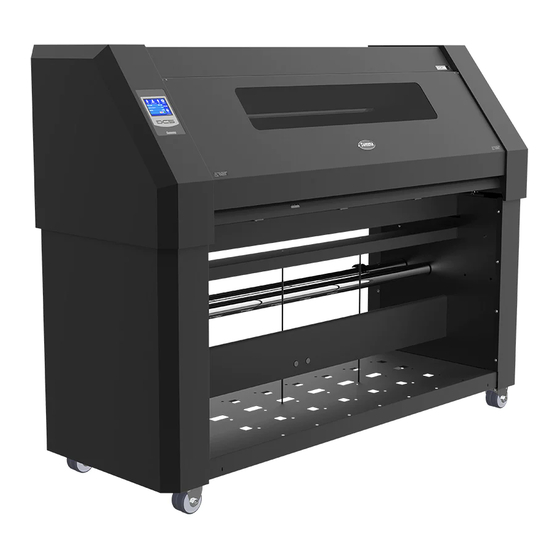
Please register your cutter on the following link: http://www.summa.be/registration.html Failure to register may result in delayed responses to your warranty and service inquiries. Contact Information All inquiries, comments or suggestions concerning this and other Summa manuals should be directed to: Summa, nv Rochesterlaan 6... - Page 4 The DC5 is the ultimate label and decal production unit, combining high image durability and precision contour cutting into one device. The DC5 uses thermal transfer technology. This is a dry transfer printing process that uses heat and pressure to create a durable bond with the resin-based inks and the media. The resin inks are supplied on ribbons containing densely packed pigments suspended in a solid plastic carrier.
-
Page 5: Table Of Contents
1.1 Unpacking the DC5(sx) ..................1-1 1.2 DC5(sx) printer components ................1-4 1.2.1 The DC5(sx) as viewed from the front ............... 1-4 1.2.2 The printer as viewed from the back ................1-6 1.3 Safety, Ideal Operating Environment Connecting to the Mains ....1-7 1.3.1 Safety ............................ - Page 6 2.6 How to change the media width ..............2-13 2.6.1 Pinch roller positioning....................2-13 2.6.2 Using oversized media widths..................2-13 2.7 Preparing the DC5(sx) for long print-outs ..........2-14 Print & Cut ..................... 3-1 3.1 Contour cutting ....................3-1 3.1.1 Making the design ........................
- Page 7 User’s Manual Detailed Operation ..................4-1 4.1 Introduction ......................4-1 4.2 Printer Menu ....................... 4-3 4.2.1 Density ............................4-3 4.2.2 Double density ........................4-3 4.2.3 Calibrate linefeed ........................4-3 4.2.4 Scratchguard ........................... 4-3 4.2.5 OptiTrac color ......................... 4-3 4.2.6 OptiTrac ............................. 4-4 4.2.7 Calibrate Print&Cut ......................
- Page 8 6.1.1 USB driver installation ......................6-2 6.1.2 Installing printer tools ......................6-3 6.1.3 Installing Summa Color Control ..................6-4 6.1.4 Cutting with a DC5(sx) ....................... 6-5 6.2 Summa Printer Control Menus ............... 6-6 6.2.1 Menu ............................6-7 6.2.2 Abort ............................6-8 6.2.3 Users ............................
- Page 9 1-11 Media Core holder ..........................1-16 1-12 Position of the supply roll on the DC5(sx) ................... 1-16 1-13 Loading a roll at the back of the DC5(sx) ..................1-17 1-14 Loading a roll at the front of the DC5(sx) ..................1-17 1-17 Rear basket .............................
- Page 10 6-3 Installation of separate printer tools ....................6-3 6-4 SCC installation ............................6-4 6-5 HASP driver installation........................... 6-4 6-6 Summa Printer Control start screen machine connected ............6-6 6-7 Summa Printer Control menu ....................... 6-7 6-8 Load Direction ............................6-7 6-9 Users menu ..............................
-
Page 11: Setup
Setup 1.1 Unpacking the DC5(sx) NOTE: Save the shipping box and any other packaging items in case the printer needs to be shipped. Do not ship the printer without first completely repacking it in its original packaging. A document explaining how to repackage is available. -
Page 12: Unpacking Dc5(Sx) Stage 2
Slide the ramp under the stand, closest to the end with the foam suspension blocks. WARNING: From this point on, two people ARE REQUIRED for safety reasons. Lift the DC5(sx) from each side, just high enough so the foam blocks can be pulled out from underneath the DC5(sx). FIG 1-3... -
Page 13: Unpacking The Dc5(Sx) Final Stage 4
Position the ramps in this way the printer can be rolled down from the pallet. Be sure the wheels of the printer are aligned with the ramp legs. FIG 1-4 UNPACKING THE DC5(sx) FINAL STAGE 4 Open the front cover and loosen the printer carriage, then remove the foam underneath the carriage, which is protecting the printhead. -
Page 14: Dc5(Sx) Printer Components
3. Pinch Rollers: The pinch rollers clamp the media to the drive system and ensure necessary tracking. The pinch rollers are electrically powered from the keypad. The right pinch roller can be set in 6 different positions for the DC5 and 3 different positions for the DC5sx. - Page 15 User’s Manual 6. Front Wheels: The front wheels of the DC5(sx) are equipped with locking brakes. Secure the brakes, once the DC5(sx) is permanently installed, by pressing the locking wheel brake down with your foot. 7. Media Take-up Sensor: The media take up sensor enables the take-up rollers. Do not place any objects in front of the sensor (optional for DC5sx).
-
Page 16: The Printer As Viewed From The Back
6. Media supply rollers: The two back rollers are part of the media supply system. 7. Rear Wheels: The rear wheels of the DC5(sx) have no locking brakes. 8. Media Supply Sensor: The media supply sensor enables the motorized media supply rollers. -
Page 17: Safety, Ideal Operating Environment Connecting To The Mains
User’s Manual 1.3 Safety, Ideal Operating Environment Connecting to the Mains 1.3.1 Safety 1.3.1.1 General The purpose of the user’s manual is not only to explain the operating procedures for working with this machine. But it also provides the owner, users and operators with precaution procedures for safe and proper machine operation for its intended purpose. -
Page 18: Safety Precautions
User’s Manual 1.3.1.3 Safety precautions WARNING: The DC5(sx) uses razor-sharp knives. Touching the knife with bare hands may cause injury. Do not touch the knives while the machine is cutting. WARNING: There is a risk of injury from being caught or trapped in moving machine parts. -
Page 19: Connecting The Printer To The Mains
User’s Manual 1.3.3 Connecting the printer to the mains 1.3.3.1 Grounding (“Earthing”) WARNING: An insulated ground conductor must be installed as part of the branch circuit that supplies power to the wall outlet to which the printer is connected. The ground conductor must have the same size, insulation material and thickness as the grounded and ungrounded branch circuit supply conductors, but the insulating seat should be green or green with yellow striping. -
Page 20: Powering-On The Printer
DC5(sx) will prompt the user for a media load procedure. When media is loaded, the DC5(sx) will measure the media width and check the presence of the cassettes and estimate how much usable ribbon is remaining on the roll. -
Page 21: Connecting The Printer To A Computer
User’s Manual 1.5 Connecting the Printer to a Computer The DC5(sx) printers support bi-directional USB and Ethernet connectivity. When both ports are connected at the same time, the port that receives data first will remain active and the other port will be deactivated. -
Page 22: Ethernet Connection
Settings Home DNS 1: 0.0.0.0 Status Media width 672mm DNS 2:0.0.0.0 Mac: 00-00-5e-fb-30-31 Knife pressure 75gr USB Class Summa USB port 1 Density 12000 Clamp Back Back Summa USB port 1 Communication Communication 2. Press status bar 3. Press Status... - Page 23 User’s Manual NOTE: it is recommended to work with a static IP address because printing software uses a static IP address to send the data to. If the lease time of the DHCP server isn’t infinite or if no static IP address is used, then it is possible that the IP address of the cutter suddenly changes and that the printer software does not function anymore.
- Page 24 User’s Manual Check if the chosen IP address (xxx.xxx.xxx.xxx) is vacant: For Windows: Press simultaneously . Type “Cmd” (without the “ “) and click on OK. A program box opens. In this box type ping xxx.xxx.xxx.xxx (xxx.xxx.xxx.xxx being the IP address that is chosen for the printer).
- Page 25 NOTE: The port the DC5 uses is 9203. This is already set correct in Printer Control and Color Control. In case another program/driver is used to communicate with the printer, then this port has to be set in this program/driver.
-
Page 26: Media Handling
1.6 Media Handling 1.6.1 Loading media The DC5(sx) is designed to work with rolls of media, not sheets. It is advised to use cotton gloves while loading the media, otherwise the surface of the media becomes contaminated by oil from fingers, and the beginning of the printout will be unusable. -
Page 27: Loading A Roll At The Back Of The Dc5(Sx)
If the media is situated too far from the origin, then the DC5(sx) will “Park” the media on the starting point (origin). If it is not loaded straight, it will align it automatically (unless OptiTrac is set to ‘white background). -
Page 28: Using Media Take-Up Rollers
1-15PREPARING THE TAKE-UP ROLL Attach the scrap media to the edge of the vinyl. Allow for some slack, so the DC5(sx) can align and park the media, if necessary. If the take-up rollers are enabled and if the DC5(sx) is printing, then the media will be rolled up. -
Page 29: Unloading The Media
DC5(sx), thus preventing the vinyl from collecting dust. When the DC5(sx) is used for print and cut, then the media baskets, front and rear, MUST be used, otherwise the vinyl will pick up dust, damaging the print. -
Page 30: Preparing The Printer For Long Print-Outs
1.6.5 Preparing the printer for long print-outs 1.6.5.1 Introduction The DC5(sx) has a fixed position at the rear for the roller guiding of the flange. It is possible that some types of vinyls are not wound up evenly (e.g. the core sticking out). -
Page 31: Loading Ribbon Cassettes
1.7.1 Loading and removing the cassettes The DC5 can take up to 8 cassettes, the DC5sx up to 5. The cassettes can be loaded or removed from the cassette station at any time, even during printing. If the printer is missing a color, then it will give a message on the touch screen just before it needs the color. -
Page 32: Refilling Ribbon Cassettes
(band), carefully aligning each pixel. The ribbons are wound onto plastic cores, which are unique to the DC5(sx) cassette and printer carriage. First remove the protective ribbon wrapping and place the RI (ribbon identification) chip aside. -
Page 33: Closing The Ribbon Cassette
User’s Manual When closing the cassette, make sure the hinge pins (top piece) fit securely into the notched out bottom part of the cassette (2). FIG 1-23 1-23 CLOSING THE RIBBON CASSETTE Setup 1-23... -
Page 34: Knife Installation
User’s Manual Knife Installation WARNING: The DC5(sx) uses razor-sharp knives. Touching the knife with bare hands may cause injury. Take extreme care when operating the printer and when installing, removing or handling the printer’s knife blade! 1.8.1 Removing the drag knife 1. -
Page 35: Installing The Drag Knife
User’s Manual 1.8.2 Installing the drag knife 1. Remove the aluminum plunger from the plastic knife holder (5) by turning the knurled adjustment knob (3) counterclockwise until the plunger comes out of the holder. 2. Insert the conical, non-cutting end of the knife into the opening in the narrow end of the holder. -
Page 36: Basic Operation
75gr Density 12000 Clamp Summa USB port 1 FIG 2-1 DC5(sx) TOUCH SCREEN There is also screen saving feature. After a certain amount of time the screen goes blank and this logo appears on the screen. Touching the screen once disables the screen saver. -
Page 37: Touch Screen
User’s Manual 2.1.1 Touch screen The touch screen provides information and lets the user change the printer’s parameters. Most common buttons on the touch screen: Normally, the status or current value is visible on the left side of the screen, while the control buttons appear on the right side. -
Page 38: Settings
DC5(sx) is operational. The DC5 contains three clamps, the DC5sx contains two. They both have the left clamp on the rotating base and the pinch rollers. The DC5 has two extra rear clamps. All clamps serve to hold the media in place while printing and transport media forward and backward. -
Page 39: Configuration
User’s Manual 2.1.5 Configuration The DC5(sx) printers include 16 user configurations, all of which consist out of the same parameters. Each configuration can have unique parameter settings. This allows the printer to be quickly and easily reconfigured for different types of jobs or media. -
Page 40: Serial Number And Firmware Revision
User’s Manual 2.1.6 Serial number and firmware revision Press the DC5 button to check the serial number and the firmware revision. 2.1.7 Checking the ribbon status Just above the status line is shown which cassettes/colors are loaded in the machine. It also shows an indication of the amount of ribbon left in the cassette. -
Page 41: How To Set Printing Density
Test Density 12000 Range: 6000...16000 MONOCHROME DENSITY TEST Printed in OptiTrack color Apply Cancel Clamp Eth 192.168.1.7 Summa USB port 2. Press Density. 3. Change 4. Select the type of test or value necessary, press test Cancel. check. The printer will print the chosen density test. -
Page 42: How To Set Media Tracking Parameters
User’s Manual 2.3 How to Set Media Tracking Parameters The DC5(sx) prints and measures small marks, located at each side of the print to optimize the tracking performance. After each printing pass, the media is advanced and those small lines are read by a sensor to align the consecutive printed passes. -
Page 43: Recommended Line Feed Calibration Test
Cancel 5. Press on recommended test. A test pattern is printed and then cut out. The DC5(sx) calibrates the OptiTrac sensor and completes the line feed test. The printed lines are measured and internal parameters are adjusted automatically. If the DC5(sx) has to compensate too much, it will prompt the operator to redo the test. -
Page 44: Automatic Head Alignment Test
A test pattern is printed. Some printed lines are measured and then internal parameters are adjusted automatically. If the DC5(sx) has to compensate too much, it will prompt the operator with following text: “VALUE OUT OF RANGE ALIGN HEAD MECHANICALLY”. In this case a mechanical calibration, as described in the head change procedure, will need to be redone. -
Page 45: How To Set The Main Knife Parameters
Range: 0 ... 400 gr Apply Apply Clamp Eth 192.168.1.7 Settings Eth 192.168.1.7 Summa USB port Eth 192.168.1.7 2. Press on pressure 3. Press arrow up or down to 4. Or fill in the new value change the value. after pressing Numpad. -
Page 46: Correct Knife Offset Pattern
Density 12000 Shut down Calbrate Print&Cut Back Back Clamp Settings Settings | Cutter menu Summa USB port 2. Press Settings. 3. Press cutter menu. 4. Press Knife offset. 0.43 Old value: 0.45 mm Cancel New value: 0.43 mm Numpad Test Range: 0.00 ... -
Page 47: How To Calibrate Print And Cut
Settings | Printer menu 5. Press Calibrate Print&Cut. 6. Set values correctly and press Apply. The DC5(sx) first prints and cuts out a test pattern similar to the one below. S E T 1 S E T 2 S E T 3... -
Page 48: How To Change The Media Width
2.6 How to change the media width 2.6.1 Pinch roller positioning. The DC5 has 6 positions for the pinch roller, located on the right side: 50, 61, 76, 100, 120 and137cm (19, 24, 30, 40, 48 and 54 inch). The DC5sx has 3 positions for the pinch roller, located on the right side: 50, 61 and 76cm (19, 24 and 30 inch). -
Page 49: Preparing The Dc5(Sx) For Long Print-Outs
2.7 Preparing the DC5(sx) for long print-outs The DC5(sx) has a fixed position at the rear for the roller guiding of the flange. It is possible that some types of vinyls are not wound up evenly (e.g. the core sticking out). -
Page 50: Print&Cut
When the printout has to be laminated, extra registration marks have to be added so the job can then be cut afterwards. NOTE: The DC5(sx) can print a protective layer (with the scratch guard ribbon) so most lamination jobs can done while cutting and can then be cut immediately after printing. -
Page 51: Contour Cutting
Define the line that needs to be cut as a special color that the RIP recognizes as an object to be cut. NOTE: When using Summa Color Control (see section 6.3) it is advised to use the spot color palette and the spot color CONTOUR. -
Page 52: Opos Cutting
User’s Manual 3.1.1.2 OPOS cutting NOTE: The DC5(sx) cannot be used as a contour cutter. It is even advised not to use it as a cutter (see section 6.1.4). When the printed job has to be laminated before cutting , extra registration marks have to be printed. -
Page 53: Printed Design
NOTE: It is advised to group the jobs on a roll because with each sheet there needs to be a rear margin of 8cm. (see user manual for the Summa cutters for the exact values according to type and model). -
Page 54: Making Cutting Data Ready
Make sure that he origin mark (top right) is also defined as a contour. This will be used as the origin for the cutting. It is recommended to use WinPlot for sending cutting data to the DC5(sx). WinPlot also send the OPOS parameters automatically to the DC5(sx). Just click on the OPOS cut icon and the parameters will be send to the cutter and the special load will be activated (the machine will ask the user to put the knife tip above the first OPOS mark. -
Page 55: Cutting Trough
12000 FlexCut Shut down Calibrate Print&Cut Back Clamp Back Settings Summa USB port Settings | Cutter menu 2. Press on Settings. 3. Press on Cutter menu. 4. Press on FlexCut. Full pressure 180 gr Full pressure cut length 7.500 mm... - Page 56 User’s Manual Old value: 0.45 mm Old value: 180 gr Press arrows or use Cancel Cancel 180 gr is a recommended Numpad to change the Full New value: 0.43 mm New value: 180 gr starting value for the full (cut pressure and press Apply to Numpad Numpad...
-
Page 57: Detailed Operation
Detailed Operation 4.1 Introduction This section is a detailed list of all parameters that can be changed and tests that can be initiated from the touch screen. Section 1 and 2 of this manual describe in detail the most commonly used touch screen manipulations. -
Page 58: Complete Menu Structure
User’s Manual FIG 4-1 COMPLETE MENU STRUCTURE Detailed Operation... -
Page 59: Printer Menu
User’s Manual 4.2 Printer Menu This menu bundles all the printer settings of the DC5(sx). All settings in this section are user- dependent (information is contained within each of the sixteen individual user settings, see section 2.1.4.). 4.2.1 Density This is the first parameter that has to be set if a new type of media is loaded in the printer. -
Page 60: Optitrac
This test cannot be started from the touch screen if no hard disk is installed. The DC5(sx) will prompt the user to start the test from the program Summa Printer Control. The manual head alignment test is used to check if the carriage is aligned (mounted) correctly on the DC5(sx). -
Page 61: Clean Printhead
The dot overlap parameter is used to activate or deactivate the dot overlap. When the DC5(sx) prints the next pass of an image, the last dot on the edge of the previous pass is reprinted. The Dot overlap can be set to on, half or off. It is advised to set the dot overlap to ON. -
Page 62: Cutter Menu
User’s Manual 4.3 Cutter menu This menu bundles all the cutter settings of the DC5(sx). All settings in this section are user- dependent (information is contained within each of the sixteen individual user settings, see section 2.1.4.). 4.3.1 Knife pressure The knife pressure submenu is used to change the default knife pressure (same as in section 2.4 but it can be changed when no media is loaded, however it can’t be tested). -
Page 63: Flexcut
User’s Manual 4.3.5 FlexCut The FlexCut submenu is explained in section 3.2, however setting up the DC5(sx) for FlexCut is not that easy. Follow the next procedure to try and determine usable FlexCut settings. 1. Turn out the knife so that protruding knife tip is longer than the material thickness. -
Page 64: Calibrate Print&Cut
This menu is only accessible if the hard disk option is installed. The DC5(sx) then stores every sent job on the hard disk. If the hard disk is almost full, the oldest jobs will be deleted automatically without any warning. -
Page 65: System Menu
User’s Manual 4.4 System menu This menu bundles the less frequently used parameters and calibrations. Only the parameter take up roll and ribbon save are user dependent parameters. 4.4.1 Take-up roll The take-up roll sub-menu is used to activate or deactivate the take-up rollers (optional on DC5sx). -
Page 66: Calibrate Touch Screen
Calibrate media is used to optimize the parameters of the OptiTrac sensor. Press the ‘calibrate media’ button to perform the calibration. The DC5(sx) prints out the pattern below. The calibration is automatic. Some values are shown on the touch screen while the machine is calibrating. -
Page 67: Coil Setup
User’s Manual 4.4.8 Coil setup This test is used to set the knife to “landing.” The cut quality is seriously affected by incorrect landing setting. Before changing these values, write them down, as there is no default setting for these parameters. After adjustment, the value is saved automatically when leaving the sub menu. -
Page 68: Communication
DHCP server. It also shows the MAC address of the Ethernet connection. 4.5.4 USB Class USB class can be set to Summa USB port 1, Summa USB port 2, Summa USB port 3 or Summa USB port 4. -
Page 69: Print Demo Files
User’s Manual 4.8 Print demo files This menu is only accessible if the hard disk option is installed. These files and prints are pre-installed and cannot be deleted. PRINT DEMO File name Apply SUMMALOGO Cancel Number of copies FIG 4-9 REPRINT MENU Press the reprint job button. -
Page 70: Maintenance And Cleaning
This situation may cause malfunctioning of the DC5(sx). 1. The front sensor is located on the DC5(sx) left side; next to the pinch roller. The rear sensor is located on the same line as the front sensor but on the rear plate. -
Page 71: Changing He Cleaning Pad
User’s Manual 5.1.3 Changing the cleaning pad Located on the left side of the DC5(sx) is a printhead cleaning pad. The printer cleans the head periodically on this pad. It is possible that after a while some dust will accumulate on this pad. -
Page 72: Cleaning The Printhead
Do not clean the printhead above the printing surface. To clean the printhead, proceed as follows: 1. Power off the DC5(sx). Open up the rear cover and take out the cassette. 2. Use a lint free cloth or gauze, moistened with isopropyl alcohol. -
Page 73: Cleaning The Printing Surface
2. Cut a piece of vinyl, the size of the printing surface width is 14cm, length is machine dependent) and stick it onto the printing surface. 3. Power on the DC5(sx) and load the media. Print out a rectangle full width and height, consisting out of two colors app 20% coverage. -
Page 74: Operating Voltage
User’s Manual 5.2 Operating voltage WARNING: Before changing the fuse, make sure the cutter is completely disconnected from its power source. WARNING: For continued protection against risk of fire, replace only with the same type and rating of fuse: T4.0A, 250V SCHURTER SPT OR EQUIVALENT. 1. -
Page 75: Software For The Pc
6.1 Introduction IMPORTANT NOTICE FOR DC3 and DC4(sx) users: None of the software for the DC5 is compatible with the DC3 or DC4(sx). The USB interface has different hardware/software specifications. To avoid problems, do not connect the DC5 with a computer where a DC3 or DC4(sx) is already connected to. -
Page 76: Usb Driver Installation
Check if there is a green checkmark before Summa (SUMMAUSB). If not, then the driver has not been installed correctly. -
Page 77: Installing Printer Tools
Summa Printer Tools DC5 opens automatically. It is recommended to immediately install the individual printer tools. In order to install at a later point, just click on start -> All Programs -> Summa -> Summa Printer Tools. FIG 6-3 INSTALLATION OF SEPARATE PRINTER TOOLS Clicking the ‘Full installation’... -
Page 78: Installing Summa Colorcontrol
User’s Manual 6.1.3 Installing Summa ColorControl Color Control is a RIP which can import eps files and then send the data to the printer. It accepts both print and contour-cut data. Color Control requires a hardware key (also called a dongle). Click on the button to install. -
Page 79: Cutting With A Dc5(Sx)
6.1.4 Cutting with a DC5(sx) The DC5(sx) is not made to use as a cutter. The reason for that is the supply mechanism. It is internally switched off during cutting (to avoid that the supply roll unrolls because of the constant movement of the vinyl during cutting). -
Page 80: Summa Printer Control Menus
The Summa Printer Control program basically has the same functions as the control panel. It is up to the user to decide which way he will work most efficiently. The users who will work with the Summa Printer Control program will notice that it is a very powerful and practical tool. -
Page 81: Menu
6.2.1 Menu FIG 6-7 SUMMA PRINTER CONTROL MENU The menu is a list of all the user parameters that can be set. There are more user parameters then shown here, but they cannot be set directly; they have to be set with the automatic calibrations. -
Page 82: Abort
6.2.3 Users FIG 6-9 USERS MENU This menu gives an overview of all the (pre)configured users on the DC5(sx). Use this menu for quick change from one user to another or to change the name of a user. Software... -
Page 83: Print
This head status can be used for warranty issues. The code can only be decoded by Summa. There are also two buttons to upgrade the firmware for the DC. The procedure for a... -
Page 84: Customize
2. Make sure the printer is switched on and check the connection status in Summa Printer Control (click on the refresh button in the machine info status). Click on 3. -
Page 85: Summa Color Control
ColorControl is a Windows-based program that processes Postscript files (“EPS”, “PS”, “EPSF” and “PDF” files). ColorControl provides the RIP (Raster Image Processor) to enable the operator to output vector and raster images to the DC5(sx). 6.3.1 Settings ColorControl Click on preferences to open the preferences menu. -
Page 86: General Preferences
User’s Manual 6.3.1.2 General preferences FIG 6-15 6-15 PROCESS PREFERENCES 1. Units: Sets the units of measurement for pixel resolution, page size and rulers within the preview menu. The units can be set separately for media size and pixel resolution. 2. -
Page 87: Rip Preferences
User’s Manual 6.3.1.3 RIP preferences FIG 6-16 6-16 RIP PREFERENCES 1. RIP memory (MB): the amount of RAM SCC used while processing files. The default amount is 64MB. The maximum memory used by SCC is 256MB. 2. The default page size can be set. If page size info is already in the file(usually it is), then this setting is not used. -
Page 88: Printer Preferences
The “spot color name = n” : the spot color name is the name of the spot color used in the design software and n is the number of the spot color ribbon in the DC5(sx). 6. Reset Spot ID’s: resets spot ID’s to factory default. -
Page 89: Reprint Preferences
User’s Manual 6.3.1.5 Reprint preferences FIG 6-18 6-18 REPRINT PREFERENCES Reprint directory: select to use the RIP output directory or choose another location to store ripped files. Software 6-15... -
Page 90: How To Rip, View And Print
(see section 6.3.1.4). If the plug-in for Corel or Illustrator is used, then the program Summa Color Control opens automatically with the printer dialog window and the current open file in the design program. -
Page 91: Rip Settings
User’s Manual 6.3.3 RIP settings The different RIP settings are grouped in tabs in one window. The buttons at the bottom are used for following: : Click this button if one of the default values of the 5 tabs needs to be changed. -
Page 92: General Tab
User’s Manual 6.3.3.1 General tab FIG 6-19 6-19 GENERAL TAB 1. Force Black Overprint: overprints all black elements, which help to prevent small black text from dropping out the background color. FORCE BLACK OVERPRINT ON FORCE BLACK OVERPRINT OFF 2. Mirror: reverses the image, which is useful for some backlit and window graphic applications. -
Page 93: Color Tab
User’s Manual 6.3.3.2 Color Tab FIG 6-20 6-20 COLOR TAB 1. Colorspace: select 3 color (CMY), 4 color (CMYK), Monochrome (Grey scale) or spot color only. Printing in 4 colors is chosen to deepen shadows and to provide a true black. Printing in 3 colors reduces the cost of the output. -
Page 94: Screening Tab
‘dots per mm’ (dpmm or dpi). Dpmm is the resolution of the printer. The head of a DC5(sx) has a fixed resolution of 12 dpmm (304 dpi). The number of shades depends on the relation between dpmm and lpmm (lpi and dpi). The formula is (dpmm/lpmm)²... -
Page 95: Screen Angles
User’s Manual 4. Angle: To get various shades to reproduce an image, the RIP uses a certain process called screening. Screening breaks an image down into series of dots. Each screen is set to a certain angle. Thus creating intersecting rows that form a pattern that looks like dot shapes, known as rosettes. - Page 96 Ellipse is the recommended default shape. Rhomboid, Double Dot and other shapes can be chosen for special effects but are not generally recommended. Summa cannot guarantee print quality, using any shape other than Ellipse.
-
Page 97: Layout Tab
There is also the option to print out each tile separately. If the weed box option is chosen, then the DC5(sx) cuts a border around the print out.. If there is print and cut information in the file, then SCC will automatically cut a border around the design. -
Page 98: Advanced Tab
User’s Manual 6.3.3.5 Advanced tab FIG 6-25 6-25 ADVANCED TAB 1. Horizontal offset: specify the offset from the origin (left side) of a normal printout. 2. Job name (optional): specify the name the printer will use in the printer’s queue. 3. -
Page 99: Masking
User’s Manual 5. Use High resolution mode is an option to print in high resolution. When this mode is used, then the DC5(sx) prints with a resolution of 304x608 dpi which results in higher color contrast and sharper images. 6. Masking: is an option to print color layers underneath other colors. Commonly used for printing on clear vinyl. - Page 100 NOTE: If the files are sent to Color Control with the plug-in from Corel or Illustrator, then the version of Summa Printer Tools has to be minimum 1.1.0.0. otherwise Color Control will be closed and opened again automatically and the queue will not function or an error message will appear.
- Page 101 User’s Manual 6.4 Webserver The DC5(sx) has a small built-in webserver. This enables access to the basic functions of Summa Printer Control with a web browser. In order to access, open the web browser and Type the IP address in the address bar. There are three main parts.
- Page 102 User’s Manual Click on ‘About’ to scroll down to the bottom. The serial number and version of the firmware is shown. Software 6-28...
- Page 103 Specifications 7.1 Features List 7.1.1 Hardware • OptiPrint™ media cleaner • Powered roll feed system with media flanges • Powered roll up system with media flanges (optional on DC5sx) • Baskets (optional on DC5sx) • Rear and Front Media sensor •...
- Page 104 Video Card: Minimum 1200x800 • USB: extra USB port for installation stick • Available programs: • Summa Color Control / SCC • Postscript Level 3 compatible RIP • Import EPS, PDF of PS files • Scaling, rotating, mirroring, inversing •...
Need help?
Do you have a question about the DC5 and is the answer not in the manual?
Questions and answers