Table of Contents
Advertisement
This work stand has been engineered and manufactured to our high standard for dependability, ease of operation and
operator safety. When properly cared for, the work stand will give you years of rugged, trouble-free performance.
WARNING
To reduce the risk of injury, the user must read and understand the operator's manual before using this product.
Thank you for buying a Ridgid product.
SAVE THIS MANUAL FOR FUTURE REFERENCE
OPERATOR'S MANUAL
Work-n-Haul IT
Two Wheel Work Stand
AC9930
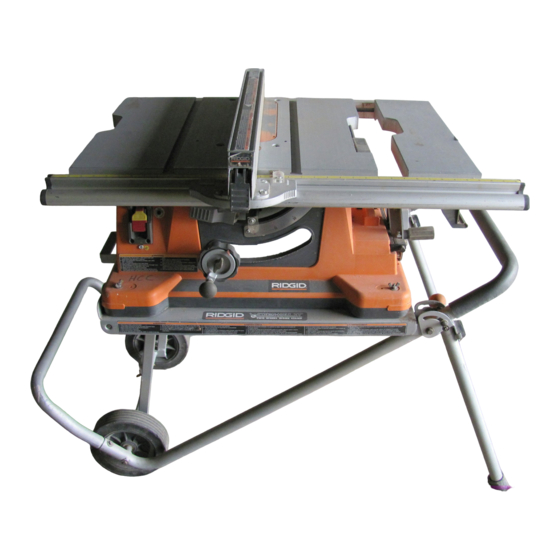
For Use With Ridgid TS2400
Table Saw And
Ridgid Miter Saws
1
TM
Advertisement
Table of Contents

Summary of Contents for RIDGID AC9930
- Page 1 When properly cared for, the work stand will give you years of rugged, trouble-free performance. WARNING To reduce the risk of injury, the user must read and understand the operator’s manual before using this product. Thank you for buying a Ridgid product. SAVE THIS MANUAL FOR FUTURE REFERENCE Work-n-Haul IT...
-
Page 2: Table Of Contents
TABLE OF CONTENTS n Introduction ... 2 n Rules for Safe Operation ... 3 n Symbols... 4 n Unpacking ... 5 n Loose Parts ... 5 n Tools Needed... 5 n Assembly ...6-10 n Exploded Views/Repair Parts ... 11 n Customer Service Information... 12 INTRODUCTION Your work stand has many features for making the use of this product more pleasant and enjoyable. -
Page 3: Rules For Safe Operation
RULES FOR SAFE OPERATION Safe operation of this accessory requires that you read and understand this operator's manual, the operator’s manual for the table saw and miter saw as well as all labels affixed to the tool. READ ALL INSTRUCTIONS n KNOW YOUR ACCESSORY. -
Page 4: Save These Instructions
This operator's manual describes safety and international symbols and pictographs that may appear on this prod- uct. Read the operator's manual for complete safety, assembly, operating and maintenance, and repair information. SYMBOL Wet Condition Alert No Hands Symbol (Miter Saw) No Hands Symbol (Table Saw) Read the Operator’s Manual Eye Protection... -
Page 5: Unpacking
UNPACKING NOTE: Before beginning assembly, check that all parts are included. If you are missing any part, do not assemble this accessory. Call 1-800-4-RIDGID or E-mail us at info@ridgid.com to get the missing part. Sometimes small LOOSE PARTS The following items are included:... -
Page 6: Assembly
ASSEMBLY ASSEMBLING THE LOWER FOOT See Figure 1. NOTE: Only ONE spring pin is required at the carry handle end of the stand. This spring pin locks the legs in the set-up or tear-down position. Instructions to change the location of this spring pin are described later in the “Assembly”... -
Page 7: Before You Start
CAUTION: Do not lift by any part of the miter saw that is attached to the workstand. Failure to do so may result in possible injury and damage the tool. - Page 8 ASSEMBLY WORK STAND FOLD DOWN See Figures 8, 9, 10 and 11. Before you start n Remove any workpieces from the tool. n If the tool is already assembled to the stand, make sure that it is securely attached to the stand per the instructions in this manual.
-
Page 9: Mounting Power Tools
100 pounds are described below. We recommend using wooden mounting blocks as explained below to attach any tool other than the RIDGID TS2400 table saw. Any holes drilled in the work stand or screws attached to the table of the work stand may cause damage to the product or interfere with the function of the work stand. - Page 10 ASSEMBLY SEE BOLT VIEW A SEE BOLT VIEW B n Remove mounting blocks from table. Attach power tool to mounting blocks with 1/4-20 carriage bolts, washers, lockwashers and nuts as shown. Reinstall mounting blocks to work stand table. NOTE: See views of bolt recommendations, see figure 15. 2 X 6 WORK STAND...
-
Page 11: Exploded Views/Repair Parts
747-13 747-14 747-15 747-16 747-17 747-18 747-19 747-20 747-21 Lubricate if Necessary Two Wheel Work Stand Model AC9930 RIDGID parts are at www.ridgidparts.com Table Locking Pin Metal Sleeve Spring Washer (10 ID) E Clip Wheel Washer (13 ID) Table Support... -
Page 12: Customer Service Information
Ridgid Miter Saws Customer Service Information: For parts or service, contact your nearest RIDGID authorized service center. Be sure to provide all relevant information when you call or visit. For the location of the authorized service center nearest you, please call 1-866-539-1710 or visit us online at www.ridgid.com.


Need help?
Do you have a question about the AC9930 and is the answer not in the manual?
Questions and answers