Table of Contents
Advertisement
OPERATOR'S MANUAL
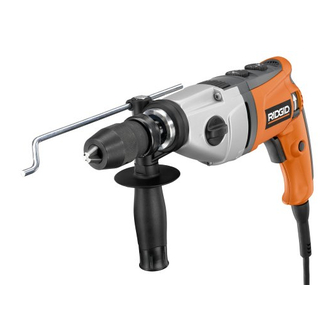
HAMMER/PULSE DRILL
R5010
Your new drill has been engineered and manufactured to our high standards for dependability, ease of operation, and
operator safety. When properly cared for, it will give you years of rugged, trouble-free performance.
WARNING:
To reduce the risk of injury, the user must read and understand the operator's manual before using this product.
Thank you for buying a Ridgid product.
SAVE THIS MANUAL FOR FUTURE REFERENCE
®
Advertisement
Table of Contents

Summary of Contents for RIDGID R5010
- Page 1 OPERATOR'S MANUAL HAMMER/PULSE DRILL R5010 Your new drill has been engineered and manufactured to our high standards for dependability, ease of operation, and operator safety. When properly cared for, it will give you years of rugged, trouble-free performance. WARNING: To reduce the risk of injury, the user must read and understand the operator’s manual before using this product.
-
Page 2: Table Of Contents
Customer Service Information ... 18 INTRODUCTION Your drill has many features for making the use of this product more pleasant and enjoyable. Safety, performance, and dependability have been given top priority in the design of this product making it easy to maintain and operate. -
Page 3: General Safety Rules
GENERAL SAFETY RULES WARNING: Read and understand all instructions. Failure to follow all instructions listed below, may result in electric shock, fire and/or serious personal injury. SAVE THESE INSTRUCTIONS Work Area Keep your work area clean and well lit. Cluttered benches and dark areas invite accidents. -
Page 4: General Safety Rules
GENERAL SAFETY RULES Service Tool service must be performed only by qualified repair personnel. Service or maintenance performed by unqualified personnel could result in a risk of injury. SPECIFIC SAFETY RULES Hold tool by insulated gripping surfaces when performing an operation where the cutting tool may contact hidden wiring or its cord. -
Page 5: Symbols
SYMBOLS Important: Some of the following symbols may be used on your tool. Please study them and learn their meaning. Proper interpretation of these symbols will allow you to operate the tool better and safer. SYMBOL NAME Volts Amperes Hertz Watt Minutes Alternating Current... -
Page 6: Specifications
Always use original factory replacement parts when servicing. Electrical Connection The drill has a precision-built electric motor. It should be connected to a power supply that is 120 volts, 60 Hz, AC only (normal household current). Do not operate this tool on direct current (DC). -
Page 7: Unpacking
UNPACKING Instructions Your drill has been shipped completely assembled. Carefully remove the tool from the box. Make sure that all items listed in the packing list are included. Inspect the tool carefully to make sure no breakage or damage occurred during shipping. -
Page 8: Features
REVERSIBLE This hammer drill allows you to reverse the bit rotation. You can control the direction with the switch located on the side of the tool. -
Page 9: Operation
See Figure 3. Your new drill has a keyless chuck. As the name implies, you can hand tighten or release drill bit in the chuck jaws. Grasp the chuck collar and rotate it to the left. Release the collar and then turn the chuck body to the right. The arrows... -
Page 10: Variable Speed
Running at low speeds under constant usage may cause your drill to become overheated. If this occurs, cool your drill by running it without a load and at full speed. The following guidelines may be used in determining... - Page 11 We recommend that you select normal drill mode when drilling with twist drills, hole saws, etc., in soft material. Pulse mode is activated when rear dial on top of drill is turned to the circle icon and can be used at any RPM (high or low speed).
- Page 12 Open or close the chuck jaws to a point where the opening is slightly larger than the drill bit you intend to use. Also, raise the front of your drill slightly to keep the drill bit from falling out of the chuck jaws.
-
Page 13: Helpful Hints
The oil will prolong the life of the bit and increase the drilling action. If the bit jams in the work piece or if your drill stalls, stop the tool immediately. Remove the bit from the work piece and determine the reason for jamming. -
Page 14: Chuck Removal
The chuck must be removed in order to use some accessories. To remove: Unplug your drill. WARNING: Failure to unplug your drill could result in acciden- tal starting causing serious injury. Using two open-end wrenches, loosen the chuck. See Figure 13. -
Page 15: Maintenance
MAINTENANCE GENERAL Avoid using solvents when cleaning plastic parts. Most plastics are susceptible to damage from various types of commercial solvents and may be damaged by their use. Use clean cloths to remove dirt, carbon dust, etc. WARNING: Do not at any time let brake fluids, gasoline, petroleum-based products, penetrating oils, etc. -
Page 16: Warranty
THREE YEAR WARRANTY This warranty covers all defects in workmanship or materials in this RIDGID tool for the three year period from the date of purchase. This warranty is specific to this tool. Warranties for other RIDGID products may vary. - Page 17 NOTES...
-
Page 18: Customer Service Information
Customer Service Information For parts or service, contact your nearest Ridgid authorized service center. Be sure to provide all relevant information when you call or visit. For the location of the authorized service center nearest you, please call 1-866-539-1710 or visit us online at www.ridgidwoodworking.com.


Need help?
Do you have a question about the R5010 and is the answer not in the manual?
Questions and answers