Table of Contents
Advertisement
Advertisement
Table of Contents

Related Manuals for Minox DTC 450 SLIM


Summary of Contents for Minox DTC 450 SLIM
- Page 1 DTC 450 SLIM Wildkamera Instructions...
-
Page 2: Included In The Purchased Package
Introduction Congratulations on the purchase of your wildlife camera MINOX DTC 450. Like all other MINOX products this MINOX DTC 450 wildlife camera boasts the traditional values fostered by MINOX. It combines functionality in the smallest possible space with the best optical quality. Simple and fast operation make the MINOX DTC 450 ideal for digital photography and videos in the intended field of use. -
Page 3: Table Of Contents
Content Introduction Language selection Get to know your MINOX DTC 450 SLIM Software update Included in the purchased package Camera information Parts and controls Connecting the camera to a computer Preparing the camera Connect with a USB cable Explanation of the controls... -
Page 4: Parts And Controls
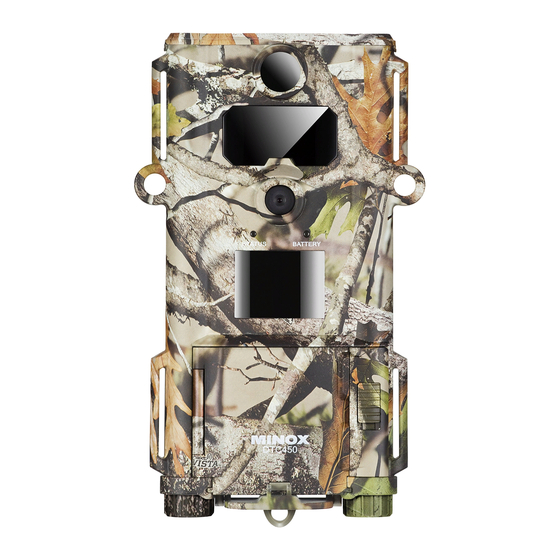
MINOX DTC 450 SLIM Parts and Controls 1. Motion sensor 2. IR LEDs for night shots 3. Camera lens 4. Battery level LED 5. Status LED 6. 2” LCD colour display 7. Controls cover 8. Unlocking mechanism for controls cover 9. -
Page 5: Preparing Your Camera
Preparing your camera area above the controls cover (7) is a 2” LCD display (6) and the two status LEDs for the operating status and the Explanation of the controls battery charge level (5,6). The two battery compartments (16) are located on both sides of the camera housing and Proceed as follows to prepare the camera for the required are fitted with screw cap closings. -
Page 6: Checking The Battery Level
each of the two battery compartments (16) as instructed. Note: The battery status LED (4) is activated when the Pay attention to the correct insertion direction/polarity battery starts to run out. (+/-). Close the two battery compartments (16) again by tightening the screw caps in a clockwise direction. -
Page 7: Operating Mode
5. Press the OK button (11). this mode, your DTC 450 camera automatically accepts 6. Using the down arrow key (11), choose the language the new settings which you previously programmed in you would like to use (highlighted in black). the “Setup mode”. -
Page 8: Replaying Video Clips
left area of the image. If the shot is a photo, only the main menu. To return to the main menu without changing play symbol will be displayed. The number of pictures or the previous settings, press the menu button (13). video recordings will be shown in the lower right area of Photo resolution the LCD display (6). -
Page 9: Delay Interval
(11), the setting is saved and you are returned to the on every recording (photo/video). In the main menu, main menu. Press the menu button (13) to return to select the menu option “Date/time stamp” and press the main menu without changing the previous settings. the OK button (11). -
Page 10: Password
Formatting the memory card When you have made all settings, press the OK button Formatting the memory card will delete all data on the (11) to save your settings. Press the menu button (13) to memory card and will prepare the memory card for use return to the main menu without changing the settings. - Page 11 The update installation is completed once your camera dis- using the up/down arrow keys (11). plays the MINOX start screen and enters the main menu. 2. Confirm with OK (11). 3. Using the up/down arrow keys (11), select the desired Note: Please note that the process described above language (highlighted).
- Page 12 Switch the camera to “Setup mode” (main switch (12) in top position (“SETUP”)). The camera will be recognized This MINOX DTC 450 SLIM is licensed under the MPEG-4 as a removable medium – pictures or video clips can be Visual Patent Portfolio License for personal and non-com- directly viewed or transferred to the PC.
- Page 13 Technical information Image sensor 3.0 MP Resolution, CMOS Sensor Image resolution Adjustable: 12 MP (interpolated), 6 MP (interpolated), 3 MP, 0.9 MP Shutter lag time < 1 Sek. / sec. Continuous shooting 1 - 9 images every shutter button actuation (adjustable) Video resolution 1280 x 720 HD Video length...
Need help?
Do you have a question about the DTC 450 SLIM and is the answer not in the manual?
Questions and answers