Table of Contents
Advertisement
Quick Links
Advertisement
Table of Contents

Subscribe to Our Youtube Channel
Related Manuals for NextBase NBDVR612GW


Summary of Contents for NextBase NBDVR612GW
- Page 1 Instruction Manual...
-
Page 3: Introduction To Using A Dash Cam
INTRODUCTION TO USING A DASH CAM The iN-CAR CAM range of Dash Cams have been designed specifically with ease of use in mind, it is recommended NOT to change the default settings, which have been carefully selected to give the best performance for day to day use. -
Page 4: Table Of Contents
TABLE OF CONTENTS INTRODUCTION TO USING A DASH CAM ....................................TABLE OF CONTENTS ........................PRECAUTIONS CAUTIONS ON USING THIS PRODUCT ....................................PRODUCT SPECIFICATION ....................... PACKAGE CONTENTS ....................... PRODUCT FEATURES ....................POWERED GPS MOUNT ..................CAMERA - PARTS & CONTROLS .................... -
Page 5: Precautions
PRECAUTIONS Please read this manual carefully before operation and keep it for future reference. It will be helpful should you encounter any operational problem. WARNING: Do not expose this product to rain, moisture or water under any circumstances, doing so may result in the risk of electric shock or fire. CAUTION: To reduce the risk of electric shock, do not perform any servicing other than that contained in the instruction manual unless you are qualified to do so. -
Page 6: Product Specification
Windows is a registered trademark of Microsoft Corporation in the United States and other countries. Exmor R is a trademark of Sony Corporation. NEXTBASE Replay 3 is a registered trademark of Portable Multimedia LTD in the United Kingdom. NEXTBASE Cam Viewer is a registered trademark of Portable Multimedia LTD in the United Kingdom. -
Page 7: Package Contents
& Software Disk Product appearance may differ slightly to that shown above. PRODUCT FEATURES Thank you for purchasing this NEXTBASE Dash Cam, in this section we will outline some of the features available with this Dash Cam. 3.0" LCD Colour Touch Screen LCD touch screen for ease of use and viewing the playback of recorded videos and photos. -
Page 8: Powered Gps Mount
POWERED GPS MOUNT Please see below to identify the parts of the supplied powered mount. 1. Locking lever The locking lever is used to attach and release the window mount to your vehicles windscreen. Pull the lever down to prepare the window mount for use. Once the mount is firmly upon the windscreen (in a suitable location) push the lever to lock the mount in place. -
Page 9: Camera - Parts & Controls
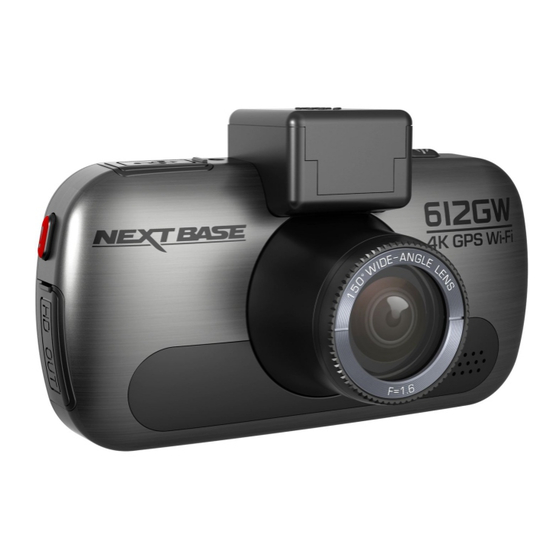
CAMERA - PARTS & CONTROLS Please see below to identify the parts and controls of your Dash Cam. Front: 1. Mounting point (located under the dust cover) After removing the dust cover, attach the supplied powered GPS mount here. 2. Speaker Integral speaker for audio playback directly from the Dash Cam. - Page 10 CAMERA - PARTS & CONTROLS (CONTD.) Back: 4. Red Power / Recording LED This red LED will be lit when the Dash Cam is turned ON. During recording the LED will flash. 5. Blue Battery LED This blue LED will be lit when the internal battery is charging, once fully charged the LED will go out.
- Page 11 CAMERA - PARTS & CONTROLS (CONTD.) Top: 7. Power On / Off Press and hold for 2 seconds to turn on / off the Dash Cam. 8. DC-IN & USB socket (located under the dust cover) Connect the supplied car power cable or USB data cable here. Note: - Normally the car power cable is connected to the mount when in use, not directly to this socket.
- Page 12 CAMERA - PARTS & CONTROLS (CONTD.) Bottom: RESET NBDVR612GW 17140001 9. Light sensor Detects the ambient light level and will adjust the screen brightness accordingly. Turned on and off within the Setup Menu. 10. Reset button In the unlikely event the Dash Cam becomes unresponsive, press the RESET button to...
- Page 13 CAMERA - PARTS & CONTROLS (CONTD.) Sides: 11. Protect button Press whilst recording to protect the current file in event of an emergency situation. If file protection is activated during recording by using the Protect button (or automatically by the G Sensor), an additional 30 seconds protected recording will be saved within the ‘Protected’ folder on the memory card.
-
Page 14: In Vehicle Installation
IN VEHICLE INSTALLATION Please follow the instructions below for first-time installation of the Dash Cam. For day to day use simply remove the camera from the mount as required. 1. Insert MicroSD Card Insert a suitable MicroSD card in to the Dash Cam, taking care that the gold contacts are facing towards the LCD screen side of the Dash Cam. - Page 15 IN VEHICLE INSTALLATION (CONTD.) 3. Attach the mount to the Dash Cam Slide the Dash Cam onto the mount. Once attached magnets within the mount will hold the two parts together. 4. Attach the mount to the windscreen Remove the protective plastic film from the suction cup of the mount. Select a suitable position for the mount and clean the windscreen with a dry / clean cloth to achieve a good contact between the glass and suction cup.
- Page 16 - Do NOT wire the Dash Cam directly to a 12V supply by cutting the cigarette plug off the end of the cable, or damage will result. - A Nextbase hardwire kit is available from your retailer. This connects directly to the vehicle fusebox and hence leaves your cigarette socket available for Phone / Sat Nav charging.
- Page 17 IN VEHICLE INSTALLATION (CONTD.) Please read and follow the notes below for the safe operation of your Dash Cam within your vehicle. As per the installation instructions, you must install the Dash Cam so it does NOT obstruct the drivers view of the road, preferably on the passenger side of the vehicle and behind the rear view mirror.
-
Page 18: First Time Use
FIRST TIME USE To ensure the set up of this Dash Cam is as quick and simple as possible, there is an easy to follow ‘First Time Use’ menu. This menu is used to set your preferred Language, Country (this defines your time zone) and speed units. -
Page 19: Touch Screen
TOUCH SCREEN This Dash Cam uses a capacitive touch screen, this makes the operation very easy. Firstly turn on the Dash Cam, by either connecting the supplied car adaptor via the GPS mount or by pressing the power button located on the top of the housing. Once the Dash Cam has powered on tap the screen anywhere to open the 'Main Menu' screen, as shown below. -
Page 20: Video Mode
VIDEO MODE Once the Mode select screen is open, select Video mode by tapping the video icon. 10:20:25 10:20:25 19-04-2017 19-04-2017 Video Mode See below for details of the various icons seen on screen when in Video mode. 2:59 10:20:25 19-04-2017 1. - Page 21 VIDEO MODE (CONTD.) See below for details of the various icons seen on screen when in Video mode. 2:59 10:20:25 19-04-2017 3. Time Lapse recording Seen on screen during Time Lapse recording. 4. Parking mode Seen on screen when Parking Mode has been turned on. 5.
- Page 22 VIDEO MODE (CONTD.) Tapping the screen when in Video mode will open the 'Main Menu' screen, from where you can start & stop recordings and turn off & on the audio recording by tapping the relevant icons. The 'Main Menu' screen will disappear after 4 seconds, simply tap once more to re-open. 2:59 10:20:25 19-04-2017...
-
Page 23: Photo Mode
PHOTO MODE Once the Mode select screen is open, select Photo mode by tapping the camera icon. 10:20:25 10:20:25 19-04-2017 19-04-2017 Photo Mode Once photo mode has been selected, then you are ready to take photos by tapping the red shutter release icon. -
Page 24: Playback Mode
PLAYBACK MODE Once the Mode select screen is open, select Playback mode by tapping the playback icon. 10:20:25 10:20:25 19-04-2017 19-04-2017 Playback Mode Recordings and photos will be saved in one of three folders: Protected Videos, Videos and Photos. 10:20:25 10:20:25 10:20:25 19-04-2017... - Page 25 PLAYBACK MODE (CONTD.) Video playback: When viewing recordings within playback mode, there are the standard controls one would expect to see, such as play, pause, stop, etc. There are also some advanced functions such as deleting unwanted files and protecting recordings so they cannot be accidentally deleted.
- Page 26 PLAYBACK MODE (CONTD.) During playback: Once playback has been started by tapping the play icon, the controls will refresh to giving you the pause, fast forward and stop icons, as seen below. 170419_102024_001_HI 0:00 10:20:25 19-04-2017 19-04-2017 19-04-2017 1. Pause Tap once during playback to pause, press again to resume playback.
-
Page 27: Settings
SETTINGS How to use the Settings: There are 5 settings screens in total, these screens are numbered from 1 - 5. Each screen contains 6 settings and 3 navigation controls. See below example which shows the first settings screen. ABCD 123 Screen Saver Number Plate Parking Mode... - Page 28 SETTINGS (CONTD.) SETTINGS (CONTD.) Screen 1: This screen includes the following settings: Screen Saver, Number Plate, Parking Mode, Announcements, Speed Display and Format SD Card ABCD 123 Screen Saver Number Plate Parking Mode Announcements Speed Display Format SD Card 1. Screen Saver Turn on the Screen Saver function to shut down the screen after 30 seconds of button inactivity, tap the screen to re-activate the display.
- Page 29 SETTINGS (CONTD.) SETTINGS (CONTD.) Screen 1: continued 4. Announcements Turn Off / On the spoken Announcements. The spoken announcements provide an audible confirmation of the button that has been pressed and its function. The announcements also serve as positive confirmation after a file has been protected due to G-Sensor activation during recording.
- Page 30 SETTINGS (CONTD.) SETTINGS (CONTD.) Screen 2: This screen includes the following settings: Resolution, Exposure, Video Length, Time Lapse, Dual Files and Audio Exposure Resolution Video Length Time Lapse Dual Files Audio 1. Resolution Select recording resolution of the High resolution file, this will increase or decrease the quality of the recorded video.
- Page 31 SETTINGS (CONTD.) SETTINGS (CONTD.) Screen 2: continued 4. Time Lapse Time Lapse recording is a technique whereby the frequency at which file frames are captured (frame rate) is lower than that used when playing back the recording. Time Lapse recording can be considered the opposite of slow motion, as when the recording is played back time appears to be moving faster.
- Page 32 3. GPS Stamp Turn On / Off both the GPS co-ordinates and speed stamp that are shown on recorded files. When a recording is viewed using the supplied NEXTBASE Replay playback software both the GPS co-ordinates and speed information remain available.
- Page 33 SETTINGS (CONTD.) SETTINGS (CONTD.) Screen 3: continued 4. Model Stamp Turn On / Off the Model stamp shown in the bottom left corner of recorded files. Options: On and Off Default Setting: On 5. Screen Dimming Turn Off / On the automatic screen brightness, when driving in low level light conditions. Options: On and Off Default Setting: On 6.
- Page 34 SETTINGS (CONTD.) SETTINGS (CONTD.) Screen 4: This screen includes the following settings: Language, Country, Time Zone / DST, Time & Date, Speed Units and Auto power Off Country Language Time Zone / DST Time & Date Speed Units Auto Power Off 1.
- Page 35 SETTINGS (CONTD.) SETTINGS (CONTD.) Screen 4: continued 4. Time & Date The Time and Date are set automatically upon satellite connection, based on the Country selected from within the First Time Use menu. 5. Speed Units Select whether to record and display speed in KMH or MPH. Options: KMH and MPH Default Setting: MPH 6.
- Page 36 SETTINGS (CONTD.) SETTINGS (CONTD.) Screen 5: This screen includes the following settings: GPS Info, SD Card Info, System Info, G Sensor, Device Sounds and Default Settings GPS Info SD Card Info System Info G Sensor Device Sounds Default Settings 1. GPS Info Displays current status of the Satellite: Satellite System and Satellite Lock 2.
-
Page 37: Pc Connection
PC CONNECTION Use the supplied USB cable to connect the Dash Cam directly to your PC via the socket, do NOT connect the USB cable to the Powered Mount. Once connected the Dash Cam will power on with three options available, as shown below. PC Connection Mass Storage Power On... - Page 38 - ALWAYS turn Off the Dash Cam before disconnecting from your computer. Update (Windows and Mac) When this option is selected, it is for use with the NEXTBASE Replay 3 Playback software in order to update the firmware within the Dash Cam to the latest version.
-
Page 39: Tv Connection
Dash Cam screen will blank. This is normal, as all output is now visible upon your television. Please contact your local NEXTBASE dealer for accessory purchases. Please note that recording is NOT available whilst using the HD Out function. -
Page 40: Trouble Shooting
TROUBLE SHOOTING PROBLEM SOLUTION The sucker will not stay in Ensure that the protective cover (plastic film) has been removed place upon my windscreen. from the suction pad. Moisten the sucker slightly before affixing upon the windscreen. Ensure that the locking lever is fully open when the sucker is pushed on to the windscreen and then close the lever. - Page 41 Restart the PC, as this may be required for the necessary driver to be loaded correctly. Disconnect and reconnect the Dash Cam. Contact NEXTBASE for the required driver. Video files cannot be played. The video files from the iN CAR CAM are in .MP4 format and may not be compatible with your PC if suitable playback software is not installed.
- Page 42 The Codecs upon your PC may not be compatible or the latest with video during playback. standard. Download the latest Codecs from: www.nextbase.co.uk Video has no sound. Ensure that “Audio” setting is turned ON within the Settings of the Dash Cam.
- Page 43 When Wi-fi Mode is turned on the screen of the Dash Cam will display the Network Name and Password. This password is case sensitive. The NEXTBASE Cam Viewer Please uninstall the NEXTBASE Cam Viewer app and re-download app will not open. again from your devices App Store. When I open the NEXTBASE...
- Page 44 NOTES...
- Page 45 NBDVR612GW-IM-ENG-R1...
Need help?
Do you have a question about the NBDVR612GW and is the answer not in the manual?
Questions and answers