Table of Contents
Advertisement
Advertisement
Table of Contents

Related Manuals for K1EL WKUSB


Summary of Contents for K1EL WKUSB
- Page 1 WKUSB with WinKeyer3 User Manual www.k1el.com...
-
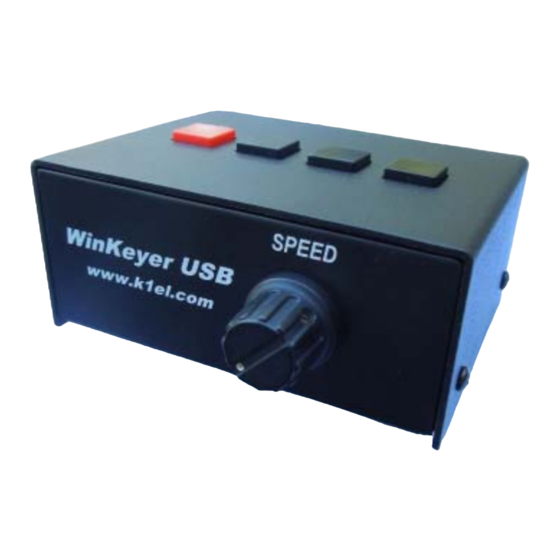
Page 2: Introduction
This document will describe WKUSB and its various interfaces. All the information you will need to connect WKUSB to your station will be included in this manual along with specific guides for getting it working with N1MM+ Logger, HRD/DM780, N3FJP AC Log, and MRP40. -
Page 3: Wkusb Connections
1.0 and 2.0 speeds but is not compatible with USB 3.0. WKUSB contains no user serviceable or configurable jumpers, Please do not tamper with or modify the internal circuitry of WKUSB as this will void the unit’s warranty and may result in unsafe operating conditions. -
Page 4: Let's Actually Run Wkusb
You can click on ? in the upper right for a very brief help menu. Click on Open to connect to WKUSB. If all is well, the Open pushbutton will change to Close and the WK IC version will be displayed. Click... -
Page 5: Wk3Tools Application
Although WKtest packs a lot of power in a small app, it is meant to be a hardware test tool. It gives you a good idea of what WKUSB is capable of and assures you that it is operating properly. - Page 6 K1EL WKUSB WKUSB with WinKeyer3 User Manual After installation, start the application and the following dialog box will appear: It will be empty since you haven’t read in WK’s current configuration settings. When WK is powered up for the very first time, all settings are loaded with defaults. To view these, connect WK to your PC, set the ComPort, and click on ReadWK.
- Page 7 K1EL WKUSB WKUSB with WinKeyer3 User Manual capability to handle 12 messages in two banks. Don’t forget that you have to write the messages back to WK with the WriteWK button. If you want to test them, press the buttons on top of WK.
- Page 8 PC USB port. When first plugged in it will start up in standalone mode and then change over to host mode when you start up an application that uses WKUSB. In host mode, the PC app has control of WKUSB settings and messages. If you close the application down, WKUSB will remain powered but will revert back to standalone mode settings.
-
Page 9: Connecting Wkusb-Smt To Your Station
Connecting WKUSB-SMT to your station Minimally all you need to do is connect the USB cable from WKUSB to a USB port on your PC and connect the key output to the keying input on your rig. Since WKUSB performs the keying function it drives your rig in the same manner as a straight key. -
Page 10: A Cheap Path To A Keying Cable
If you decide to use a set of keying paddles with WKUSB, they plug into the paddle jack input on the rear of the unit. An 1/8 inch stereo jack is used on WKUSB, if your paddles have a 1/4 inch size plug an adapter cable will be necessary. -
Page 11: Troubleshooting Hints
Recheck your port selection using WKscan. 6) WKUSB is plugged in but WKscan does not show a com port with a WK device. This is a sign that either a USB driver has not been installed or the USB hardware on WKUSB is not working. -
Page 12: Theory Of Operation
Commands and Morse letters are processed differently in WKUSB. Morse is put into a FIFO* buffer memory that allows the host to send data ahead of the Morse being sent. The size of this buffer is 160 bytes. Since there can be a considerable delay from host input to Morse output, commands bypass the input FIFO and are acted upon immediately. -
Page 13: Paddle Input Priority
USB Sense WKUSB is able to sense when the host PC it is connected to goes into standby and it will go into standby as well. It will stay in this state until the PC comes out of standby. It then wakes up and resumes. -
Page 14: N1Mm Interfacing
WKUSB with WinKeyer3 User Manual N1MM Interfacing You will first need to know your WKUSB’s comport assignment, if you don’t know it, follow the WKscan Tutorial on page 4. Now start up N1MM+ and click on the Config Tab and then select the entry as shown: This brings up the Configurer dialog box. - Page 15 K1EL WKUSB WKUSB with WinKeyer3 User Manual Clicking Set brings up the Com2 configuration dialog box. All we need to do here is click the WinKey checkbox, leave all the other settings as is. Now click OK to close the Com2 configuration dialog box which brings us back the Configurer dialog box.
- Page 16 When you are finished, click OK and then another OK to close the Configurer. Now that we are back to N1MM+ main control dialog box we can do some WKUSB testing. First off select CW mode by clicking on a band in the CW column:...
- Page 17 WKUSB WKUSB with WinKeyer3 User Manual Now on the PC's keyboard enter CTL-T to put WKUSB into tune mode. Cancel tune mode by entering CTL-T a second time. With tune enabled you should hear sidetone coming from WKUSB. Now either enter CTL-K or select the CW Key Window as shown:...
- Page 18 WKUSB with WinKeyer3 User Manual The CW keyboard window is now displayed and you can type into it to send letters to WKUSB. Note that when the Send CW window is up, the main N1MM+ dialog box is disabled. For a final test, turn the speed pot and you should see the CW Speed display in the main N1MM+ dialog box change.
-
Page 19: Hrd Interface Guide
WKUSB with WinKeyer3 User Manual HRD Interface Guide You will first need to know your WKUSB’s comport assignment, if you don’t know it, follow the WKscan Tutorial on page 4. Be sure to close WKscan and keep WKUSB plugged in. - Page 20 K1EL WKUSB WKUSB with WinKeyer3 User Manual This brings up the Winkeyer dialog box which has multiple tabs with many configuration choices. We will start with the Keyer Tab where we set WK’s com port, and then click Connect. Now Connect changes to Connected and items in the dialog box are no longer grayed out. If you click Auto-connect, DM780 will re-connect to Winkeyer automatically on startup.
- Page 21 If you click on the PTT/Sidetone tab a list of hardware options are displayed. Winkeyer1 settings are historical and can be ignored. Even though WKUSB uses a WinKeyer 3 IC, the Winkeyer2 settings are the ones we are concerned with. This is where you setup the output port operation.
- Page 22 Now WKUSB is ready to work with HRD/DM780. It is a very complex and multi-featured application and I am only able to cover just the WKUSB interface portion. It will take some time to get familiar with the application.
-
Page 23: N3Fjp Ac Log Interface Guide
Start AC Log. From the main application page, select the Settings->Transmit->CW Setup tab. That will bring up the CW Setup Form shown below. A list of the active com ports are shown, click on the one WKUSB is assigned to. Next select Winkeyer and then click Configure Winkeyer. WKUSB User Manual 12/20/2017 Rev 1.0... - Page 24 This brings up a form that presents the Winkeyer options that can be modified. First thing to do is click Open. That connects AC Log to WKUSB, the status will change to Open and WKUSB’s firmware revision will be displayed. Most of the options should be familiar, any that aren’t can be looked up in Appendix D.
-
Page 25: Mrp40 Interface Guide
WKUSB with WinKeyer3 User Manual MRP40 Interface Guide This is one of my favorite applications to use with WKUSB. It’s not a logging program but instead it’s a conversational, Morse terminal. It has an excellent CW reader that uses your PC’s sound card to perform DSP tone detection. -
Page 26: Interfacing Wkusb To Other Applications
If that is not possible post an inquiry on the K1EL Yahoo Group. Odds are that there is someone else in the group who has used the app and they can give you first hand advice. If no one picks up the trail, we will jump in and do what we can. -
Page 27: Appendix A - Installing The Ftdi Usb Driver For Wkusb
For Windows XP or Vista users, we have a special procedure for you on page 27. For Windows 7 and newer, the procedure is usually easy. Just plug WKUSB into your PC’s USB port and it will be detected. Then a dialog similar to the one below will be displayed as Windows tries to locate a driver. - Page 28 Sometimes the com port assignment will be displayed so watch for that. If you miss it, no big deal, we can determine it later using K1EL’s WKscan app. At this point you can return to page 2 and start testing WKUSB.
-
Page 29: Usb Driver Installation For Windows Xp Or Vista
Now make an empty directory on your PC and extract the driver into that directory. I usually use a directory called FTDIdriver at the root of the C drive (C:\FTDIdriver) Now plug in WKUSB and you should get this dialog: Select ‘Install from a list or specific location’... - Page 30 Hopefully the install will finish without errors and the drivers will be ready to use. At this point you can return to page 2 and continue testing WKUSB. FTDI provides detailed installation guides for download. Links can be found on the driver webpage.
-
Page 31: Appendix B - Wkusb Usb Com Port Assignment Information
It’s usually pretty easy to determine which ports are not in use and reassign one of those to WKUSB. If you choose something under 15 you are probably not going to have port issues with any WK application. -
Page 32: Winxp Com Port Viewing And Reassignment
K1EL WKUSB WKUSB with WinKeyer3 User Manual You will get this pop up when you pick an ‘in use’ port. If you are sure the port is not assigned to any other serial com device, click Yes and then continue on to close all remaining dialog boxes. - Page 33 K1EL WKUSB WKUSB with WinKeyer3 User Manual Expand (COM & LPT) Look for USB Serial Port (COMx) x is the port In the example above, the USB com port assignment is 4. If you have multiple USB Serial Ports listed and you are not sure which one is WK, disconnect WK from the computer and see which one is removed from the list.
-
Page 34: Appendix C - Winkeyer Settings Defined
Minimum adjustment is 0% while maximum addition is 62%. Paddle Sample Delay This setting controls when WKUSB will start looking for a new paddle press after sensing the current one. If there is not enough delay, the keyer could send unwanted dits or dahs. If there is too much delay, the operator is held back because they can't paddle ahead. -
Page 35: Dit/Dah Ratio
Three ratio settings for the letter R PTT Lead and Tail Times WKUSB’s PTT output is used to control an accessory device in addition to normal CW transmitter keying. In most cases this device is a linear amplifier but it could be an antenna changeover relay or PTT input of a transmitter. -
Page 36: Paddle Watchdog
Morse letters as they are sent. Each letter is sent to the host after it has been sent in Morse. This permits the host to track WKUSB’s progress in real time. Note that buffered commands and their parameters are not echoed back to the host. -
Page 37: Speed Pot Lock
Speed Pot Lock This tells WKUSB to ignore host speed control and to instead lock the current sending speed to the speed pot. Speed Pot Minimum and Maximum The limits for the speed pot can be specified. -
Page 38: Appendix D Wkusb (Wk3) Standalone Mode
Standalone Command Mode If the command push-button is pressed and held, WKUSB (WK) will respond after about two seconds with the letter R in sidetone only. This means WK is ready to accept a command, you simply enter the command letter in Morse on the paddles and the command will be executed. - Page 39 K1EL WKUSB WKUSB with WinKeyer3 User Manual G – Set tune duty cycle default : This sets the default tune duty cycle which can be either 50% or 100%. Some folks prefer a 50% tuning duty cycle to reduce power dissipation in transmitter finals and/or linear amplifier.
- Page 40 K1EL WKUSB WKUSB with WinKeyer3 User Manual Level 1: E T A N I M W S G D U K O R Level 2: C Q P J F B V Y H X Z L including level 1 Level 3: 1 2 3 4 5 6 7 8 9 0 including level 1 &...
- Page 41 K1EL WKUSB WKUSB with WinKeyer3 User Manual T [nn] - Set PTT Tail Time : WK provides a transmitter PTT output that can be used to switch a transmitter or linear amplifier over to transmit mode in advance of actual CW keying. You have control over the time delay between when PTT is asserted and when CW keying will start, this is lead-in.
-
Page 42: Extended Command List
K1EL WKUSB WKUSB with WinKeyer3 User Manual W [nn] - Keying Weight can be adjusted in percentage from 25% to 75%. When set to 50 % the dit time is equal to the inter-element time, which is normal. Values less than 50 reduce weighting while values greater than 50 increase weighting. -
Page 43: Standalone Message Functionality
K1EL WKUSB WKUSB with WinKeyer3 User Manual M - Load Callsign : Use this command to load a stored callsign. It works just like a message entry and the destination is the currently enabled user slot. Each user slot has one unique callsign. Since the callsign is treated like any other message, embedded commands can be included if desired. -
Page 44: Standalone 'Two Press' Message Button Functionality
K1EL WKUSB WKUSB with WinKeyer3 User Manual When the message has been completely entered, press the command push-button or enter di-dah-di-dah (AA) and WK will respond with an R to signify that the message was accepted and stored. If you make a mistake while entering a message, press and hold the command pushbutton and WK will backspace through the letters that have been entered. -
Page 45: Embedded Message Command List
If you want to insert the DN prosign into a message but don’t want it to be interpreted as a command simply enter DN twice. Example: K1EL/1 would be entered as K1EL//1 Embedded message command table /Bnn Set a beacon cycle time of nn seconds (nn=00 to 99). -
Page 46: Embedded Command Examples
This would look like this, loaded into slot one: K1EL BCON /W12 /J1 K1EL BCON will be sent followed by a 12 second delay after which there is a jump back to the beginning. The second way is to use the embedded beacon command, which is easier:... -
Page 47: Standalone Qrss/Hscw Operation
K1EL WKUSB WKUSB with WinKeyer3 User Manual Standalone QRSS/HSCW Operation The /H and /Q buffered commands allow HSCW or QRSS strings to be sent in standalone mode. (Note that QRSS speeds are not supported in Host Mode) HSCW and QRSS strings can be aborted with either a paddle press or a Command+PB4 pushbutton press. -
Page 48: Wkusb Standalone Tutorial
When you are satisfied with the pitch, end the command by pressing the command PB. WKUSB uses a small speaker and you’ll find that higher frequencies produce the loudest sidetone. - Page 49 If you need to insert / into a message simply enter it twice, this tells WK it is not a command: K1EL//1 Another set of speed related embedded commands are /Y and /Z.
-
Page 50: Wkusb Standalone Command Cheatsheet
Here are examples of each: QRSS: /K10/ Q2EL/2 Key down for 10 seconds followed by EL at QRSS6 rate then repeat. HSCW: /H3K1EL K1EL K1EL K1EL K1EL K1EL K1EL /1 Callsign in slot 1 is repeated at 3000 lpm WKUSB Standalone Command Cheatsheet... - Page 51 K1EL WKUSB WKUSB with WinKeyer3 User Manual 2) Press a message PB 3) Dual-press CMD+PB4 to cancel. Set QRSS speed. See table below for determining n Merge next two letters into a prosign /Snn Set a new sending speed (nn=WPM, 5 to 59)
-
Page 52: Table Of Contents
Support and Warranty ________________________________________________________ 26 Revision History ____________________________________________________________ 26 Appendix A - Installing the FTDI USB Driver for WKUSB ___________________________ 27 Preloading the FTDI USB Driver _______________________________________________ 27 USB Driver Installation for Windows XP or Vista __________________________________ 29 ... - Page 53 Sidetone Enable ............................37 Sidetone Frequency ..........................37 SO2R Enable ............................37 Appendix D WKUSB (WK3) Standalone Mode ____________________________________ 38 Standalone Command Mode ........................38 Standalone Command List ........................38 Extended Command List ........................... 42 ...
Need help?
Do you have a question about the WKUSB and is the answer not in the manual?
Questions and answers