Weber E-210 GBS Owner's Manual
Hide thumbs
Also See for E-210 GBS:
- Owner's manual (76 pages) ,
- Assembly manual (32 pages) ,
- Owner's manual (24 pages)
Advertisement
Quick Links
Download this manual
See also:
Owner's Manual
E-210 GBS • E-310 GBS • E-410 GBS • E-610 GBS
LPG OWNER'S MANUAL
L E T ' S G R I L L
Unlock grilling happiness: Register your GENESIS II gas grill and receive special content
to make you the ultimate backyard hero.
Registration is easy and we only ask a few quick questions. In less than two minutes,
activate your unique WEBER-ID, and unlock a lifetime of WEBER knowledge and guidance.
Stay inspired along the way.
68096
030118
PHONE
MOBILE
EMAIL
ONLINE
enGB - English (United Kingdom)
Keep this Owner's Manual for future reference, thoroughly read through it, and if you have any questions please contact us today-
contact information can be found at the back of this manual.
Advertisement

Related Manuals for Weber E-210 GBS


Summary of Contents for Weber E-210 GBS
- Page 1 Registration is easy and we only ask a few quick questions. In less than two minutes, activate your unique WEBER-ID, and unlock a lifetime of WEBER knowledge and guidance. Stay inspired along the way.
- Page 2 What we do promise is to be by your side, every step of the way. When you sign up for a WEBER ID as part of your registration, we will deliver special barbecue-related content just for you to enjoy.
- Page 3 TABLE OF CONTENTS DANGER: This barbecue is not intended to be installed in or on recreational vehicles or boats. Welcome to WEBER WARNING: Do not use this barbecue unless all parts are in place and the barbecue was properly assembled according to the assembly instructions.
- Page 4 3 FLAVORIZER BARS The classic WEBER FLAVORIZER BARS are angled just right to catch drippings that smoke and sizzle, adding that irresistible smoky flavor that we all know and love to your food. Any...
- Page 5 C GOURMET BBQ SYSTEM Cooking Grate on your mobile device. Once you’ve downloaded the WEBER iGRILL app, connect the iGRILL to Bluetooth, Remove the circular grate insert and transform your and run up to four thermometer probes from your grill grill into a griddle, poultry roaster, pizza stone or any to the food.
- Page 6 The Flame- Direct or Indirect START/HIGH MEDIUM DIRECT HEAT INDIRECT HEAT SETUP SETUP HIGH MEDIUM DIRECT HEAT INDIRECT HEAT SETUP SETUP Use the direct method for small, tender pieces of food that take Use the indirect method for larger cuts of meat that require 20 less than 20 minutes to cook, such as: hamburgers, steaks, chops, minutes or more of barbecuing time, or for foods so delicate that kebab sticks, boneless chicken pieces, fish fillets, shellfish, and...
- Page 7 Barbecuing Do’s and Don’ts Preheat each and every time. Try not to peek. If the cooking grates aren’t hot enough, food will The lid on your barbecue is for more than just keeping stick, and you will likely never have a chance of the rain out.
- Page 8 The WEBER Promise (10 year EMEA voluntary warranty) At WEBER, we pride ourselves on two things: making barbecues that last and providing a lifetime of excellent customer service. Owner’s Responsibilities Under this Disclaimers Thank you for purchasing a WEBER product.
- Page 9 37 millibars. threads that sop up the thinner, • The length of the hose must not exceed 1.5 metres. vinegar-based sauces. • Avoid kinking the hose. • Replacement regulator and hose assemblies must be as specified by Weber-Stephen Products LLC.
- Page 10 LPG Cylinder Installation & Leak Checking Connect the Regulator to the Cylinder 1) Check that all burner control knobs are in the position. Check by pushing in and turning knobs clockwise. 2) Identify your regulator type and connect the regulator to the LPG cylinder by following the appropriate connection instructions.
- Page 11 These factory-made connections have been thoroughly checked for gas leaks and the burners have been flame-tested. WEBER recommends performing an additional thorough leak check after assembly, as well as annually. Instructions for this can be found online at WEBER.com.
- Page 12 WARNING: Grill brushes should be checked for loose bristles and excessive wear on a regular basis. Replace brush if any loose bristles are found on cooking grates or brush. WEBER recommends purchasing a new stainless steel bristle grill brush at the beginning of every spring.
-
Page 13: Igniting The Grill
Igniting the Grill Using the Electronic Ignition System to Ignite the Grill Each control knob operates an individual burner, and each burner ignites independently. Ignite the burners starting from left to right. All burners should be lit for preheating, however, all burners do not have to be lit while grilling. -
Page 14: Cleaning And Maintenance
Cleaning and Maintenance Cleaning the Inside of the Grill Over time, the performance of your grill can diminish if it has not been maintained properly. Low temperatures, uneven heat, and food sticking to cooking grates are all signs that cleaning and maintenance are overdue. - Page 15 MEAL-TO- MEAL MAINTENANCE. Cleaning the Outside of the Grill The outside of your grill may include stainless steel, porcelain-enameled, and plastic surfaces. WEBER recommends the following methods based on the surface type. Cleaning Stainless Steel Surfaces...
- Page 16 CALL CUSTOMER SERVICE If you are still experiencing any problems, contact the Customer Service REPLACEMENT Representative in your area using PARTS the contact information on Weber.com. To obtain replacement parts, contact the local retailer in your area or log onto Weber.com.
- Page 17 Customer Service Department. The inside of the barbecue needs to be cleaned Follow the steps in the "Cleaning and Maintenance" WARNING: Failure to use genuine Weber- thoroughly. section to clean the barbecue inside from the top Stephen parts for any repair or replacement down.
- Page 18 Barbecuing Guide Type Thickness/Weight Approximate Total Barbecue Time RED MEAT 19 mm thick 4 to 6 minutes direct high heat Steak: New York strip, porterhouse, rib-eye, T-bone, and filet mignon 25 mm thick 6 to 8 minutes direct high heat (tenderloin) 50 mm thick 14 to 18 minutes sear 6 to 8 minutes direct high heat, then 8 to 10 minutes indirect high heat...
- Page 19 GENESIS II E-210 GBS GENESIS II_E210_LP_EN_110117 weber.com...
- Page 20 GENESIS II E-310 GBS GENESIS II_E310_LP_EN_110117...
- Page 21 GENESIS II E-410 GBS GENESIS II_E410_wGBS_LP_EN_110117 weber.com...
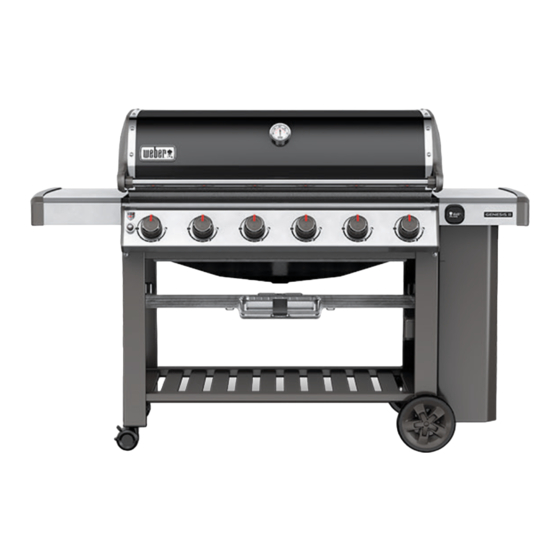
- Page 22 GENESIS II E-610 GBS GENESIS II_E610_LP_EN_110117...
- Page 23 WEBER ACCESSORIES Essential tools and cookware to get the most out of your grilling experience. weber.com...
- Page 24 Weber-Stephen Magyarország Kft. info.ru@weberstephen.com +36 70 / 70-89-813 SOUTH AFRICA info-hu@weberstephen.com weber.com Weber-Stephen Products (South Africa) (Pty) Ltd. +27 11 454 2369 info@weber.co.za © 2018 Designed and engineered by Weber-Stephen Products LLC, 1415 S. Roselle Road, Palatine, Illinois 60067 USA.
Need help?
Do you have a question about the E-210 GBS and is the answer not in the manual?
Questions and answers