Table of Contents
Advertisement
Quick Links
Advertisement
Table of Contents

Related Manuals for Arturia MINIBRUTE 2S


Summary of Contents for Arturia MINIBRUTE 2S
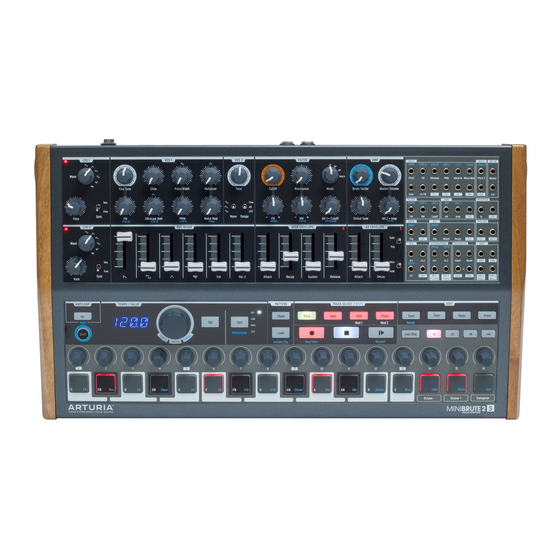
- Page 1 USER MANUAL...
-
Page 2: Special Thanks
Information contained in this manual is subject to change without notice and does not represent a commitment on the part of Arturia. The software described in this manual is provided under the terms of a license agreement or non-disclosure agreement. The software license agreement specifies the terms and conditions for its lawful use. - Page 3 • One preset catalog Be sure to register your MiniBrute 2S as soon as possible! There is a sticker on the bottom panel that contains the serial number of your unit. This is required during the online registration process. You may want to record these elsewhere or take a photo of the sticker in case it becomes damaged.
-
Page 4: Special Message Section
The information contained in this manual is believed to be correct at the time of printing. However, Arturia reserves the right to change or modify any of the specifications without notice or obligation to update the hardware that has been purchased. - Page 5 Arturia recommends the use of shielded cables for audio (less than 3 meters long), and ferrite equipped CV/Gate cables.
- Page 6 Introduction Congratulations on your purchase of the Arturia MiniBrute 2S! The MiniBrute 2S is designed to be an exceptionally powerful, modern analog synthesizer with a classic flair. The roots of this product stem from the greatest synthesizers of all time, all enhanced with Arturia’s own modern touch and character.
-
Page 7: Table Of Contents
Usage Precautions................................6 2.2. WARNING ....................................6 2.3. Register your Instrument..............................6 2.4. Connecting the MiniBrute 2S to the World......................7 2.5. Warm-Up and General Tuning ............................ 9 Quick Start ..................................10 3.1. Create your first sound: the “basic patch” ......................10 3.2. - Page 8 8.13. Transport controls ................................93 8.14. Scale selection ................................... 95 8.15. Define the User scale ..............................98 Sequencer basics..............................99 9.1. Play a pattern..................................99 9.2. Record a pattern ................................101 9.3. Pattern management ..............................103 9.4. Create a Chain .................................. 107 Sequence Editing ..............................
-
Page 9: Introduction
Yves Usson and a couple of wired friends Combining Arturia’s acclaimed savoir-faire in designing innovative musical instruments, and Yves’ deep knowledge and experience, the MiniBrute 2S analog synthesizer has its roots in the 1970s yet incorporates the best of the 21st century. - Page 10 We think it will even make the "big boys" come knocking at the door, wanting to join the fun! And yet for all its flexibility, the focus of MiniBrute 2S is on music, creativity, and the experience of playing an instrument that is fun, physical, inspiring, and satisfying. What’s more, with its compact size, MiniBrute 2S is ideal for the mobile and desktop musician.
- Page 11 • Audio and headphone outputs • Use with Arturia's MIDI Control Center for device configuration and sequence archival But that’s enough talk — plug in your new analog friend, and start shaking the walls! Arturia - User Manual MiniBrute 2S - Introduction...
-
Page 12: Installation
2. INSTALLATION 2.1. Usage Precautions The MiniBrute 2S uses an external power adapter. Do not use any power supply or adapter other than the one provided by Arturia. Arturia accepts no responsibility for damage caused by use of an unauthorized power supply. -
Page 13: Connecting The Minibrute 2S To The World
Always power-off all audio gear before making any audio connections. Failing to do so may damage your speakers, the MiniBrute 2S synthesizer, or other audio equipment. After completing all connections, set all levels to 0. Power on the various devices, with audio amplifier or monitoring system last, then raise the volumes to a comfortable listening level. - Page 14 2.4.2. Patch Bay MiniBrute 2S patch bay, modular synth, and external audio sources This is only one example of the connections that can be made between the MiniBrute 2S and external devices. The possibilities are as endless as your imagination!
-
Page 15: Warm-Up And General Tuning
2.5. Warm-Up and General Tuning As with all other true analog synthesizers, after being powered-on the MiniBrute 2S needs a warm-up period of approximately five to ten minutes. This allows it to reach a stable operating temperature, which ensures accurate oscillator pitch. Warm-up time depends on the external temperature;... -
Page 16: Quick Start
[p.17]. 3.1. Create your first sound: the “basic patch” Once your MiniBrute 2S has been correctly connected to your sound system, set all the controls to their minimum level: - counter-clockwise for the knobs - lowest position for sliders - center position (12 o'clock) for controls with – and + (FM 1 and RM) - center position for all... -
Page 17: Add A Second Oscillator
3.2. Add a second oscillator Press the Octave + pad to raise the pitch of the MiniBrute 2S by one octave. (The Octave + pad is under knob #15.) Now press and hold a pad and do the following: •... -
Page 18: Sweep The Filter With A Pad
The pressure-sensitivity of the pads can be used to control other parameters, both inside the MiniBrute 2S and on external devices. The patch bay [p.58] makes all of that possible. Arturia - User Manual MiniBrute 2S - Quick Start... -
Page 19: Introduction To The Lfos
Top Panel [p.28] chapter. We have barely scratched the surface! Thanks to the patch bay, an LFO can add a cyclical variation to almost any aspect of the MiniBrute 2S sound. To learn more, read the Patch Bay [p.58] chapter. - Page 20 Pitch 2 input jack in the patch bay. See the Patch Bay [p.58] chapter to learn more. Arturia - User Manual MiniBrute 2S - Quick Start...
-
Page 21: Introduction To Envelopes
3.5. Introduction to envelopes MiniBrute 2S has two independent envelopes: the AD and the ADSR. The AD ENVELOPE controls the amplitude of the sound, while the ADSR ENVELOPE is dedicated to the Filter; it affects the harmonic content of the sound. - Page 22 The release time can be as quick as 0.5ms and as long 4 seconds. Examples of the ADSR envelope Arturia - User Manual MiniBrute 2S - Quick Start...
-
Page 23: The Sequencer And Arpeggiator
The four LEDs to the right of that button indicate the clock source for all of the time- based features of the MiniBrute 2S: the LFOs, the Sequencer, and the Arpeggiator. Push the Sync button repeatedly until the LED next to the letters "INT" is lit. This means you have selected the Internal clock and will be able to work with the Sequencer and the Arpeggiator immediately. -
Page 24: The Arpeggiator
3.6.2. The Arpeggiator The MiniBrute 2S is in Sequencer mode by default. But you can switch to Arpeggiator mode instantly by pressing the On button in the Arp/Loop section of the top panel. It looks like this: The Arp/Loop section Before you play the pads, let's configure the Arpeggiator so we'll be hearing the same thing. -
Page 25: The Sequencer
3.6.3. The Sequencer The MiniBrute 2S allows you to record up to 64 patterns of your own. But there may be something there already that you could use as a starting point later, so first we'll audition the existing patterns. We'll learn how to record them [p.19]... - Page 26 Save a pattern [p.105] section to learn how to copy a pattern to a new location, etc. Each MiniBrute 2S pattern has four parallel tracks. In addition to note data, many other types of control data may be recorded there.
- Page 27 But unlike real-time record mode, the Record button is red to signify step recording mode. ♪: When the Record button is red, the MiniBrute 2S is in step-time recording mode. When the Record button is blue, the MiniBrute 2S is in real-time recording mode.
-
Page 28: Hardware Overview
4. HARDWARE OVERVIEW 4.1. Main features The MiniBrute 2S takes a multi-layered step sequencer, an arpeggiator, a powerful analog monosynth, and a flexible patch bay, and combines them into a powerful music creation station. As its initial interface it provides a set of drum-machine-style pads, arranged in a piano-style layout and spanning a single octave. -
Page 29: Inputs And Outputs
4.3. Inputs and outputs In order to hear the MiniBrute 2S, its audio output needs to connect to an audio amplifier either directly or through a mixer console (or use the Headphones output). As to control, the MiniBrute 2S can accept control voltage signals from devices like a modular synthesizer or a MIDI controller (e.g., a MIDI drum pad or wind controller), or even audio... -
Page 30: The Sequencer Section
Pads G# – C (Preset scales): play notes; Shift + pad selects certain preset scales Octave/Transpose (Preset/User scales): Octave shift; Transpose + pad to transpose pattern; Shift + pad selects other preset scales and User scale Arturia - User Manual MiniBrute 2S - Hardware overview... - Page 31 4.5.1.1. Octave + / - pads The Octave pads can transpose the MiniBrute 2S pads and sequences over a wide pitch range. Pad range: Press [Octave -] once to shift the pads down by one octave. Press •...
- Page 32 Octave -/+ pads, you will need to use those pads as well to restore the pattern to its original pitch. ♪: Transposing a pattern does not transpose the pads; it only transposes the pattern. The pads will remain at their original pitches. Arturia - User Manual MiniBrute 2S - Hardware overview...
-
Page 33: The Rear Panel
Sync [p.87] setting. In addition, the USB port is used to connect the MiniBrute 2S to Arturia's MIDI Control Center. This software is used to configure various settings of the MiniBrute 2S. ♪: Synchronization with non-MIDI devices is done through a connector on the patch bay. For a full description of the CLK setting and the connector types to use, see the Synchronization [p.87]... -
Page 34: The Top Panel
5. THE TOP PANEL This chapter covers the synthesizer features of the MiniBrute 2S: the oscillators, the filter, the envelopes, etc. Click the following links for descriptions of the patch bay [p.58], the Sequencer [p.19] Arpeggiator [p.18], and the Sync [p.87] settings. - Page 35 There are nine potential rates when an LFO is set to Sync: Rate LFO cycle repeats every: Periodicity 8 bars 4 bars 2 bars 1 bar half note 0.5x quarter note 0.25x eighth note 0.125x sixteenth note 0.0625x thirty-second note 0.03125x Arturia - User Manual MiniBrute 2S - The top panel...
-
Page 36: Vco 1
5.2. VCO 1 The VCO 1 section has eight controls that form the foundation of the MiniBrute 2S sound. The VCO 1 section ♪: Many top panel knobs have blue letters beneath them. This means there are pre-wired connections between those knobs and the blue-lettered item. - Page 37 ♪: This knob affects only the square wave of VCO 1. It has no impact on the saw or triangle waveforms of VCO 1 nor the square wave of VCO 2. Arturia - User Manual MiniBrute 2S - The top panel...
- Page 38 The Metal Mod knob sets the modulation range for the Metalizer knob. Velocity is routed to the Metal Mod by default, but the patch bay allows you to use something else to modulate the parameter instead. Arturia - User Manual MiniBrute 2S - The top panel...
-
Page 39: Vco 2
5.3. VCO 2 MiniBrute 2S has two oscillators that are completely independent: each has its own waveshape and tuning, and can be mixed separately in the OSC MIXER section. They share the filter and amplifier stages. The VCO 2 section There is a certain level of pre-wired interaction between VCO 1 and VCO 2, though. - Page 40 LFO: VCO2 can be used as an additional LFO with a wide frequency range (1Hz • to audio range). This is handy if you're already using LFOs 1 and 2 for other modulations through the patch bay, for example. Arturia - User Manual MiniBrute 2S - The top panel...
-
Page 41: The Filter Section
The cutoff can also be controlled by the keyboard and modulated by various modulation generators. The MiniBrute 2S filter is based on Nyle Steiner’s Sallen & Key architecture (designed in the 70s) and offers -12dB/octave slopes in LP and HP modes, and -6dB/octave slopes in BP and Notch modes. - Page 42 When the knob reaches its last quarter zone, the filter starts to oscillate on its own. However, this oscillating behavior depends on the cutoff frequency; the MiniBrute 2S filter oscillates within a range beginning around 180Hz up to approximately 8kHz. To extend the oscillation range, use the Brute Factor knob.
- Page 43 Experimenting with RM modulation ♪: For the technically-minded, you may notice that there is a slight deformation of the RM signal due to the threshold in the bipolar attenuator circuitry. Arturia - User Manual MiniBrute 2S - The top panel...
- Page 44 Att 1 > Cutoff knob sets the modulation range. There's more to say about using the patch bay and the Attenuators [p.76], and we'll cover that in the patch bay chapter [p.58]. Arturia - User Manual MiniBrute 2S - The top panel...
-
Page 45: The Amplifier Section (Amp)
Master input in the patch bay. It affects only the rear panel outputs (Master and Headphones). 5.5.3. Global Tune Once the oscillators have warmed up you can use this knob to tune the MiniBrute 2S to other devices. See the Warm-Up and General Tuning [p.9] section of the Installation chapter [p.6]... - Page 46 The beauty of having a knob to control this parameter, rather than a switch that simply forces the VCA to a never-ending maximum level, is that you can control the level at which the envelope stays open. Arturia - User Manual MiniBrute 2S - The top panel...
-
Page 47: The Osc Mixer
The pulse width is also under the control of LFO 1 by default. The depth of the pulse width modulation can be adjusted with the PWM knob in the VCO 1 section, and the shape of the LFO can be changed the with LFO 1 Wave knob. Arturia - User Manual MiniBrute 2S - The top panel... - Page 48 This slider controls the output level of VCO 2 into the Amplifier section. See the VCO 2 [p.33] section for a full description of the capabilities of the second oscillator, Arturia - User Manual MiniBrute 2S - The top panel...
- Page 49 1ms to 14s. The AD Envelope section ♪: An LED indicator shows the envelope amount that is being sent to the amplifier. The LED’s brightness depends on the envelope signal’s amplitude. Arturia - User Manual MiniBrute 2S - The top panel...
- Page 50 The envelope loops indefinitely and is retriggered by a new trigger (note on), regardless of the Trig + Loop current position. Arturia - User Manual MiniBrute 2S - The top panel...
-
Page 51: The Patch Bay Section
There are some very useful secondary functions that are activated by holding the Shift button and then pressing a pad or a button. For a description of those features, see the Shift functions [p.158] chapter. Arturia - User Manual MiniBrute 2S - The top panel... -
Page 52: Basics Of Synthesis
Your MiniBrute 2S is a true analog synthesizer, so all sounds are produced by analog electronic circuits. No digital computer circuitry is involved in the generation, filtering, or basic control of the sound. This is one of the reasons why MiniBrute 2S creates rich, animated, and lively electronic sounds. - Page 53 The output of a random noise generator Such signals sound very different from the pitched signals, and are like the sound of wind, a water stream, steam exhaust, rain, waterfall, etc. Arturia - User Manual MiniBrute 2S - Basics of synthesis...
- Page 54 This results in “metallic” pitched sounds that are ideal for harpsichord- and clavinet-type tones. Dynamic modulation (LFO or envelope) of the warp/folding parameters opens up a realm of clangorous, spring coil-like sounds. Arturia - User Manual MiniBrute 2S - Basics of synthesis...
- Page 55 The top of a triangle wave is folded over by the Metalizer Arturia - User Manual MiniBrute 2S - Basics of synthesis...
- Page 56 (resonating) particular overtones and partials, and these changes can be either static or dynamic. Filters are very important circuits whose design contributes greatly to the a synthesizer’s sound and character. Arturia - User Manual MiniBrute 2S - Basics of synthesis...
- Page 57 A filter can operate in various ways or modes. These modes are called transfer functions or spectral responses. In the MiniBrute 2S the filter can operate either as a low-pass filter, a band-pass filter, a high-pass filter, or a notch filter.
- Page 58 This parameter can be increased up to a point where the filters no longer acts like a mere filter, but starts to oscillate on its own. The resonance emphasizes a particular range of frequencies Arturia - User Manual MiniBrute 2S - Basics of synthesis...
- Page 59 LFO, envelope generator, or some kind of external control (like a foot pedal). The amplifier is primarily responsible for shaping a sound’s dynamics. The Amplifier is the final stage of the signal Arturia - User Manual MiniBrute 2S - Basics of synthesis...
- Page 60 6.1.5.1. Low-Frequency Oscillators (LFOs) An LFO is low frequency oscillator that can produce various waveforms at sub-audio frequencies (0.05Hz up to 100Hz). In MiniBrute 2S the waveform options are sine, triangle, sawtooth, square, random steps, and random waves. These waves’ amount and polarity (i.e., whether they go positive or negative) can be controlled before being fed to the target...
- Page 61 Now play a note and hold it. The sound will start quickly and be very bright, but the harmonic content will be reduced gradually until the sound is very faint again. The decay time of the filter envelope makes a major contribution to the character of a sound. Arturia - User Manual MiniBrute 2S - Basics of synthesis...
- Page 62 AD Decay stage upon the release of the note, the ADSR Release stage will not be heard because the sound itself is no longer audible. Arturia - User Manual MiniBrute 2S - Basics of synthesis...
- Page 63 Raise the AD Attack slider to about 3/4 of the way up Now play a note and hold it while listening carefully. The sound will fade in gradually but its harmonic content will remain constant throughout the change in amplitude. Arturia - User Manual MiniBrute 2S - Basics of synthesis...
-
Page 64: The Patch Bay
The MiniBrute 2S is an impressive synthesizer with a powerful set of analog circuitry that puts it in a class of its own. But with the addition of the patch bay the MiniBrute 2S joins ranks with modular synthesizers many times its size. - Page 65 7.1.2. Patch points: Inputs vs. Outputs The connectors in the MiniBrute 2S patch bay fall into two main categories: inputs and outputs. It is easy to know which is which: The output jacks are labeled with white boxes containing text or graphics, and the input jacks only have words under them.
- Page 66 But to use one example from the section pictured above, the label (KBD) means the Pitch of VCO 1 normally tracks the MiniBrute 2S pads (abbreviated KBD). If a patch cable is connected to the VCO 1 Pitch jack it will break this connection and tell VCO 1 to expect its modulation signals to come from another source such as an LFO or the output of an envelope.
- Page 67 MiniBrute 2S can serve as the master clock source for an external device. ♪: The MIDI Control Center software allows you to specify what sort of clock the MiniBrute 2S should send and receive. A wide range of options is available; see the MCC [p.140]...
- Page 68 For example, for the VCA section's CV input and the ATTENUATOR section's Att 2 input, the pre-wired control is the internal +5V source of the MiniBrute 2. But you can patch any control voltage standard into the patch bay here (1V, 2V, 5V, 8V, etc.). Arturia - User Manual MiniBrute 2S - The Patch bay...
-
Page 69: The Vco 1 Section
To hear PWM it is necessary to have the PWM knob in the VCO 1 section of the top panel set to a non-zero value. The Square wave slider in the OSC MIXER section must also be set high enough. Arturia - User Manual MiniBrute 2S - The Patch bay... - Page 70 7.2.6. Metal Mod The default source of the Metal Mod parameter is the velocity of a note played on the MiniBrute 2S pads. But a different source may be used by connecting its output to this patch point. For example, try connecting a patch cable from the Out 1 of the LFO 1&2 section of the patch bay to the Metal Mod input.
- Page 71 Here's roughly how the patch should look. We've omitted the LFOs and other irrelevant settings: Hard Sync example patch Now play some low notes. You should hear a recognizable sync sweep. Arturia - User Manual MiniBrute 2S - The Patch bay...
- Page 72 ATTENUATORS section: Out 1 to VCO 1 section: Lin FM (In) • FILTER section: Connect one end of a cable into the Cutoff input to break the pre- wired Att 1 connection The patch bay should look like this: Arturia - User Manual MiniBrute 2S - The Patch bay...
- Page 73 This jack provides the full-strength output of the VCO 1 Sawtooth waveform. The setting of the Sawtooth slider in the OSC MIXER has no effect on this connector. To control its level, route it through one of the Attenuator [p.76] pairs. Arturia - User Manual MiniBrute 2S - The Patch bay...
-
Page 74: The Vco 2 Section
This jack provides the full-strength output of the selected VCO 2 waveform. The setting of the Osc 2 slider in the OSC MIXER has no effect on this connector. To control its level, route it through one of the Attenuator [p.76] pairs. Arturia - User Manual MiniBrute 2S - The Patch bay... -
Page 75: The Ext In Section
The Master input allows you to run the audio output of another device directly to the outputs of the MiniBrute 2S. It does not pass through the filters or any other circuitry; only the Master Volume knob will affect the signal. The level control on the source device might need to be used to balance its level with level of the MiniBrute 2S. -
Page 76: The Filter Jacks
The Filter cutoff frequency can be modulated by any source that is patched into this connection. The depth of the modulation is controlled by the Att 1 > Cutoff knob in the Filter section. Arturia - User Manual MiniBrute 2S - The Patch bay... -
Page 77: The Amp Section
Envelope, plug the new source into the AM jack in the AMP section. Doing so will bypass the AD Envelope, so you won't hear any sound out of the MiniBrute 2S until a signal is received at this connector (or the Att 2>Amp knob is raised). -
Page 78: The Adsr Section
The ADSR section 7.8.1. Trig Normally a gate signal from the MiniBrute 2S pads is required to trigger the ADSR Envelope. But you can use a different source instead, such as a trigger signal from a modular synthesizer. To make that happen, plug the new source into the ADSR Trig input jack. -
Page 79: The Ad Section
(Attack time) or cut it off suddenly (Decay time). If you want to use its stages to control a particular destination (internal or external), connect a cable from the Out jack to the input connector of destination parameter. Arturia - User Manual MiniBrute 2S - The Patch bay... -
Page 80: The Lfo 1&2 Section
7.10.2. LFO Out 2 This jack provides the full-strength output of the selected LFO 2 waveform. To control its level, route it through one of the Attenuator [p.76] pairs. Arturia - User Manual MiniBrute 2S - The Patch bay... -
Page 81: The Vca Section
This jack will output the combined signals of the In 1 and In 2 jacks at their raw input levels unless they are controlled by an input voltage at the CV jack. Arturia - User Manual MiniBrute 2S - The Patch bay... -
Page 82: The Attenuators Section
Patch the output of the signal you want to control into the In 1 jack and then use the Out 1 > Cutoff jack as the source for the desired destination parameter. To control the level of the modulation, use the Att 1 > Cutoff knob in the Filter section. Arturia - User Manual MiniBrute 2S - The Patch bay... - Page 83 Att 2 > Amp knob on the front panel. ♪: Read the Using the Attenuators [p.76] section for essential information about routing a signal through the Attenuators. Arturia - User Manual MiniBrute 2S - The Patch bay...
-
Page 84: Sequencer Section
LED next to the word CLK is lit. Use the MIDI Control Center [p.140] to instruct the MiniBrute 2S what sort of external clock is being used as the sync reference: 1step (Gate), 1step (Clock), 1pulse (Korg), 24ppq, or 48ppq. 7.13.2. Reset A trigger received at this connector will reset the sequence that is currently playing back to its beginning. - Page 85 Simply connect one TRS patch cable from the Sync jack of the master MiniBrute 2S to the Clock input of the slaved Arturia device (or vice versa) and the slave will start, pause, resume playback, and restart from the beginning whenever the master does.
- Page 86 Reset input jack of the MiniBrute 2S. ♪: Be sure to match the clock rates between the two devices. On the MiniBrute 2S, hold the Sync button and turn the Tempo/Value knob to select the desired clock rate.
-
Page 87: The Midi Section
7.14. The MIDI section This section of the patch bay is entirely populated with output jacks. You can use them locally with the MiniBrute 2S or externally with other devices. The MIDI section 7.14.1. KBD This jack provides a pitch output signal that changes its voltage based on which notes are played or received over MIDI. - Page 88 The Press / Mod 2 jack will send a control voltage to the destination of your choice. The input source for this jack is the aftertouch signal generated by the pads. Arturia - User Manual MiniBrute 2S - The Patch bay...
-
Page 89: Seq / Arp: Shared Features
8. SEQ / ARP: SHARED FEATURES MiniBrute 2S provides a powerful set of tools with its Sequencer and Arpeggiator. You can record 64 different multi-track sequences, each with up to 64 steps, and chain those sequences together. The Arpeggiator generates notes based on the pads you have pressed and plays them back according to the settings you have defined. -
Page 90: Pitch And Transposition
Description Octave [p.25] Independent transposition for Seq and pads; no special Octave shift feature for Arp Transpose [p.26] An active arpeggio does not transpose when Seq is transposed. Arturia - User Manual MiniBrute 2S - Seq / Arp: shared features... -
Page 91: Transport Section
Step Record [p.102] Use pads to enable/disable steps (inactive for Arp mode) Real-time Record [p.101] Play the pads to enter pitch, volume and gate length (inactive for Arp mode) Arturia - User Manual MiniBrute 2S - Seq / Arp: shared features... -
Page 92: Playback And Polyphony
Gate time [p.91] The sequencer has a Gate track; Arp gate time is fixed at 50% The sections that follow expand upon the information provided earlier in this chapter. Arturia - User Manual MiniBrute 2S - Seq / Arp: shared features... -
Page 93: Synchronization
8.5. Synchronization MiniBrute 2S can be the master clock for a wide range of musical devices, or it can serve as a slave to any one of several sources. See the rear panel connectors [p.8] section for connection diagrams. The Sync options are selected using the Sync button on the right side of the top panel. - Page 94 8.5.2. As Slave MiniBrute 2S functions as a slave to an external clock when one of those options is selected (USB, MIDI or CLK). When MiniBrute 2S is in Slave mode: • The Tempo controls will not control the internal sequencer or arpeggiator while the external source is running.
-
Page 95: Metronome (Shift + Sync)
Arpeggiator. Four settings are available, and each track can have its own setting (depending on its Type). The Arpeggiator value is shared with the Pitch track. Arturia - User Manual MiniBrute 2S - Seq / Arp: shared features... -
Page 96: Swing
The three Time Division settings with Master Swing = 1/8 Technically, the description of what happens is "If a smaller resolution is selected, the swing period will be subdivided in 2^n trigs of equal length." Arturia - User Manual MiniBrute 2S - Seq / Arp: shared features... -
Page 97: Gate Time: Seq Vs. Arp
Gate track • The Arpeggiator Gate time is fixed at 50%. ♪: The Sequencer has an adjustable Gate setting but the Arpeggiator Gate setting is fixed at 50%. Arturia - User Manual MiniBrute 2S - Seq / Arp: shared features... -
Page 98: Playback Direction/Note Order
There will be no discernible pattern, especially if the sequence is longer than 4 steps and contains more than 4 notes. The default setting is Forward. Arpeggiator: Note order Arturia - User Manual MiniBrute 2S - Seq / Arp: shared features... -
Page 99: Transport Controls
The Stop button has an additional function. If for some reason you end up with a stuck note, just press the Stop button quickly three times in a row. MiniBrute 2S will then send an All Notes Off command over USB and MIDI. - Page 100 ♪: If the Record button is blue, the sequencer is in real-time recording [p.19] mode. For advanced coverage of Real-time recording, see the Sequence Editing [p.108] chapter. Arturia - User Manual MiniBrute 2S - Seq / Arp: shared features...
-
Page 101: Scale Selection
8.14. Scale selection 8.14.1. What the Scales do The MiniBrute 2S pads give you the ability to assign one of eight input scales to the pads and the Step encoders: seven preset scales and one you can customize yourself (the User scale). - Page 102 Now the ‘filters’ will start to kick in. There are only eight notes in most of these Scales: 8.14.2.2. Major and Minor Major Minor Arturia - User Manual MiniBrute 2S - Seq / Arp: shared features...
- Page 103 8.14.2.3. Dorian and Mixolydian Dorian Mixolydian 8.14.2.4. Harmonic Minor and Blues Harmonic Minor Blues Notice that the Blues Scale only contains seven notes. And last but certainly not least, the… Arturia - User Manual MiniBrute 2S - Seq / Arp: shared features...
-
Page 104: Define The User Scale
Those are the notes the pads will make available when the User scale is selected, and those are the notes you will hear when the Step encoders are turned or when using the Arpeggiator. Arturia - User Manual MiniBrute 2S - Seq / Arp: shared features... -
Page 105: Sequencer Basics
Pitch track will not be heard until all pads are released. If one of the other tracks is set to the Velocity type or the Pressure type, they will not play either. Arturia - User Manual MiniBrute 2S - Sequencer basics... - Page 106 Sequences can be transposed up and down from an external keyboard using the MIDI or USB input. When you hold pad 16 the pads will show the transposition amount, even if it arrived from an external source. Arturia - User Manual MiniBrute 2S - Sequencer basics...
-
Page 107: Record A Pattern
You can load in a different pattern while the Sequencer is still recording in real time. This works exactly as you would expect: Arturia - User Manual MiniBrute 2S - Sequencer basics... - Page 108 Hold Shift and turn a Step encoder to edit the secondary parameter of a step on the selected track. • Press Stop or Record again to exit Step mode. Here's a list of the primary and secondary encoder functions [p.116] for each track type. Arturia - User Manual MiniBrute 2S - Sequencer basics...
-
Page 109: Pattern Management
9.3. Pattern management 9.3.1. Flash memory vs. RAM The MiniBrute 2S holds 64 patterns, arranged in four banks of 16 patterns each. But it doesn't hold them all in its RAM memory at once: It holds a single bank at a time. - Page 110 When enabled, the Sequencer will switch to the next pattern at the next step, as determined by the Time Division setting. ♪: Instant Change is a global parameter; it is not stored with the pattern. But the setting is remembered and recalled at startup. Arturia - User Manual MiniBrute 2S - Sequencer basics...
- Page 111 (it should be blinking), then hold the Paste button and select another pad (preferably one that is dark, i.e. empty). ♪: The copy/paste technique also works on individual steps in Step mode. Arturia - User Manual MiniBrute 2S - Sequencer basics...
- Page 112 Select a new bank, if desired, by turning the Tempo/Value knob • Press the pad that corresponds to the location of the pattern to be erased • If you want to keep going, keep pressing pads until they're all dark. Arturia - User Manual MiniBrute 2S - Sequencer basics...
-
Page 113: Create A Chain
9.4. Create a Chain The MiniBrute 2S allows you to chain multiple patterns together from within the same bank. It's a quick way to put a song or performance together, drawing from the 16 patterns within the bank you have loaded into RAM. -
Page 114: Sequence Editing
Welcome to the inner workings of the MiniBrute 2S. 10.1. Track selection The Sequencer section of the MiniBrute 2S has four tracks, two of which share the features of a single sequencer, and another two which are fully independent and configurable. -
Page 115: Track Type
But when those tracks are set to their defaults (Velo and Pressure, respectively), then all four tracks are effectively working as one voice. Each track will capture its default data type during real-time recording. Arturia - User Manual MiniBrute 2S - Sequence Editing... - Page 116 Slide. The Slide function values range from 0 to 100. At 0, the CV instantly jumps to the new value. At 100, the CV goes to the new value in a straight line. Arturia - User Manual MiniBrute 2S - Sequence Editing...
- Page 117 With this track type (Press) it is safe to assume that track 4 is part of the Pitch track. Anything that applies to the Pitch track will apply to track 4. Arturia - User Manual MiniBrute 2S - Sequence Editing...
- Page 118 If Step repeat = 3 and Gate length = 37, the Gate length for each repeat is 37/3 = When Gate is set to TIE, the last “repeat” is tied with the next step. Arturia - User Manual MiniBrute 2S - Sequence Editing...
- Page 119 LFO. This can be done for each step in the pattern. The values range between 0 and 100, which is the default value. The LFO will instantly jump to the new amplitude when a step is active. Arturia - User Manual MiniBrute 2S - Sequence Editing...
-
Page 120: Track Mute
This helps you set the notes for the pads and the Arpeggiator. • Play mode: The Step encoders can adjust the primary and secondary functions [p.116] for the selected track, but you won't hear any notes if the track type = Pitch. Arturia - User Manual MiniBrute 2S - Sequence Editing... -
Page 121: Editing In Step Mode
The playing cursor is purple: it identifies the pattern location during playback, and also lets you know exactly where the pattern was when it was paused. Arturia - User Manual MiniBrute 2S - Sequence Editing... - Page 122 Gate Gate length Step repeat Velocity Velocity value Slide rate Pressure Depth Slide rate Percentage of selected Voltage Slide rate Envelope Decay of AD envelope Attack of AD envelope Rate Depth Arturia - User Manual MiniBrute 2S - Sequence Editing...
- Page 123 When Track 3 or Track 4 are set to something other than their default type (Velo or Pressure, respectively), and that track is selected prior to the copy operation, the copy process will only copy the data from that track. Arturia - User Manual MiniBrute 2S - Sequence Editing...
-
Page 124: Pages
Each pattern in the MiniBrute 2 can be up to 64 steps in length. These steps are arranged in groups of 16, and those "step groups" are known as Pages. Steps 1-16 are under the 16 button, steps 17-32 are under the 32 button, and so on. Arturia - User Manual MiniBrute 2S - Sequence Editing... -
Page 125: Page Edit View
Page Copy process only copies the page of that track. • The information copied from one of the pages on a particular track can only be pasted into the same pattern, not another pattern. Arturia - User Manual MiniBrute 2S - Sequence Editing... -
Page 126: Lengthen A Pattern
When a pattern is extended, a portion of the existing pattern data is copied and attached to the end of the current pattern. ♪: MiniBrute 2S patterns can be lengthened or extended up to the maximum pattern length of 64 steps. 10.9.2. Lengthening a sequencer pattern It’s possible to lengthen a pattern using the Last Step button and the Page buttons. - Page 127 Steps 1-7 copied/pasted to fill 48 steps; the last six steps = first six To make the pattern a particular length, use the Last Step button and the Step buttons as described in the Default Pattern Length [p.122] section. Arturia - User Manual MiniBrute 2S - Sequence Editing...
- Page 128 If you’d like your pattern to be less than 16 steps long, simply hold the Last Step button and then press the pad that corresponds to the desired setting. If you'd like it to be longer than 16 steps, see Lengths > 16 steps [p.123] below. Arturia - User Manual MiniBrute 2S - Sequence Editing...
- Page 129 32 steps, but the pads will stay focused on steps 17-32. When you’re finished editing you can re-enter Page Follow mode if you like (Shift + Last Step). Arturia - User Manual MiniBrute 2S - Sequence Editing...
-
Page 130: Independent Playing Directions
The active playing direction will have a lit LED. Others will be unlit • When track 3 is in Velo mode or track 4 is in Pressure mode, the playing direction is shared with the Pitch track. Arturia - User Manual MiniBrute 2S - Sequence Editing... -
Page 131: Arpeggiator Basics
11.2. Arpeggiator features The MiniBrute 2S arpeggiator provides lots of different ways to arpeggiate the notes you play on the pads. The following features were covered in the "Shared Features [p.83]"... -
Page 132: Basic Operations
♪: In order to hear the Arpeggiator you must first press the On button before holding down the pads. The Arpeggiator will not play back any notes If you hold down the pads first and then press the On button. Arturia - User Manual MiniBrute 2S - Arpeggiator basics... - Page 133 See the MCC chapter [p.140] for more information. ♪: Tap tempo and the Rate knob will not function when MiniBrute 2S is set to one of the external sync [p.87] sources. 11.3.5. Time Division...
- Page 134 The Scale you've selected for the pads does change the notes assigned to the pads, and makes only those notes available to the Arpeggiator. The Scale selection also affects the notes being played by a Held arpeggio. Arturia - User Manual MiniBrute 2S - Arpeggiator basics...
-
Page 135: Arpeggiator Modes (Note Order)
Inc the arpeggiator will play the held notes in order from With the Arp mode [p.126] low to high, then from high to low, repeating the high note and low note. Arp Mode: Inclusive Arturia - User Manual MiniBrute 2S - Arpeggiator basics... - Page 136 In the example below the notes were played in this order: Middle C, G, E, and higher C. The result is the following arpeggio: Arp Mode: Order Arturia - User Manual MiniBrute 2S - Arpeggiator basics...
- Page 137 Dn x2 the arpeggiator will play the held notes in order from With the Arp mode [p.126] the top to the bottom. But unlike the Dwn mode it will play each note twice before the next note plays. Arp Mode: Down x2 Arturia - User Manual MiniBrute 2S - Arpeggiator basics...
-
Page 138: Build A Multi-Octave Arpeggio
♪: It’s possible to let go of the original note(s) at any stage in the process as long as you keep holding down at least one of the new notes you add. Arturia - User Manual MiniBrute 2S - Arpeggiator basics... -
Page 139: Pausing An Arpeggio
Hold feature is On: You let go of all pads and play a new note • You press the Stop button. ♪: If you want to force the arpeggio pattern to start again from the beginning, hold the Shift button and press Play/Pause. Arturia - User Manual MiniBrute 2S - Arpeggiator basics... -
Page 140: Arp/Loop Features
The D pad and the A# pad are being held down. In this example, all four tracks will play their patterns forward between step 3 and step 11 (the D pad and the A# pad) Arturia - User Manual MiniBrute 2S - Arp/Loop features... -
Page 141: Sequencer Tracks And The Arpeggiator
The two other tracks will be looping at the same time, though as mentioned above, depending on their settings they may not send their data because the Arpeggiator will override their output until all pads are released. Arturia - User Manual MiniBrute 2S - Arp/Loop features... -
Page 142: Introduction: The Midi Control Center
2S for your system. Use it to define the hardware response, the voltages and triggers that will be used, and the MIDI settings. It works with most of Arturia’s devices, so if you have an earlier version of the software you’ll want to download the latest version. - Page 143 13.1.4. Connection Connect MiniBrute 2S to your computer using the included USB cable. It’ll be ready to go within seconds after power-up. Now launch the MIDI Control Center. MiniBrute 2S will be in the list of connected devices: A check mark indicates the selected device 13.1.4.1.
- Page 144 13.1.4.2. Potential issues: macOS If the cable between your Mac and the MiniBrute 2S is connected properly and the Mac is having trouble detecting the unit, your Mac could be experiencing what is known as a "USB port enumeration issue." Here is one potential solution.
- Page 145 MiniBrute 2S to match your system and enhance your workflow. - The MiniBrute 2S also might be labeled "MIDI Device" or something else, so you may need to delete all MIDI Device images and restart any connected devices. First you must disconnect any units or turn them off, or else you will not be able to delete the icons.
-
Page 146: Midi Control Center
Center (MCC). They have been stored on your computer. These are divided into two main groups of Templates: Factory and User. The User Templates are the ones you have recalled from your MiniBrute 2S with the MCC. See the Store To/Recall From [p.144] section to learn how to do this. -
Page 147: Device Memories
The upper half of the Template Browser window contains a location called the Working Memory. It functions as a sort of ‘target’ onto which a group of patterns (i.e., Templates) can be dragged and then transmitted to the MiniBrute 2S internal memory. Arturia - User Manual MiniBrute 2S - MIDI Control Center... -
Page 148: Local Templates
MiniBrute 2S !: The following process will send a bank of 16 patterns to MiniBrute 2S and will overwrite the 16 patterns in that memory location. The MiniBrute 2S has the added ability to drag a bank of 16 patterns from within a Template in the Template Browser onto the Working Memory. - Page 149 Send a Bank of 16 patterns to MiniBrute 2S Arturia - User Manual MiniBrute 2S - MIDI Control Center...
-
Page 150: Store To/Recall From
This process will store all 64 patterns from the selected Template into the MiniBrute 2S. 14.4.2. Recall edited patterns from MiniBrute 2S If you changed any patterns inside the MiniBrute 2S you need to pull those patterns into the MIDI Control Center to back them up. To do that, click the Recall From button. -
Page 151: Import/Export Device Settings
Device Settings window (see the next section). These files have the extension .MiniBrute2. They contain all of the internal MiniBrute 2S parameters: a complete set of 64 patterns and all of the Device Settings. Use these files to share settings and patterns with other users. -
Page 152: Data Entry
Editing a knob value Some parameters have a pull-down menu. To change the value, click the menu and make a selection: Selecting a pull-down menu option Arturia - User Manual MiniBrute 2S - MIDI Control Center... -
Page 153: Device Settings
Now let’s go through the parameters one at a time. 14.7.1.1. User Channel This sets the keyboard MIDI Channel. When this is changed, any parameter with its MIDI Channel set to "User" will also change its send/receive channel. Arturia - User Manual MiniBrute 2S - MIDI Control Center... - Page 154 These MIDI messages can either arrive via USB or the MIDI Input connector. 14.7.1.3. MIDI Thru This parameter will turn the MiniBrute 2S MIDI Output into a MIDI Thru. Incoming MIDI data will be routed directly to the Output instead of being used to transpose patterns, etc.
- Page 155 ♪: Since the MiniBrute 2S is monophonic it cannot respond to polyphonic aftertouch. But it is a very useful and expressive feature to have as a creative option for your system. But keep in mind that Pad Poly Aftertouch generates a significant amount of control data, and if the devices in your system are only capable of receiving Channel Aftertouch, you should consider disabling this feature.
- Page 156 This parameter allows you to select how quickly the metronome will count. If your tempo is slow, a higher resolution may be preferred. If your tempo is fast, a lower resolution such as 1/4 might be best. Arturia - User Manual MiniBrute 2S - MIDI Control Center...
- Page 157 14.7.2.3. Sync Clock In/Out settings MiniBrute 2S is endowed with the ability to transmit or receive clocking signals from a huge range of vintage devices. Here’s a brief look at each setting: •...
- Page 158 For example, if Time Div = 1/4 and Master Swing = 1/8, the Seq/Arp will not have a shuffle feel. See Master Swing vs. Time Division [p.90] for specific information. Arturia - User Manual MiniBrute 2S - MIDI Control Center...
- Page 159 A setting of Disable will filter out transposition requests. 14.7.3.2. Transposition Input port Use this to tell MiniBrute 2S which MIDI port will receive the transposition request. 14.7.3.3. Transpose Input channel Instructs MiniBrute 2S which MIDI channel will set the transposition amount.
- Page 160 14.7.4.1. CV Pitch (Mod 1, 2) The CV Pitch Mod1 and CV Pitch Mod2 parameters are identical so we'll cover them both here. The various models of vintage gear respond differently to electricity. MiniBrute 2S works well with the most common types. •...
- Page 161 14.7.4.2. V/Oct base note, Hz/V base note (Mod 1, 2) MiniBrute 2S provides the option to set a separate reference note for both Mod 1 and Mod 2. This parameter will change from V/Oct to Hz/V depending on which CV Pitch option is selected for the Mod.
- Page 162 Play CC 0-127 Full MIDI range ♪: The “User” value allows the MIDI channel of that parameter to change automatically whenever the MIDI channel of the keyboard is changed. Arturia - User Manual MiniBrute 2S - MIDI Control Center...
- Page 163 As with the other Scales, if the User Scale is selected it will dictate which notes will played back by a pattern. See the Scales [p.95] section of the Seq / Arp: shared features [p.83] chapter for more information. The process is simple: Arturia - User Manual MiniBrute 2S - MIDI Control Center...
-
Page 164: Shift Functions
15. SHIFT FUNCTIONS 15.1. Shift function chart Note: Some Shift functions are only available in specific modes. Here’s a list of the Shift button features that are available in all modes: Arturia - User Manual MiniBrute 2S - Shift functions... - Page 165 Last Step + Pad [p.164] Define last step of sequence Velo/Press + Tempo knob [p.164] Mod 1/2 modes Here’s a list of the Shift button features that are available in Step Recording mode: Arturia - User Manual MiniBrute 2S - Shift functions...
- Page 166 Here’s a list of the button combinations that are available in Pad Playing / Real-Time mode: Combination Result Erase + Pad 1-16 [p.164] Erase a pattern Copy + Pad 1-16 [p.164] Copy a pattern Paste + Pad 1-16 [p.164] Paste a pattern Arturia - User Manual MiniBrute 2S - Shift functions...
-
Page 167: Shift Function Descriptions
This changes the Root Note and retains that for any pattern that you load. In contrast, the standard Transposition feature (Pad 16 + Pad 1-12) is not retained when a new pattern is loaded. Arturia - User Manual MiniBrute 2S - Shift functions... - Page 168 Toggles the metronome on and off. This works in both Sequencer and Arpeggiator modes. 15.2.1.16. SHIFT + Tempo knob This sets the Swing amount for the sequencer and the arpeggiator. The range is from 50% (none) to 75% (maximum) in increments of 1%. Arturia - User Manual MiniBrute 2S - Shift functions...
- Page 169 15.2.1.26. Load + Pad 1-16 Load the pattern you select within the current bank. 15.2.1.27. Save + Pad 1-16 Save the current pattern into the location you select within the current bank. Arturia - User Manual MiniBrute 2S - Shift functions...
- Page 170 Copy a pattern to a temporary buffer so it can be pasted to a new pattern location. 15.2.3.3. Paste + Pad 1-16 Paste a copied pattern to a new pattern location. Arturia - User Manual MiniBrute 2S - Shift functions...
-
Page 171: Declaration Of Conformity
Important notice: DO NOT MODIFY THE UNIT! This product, when installed as indicate in the instructions contained in this manual, meets FCC requirement. Modifications not expressly approved by Arturia may avoid your authority, granted by the FCC, to use the product.
Need help?
Do you have a question about the MINIBRUTE 2S and is the answer not in the manual?
Questions and answers