Table of Contents
Advertisement
Advertisement
Table of Contents

Related Manuals for Arturia minibrute 2 series


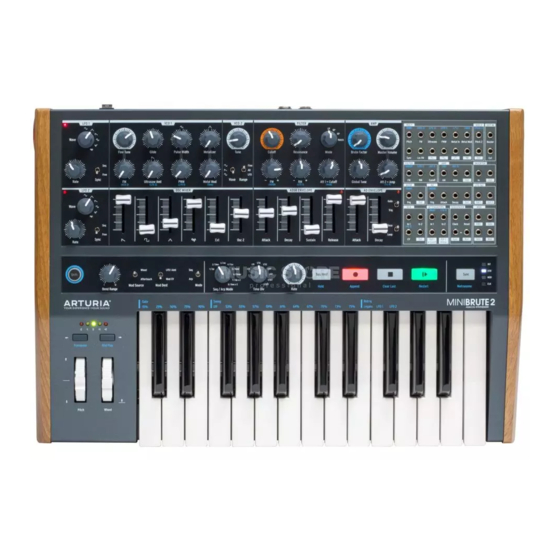
Summary of Contents for Arturia minibrute 2 series
- Page 1 USER MANUAL...
-
Page 2: Special Thanks
Information contained in this manual is subject to change without notice and does not represent a commitment on the part of Arturia. The software described in this manual is provided under the terms of a license agreement or non-disclosure agreement. The software license agreement specifies the terms and conditions for its lawful use. -
Page 3: Special Message Section
It enables you to download the user manual and the latest version of the MIDI Control Center software • It allows you to receive special offers restricted to owners of MiniBrute 2 series synthesizers. Special Message Section Specifications Subject to Change: The information contained in this manual is believed to be correct at the time of printing. - Page 4 Do not expose the instrument to hot sunlight. Do not use the instrument when there is a gas leak nearby. Arturia is not responsible for any damage or data loss caused by improper operation of the instrument. Arturia recommends the use of shielded cables for audio (less than 3 meters...
- Page 5 There are many great features, both old and new, in the MiniBrute 2 series synths. But the pièce de résistance of the MiniBrute 2 might be the inclusion of a very flexible 48-point patch bay.
-
Page 6: Table Of Contents
Table Of Contents Introduction..................................5 Installation..................................6 2.1. Usage Precautions................................6 2.2. WARNING ....................................6 2.3. Register your Instrument..............................6 2.4. Connecting the MiniBrute 2 to the World......................7 2.5. Warm-Up and General Tuning ............................ 9 Quick start..................................10 3.1. Create your first sound: the “basic patch”... - Page 7 9.4. Modifying a sequence..............................95 9.5. Saving sequences ................................96 The Arpeggiator............................... 97 10.1. What’s an arpeggiator? .............................. 97 10.2. Arpeggiator features ..............................97 10.3. Basic operations................................98 10.4. Arpeggiator modes..............................100 10.5. Build a multi-octave arpeggio ..........................103 10.6. Pausing an arpeggio ..............................
-
Page 8: Introduction
1. INTRODUCTION Congratulations, and thank you for your purchase of the Arturia MiniBrute 2 analog synthesizer. You now own what many players feel is the best sounding, most versatile, and most powerful analog synthesizer in its class. The MiniBrute series of synthesizers is the culmination of a lengthy (and very enjoyable!) collaboration between Arturia's engineers and analog synthesizer "guru"... - Page 9 MiniBrute 2 is truly a musical instrument. We loved designing it, building it, and now, playing it. We hope you will share our enthusiasm, and find inspiration in its sounds. Here’s an overview of the features at your disposal: Arturia - User Manual MiniBrute 2 - Introduction...
- Page 10 • Audio and headphone outputs • Use with Arturia's MIDI Control Center for device configuration and sequence archival But that’s enough talk — plug in your new analog friend, and start shaking the walls! Arturia - User Manual MiniBrute 2 - Introduction...
-
Page 11: Installation
2.1. Usage Precautions The MiniBrute 2 uses an external power adapter. Do not use any power supply or adapter other than the one provided by Arturia. Arturia accepts no responsibility for damage caused by use of an unauthorized power supply. -
Page 12: Connecting The Minibrute 2 To The World
Clock inputs: Eurorack level signals, 68kΩ, 0V/+5V jacks) Clock outputs: Eurorack level signals, 2kR, 0V/+5V MIDI input & output Standard MIDI DIN-5 Standard USB type B Power DC input Internal 2.1 mm, external 5.5 mm Arturia - User Manual MiniBrute 2 - Installation... - Page 13 MiniBrute 2 patch bay, modular synth, and external audio sources This is only one example of the connections that can be made between the MiniBrute 2 and external devices. The possibilities are as endless as your imagination! Arturia - User Manual MiniBrute 2 - Installation...
-
Page 14: Warm-Up And General Tuning
20°C and 32°C in temperate areas. In practice, the MiniBrute 2 provides satisfactory operation over a much wider temperature range, although extreme external temperatures or fluctuations can lead to longer stabilization time or erratic tuning. Arturia - User Manual MiniBrute 2 - Installation... -
Page 15: Quick Start
But if you simply want to play the keyboard for a moment, you can use the Down or Up Octave [p.19] buttons to transpose the notes to the range you prefer. Arturia - User Manual MiniBrute 2 - Quick start... -
Page 16: Add Some Vibrato
Play a few notes. VCO 2 has become a sub-oscillator, which beefs up your sound by adding more bass. Here’s an overview of the patch: VCO 2 is being used as a sub-oscillator Arturia - User Manual MiniBrute 2 - Quick start... -
Page 17: Introduction To Envelopes
There are two switches inside the AD ENVELOPE section (Gate/Trig and Once/Loop [p.39]). Their functions are somewhat more complex and will be described in the Top Panel [p.22] chapter. Arturia - User Manual MiniBrute 2 - Quick start... - Page 18 The release time can be as quick as 0.5ms and as long 4 seconds. Examples of the ADSR envelope Arturia - User Manual MiniBrute 2 - Quick start...
-
Page 19: Get To Know An Lfo
We have barely scratched the surface! Thanks to the patch bay, an LFO can add a cyclical variation to almost any aspect of the MiniBrute 2 sound. To learn more, read the Patch Bay [p.53] chapter. Arturia - User Manual MiniBrute 2 - Quick start... -
Page 20: The Sequencer And Arpeggiator
Sync button repeatedly until the LED next to the letters "INT" is lit. This means you have selected the Internal clock and will be able to work with the Sequencer and the Arpeggiator immediately. Arturia - User Manual MiniBrute 2 - Quick start... - Page 21 Shift button and press the Sync button until it goes dark. We'll learn how to change the length of a sequence, erase unwanted notes from the end of a sequence, and use step-time recording in the Sequencer [p.87] chapter. Arturia - User Manual MiniBrute 2 - Quick start...
-
Page 22: Hardware Overview
The sequencer allows you to trigger musical passages you have created, such • as melodies, bass lines, or percussive riffs. Alternative ways of playing the synthesizer are available through MIDI control and external CV/GATE signals. Arturia - User Manual MiniBrute 2 - Hardware overview... -
Page 23: The Control Section
LFO 1 Vib: The Mod wheel controls the amount of LFO 1, which by default will • introduce vibrato. Mod CV: The Mod wheel becomes a modulation source in the patch bay via the • Mod jack in the MIDI section. Arturia - User Manual MiniBrute 2 - Hardware overview... - Page 24 Aftertouch. By default this signal appears at two locations: the Att 1 -> Cutoff knob and the Press / Mod output jack in the MIDI section of the patch bay. The modulation signal is also routed by the Mod Dest switch (see the next section). Arturia - User Manual MiniBrute 2 - Hardware overview...
-
Page 25: Inputs And Outputs
This is where all of the synthesizing takes place. There are so many powerful features located here that the top panel [p.22] has its own chapter. The Patch bay [p.53] has its own chapter too. Arturia - User Manual MiniBrute 2 - Hardware overview... -
Page 26: The Rear Panel
Sync [p.85] setting. In addition, the USB port is used to connect the MiniBrute 2 to Arturia's MIDI Control Center. This software is used to configure various settings of the MiniBrute 2. ♪: Synchronization with non-MIDI devices is done through a connector on the patch bay. For a full description of the CLK setting and the connector types to use, see the Synchronization [p.85]... -
Page 27: The Top Panel
Square rises and falls suddenly between its minimum and maximum values • Random stepped rises and falls suddenly between values that are generated at • random Random gliding rises and falls gradually between values that are generated at • random Arturia - User Manual MiniBrute 2 - The top panel... - Page 28 There are nine potential rates when an LFO is set to Sync: Rate LFO cycle repeats every: Periodicity 8 bars 4 bars 2 bars 1 bar half note 0.5x quarter note 0.25x eighth note 0.125x sixteenth note 0.0625x thirty-second note 0.03125x Arturia - User Manual MiniBrute 2 - The top panel...
- Page 29 To toggle this function, hold the Shift button and then press the top F key (LFO 1) or the top F# key (LFO 2). Arturia - User Manual MiniBrute 2 - The top panel...
-
Page 30: Vco 1
♪: By default the pitch of VCO 2 will track the pitch of VCO 1 when the Glide value is increased. The main exception to this rule is when a patch cord is inserted into the Pitch 2 input [p.63] jack in the VCO 2 section of the patch bay [p.53]. Arturia - User Manual MiniBrute 2 - The top panel... - Page 31 ♪: This knob affects only the square wave of VCO 1. It has no impact on the saw or triangle waveforms of VCO 1 nor the square wave of VCO 2. Arturia - User Manual MiniBrute 2 - The top panel...
- Page 32 The Metal Mod knob sets the modulation range for the Metalizer knob. Velocity is routed to the Metal Mod by default, but the patch bay allows you to use something else to modulate the parameter instead. Arturia - User Manual MiniBrute 2 - The top panel...
-
Page 33: Vco 2
5.3.2. Wave The Wave switch selects the waveshape for VCO 2, which can be either a sine wave, a sawtooth wave, or a square wave. Arturia - User Manual MiniBrute 2 - The top panel... - Page 34 LFO: VCO2 can be used as an additional LFO with a wide frequency range (1Hz • to audio range). This is handy if you're already using LFOs 1 and 2 for other modulations through the patch bay, for example. Arturia - User Manual MiniBrute 2 - The top panel...
-
Page 35: The Filter Section
!: Resonant filters can overload an audio circuit very easily. Be careful with the various levels involved (Noise level, Resonance amount, Master Volume, and the channel settings of your mixer or speaker). This is especially true when you are working with headphones! Arturia - User Manual MiniBrute 2 - The top panel... - Page 36 The letters "ADSR" are silkscreened under the FM1 knob because this connection has been pre-wired for you. However this connection can be bypassed through the patch bay [p.53]. ADSR Envelope [p.50] is covered extensively in the Basics of Synthesis [p.41] chapter. Arturia - User Manual MiniBrute 2 - The top panel...
- Page 37 Experimenting with RM modulation ♪: For the technically-minded, you may notice that there is a slight deformation of the RM signal due to the threshold in the bipolar attenuator circuitry. Arturia - User Manual MiniBrute 2 - The top panel...
- Page 38 Att 1 > Cutoff knob sets the modulation range. There's more to say about using the patch bay and the Attenuators [p.71], and we'll cover that in the patch bay chapter [p.53]. Arturia - User Manual MiniBrute 2 - The top panel...
-
Page 39: The Amplifier Section (Amp)
Once the oscillators have warmed up you can use this knob to tune the MiniBrute 2 to other devices. See the Warm-Up and General Tuning [p.9] section of the Installation chapter [p.6] for more information. Arturia - User Manual MiniBrute 2 - The top panel... - Page 40 The beauty of having a knob to control this parameter, rather than a switch that simply forces the VCA to a never-ending maximum level, is that you can control the level at which the envelope stays open. Arturia - User Manual MiniBrute 2 - The top panel...
-
Page 41: The Osc Mixer
The pulse width is also under the control of LFO 1 by default. The depth of the pulse width modulation can be adjusted with the PWM knob in the VCO 1 section, and the shape of the LFO can be changed the with LFO 1 Wave knob. Arturia - User Manual MiniBrute 2 - The top panel... - Page 42 This slider controls the output level of VCO 2 into the Amplifier section. See the VCO 2 [p.28] section for a full description of the capabilities of the second oscillator, Arturia - User Manual MiniBrute 2 - The top panel...
- Page 43 1ms to 14s. The AD Envelope section ♪: An LED indicator shows the envelope amount that is being sent to the amplifier. The LED’s brightness depends on the envelope signal’s amplitude. Arturia - User Manual MiniBrute 2 - The top panel...
- Page 44 The envelope loops indefinitely and is retriggered by a new trigger (note on), regardless of the Trig + Loop current position. Arturia - User Manual MiniBrute 2 - The top panel...
-
Page 45: Legato Vs. Retrigger Note Response
There are some very useful secondary functions that are activated by holding the Shift button and then pressing a key or a button. For a description of those features, see the Shift functions [p.123] chapter. Arturia - User Manual MiniBrute 2 - The top panel... -
Page 46: Basics Of Synthesis
These harmonics are an integer multiple of the fundamental frequency, i.e., the second harmonic is twice the fundamental frequency, the third harmonic is three times the fundamental, and so on. Arturia - User Manual MiniBrute 2 - Basics of synthesis... - Page 47 The output of a random noise generator Such signals sound very different from the pitched signals, and are like the sound of wind, a water stream, steam exhaust, rain, waterfall, etc. Arturia - User Manual MiniBrute 2 - Basics of synthesis...
- Page 48 This results in “metallic” pitched sounds that are ideal for harpsichord- and clavinet-type tones. Dynamic modulation (LFO or envelope) of the warp/folding parameters opens up a realm of clangorous, spring coil-like sounds. Arturia - User Manual MiniBrute 2 - Basics of synthesis...
- Page 49 The top of a triangle wave is folded over by the Metalizer Arturia - User Manual MiniBrute 2 - Basics of synthesis...
- Page 50 (resonating) particular overtones and partials, and these changes can be either static or dynamic. Filters are very important circuits whose design contributes greatly to the a synthesizer’s sound and character. Arturia - User Manual MiniBrute 2 - Basics of synthesis...
- Page 51 How a band-pass filter affects the sound In high-pass mode, partials above the cutoff frequency remain unchanged, while the partials below the cutoff are attenuated. How a high-pass filter affects the sound Arturia - User Manual MiniBrute 2 - Basics of synthesis...
- Page 52 This parameter can be increased up to a point where the filters no longer acts like a mere filter, but starts to oscillate on its own. The resonance emphasizes a particular range of frequencies Arturia - User Manual MiniBrute 2 - Basics of synthesis...
- Page 53 LFO, envelope generator, or some kind of external control (like a foot pedal). The amplifier is primarily responsible for shaping a sound’s dynamics. The Amplifier is the final stage of the signal Arturia - User Manual MiniBrute 2 - Basics of synthesis...
- Page 54 These waves’ amount and polarity (i.e., whether they go positive or negative) can be controlled before being fed to the target devices. A signal can be modified by random steps or smoothed random steps Arturia - User Manual MiniBrute 2 - Basics of synthesis...
- Page 55 Now play a note and hold it. The sound will start quickly and be very bright, but the harmonic content will be reduced gradually until the sound is very faint again. The decay time of the filter envelope makes a major contribution to the character of a sound. Arturia - User Manual MiniBrute 2 - Basics of synthesis...
- Page 56 AD Decay stage upon the release of the note, the ADSR Release stage will not be heard because the sound itself is no longer audible. Arturia - User Manual MiniBrute 2 - Basics of synthesis...
- Page 57 Raise the AD Attack slider to about 3/4 of the way up Now play a note and hold it while listening carefully. The sound will fade in gradually but its harmonic content will remain constant throughout the change in amplitude. Arturia - User Manual MiniBrute 2 - Basics of synthesis...
-
Page 58: The Patch Bay
(AMP), and the two jacks on the route signals to/ from the Inverter circuit. We'll cover the function of each section of the patch bay later in this chapter. Arturia - User Manual MiniBrute 2 - The Patch bay... - Page 59 Fortunately, we have provided two sets of Attenuators in the patch bay for this purpose. We'll describe how to use the Attenuators [p.71] in that section of the manual. Arturia - User Manual MiniBrute 2 - The Patch bay...
- Page 60 VCO 1 Pitch jack it will break this connection and tell VCO 1 to expect its modulation signals to come from another source such as an LFO or the output of an envelope. Arturia - User Manual MiniBrute 2 - The Patch bay...
- Page 61 A wide range of options is available; see the MCC [p.109] chapter for more information. 7.1.5.1. Control voltage inputs Some labels reveal the default control voltages the MiniBrute 2 is using internally: Arturia - User Manual MiniBrute 2 - The Patch bay...
- Page 62 For example, for the VCA section's CV input and the ATTENUATOR section's Att 2 input, the pre-wired control is the internal +5V source of the MiniBrute 2. But you can patch any control voltage standard into the patch bay here (1V, 2V, 5V, 8V, etc.). Arturia - User Manual MiniBrute 2 - The Patch bay...
-
Page 63: The Vco 1 Section
To hear PWM it is necessary to have the PWM knob in the VCO 1 section of the top panel set to a non-zero value. The Square wave slider in the OSC MIXER section must also be set high enough. Arturia - User Manual MiniBrute 2 - The Patch bay... - Page 64 Remember: the Metalizer knob sets the initial amount of the Metalizer effect, and the Metal Mod knob determines how much modulation of that amount will occur. Arturia - User Manual MiniBrute 2 - The Patch bay...
- Page 65 Here's roughly how the patch should look. We've omitted the LFOs and other irrelevant settings: Hard Sync example patch Now play some low notes. You should hear a recognizable sync sweep. Arturia - User Manual MiniBrute 2 - The Patch bay...
- Page 66 ATTENUATORS section: Out 1 to VCO 1 section: Lin FM (In) • FILTER section: Connect one end of a cable into the Cutoff input to break the pre- wired Att 1 connection The patch bay should look like this: Arturia - User Manual MiniBrute 2 - The Patch bay...
- Page 67 This jack provides the full-strength output of the VCO 1 Sawtooth waveform. The setting of the Sawtooth slider in the OSC MIXER has no effect on this connector. To control its level, route it through one of the Attenuator [p.71] pairs. Arturia - User Manual MiniBrute 2 - The Patch bay...
-
Page 68: The Vco 2 Section
This jack provides the full-strength output of the selected VCO 2 waveform. The setting of the Osc 2 slider in the OSC MIXER has no effect on this connector. To control its level, route it through one of the Attenuator [p.71] pairs. Arturia - User Manual MiniBrute 2 - The Patch bay... -
Page 69: The Ext In Section
Play a note • Send a trigger to one of the MiniBrute 2 envelopes (AD Trig input or ADSR Trig input) • Open the Amplifier with the Att 2 > Amp knob. Arturia - User Manual MiniBrute 2 - The Patch bay... -
Page 70: The Filter Jacks
The Filter cutoff frequency can be modulated by any source that is patched into this connection. The depth of the modulation is controlled by the Att 1 > Cutoff knob in the Filter section. Arturia - User Manual MiniBrute 2 - The Patch bay... -
Page 71: The Amp Section
♪: In cases like the example above you may want to route the output of the LFO through one of the Attenuators first. This will help you to control the depth of the LFO modulation at the destination. Arturia - User Manual MiniBrute 2 - The Patch bay... -
Page 72: The Adsr Section
(e.g., VCO 1 FM), connect a cable from the Out jack to the input connector of that pararameter. You can also send that signal to an external device, such as the filter of another modular synthesizer. Arturia - User Manual MiniBrute 2 - The Patch bay... -
Page 73: The Ad Section
(Attack time) or cut it off suddenly (Decay time). If you want to use its stages to control a particular destination (internal or external), connect a cable from the Out jack to the input connector of destination parameter. Arturia - User Manual MiniBrute 2 - The Patch bay... -
Page 74: The Lfo 1&2 Section
7.10.2. LFO Out 2 This jack provides the full-strength output of the selected LFO 2 waveform. To control its level, route it through one of the Attenuator [p.71] pairs. Arturia - User Manual MiniBrute 2 - The Patch bay... -
Page 75: The Vca Section
This jack will output the combined signals of the In 1 and In 2 jacks at their raw input levels unless they are controlled by an input voltage at the CV jack. Arturia - User Manual MiniBrute 2 - The Patch bay... -
Page 76: The Attenuators Section
Patch the output of the signal you want to control into the In 1 jack and then use the Out 1 > Cutoff jack as the source for the desired destination parameter. To control the level of the modulation, use the Att 1 > Cutoff knob in the Filter section. Arturia - User Manual MiniBrute 2 - The Patch bay... - Page 77 Att 2 > Amp knob on the front panel. ♪: Read the Using the Attenuators [p.71] section for essential information about routing a signal through the Attenuators. Arturia - User Manual MiniBrute 2 - The Patch bay...
-
Page 78: The Sequencer Section
1step (Gate), 1step (Clock), 1pulse (Korg), 24ppq, or 48ppq. 7.13.2. Reset A trigger received at this connector will reset the sequence that is currently playing back to its beginning. Arturia - User Manual MiniBrute 2 - The Patch bay... - Page 79 Simply connect one TRS patch cable from the Sync jack of the master MiniBrute 2 to the Clock input of the slaved Arturia device (or vice versa) and the slave will start, pause, resume playback, and restart from the beginning whenever the master does.
- Page 80 If the Master unit is paused and then playback is resumed, the Reset input on the slave will not receive a Run/Reset trigger and the unit will continue to play from the middle of its sequence, not from the beginning. Arturia - User Manual MiniBrute 2 - The Patch bay...
-
Page 81: The Midi Section
Depending on how much modulation you want, it may be a good idea to run this output through one of the Attenuators so you can adjust the modulation amount to fit the desired pitch range. Arturia - User Manual MiniBrute 2 - The Patch bay... - Page 82 When using the Mod jack in the patch bay you may want to set the Mod Dest switch to the Mod CV position instead of LFO 1 Vib. That way you can control the desired destination without also introducing vibrato as you move the Mod wheel upward. Arturia - User Manual MiniBrute 2 - The Patch bay...
-
Page 83: Seq / Arp: Shared Features
For a full explanation of these features, see the Sequencer [p.87] Arpeggiator [p.97] chapters. Arturia - User Manual MiniBrute 2 - Seq / Arp: shared features... -
Page 84: Timing Controls
The word "Hold" is printed in blue under the Tap/Rest button also. This is a secondary Arpeggiator function activated by the Shift button, and we'll describe it in the Hold mode [p.99] section. Arturia - User Manual MiniBrute 2 - Seq / Arp: shared features... -
Page 85: Transport Section
The Stop button has an additional function. If for some reason you end up with a stuck note, just press the Stop button quickly three times in a row. MiniBrute 2 will then send an All Notes Off command over USB and MIDI. Arturia - User Manual MiniBrute 2 - Seq / Arp: shared features... -
Page 86: Playback Functions
See the "Tie notes [p.90]" section of the Sequencer [p.87] chapter for information. ♪: Sequencer mode and Arpeggiator mode have independent Gate settings. Arturia - User Manual MiniBrute 2 - Seq / Arp: shared features... - Page 87 Here’s a graphic showing the minimum and maximum Swing values in musical notation: The extremes of the Swing setting ♪: Sequencer mode and Arpeggiator mode have independent Swing settings. Arturia - User Manual MiniBrute 2 - Seq / Arp: shared features...
- Page 88 Master Swing setting and the Time Division settings, it may be helpful to cut the master tempo in half or less temporarily. The Master Swing setting may be changed using the MIDI Control Center [p.109]. Arturia - User Manual MiniBrute 2 - Seq / Arp: shared features...
-
Page 89: Skip Selections: Seq / Arp
To restart a sequence or an arpeggio pattern from its beginning, hold the Shift button and press the Play/Pause button. ♪: We will cover the Shift functions [p.123] that are used during sequence creation in the Sequencer [p.87] chapter. Arturia - User Manual MiniBrute 2 - Seq / Arp: shared features... -
Page 90: Synchronization
Clock signals are sent to the Sync output. You can specify the clock output type with the MIDI Control Center [p.109] • The tempo can be set using the Rate knob and the Tap button. Arturia - User Manual MiniBrute 2 - Seq / Arp: shared features... - Page 91 You can use a MIDI cable to connect to devices which utilize MIDI clock sync messages. Check the owner’s manual for your device if you are not sure which sort of sync capabilities it has. Arturia - User Manual MiniBrute 2 - Seq / Arp: shared features...
-
Page 92: The Sequencer
Press the Play/Pause button and the sequence will start. Press it again to pause the sequence, and another time to resume playback from where you stopped. To start a sequence from the beginning, press the Stop button and then press Play again. Arturia - User Manual MiniBrute 2 - The Sequencer... -
Page 93: Transpose / Kbd Play
To activate Kbd Play mode, hold the Shift button and press the Oct+ button. It will flash and the Transpose button will go dark. Arturia - User Manual MiniBrute 2 - The Sequencer... -
Page 94: Creating A Sequence
The spaces that sometimes happen between notes are called “rests”. If you want to add rests while creating a sequence, MiniBrute 2 provides an easy way to do it. Take a look at the Tap / Rest button: Arturia - User Manual MiniBrute 2 - The Sequencer... - Page 95 If you want the note to be held longer, press Tap / Rest as many times as you need • Release the key • Repeat the process until you get the result you want. Arturia - User Manual MiniBrute 2 - The Sequencer...
- Page 96 “legato” response (voltage change without any gate events between the notes). Press Play to hear your sequence. A combination of tied notes and legato notes might sound something like this: An example sequence with tied notes and rests Arturia - User Manual MiniBrute 2 - The Sequencer...
- Page 97 All you have to do is hold the Shift button and press Play/Pause. You will hear the sequence jump immediately to its beginning. MiniBrute 2 will remain in Record mode, so when the proper step arrives, play the notes you want and they will replace the existing notes. Arturia - User Manual MiniBrute 2 - The Sequencer...
- Page 98 MiniBrute 2 sequencer and arpeggiator can be slaved to incoming clock data. ♪: The Gate time setting and Swing amount are stored individually per sequence. Arturia - User Manual MiniBrute 2 - The Sequencer...
- Page 99 You can also specify exactly what that value will be. See the MIDI Control Center [p.109] chapter 10 for more information about these features. Arturia - User Manual MiniBrute 2 - The Sequencer...
-
Page 100: Modifying A Sequence
♪: The Clear Last function does not undo the last recording you made; it shortens the sequence by removing the last step. Arturia - User Manual MiniBrute 2 - The Sequencer... -
Page 101: Saving Sequences
And once the sequences are safely stored on your computer it is possible to hand-pick sets of sequences that are aimed at particular audiences or sessions. See the MIDI Control Center [p.109] chapter for more information about how to use that software. Arturia - User Manual MiniBrute 2 - The Sequencer... -
Page 102: The Arpeggiator
16 notes [p.103] • Pause an arpeggio [p.104] in mid-stream and then resume the pattern • Hold [p.99] function ♪: The Record button is not active in Arp mode. Arturia - User Manual MiniBrute 2 - The Arpeggiator... -
Page 103: Basic Operations
♪: In order to hear the Arpeggiator you must first press the Play button before holding down the keys. The Arpeggiator will not play back any notes If you hold down the keys first and then press the Play button. Arturia - User Manual MiniBrute 2 - The Arpeggiator... - Page 104 The same rule applies with large arpeggios: once you release all of the keys the arpeggio you have constructed will continue to run until you play another note or chord. Arturia - User Manual MiniBrute 2 - The Arpeggiator...
-
Page 105: Arpeggiator Modes
With the Arp mode encoder set to Inc the arpeggiator will play the held notes in order from low to high, then from high to low, repeating the high note and low note. Arp Mode: Inclusive Arturia - User Manual MiniBrute 2 - The Arpeggiator... - Page 106 In the example below the notes were played in this order: Middle C, G, E, and higher C. The result is the following arpeggio: Arp Mode: Order Arturia - User Manual MiniBrute 2 - The Arpeggiator...
- Page 107 With the Arp mode encoder set to Dwn x2 the arpeggiator will play the held notes in order from the top to the bottom. But unlike the Dwn mode it will play each note twice before the next note plays. Arp Mode: Down x2 Arturia - User Manual MiniBrute 2 - The Arpeggiator...
-
Page 108: Build A Multi-Octave Arpeggio
♪: It’s possible to let go of the original note(s) at any stage in the process as long as you keep holding down at least one of the new notes you add. Arturia - User Manual MiniBrute 2 - The Arpeggiator... -
Page 109: Pausing An Arpeggio
Hold feature is On: You let go of all keys and play a new note • You press the Stop button. ♪: If you want to force the arpeggio pattern to start again from the beginning, hold the Shift button and press Play/Pause. Arturia - User Manual MiniBrute 2 - The Arpeggiator... -
Page 110: Introduction: The Midi Control Center
2 for your system. Use it to define the hardware response, the voltages and triggers that will be used, and the MIDI settings. It works with most of Arturia’s devices, so if you have an earlier version of the software you’ll want to download the latest version. - Page 111 Center will not launch. In order to use the MIDI Control Center to alter the parameters of your MiniBrute 2 you will need to exit the DAW application. Arturia - User Manual MiniBrute 2 - Introduction: the MIDI Control Center...
- Page 112 MIDI Device images and restart any connected devices. First you must disconnect any units or turn them off, or else you will not be able to delete the icons. Arturia - User Manual MiniBrute 2 - Introduction: the MIDI Control Center...
- Page 113 Center, such as ‘the Browser’ and ‘Template’. The next chapter explains how to use the MIDI Control Center software to configure the MiniBrute 2 to match your system and enhance your workflow. Arturia - User Manual MiniBrute 2 - Introduction: the MIDI Control Center...
-
Page 114: Midi Control Center
MCC, where it can be saved as a new Template. The Template will be named automatically with a date/time stamp, but you can give it a more descriptive name if you like. Arturia - User Manual MiniBrute 2 - MIDI Control Center... -
Page 115: Device Memories
The upper half of the Template Browser window contains a location called the Working Memory. It functions as a sort of ‘target’ onto which a group of sequences (i.e., Templates) can be dragged and then transmitted to the MiniBrute 2 internal memory. Arturia - User Manual MiniBrute 2 - MIDI Control Center... -
Page 116: Local Templates
12.3.0.1. Drag and drop It’s possible to drag a Template from the Template Browser onto the Working Memory. When you do, the sequences will be sent to the MiniBrute 2 internal memory. Arturia - User Manual MiniBrute 2 - MIDI Control Center... -
Page 117: Store To/Recall From
MIDI Control Center to back them up. To do that, click the Recall From button. A new file containing all eight sequences will appear in the Template Browser with the current time/date stamp for a name. You can rename it if you like. Arturia - User Manual MiniBrute 2 - MIDI Control Center... -
Page 118: Import/Export Device Settings
The Device Settings files carry the extension .MiniBrute2_ds. You can swap these files with other users or build a library of configurations for the different systems you encounter in different locations. Arturia - User Manual MiniBrute 2 - MIDI Control Center... -
Page 119: Data Entry
Editing a knob value To edit a parameter such as the Tempo Knob Mode, click its pull-down menu and make a selection: Selecting a pull-down menu option Arturia - User Manual MiniBrute 2 - MIDI Control Center... -
Page 120: Device Settings
Now let’s go through the parameters one at a time. 12.7.1.1. User Channel This sets the keyboard MIDI Channel. When this is changed, any parameter with its MIDI Channel set to "User" will also change its send/receive channel. Arturia - User Manual MiniBrute 2 - MIDI Control Center... - Page 121 12.7.1.10. Seq MIDI Out Port With this setting the MiniBrute 2 will know if you want the data generated by the sequencer to be sent to the USB port, the MIDI Output, or both. Arturia - User Manual MiniBrute 2 - MIDI Control Center...
- Page 122 • Jump: The tempo value will respond immediately when the Rate knob is turned. • Hook: The tempo will not change until the Rate knob passes through the current value. Arturia - User Manual MiniBrute 2 - MIDI Control Center...
- Page 123 This parameter allows you to select how quickly the metronome will count. If your tempo is slow, a higher resolution may be preferred. If your tempo is fast, a lower resolution such as 1/4 might be best. Arturia - User Manual MiniBrute 2 - MIDI Control Center...
- Page 124 The cycle of the LFO 1 waveform will be reset when a note is triggered if this parameter is set to Enable. Otherwise it will run freely, and when a note is played the LFO waveform could be at any point in its cycle. Arturia - User Manual MiniBrute 2 - MIDI Control Center...
- Page 125 The Center pitch decides which incoming note means “don’t transpose”. The default value is MIDI note #60, or C3. So for example, an incoming C3 won't transpose the sequence, but an incoming D3 will transpose the sequence +2, etc. Arturia - User Manual MiniBrute 2 - MIDI Control Center...
- Page 126 12.7.4.3. Velocity Range This determines the change in voltage that will be generated by the full velocity range of the keyboard. It affects the Velo patch bay jack. Arturia - User Manual MiniBrute 2 - MIDI Control Center...
- Page 127 Play CC 0-127 Full MIDI range ♪: The “User” value allows the MIDI channel of that parameter to change automatically whenever the MIDI channel of the keyboard is changed. Arturia - User Manual MiniBrute 2 - MIDI Control Center...
-
Page 128: Shift Functions
Retrig mode will restart the envelopes from their Attack stages unless a cable is plugged into one of the Trig inputs [p.67] in the patch bay [p.53]. Arturia - User Manual MiniBrute 2 - Shift functions... -
Page 129: Shift + Keys 18-19
13.12. SHIFT + Tap / Rest (Arp mode only) Toggles Hold mode [p.99] on and off for the Arpeggiator. When on, notes the arpeggiator is playing will continue to play after the keys have been released. Arturia - User Manual MiniBrute 2 - Shift functions... -
Page 130: Shift + Time Div Encoder
[p.84]. Instructs the Sequencer and the Arpeggiator not to change the Time Division until the Shift button is released. This makes it possible to select non-adjacent Time Division settings without having to pass through the settings between them. Arturia - User Manual MiniBrute 2 - Shift functions... -
Page 131: Declaration Of Conformity
Important notice: DO NOT MODIFY THE UNIT! This product, when installed as indicate in the instructions contained in this manual, meets FCC requirement. Modifications not expressly approved by Arturia may avoid your authority, granted by the FCC, to use the product.
Need help?
Do you have a question about the minibrute 2 series and is the answer not in the manual?
Questions and answers