
Related Manuals for Mira SILVER


Summary of Contents for Mira SILVER
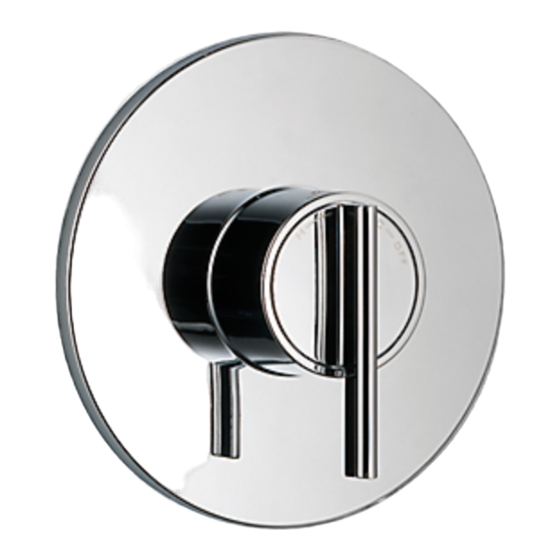
- Page 1 For SPARES, ADVICE or REPAIRS Please call us on 0844 571 5000 (UK Only) MIRA SILVER THERMOSTATIC MIXER Installation and User Guide These instructions must be left with the user.
-
Page 2: Table Of Contents
CONTENTS Introduction ..................... 3 Guarantee .................... 4 Patents and Design Registration ............4 Safety : Warnings ..................5 Pack Contents ..................7 Dimensions ....................9 Specifications ..................10 Operating Parameters ................ 10 Installation Requirements ..............12 Installation ..................... 14 General ....................14 Installation Methods ................ -
Page 3: Introduction
INTRODUCTION Thank you for purchasing a quality Mira product. To enjoy the full potential of your new product, please take time to read this guide thoroughly, having done so, keep it handy for future reference. The Mira Silver Thermostatic Mixer is a Thermostatic Shower Control with a single control lever for on/off and temperature control. -
Page 4: Guarantee
Guarantee For domestic installations, Mira Showers guarantee the Mira Silver Thermostatic Mixer against any defect in materials or workmanship for a period of five years from the date of purchase. For non-domestic installations, Mira Showers guarantee the Mira Silver Thermostatic Mixer against any defect in materials or workmanship for a period of five years from the date of purchase. -
Page 5: Safety : Warnings
SAFETY : WARNINGS This Mira Silver Thermostatic Mixer is precision engineered and should give continued safe and controlled performance, provided: It is installed, commissioned, operated and maintained in accordance with manufacturer’s recommendations. Periodic attention is given, when necessary, to maintain the product in good functional order. - Page 6 10. The plumbing installation must comply with the requirements of UK Water Regulations/Bye-laws (Scotland), Building Regulations or any particular regulations and practices, specified by the local water supplier. The installation should be carried out by a plumber or contractor who is registered or is a member of an association such as: Institute of Plumbing (IOP), throughout the UK.
-
Page 7: Pack Contents
PACK CONTENTS Tick the appropriate boxes to familiarize yourself with the part names and to confirm that the parts are included. Exposed Silver Thermostatic Mixer 1 x Mira Silver Thermostatic Mixer 2 x Wall Plugs 2 x Concealing Plates 2 x No. 8 x 1 ¼”... - Page 8 Built-in Silver Thermostatic Mixer 1 x Mira Silver Thermostatic Mixer 1 x Control Assembly (attached to the Building-in Shroud) 3 x Compression Nuts 1 x ‘O’ Key 3 x Olives 2 x Wall Plugs 1 x 12 L/Min Flow Regulator 2 x No.
-
Page 9: Dimensions
DIMENSIONS Exposed Silver Thermostatic Mixer Ø70 Ø56 Built-in Silver Thermostatic Mixer 67 - 85 Ø183 Building-in Depth All dimensions in mm. -
Page 10: Specifications
SPECIFICATIONS Operating Parameters For Type 2 Valves, the supply conditions specified in the TMV2 Requirements Manual take precedence over the operating parameters which follow. Pressures Maximum Static Pressure: 10 Bar. Maximum Maintained Pressure: 5 Bar. Minimum Maintained Pressure (Gas Water Heater): 1.0 Bar. (for optimum performance supplies should be nominally equal). - Page 11 Do not fit flow regulators in TMV2 applications. Flow Rates Typical Flow Rates on Low Pressure Systems (0.1 Bar to 1 Bar) - Mira Silver with L10 Adjustable Fittings or Rigid Head: Typical Flow Rates on High Pressure Systems (1 Bar to 5 Bar, with 12 Litre/Min Flow...
-
Page 12: Installation Requirements
Tempering Valve Overflow Indicator Mini Expansion Vessel Pressure Reducing Valve The Mira Silver Thermostatic Mixer is compatible with the following systems: Gravity fed system The Thermostatic Mixer MUST be fed from a cold water cistern and hot water cylinder providing nominally equal pressure. - Page 13 Unvented mains pressure system The Thermostatic Mixer can be installed with a unvented, stored hot water cylinder. Note! We recommend the use of a 12 L/Min Outlet Flow Regulator (supplied). Mains pressurised instantaneous hot water system (thermal store) The Thermostatic Mixer can be installed with systems of this type with balanced pressures.
-
Page 14: Installation
INSTALLATION General Installation must be carried out in accordance with these instructions, and must be conducted by designated, qualified and competent personnel. The installation must comply with the “Water Supply Regulations 1999 (Water Fittings)” or any particular regulations and practices, specified by the local water company or water undertakers. -
Page 15: Installation Methods
Installation Methods Rear Entry Supplies Exposed Silver Thermostatic Mixer The Exposed Silver Mixer can be installed with rear, rising or falling supply inlets. For rear entry supplies, go to section: ‘Exposed Thermostatic Mixer, 1. Rear Entry Supplies’. Rising or Falling Supplies For rising or falling supplies, go to section: ‘Exposed Thermostatic Mixer, 2. -
Page 16: Exposed Thermostatic Mixer
Exposed Thermostatic Mixer 1. Rear Entry Supplies (rising or falling concealed pipework) 1.1 Use the Installation Template to mark the positions of the holes for the Backplate and the pipe centres. Note! Allow a minimum of 150 mm either side of the Mixer, to allow access to the hot and cold Inlet Filters for servicing. - Page 17 1.6 Loosen the Grubscrew with the 2.5 mm Hexagon Key (supplied) and remove the Backplate from the Mixer. 1.7 Secure the Backplate to the wall using the Screws (supplied). 1.8 Fit the Concealing Plates. Note! Apply silicone sealant to the back face of the flange. Caution! It is essential at this point that the supply pipework is thoroughly flushed through before connection to the Mixer.
-
Page 18: Rising Or Falling Supplies
2. Rising or Falling Supplies 2.1 Loosen the Grubscrew on each Elbow using the 2.5 mm Hexagon Key (supplied) and rotate the Elbow 90° as required. Retighten the Grubscrews. 2.2 Use the Installation Template to mark the positions of the fixing holes for the Backplate. - Page 19 2.5 Fit the supply pipework (Hot - Left, Cold - Right). Note! If the connections are reversed, complete the installation then refer to section: ‘Reversed Inlet Supplies’ before commissioning. Cold 2.6 Loosen the Grubscrew with the 2.5 mm Hexagon Key (supplied) and remove the Backplate from the Mixer.
-
Page 20: Built-In Thermostatic Mixer
Built-in Thermostatic Mixer 1. Solid Wall or Stud Partition (Using Securing Brackets - Mounting on Front Face of Wall) 1.1 Determine the route for the hot and cold supply pipework and for the outlet pipework. When connecting to the BIV Shower Fittings it is recommended that the outlet be positioned above and to one side of the Mixer. - Page 21 1.7 Remove the plasterboard and/or Countersunk Fixing Hole brick work to a minimum depth of 62 mm. Rotate for Suitable Fixing Point 1.8 Fit the Securing Brackets to the Mixer Backplate with the Bracket Securing Screws. Securing Hole Important! Make sure that the correct holes are used, otherwise the Backplate cannot be fitted.
- Page 22 1.15 Attach the Building-in Shroud to the Mixer using the two Shroud Screws removed earlier. Minimum finished wall surface 1.16 Using the ‘Finished Wall Indicator’ Finished Wall F9802 on the Building-in Shroud as a guide, finish the wall, e.g. tiles. Caution! Make sure that the finished Maximum finished wall is within the maximum and...
-
Page 23: Solid Wall Or Stud Partition (Using Rear Fixing Points On The Thermostatic Mixer)
2. Solid Wall or Stud Partition (Using Rear Fixing Points on the Thermostatic Mixer) 2.1 Refer to section: ‘1. Solid Wall or Finished Wall Stud Partition (Using Securing Surface Brackets - Mounting off Front Face of Wall)’ and follow steps 1.1 to 1.4. - Page 24 2.3 Make sure that the Mixer is level and central in the hole, and square to the Outlet Pipe to Fittings finished wall surface (or the control components will not fit correctly), then mark the positions of the Fixing Screw holes on the wall. 2.4 For solid walls drill two 6 mm holes for the Wall Plugs.
-
Page 25: Laminated Panel
3. Laminated Panel (Using Securing Brackets - Mounting on Rear Face of Wall) Note! For laminated panels the Mixer must be positioned from the rear of the panel. Panel thickness must be between 4 and 12 mm (if a thicker panel is used, it will be necessary to recess the Securing Brackets into the rear of the panel). - Page 26 3.6 Drill the two 5.5 mm holes for the fixing positions (countersink the holes at the front). 3.7 S e c u r e t h e M i x e r w i t h t h e M5 x 40 screws as shown. 3.8 Fit the hot and cold supply pipes (hot - left, cold - right) and tighten the compression nuts.
-
Page 27: Control Assembly (Built-In Models)
Control Assembly (Built-in Models) Loosen the Control Lever Grubscrew (by approximately 4 turns) with the 2.5 mm Hexagon Key (supplied) and pull off the Control Lever and Bearing. Carefully unclip the Concealing Plate from the Backplate. Note! Use a screwdriver in the cutout to assist separation. Align the slots in the Backplate with the lugs on the Hub (refer to illustration), and fit the Backplate to the Mixer. -
Page 28: Reversed Inlet Supplies
REVERSED INLET SUPPLIES The Mira Silver Thermostatic Mixer is supplied with inlet connections Hot - Left, Cold - Right as standard. If the hot and cold water supply pipes have been reversed during installation the Thermostatic Cartridge must be removed and rotated 180°. - Page 29 Built-in Models Cartridge Seal Shroud Screws Concealing Plate Bearing Backplate Cutout Grubscrew Exposed Models Body Slot Hexagon Key Cartridge Removal Socket ‘O’ Key Bearing Control Lever Cartridge Seal Hexagon Key...
-
Page 30: Operation
OPERATION The Mira Silver Thermostatic Mixer is a Thermostatic Shower Control with a Single Sequential Control Lever for on/off and temperature control. The Control Lever operates anti-clockwise in the following sequence: Maximum Preset Temperature Cold Warm Maximum Preset Temperature... -
Page 31: Commissioning
COMMISSIONING Maximum Temperature Setting Before using the Shower the maximum temperature must be checked to make sure that it is at a safe level. It has been preset to approximately 43°C at the factory but due to variations in site conditions the maximum temperature may need adjustment. Note! Make sure that the hot water temperature is at least 55°C and that there is sufficient supply. -
Page 32: Fault Diagnosis
(refer to ‘Specifications’). Fit flow regulator (supplied) to shower valve outlet. For more information contact Mira Showers or visit the website. Refer to symptom 4. above. Water leaking from Normal for a short period after shut off. -
Page 33: Maintenance
Periodic attention is given, when necessary, to maintain the product in good functional order. The Mira Silver Thermostatic Mixer is designed for the minimum of maintenance in normal use. The only serviceable parts are the inlet filters which should be checked and cleaned every 12 months. - Page 34 Inlet Filters The Inlet Filters should be checked and cleaned as necessary every 12 months. Note! The Inlet Filters must not be removed except for cleaning. If the Thermostatic Mixer is operated without the Inlet Filters fitted the Warranty on the product will be void.
- Page 35 Built-in Models Note! Refer to illustrations in section: ‘Control Assembly (Built-in Models)’. Isolate the hot and cold water supplies and operate the Control Lever to drain any residual water. Loosen the Control Lever Grubscrew (by approximately 4 turns) with the 2.5 mm Hexagon Key (supplied) and pull off the Control Lever and Bearing.
-
Page 36: Spare Parts
SPARE PARTS Exposed Silver Thermostatic Mixer 1062470 Seal Pack (identified ‘A’) 1062471 Component Pack 1062472 Elbow Cap 1062473 Elbow Assembly 1062474 Cartridge Assembly 1062476 Backplate 1062477 Filter Pack (x 2) 1062478 Elbow Connector Pack 1062479 Outlet Connector Pack 1063660 Screw Pack (identified ‘B’) - Page 37 Built-in Silver Thermostatic Mixer 1062474 Cartridge Assembly 1063671 ‘O’ Key 1595.067 Screw Pack (identified ‘A’) 1595.070 Component Pack 1595.149 Outlet Connector Pack 1595.283 Building-in Shroud 1609.046 Filter Pack (x 2) 1617.196 Hub Pack 1628.110 Bearing 1628.111 Control Lever 1628.113 Concealing Plate Assembly 1609.046...
-
Page 38: Accessories
ACCESSORIES Genuine Mira accessories can be purchased direct from Customers Services (our contact details can be found on the back cover of this guide) or from approved stockists or merchants. Eco Showerhead Everclear Showerhead Logic Showerhead Holder White - 2.1668.001 White - 2.1616.030... -
Page 39: Notes
NOTES... -
Page 40: Customer Service
The product must be installed and maintained in Spares and Accessories - We hold the largest accordance with the instructions given in this user stocks of genuine Mira spares and accessories. guide. Contact us for a price or visit our website to...
Need help?
Do you have a question about the SILVER and is the answer not in the manual?
Questions and answers