Table of Contents
Advertisement
Advertisement
Table of Contents

Related Manuals for Point Mobile PM60


Summary of Contents for Point Mobile PM60
- Page 1 POINT MOBILE CO., LTD. B-9F, Kabul Great Valley, 32, Digital-Ro 9Gil Geumcheon-gu, Seoul, Korea 153-709 www.Pointmobile.co.kr Model : Originator : Version : Dept. Date : PM60 with Android Jinny Cho PC/PE/ID/PM/QA March 12 , 2015 PM60 Android User Manual...
-
Page 2: Table Of Contents
CONTENTS 1. INTRODUCTION ················································································· 2 About the PM60 Handy Terminal ····························································· 6 Accessories ·························································································· 6 2. SAFETY REGULATIONS HW ·································································· 7 2.1. General Safety Rules ······································································ 7 2.2. Power Supply ·············································································· 8 2.3. Laser Safety ················································································ 9 2.4. LED Safety ················································································ 10 2.5. - Page 3 Suspend Mode ··········································································· 38 4.21. Memory Allocation ······································································· 38 4.22. Care and Cleaning of the Products ··················································· 38 4.23. PM60 Technical Specifications ························································ 38 5. USING THE KEYPAD ···········································································40 5.1. Numeric Keypad Layout ································································ 40 5.2. Navigation Keys ·········································································· 40 5.3.
- Page 4 8. USING SCANWEDGE ··········································································49 8.1. Overview ·················································································· 49 8.2. Enabling ScanWedge ··································································· 49 9. USING CONTROL PANEL ·····································································50 9.1. Settings ··················································································· 50 9.2. Program Buttons Settings ······························································ 64 9.3. NoNaviBar ················································································ 65 9.4. NoSIP ······················································································ 65 10. COMMUNICATION ·············································································65 10.1. Communication Options ································································...
-
Page 5: Introduction
This manual generally provides you with the safety information and basic features and operations of the PM60 device. Please read all safety precautions and this manual carefully before using your handy terminals and peripherals to ensure safe and proper use. -
Page 6: About The Pm60 Handy Terminal
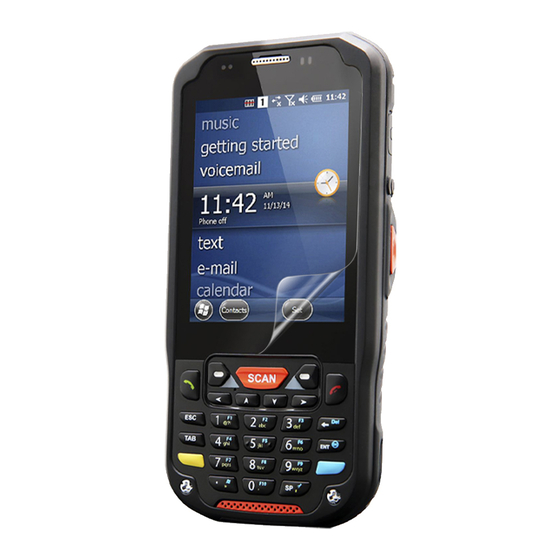
About the PM60 Handy Terminal The new PM60 is the latest generation handy terminal device, combining a pocket sized rugged form factor built on Android 4.2.2(Jelly Bean) operation system. The PM60 is designed for retail warehousing and logistics applications where maximum performance and durability is required in compact Pointmobile device. -
Page 7: Safety Regulations Hw
Use only the components supplied by the manufacturer for the specific PM60 being used. Do not attempt to disassemble the PM60 handy terminal, as it does not contain parts that can be repaired by the user. Any tampering will invalidate the warranty. -
Page 8: Power Supply
Ne tentez pas de démonter le PM60. Ce produit ne contient aucune pièce ne pouvant être réparée par l'utilisateur. Toute manipulation fera perdre la garantie au produit. Lors du remplacement de la batterie ou en fin de vie du terminal portatif PM60, l'élimination et le recyclage doit être effectuée en conformité avec les lois en vigueur dans votre pays. -
Page 9: Laser Safety
If the above laser light label is attached to your device, it indicates the product contains a laser engine or laser aimer that emits the laser light. The following information is provided to comply with the rules imposed by international authorities and refers to the correct use of PM60 handy terminal. -
Page 10: Led Safety
Pursuant to part 15 of the FCC Rules, you are cautioned that changes or modifications not expressly approved by Pointmobile could void your authority to operate the PM60 handy terminal. This device complies with part 15 of the FCC Rules. Operation is subject to the following two conditions: (1) This device may not cause harmful interference, and (2) this device must accept any interference received, including interference that may cause undesired operation. -
Page 11: Radio Compliance
. Radio Compliance 2.8. PM60 RF terminals are in conformity with all essential requirements of the R&TTE Directive (1999/5/EC). This device is marked with in accordance with the Class II product requirements specified in the R&TTE Directive, 1999/5/EC. The device is intended for use throughout the European Community;... -
Page 12: Weee Compliance
.The TYPE field shows the correspondence between PM60 types and radio modules: HSPA+ HSPA+, or Evolved High-Speed Packet Access, is a technical standard for wireless, broadband telecommunication. HSPA+ enhances the widely used WCDMA (UMTS) based 3G networks with higher speeds for the end user. - Page 13 Rib of hanging Battery door lock Up 2. Insert the battery well with the battery cells facing top. 3. Replace the battery door to start from bottom to top door’s lock downwards.
-
Page 14: Charge The Batteries
☞ NOTE: Two points of Battery guide stopper must be pertinently inserted to rear cover battery guide stopper hole ☞ NOTE: The battery door must be installed prior to booting the unit. WARNING: Use only Pointmobile-approved Li-Ion battery packs. Unauthorized battery may result in damage not covered by the warranty. -
Page 15: Led Indicators
doivent être impérativement séchés avant la connexion à une source d'alimentation externe. Les batteries doivent être chargées à une température allant de 0~45°C (± 3°C). Le non-respect de ces recommandations pourrait avoir un effet néfaste sur la durée de vie de la batterie. CAUTION: After the battery has been charged, disconnect the DC Power Jack from the terminal. - Page 16 WARNING: DO NOT attempt to charge damp/wet handy terminals or batteries. All components must be dry before connecting to an external power source. AVERTISSEMENT : NE PAS tenter de recharger les terminaux ou les batteries encore humides lorsqu’ils ont été mouillés. Tous les composants doivent être impérativement séchés avant la connexion à...
- Page 17 WARNING Do not short-circuit the battery pack contacts connecting the positive terminal and negative terminal. This might happen, for example, when you carry a spare battery pack in your pocket or purse; accidental short–circuiting can occur when a metallic object such as a coin, clip, or pen causes direct connection of the contacts of the battery pack (these look like metal strips on the battery pack).
-
Page 18: Boot The Terminal And Access The Home Screen
3.5.1. The First Screen The first time you power up the PM60 terminal, a [Make yourself at home] screen appears after the boot process is finished. After the initial OK button is touched the Home Screen appears. -
Page 19: Status Bar
Notification/Status Bar Search Bar Tools App Folder Home Screen Panel Swipe left or right with your finger to scroll Demos App Folder between five Home screen panels. Personalize the panels with your choice of app shortcuts, folders, and widgets. Favourites Tray (Content is model dependent.) Navigation Bar hone App Shortcut... - Page 20 Common Status and Notification Icons Icon Meaning Note: Status and notification icons are hardware and software dependent. Some of the icons listed below may not be relevant for your PM60 model. Open notification panel to see additional Sound is turned off notifications...
-
Page 21: Quick Settings
Icon Meaning Downloading data Ethernet status - disconnected Download finished Ethernet status - connected Synchronizing data Music player active Error with sync or sign-in Call in progress The terminal could not synchronize data with Call in progress using a headset with Bluetooth the computer technology GPS is turned on... -
Page 22: Search Bar
Quick Settings List Icon When touch Note: Status and notification icons are hardware and software dependent. Some of the icons listed below may not be relevant for your PM60 model. Brightness settings is opened. Settings is opened. Wi-Fi Connector is opened. -
Page 23: Turning Power On/Off
To add a widget: 1. Touch All Apps 2. Select the Widget tab. 3. Touch and hold the widget you want to add. The terminal vibrates and switches to the Home screen. 4. Drag and drop the widget into the desired position. To remove/delete an item: 1. -
Page 24: Using The Stylus
1. Press and release the Power button to toggle the terminal in or out of Suspend mode. ☞ NOTE: If the Power key setting has been turned off (disabled), pressing and releasing the key has no effect. 2. Drag the to the any direction ☞... -
Page 25: Get To Know Your Device
If Settings > Security > Unknown sources is checked on the check box, please skip no. 4.5 4. Get to Know Your Device Feature of Your Device 4.1. The following list outlines a few of the feature included in your device. PM60 Handy Terminal 4.2. Operating Systems: Android 4.2.2(Jelly Bean) Micro Processor: Cortex-A8 1GHz ... -
Page 26: Front Panel Layout
• 1D engine: N4313 • 2D engine: N560X Battery: Li-ion battery, 3.7V/4000mAh/14.8Wh IP65 certified enclosures Audio: Integral Microphone, Earpiece, Loud, Speaker, 3.5pi 4pole Jack for Ear-Mic headset BT: Bluetooth Radio 2.1+EDR with Internal Antenna WLAN: 802.11 b/g/n Radio with Internal Antenna ... -
Page 27: Led Indicator
LED Indicator Shows the information needed to operate your device as follows: Note: The LED is user-programmable. LED Color Meaning LED Color Meaning Lights when main battery is charging. Blinks, when the battery is very low (<10%), Lights when the battery is low (<20%), Blinks as Red/ Green by turns when it is no battery or not recognized Green Lights, when the PDA resets... -
Page 28: Display
Display Touch All Apps > Settings > Display from the screen to set the touch screen Brightness level, Turn on keyboard backlight on or off, Wallpaper, turn Auto-rotate screen on or off, adjust the touch Screen timeout settings, set the on display Wakeup Source, set the on screen Font size, and enable or disable some Power button functions. - Page 29 ☞ NOTE: To reposition the screen protector, lift up gently and reapply. 5. Yellow tag with cover film: “Please peel off this mask after application completed. 6. Press gently but firmly. Use the card a necessary to smooth out any air pockets or bumps after alloation...
-
Page 30: Back Panel Layout
Press the Power key to weak the terminal and check the touch panel with the stylus. Verify that the screen accepts input from the stylus as usual. If not, re-apply the screen protector. Press the Power key to put the terminal back in suspend mode. 10. -
Page 31: Left Side Panel Layout
Hand strap The HANDY TERMINAL comes with Hand strap. You can attach it to the device. Finger Saddle This is a slightly depressed and angled area of the back housing that is designed to cradle or “saddle” your finger while holding the terminal. This unique ergonomic design makes the terminal comfortable to hold and helps prevent you from accidentally dropping the terminal. -
Page 32: Right Side Panel Layout
1. Press the Power key to put the terminal in Suspend Mode; see Suspend Mode on paragraph 4.20. 2. Remove the battery door on the back of the unit. 3. Remove the battery and open 4. Insert the SD card with the label facing upward. ☞... -
Page 33: Bottom Panel Layout
4.11 Top Panel Layout Image engine window (with engine) Image Engine Window The angled image engine reads and decodes most popular bar code symbolizes. For more information, see Using the Image Engine on paragraph 6. 4.12 Bottom Panel Layout I/O connector USB port HandyLink Connector The HandyLink mechanical connector is designed to work exclusively with HANDY... -
Page 34: Peripherals And Accessories
The I/O connector supports the following signals: Pin Description Direction DC IN +5V DC IN +5V RS-232 Transmitted Data NC USB Host +5V Enable USB Host D+ IN/OUT USB Host D- IN/OUT USB Host Detect RS-232 Received Data NC CRADLE Detect USB Client D+ IN/OUT... -
Page 35: Li-Ion Battery Packs
The MicroUSB able is used when communicating between the terminal and a host computer to transfer data via the USB interface. 4.15 Li-ion Battery Packs The Li-ion battery pack provides the main power supply for the terminal. 4.16 Battery Power The intelligent battery technology inside the terminal features of battery power: •... -
Page 36: Managing Main Battery Power
charge the battery. • AC Power Supply to USB Port direct. • Single slot docking cradle/Single slot Ethernet cradle • Insert the battery in the spare battery charging well in the back of either the Handy Terminal slot cradle or Handy Terminal Ethernet cradle. Charging Time The standard capacity 4000mAh Li-ion battery pack requires five hours to charge to full capacity. -
Page 37: Resetting The Terminal
Touch to view History details Touch an item to view usage details and adjust power use. ☞ NOTE: Touch All Apps > Settings > Battery to display information the Main battery status and Backup battery status (charging or discharging), the level (percentage) of charge remaining on the battery, and a breakdown of battery usage statistics for any running apps and services. -
Page 38: Suspend Mode
4.22 Care and Cleaning of the Products When needed, clean the image engine window and the LCD display with a clean, non-abrasive, lint- free cloth. The terminal can be cleaned with a damp cloth. 4.23 PM60 Technical Specifications Model PM60 Operating System Android 4.2.2 (Jelly Bean) - Page 39 1D engine: N4313 Scan Engine 2D engine : N560x Keypad Numeric , Qwerty Audio Built-in microphone and speaker High speed USB 2.0 from cradle (or I/O cable) Battery Li-ion battery 3.7V / 4000 mAh / 14.8 Wh Expected Hours of 8.5+ hours (with scan and continuously transmitting if using new standard Li-ion battery) Operation Charging...
-
Page 40: Using The Keypad
1D Laser model: N4313 laser engine. Decodes all standard 1D codes. Scanner / Decode 2D engine model: N560X 2D Imager. Decodes all standard 1D, 2D, Postal, and OCR Capabilities codes. 5 Using the Keypad Numeric Keypad Layout Scan key Keyboard (29-key numeric) Navigation Keys Located in the center of the keypad for easy access with either hand, the navigation keys enable... -
Page 41: Alpha/Numeric Modes
Enter Performs the same function as the Enter key on a workstation. Power Suspends and resumes the terminal. Scan Activates the image engine to scan a bar code or take an image. Soft(Left/Right) Button move of Task Bar of bottom (Left/Right) Alpha/Numeric Modes The keypad defaults to numeric mode. -
Page 42: Program Buttons
Key Combination Function BLUE + 1 BLUE + 2 BLUE + 3 BLUE + 4 BLUE + 5 BLUE + 6 BLUE + 7 BLUE + 8 BLUE + 9 BLUE + 0 BLUE + SP Align the screen (Press ESC to exit) BLUE + . -
Page 43: Using The Image Engine
No Action No Action No Action No Action No Action No Action No Action No Action 6 Using the Image Engine Overview The HANDY TERMINAL contains an N560X 2D image engine that instantly reads all popular 1D and 2D bar codes and supports omni-directional aiming and decoding or a N4313 1D laser engine that reads all popular 1D bar codes. -
Page 44: Available Image Engines
☞ NOTE: Misreading may occur, if the bar code isn’t positioned correctly. Recommended scanner beam positions are as follows Available Image Engines The HANDY TERMINAL is equipped with an N560X. Depth of Field Depth of Field for N560X ☞ NOTE: Test Condition: Room Temperature (Approx. -
Page 45: Supported Bar Code Symbologies
Supported Bar Code Symbologies Symbology Type Symbology Name Codabar 1D Symbologies Code 11 Trioptic Code Code 128 Code 32 Pharmaceutical (PARAF) Code 39 Matrix 2 of 5 Code 93 / 93i Telepen EAN-8 GS1-128 EAN-13 ISBT 128 Interleaved 2 of 5 Straight 2 of 5 (Industrial) Reduced Space Symbology UPC-A (Coupon Code) -
Page 46: Decoding
engine: Image Demo and Scan Demo. To access these demos, tap All Apps -> Demos. • Select Scan Demo to verify decoding, or • Select Image Demo to verify imaging (not available on device using the N4313 laser engine). Decoding The Handy Terminal supports Full-area Imaging decode mode. -
Page 47: Capturing Images (It5300Sr Engine Only)
☞ NOTE: To achieve the best read, the aiming beam should be centered horizontally across the bar code. The aiming pattern is smaller when the terminal is held closer to the code and larger when the terminal is held farther from the code. Symbologies with smaller bars or elements (mil size) should be read closer to the unit whereas larger bars or elements (mil size) should be read farther from the unit. -
Page 48: Supported Bar Code Symbologies
Code 39 4 mil 5in / 12.7cm 5.4in / 13.8cm Code 39 5 mil 4.1in / 11.7cm 7.2in / 18.4cm Code 39 7.5 mil 4.1in / 10.4cm 10.7in / 27.4cm Cede 39 10 mil 3.4in / 8.7cm 14.5in / 36.9cm UPC 13 mil, 100% 1.9in / 4.7cm 16.8in / 42.8cm... -
Page 49: Sample Bar Code
3. Project the aiming beam by pressing and holding the Scan key. The Scan LED lights red 4. Center the aimer beam horizontally over the bar code and highlight all of the vertical bars of the bar code. The aiming pattern is smaller when the terminal is held closer to the code and larger when the terminal is held farther from the code. -
Page 50: Using Control Panel
9 Using Control Panel Settings Overview The Settings allows you to verify and/or alter system parameters to customized your terminal to meet your specific needs. Touch All Apps > Settings or pull down the notification 50panel, and then touch the quick settings icon next to touch Settings icon... - Page 51 Wireless & Networks Settings 9.1.1 Under the Wireless & Networks heading on the Settings screen there are options for turning the on board wireless radios in the terminal on or off and for configuring network connections. See 10.7.1. Wi-Fi Network Connections on page and 11.
-
Page 52: Mobile Networks
Virtual Private Networks (VPN) To complete the VPN setup screens, you may need to ask your ISP or network administrator for the proxy server name, server type, port, type of Socks protocol used, and your user name and password if you do not already have the information. Adding a VPN: 1. -
Page 53: Device Settings
☞ NOTE: The Access Point Name (APN) is the name for the settings your phone reads to set up a connection to the gateway between your carrier's cellular network and the public Internet. Device Settings 9.1.2 Sound Setting 9.1.2.1 Touch Sound from the Settings screen then select the configuration setting you want to modify. -
Page 54: Storage Settings
By default, the display automatically adjusts the orientation of the screen between landscape and portrait when the terminal is rotated. Touch the Auto-rotate screen checkbox to toggle the option on or off. Screen timeout The Screen timeout setting enables you to customize backlight functionality for the display. Select how many minutes or seconds you want to elapse before the backlight automatically turns off and the terminal enters Suspend mode (see page X-XX). - Page 55 Touch the tabs at the top of the Apps screen to view lists organized into three categories: Downloaded Displays all apps downloaded to the terminal. To sort the list, press the Menu button at the top of the screen, and then touch Sort by size or Sort by name or touch the Reset app preferences to reset of App environment setting.
- Page 56 To access the App info screen, touch the app name on the list displayed under the Downloaded tab on the Settings > Apps screen Uninstall Applications On the All Apps Please drag application on the Uninstall after putting for a second Uninstall 2.
- Page 57 Section Option Description Specifies the trigger time out in seconds. If a barcode is not Trigger timeout (sec) decoded within the specified timeout, the default Notifier indicates that decoding is failed Enable Auto Scan with specified Enable Auto Scan interval. Auto Scan interval (sec) Set Auto Scan interval time.
-
Page 58: Factory Default
If enabled Set vibration time after Good read - Turn on LED for good/bad good read. scan indicator Set vibration time after Bad read bad read. Enable to transmit predefined Barcode ID Transmit Barcode ID barcode ID in Detail tab Enter Prefix to be sent prior to Wedge Prefix... -
Page 59: Security Settings
Please on/off to let apps that have asked your permission use your location information. Security Settings 9.1.3.2 Touch Security from the Settings menu to manage terminal security parameters (e.g., authorization for device administration, setup a screen lock, setup a SIM card PIN, enable/disable visible passwords, load security certificates, and setup a password to protect the terminal's credential storage). -
Page 60: Device Administration
Touch the Make passwords visible checkbox to toggle between hiding or showing passwords as you type. Device Administration The Device administrators screen lists all applications that have been given authorization to act as a device administrator, which is often required when you set up accounts that synchronize data between the terminal and an enterprise service. - Page 61 Keyboard & Input Methods The enhanced Point Mobile virtual keyboard appears when you open an application or select a field that requires text or numerical input. The content of the keyboard may vary depending on the selected default, the application in use, and the input field requirements.
-
Page 62: Factory Data Reset
☞ NOTE: PM60 terminals are shipped from the factory configured to use the Android Keyboard(AOSP) as the default input method. Touch next to the keyboard name to adjust settings specific for the keyboard type (e.g., Keyboard Skin, Vibrate on Key Press, Sound on Key Press, Show Key Preview, Show Settings Key, and Input Language Preference). -
Page 63: System Settings
2. Touch Add acoount. 3. Touch the type of account to add. 4. Follow the on-screen instructions to enter the required information for the account type selected. You may need to provide a user name and password, select security settings, and configure data sync preferences during the setup. -
Page 64: Program Buttons Settings
Accessibility Settings 9.1.4.2 Touch Accessibility from the Settings screen to configure features that make using the terminal easier for people with certain physical disabilities. System System Under the heading on the Accessibility screen, additional options are available to enable or disable Large Text, speak passwords, or ending calls using the Power button . -
Page 65: Nonavibar
2. Chose its type: Default – button will be assigned default function. Application – click on Open button and select application to bind with this key. 3. To exit, press OK button. To apply, press Apply button. Define 9.2.2 Apply and Set the key which is already defined. NoNaviBar Hide / Show Navigation Bar Tap All Apps... -
Page 66: Communication Type
The MicroUSB connector on bottom side supports USB 2.0 High speed Wireless Radios (Wireless Communication) HANDY TERMINALs can be equipped with an 802.11b/g/n Bluetooth radio and WWAN. For more information, see Wireless Radios on paragraph 10.6. Communication Type 10.2 The HANDY TERMINAL supports the following type of communication via USB through its I/O connector on the bottom panel: The USB cable and hardware peripherals allow the Handy Terminal to communicate with a workstation through a USB port or to a network through a USB hub. -
Page 67: Exploring The Terminal From The Workstation
3. Phone (WWAN configuration): 3G WWAN HSPA+Module 4. GPS: Module inherent to HSPA+ Module ☞ NOTE: PM60 does not provide all Bluetooth profiles. Connecting the Terminal to a Wireless Network 10.7 You connect the terminal to a wireless network through the on-board radio (802.11b/g/n Bluetooth... - Page 68 and/or Phone). Each radio has its own configuration program and requires specific information about the wireless network to connect. Successful connection depends on your network infrastructure about which you will need specific information from your network administrator. ☞ NOTE: 802.11 b/g/n radio module is off by default, in order to avoid wasting energy, you can switch it off using the Wireless Communications applet ☞...
-
Page 69: Wlan (802.11B/G/N Radio)
Receiving Network Notifications If Wi-Fi networking is turned On, you can set the terminal to notify you when an open network is available. 1. Touch All Apps > Settings > Wi-Fi. 2. Press the Menu button on the bottom right, and then touch Advanced. 3. -
Page 70: Bluetooth Handler
802.11b/g/n, Wi-Fi compliant products including access points (APs), workstations via PC card adapters, and other wireless portable devices. By default, the 802.11b/g/n radio is powered-off (i.e., disabled) “out of the box” To power it on (i.e., enable), press the vertical arrow (bottom right corner of screen) and select Turn Wireless LAN On. -
Page 71: Pairing Bluetooth Devices
1. Tap All Apps > Settings > Bluetooth The Bluetooth Handler appears on the screen. 2. Tap Search for Devices button at the bottom. The available services of all devices / profiles in range display in the Bluetooth Handler. Pairing Bluetooth Devices 11.3 Connecting Bluetooth devices usually requires that they be paired;... -
Page 72: Power Supply
In addition to charging, the base powers the terminal’s intelligent battery charging system, which protects the battery from being damaged by overcharging. The terminal senses when a battery pack is fully charged and automatically turns off the charger. If the battery voltage drops below the charge threshold, the charger turns on again to maintain the battery at full capacity. -
Page 73: Powering The Single Slot Docking Cradle Or Single Slot Ethernet Cradle Device
DC power jack DC power jack USB port USB port Ethernet port DC Power Jack Connect the power cable to this power jack; see powering the Single Slot Cradle Device on paragraph 12.6. USB Port The USB port is full-speed (v2.0). Using the USB cable, you can connect the base to a USB- compliant device to facilitate USB communication to and from the terminal, see USB Communication on paragraph 10.4. -
Page 74: Charging Thebattery
1. Attach the appropriate plug adapter to the power adapter. 2. Plug the power cable into the power source. 3. Plug the connector into the DC power jack on the back panel. The base is now powered. When a terminal is properly seated, the base powers the terminal, charges the terminal’s main battery pack, and launches MTP (see USB Communication on paragraph 10.4). -
Page 75: Single Slot Docking Cradle/Single Slot Ethernet Cradle Device
Green: charged Status LED Red: charging Communication MicroUSB connector supports data transmission of up to 480Mbps OR Interface Ethernet 10/100BASE-T(support only PM60-SEC) Agency Approvals UL listed Power Supply TUV licensed Power Supply compliant to FCC part 15, Class B CE Marking (EMC) -
Page 76: Front Panel
charging, see Battery Charging on page 13-2. Power Supply 13.2 The power cable that ships with each charger WARNING: We recommend use of Pointmobile peripherals, power cables, and power adapters. Use of any non-Pointmobile peripherals, cables, or power adapters may cause damage not covered by the warranty. We recommend use of Pointmobile Li-Ion battery packs. -
Page 77: Back Panel
Back Panel 13.4 Charging LED DC power jack DC Power Jack Connect the power cable to this power jack; see powering the Single Slot Cradle Device on paragraph 12.6. Charging the Battery 13.5 The base powers the terminal and fully charges the battery pack in 5 hours depending on the battery. -
Page 78: Technical Specifications
Technical Specifications for 4-slot battery charger 13.6 Model 4SBC (4- Slot Battery Charger) Structural Dimensions 256mm(L) x 105mm(W) x 37mm(H) Weight 4- Slot Battery Charger - 434g Material Polycarbonate Color Black Environmental Operating Temperature -20° to 55°C Storage Temperature -25° to +70°C Charging Temperature 0~45℃... - Page 79 AC 100–240 Vac. Input (Universal) 50/60Hz 0.9A (from the power source) Included with Charger Output (to the cradle) DC 5V , 4A Charging Standard Charge Main battery: Standard Capacity:4000mAh (60-BTSC) – Approx. 5hours Green: charged Status LED Red: charging Agency Approvals UL listed Power Supply TUV licensed...
Need help?
Do you have a question about the PM60 and is the answer not in the manual?
Questions and answers