Sailmon E4 Installation Manual
Hide thumbs
Also See for E4:
- Installation manual (53 pages) ,
- Installation manual (50 pages) ,
- Installation manual (10 pages)
Table of Contents
Advertisement
Quick Links
Advertisement
Table of Contents

Related Manuals for Sailmon E4


Summary of Contents for Sailmon E4
- Page 1 SAIL M ON Installation Manual version 3.0 October 2017 SAIL M ON Page 1...
-
Page 2: Table Of Contents
1.4 E4 installation 1.4.1 Network installation 1.4.2 Sailmon Network Chapter 2 2.1 Software 2.1.1 Software download 2.1.2 Minimum system requirements 2.2 Using software to connect to E4 Chapter 3 3.1 Displays 3.1.1 product overview 3.1.2 Technical specifications Chapter 4 4.1 Sailmon components 4.1.1 Snet connector... - Page 3 Operation 4.1.5 LinearBox Installation 4.1.6 Loadcell Box Chapter 5 5.1 system set ups 5.1.1 B&G 5.1.3 Raymarine 5.1.4 Nexus 5.2 Troubleshooting 5.2.1 NMEA 2000 5.2.2 NMEA 2000 details FAQ. General Fastnet No Network detected Windbox SAIL M ON Page 3...
-
Page 4: Disclaimer
It is the user’s obligation and responsibility to comply with the standards of safe boat handling. Sailmon B.V. disclaims all liabilities for any use of this product in a way that may cause accidents, damage or that may violate the law. -
Page 5: About This Manual
About this Manual As Sailmon is continuously improving their products, we retain the right to make changes to our products at any time which may not be reflected in this version of the manual. This manual is exclusively for the installation of Sailmon products. We will not be responsible for any faulty installation. - Page 6 All Sailmon processors should be installed below decks in a dry location protected from water and moisture. Power Off Disclaimer When in standby mode, the E4 still consumes a little power. If you leave it for too long without shore power, it could drain the battery. Caution: Cleaning When cleaning this product: ●...
- Page 7 ● Do NOT wipe the display screen with a dirty or rough cloth, as this could scratch the screen coating. ● Do NOT use abrasive, acid or ammonia based products. ● Do NOT use a jet wash. SAIL M ON Page 7...
-
Page 8: Introduction
With more than six data compatibilities, it is the smartest and most advanced CPU on the market. Powered with either 12 or 24VDC it is possible to install the E4 nearly anywhere on board. With the use of WiFi, data is accessible everywhere. -
Page 9: Sailmon System Example
Sailmon system example SAIL M ON Page 9... - Page 10 GH2183 Airmar compass SAIL l ethernet box, converts Ethernet & power into Snet for displays Circuit breaker, For system protection Sailmon Element X displays, Landscape Model E4 processor Actisense DST - 2. Analogue transducer converter Analogue Depth - and Speed transducer SAIL...
-
Page 11: Product Overview
USB wifi dongle or on board access point. Due to its number of data ports, the E4 can be connected to almost any network or can be set up as a standalone CPU to run your Sailmon equipment. -
Page 12: Instrument Integration
1.1.2 Instrument Integration The E4 system can use a wide range of sensors based on NMEA, B&G, Nexus or Raymarine protocols. Sailmon can provide support for various other sensors via optional Sailmon boxes such as WindBox, LoadcellBox and LinearBox. The Sailmon E4 system is very flexible: ●... -
Page 13: Hardware Specifications
1.2 Hardware specifications 1.2.1 Power consumption The E4 will draw a maximum of 3 Watts at 12v. The E4 can be powered up to 30V Max. 1.2.2 Internal components The E4 is powered by a A9 dual core processor. 1.2.3 Dimensions SAIL... -
Page 14: E4 Port Connections
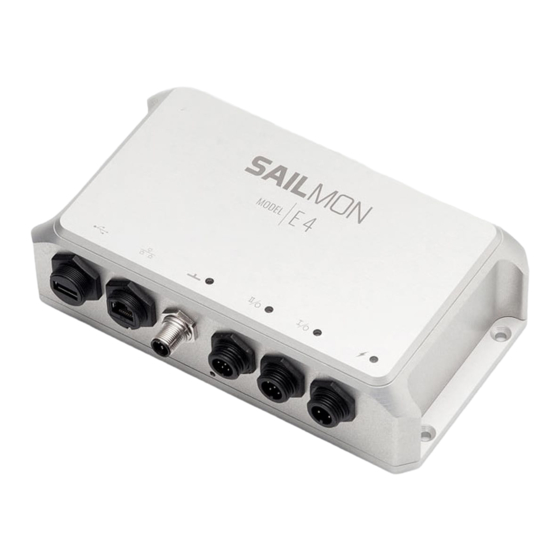
Figure 1.1 USB / Wifi For connecting USB WIFI Adaptor, to connect smart devices Ethernet Links laptop with Sailmon software or ship's network via a wired connection NMEA 2000 Connection for N2K backbone network Port II Connection between Sailmon and NMEA... -
Page 15: Led Status
1.3.0 Sensor connecting Port 1 & 2 are set in a default mode when the E4 is delivered to NMEA 0183. Each model E4 port must be set during commissioning using the Sailmon tool. Connect a PC to the E4 for setting the correct port option before connecting the cable to the port. - Page 16 E4 data will be mapped to the custom channels on the B&G display Seatalk Seatalk 1 can be connected through port I on the E4 using the 6 pin NMEA cable Seatalk NG can be connected with the use of a Seatalk NG to NMEA 2000 cable SAIL...
-
Page 17: System Architecture
1.3.2 System architecture The system architecture varies in practice on each boat. It is very important to have a clear overview of the architecture in which the E4 system is placed. Below are examples of possible architectures showing how Sailmon is implemented. - Page 18 Standalone with Sailmon X7 or X10 display: A Sailmon display can be connected using the SAILethernet and the ethernet port of the E4. The USB wifi adapter is still used, with a PC or Tablet used to configure the displays though navdesk.
- Page 19 ● NMEA 2000 Speed depth TX (optional) ● TP - Link USB dongle ● Two extra NMEA 2000 pieces More information about Sailmon displays can be found in chapter 3 Sailmon E4 processor and display upgrade / integration: Image 1.3 Example of Sailmon E4 integration SAIL...
-
Page 20: E4 Installation
Make sure the E4 is mounted in a dry and well ventilated area., the E4 is not designed to be watertight and should therefore not be in contact with water. Securely mount the E4 in the desired location and mount with four screws. -
Page 21: Network Installation
1.4.1 Network installation It is vital for good communication that all network cables are of good quality and are being used as designed . Ensure that all non sailmon products are in good condition and are fit for purpose. When connecting the E4 to a PC or tablet, several possibilities occur:... - Page 22 Wireless TP - link: With the USB port of the E4, there can be a USB / Wifi stick connection. This way, the E4 will create its own wireless network which can be detected by any wifi device SAIL...
- Page 23 4G Router One of the benefits of a separate router is the possibility to insert a 4G SIM card so you are able to connect to internet. Besides this, the wifi network can be used to view data on a tablet or smartphone.
-
Page 24: Sailmon Network
Sailmon can be deployed as a standalone as well, without a DHCP server on the network. In this case Zeroconf addressing is used. The Model E4 processor can be configured to provide a DHCP server, or act as simple Wifi access-point for convenience. - Page 25 Source of heartbeat broadcasts sent every 2 seconds by Sailmon devices. Heartbeats are required by every application to find the IP of the Sailmon server in an unknown network. Heartbeats are broadcast and sent to the Sailmon multicast group. Join the multicast group to receive them.
- Page 26 Source of Fastnet data output to the SBox ( SBox only) URLs and IP addresses Hardcoded IPv4 addresses 239.255.83.77 Sailmon Multicast Group (used instead of broadcasts) 192.168.4.1 E4 wired ethernet when DHCP server is enabled 192.168.5.1 E4 wireless interface when used as Access Point SAIL M ON Page 26...
-
Page 27: Software
Chapter 2 2.1 Software 2.1.1 Software download The Sailmon software can be downloaded from h ttp://www.sailmon.com/support-2/ Here you will find: ● Latest software releases ● Release notes ● Older software versions ● Manuals ● FAQ 2.1.2 Minimum system requirements MAC... -
Page 28: Using Software To Connect To E4
2. Power the Sailmon instruments 3. Connect your computer or smart device directly to the E4, this can be done using a ethernet cable, with a wifi stick or connect the E4 in to your existing boat network. 4. Open the apps to show data or use your system 5. -
Page 29: Displays
Casings are different shown by the Sailmon logo position. When installing a display it will need to be connected to the ethernet port of the E4. The SAILethernet is needed to combine both the data and power from the power supply and E4 to the display. - Page 30 SAIL M ON Page 30...
- Page 31 Element X Mounting Template SAIL M ON Page 31...
-
Page 32: Technical Specifications
3.1.2 Technical specifications Element VII ● Display size: 800 x 480 Pixels ● Display type: LED - Backlit LCD ● Brightness: 1000cd/ m2 ● Max brightness: min 0,3 / max 1000 nits ● Viewing angle: -85 + 85 degrees ● Maximum digit size: 9 cm SAIL... - Page 33 Element X ● Display size:1024 x 768 pixels ● Display type: LED - Backlit LCD ● Brightness: 1000cd/ m2 ● Max brightness: min 0,3 / max 1000 nits ● Viewing angle: -85 + 89 degrees ● Maximum digit size: 12 cm SAIL...
- Page 34 Power supply 12V system: ● Four 7’’ can be powered ● Two 10’’ can be powered On a 24V system: ● Eight 7’’ can be powered ● Four 10’’ can be powered SAIL M ON Page 34...
-
Page 35: Sailmon Components
4.1 Sailmon components 4.1.1 Snet connector To connect displays to the Sailmon network or to each other, a Snet connector is used. These connectors are suitable for use outside the hull due to the IP classification. This classification is only effective when connectors are attached to each other. Loose connectors can easily be damaged by moisture. -
Page 36: Sailethernet
4.1.2 SAILethernet This box has to be connected to the ethernet port of the E4 and the ship's power supply. The SAILethernet powers and establishes a connection between your display and model E4 over ethernet. This connection can be achieved by... -
Page 37: Mounting
● Pull a power cable from the power supply location to the SAILethernet location. ● P ull a network Cable from the E4 (or network switch) to the SAILethernet location. ● The SNET cable is supplied with the outside stripped 70mm. -
Page 38: Windbox
4.1.4 Windbox The Sailmon WindBox offers an interface for 3rd party wind sensors to the NMEA 2000 back bone and in turn connection to the E4 processor.. The NMEA 2000 interface cable is pre-installed. For overvoltage and electrostatic discharge protection the WindBox is galvanically isolated. -
Page 39: Operation
Choose a dry and protected place for the Wind Box. The Wind Box is designed to be installed inside the hull. Do not install your Sailmon windbox on the head of the mast. This will make lighting protection impossible and the NMEA 2000 specifications for the maximum drop cable length are likely to be exceeded. -
Page 40: Linearbox
The Sailmon LinearBox is an interface for 3rd party linear sensors to be connected to the E4 processor by means of the NMEA 2000 backbone. Up to 16 LinearBoxes can be connected to a single E4 Processor. The linear box provides overvoltage and electrostatic protection by means of galvanic isolation. - Page 41 ● Ambient Temperature Range: 0°C to 50°C, 32°F to 122°F ● Power Supply: NMEA 2000 compatible, 9-16V ● Galvanic Isolation of Linear Inputs to NMEA 2000, no isolation between channels ● NMEA 2000 PGNs Supplied: 64233 (0x0FAE9) Sailmon proprietary SAIL M ON Page 41...
-
Page 42: Loadcell Box
4.1.6 Loadcell Box The Sailmon Loadcell Box offers connection of load cells to the Sailmon system. It can be used to interface all common 4-wire or 6-wire load cells. Calibration is done with the Sailmon Software Tool. For overvoltage and electrostatic discharge protection the Load Cell Box is galvanically isolated. - Page 43 ● Protection: IP65 ● Ambient Temperature Range: 0°C to 50°C, 32°F to 122°F ● Power Supply: NMEA 2000 compatible, 9-16V ● Isolation: Galvanic Isolation of Load Cell ● NMEA 2000: PGNs Supplied: 64221 (0x0FADD) Sailmon proprietary SAIL M ON Page 43...
-
Page 44: System Set Ups
Chapter 5 5.1 system set ups What are the minimum requirements of existing on board systems that Sailmon can work with? 5.1.1 B&G H3000 A H3000 CPU and fastnet network can easily be Upgraded to an E4 processor With the E4 it is possible to connect the fastnet installation and retain the B&G... - Page 45 The Schematic below shows how the E4 can replace the H3000 CPU and still retain 20/20 displays and through hull transducers Upgrade benefits: Reuse of existing transducers with use of an Actisense DST - 2 Reuse of existing displays Wifi connectivity to stream data to any wifi enabled device...
-
Page 46: Raymarine
H5000 Due to the H5000 use of the NMEA 2000 data format the E4 is a straightforward upgrade from the B&G processor, resulting in greater usability and connectivity. All existing sensors can be connected directly to the NMEA 2000 backbone or with the use of Sailmon interface boxes. -
Page 47: Nexus
Raymarine SeaTalk ng Due to the SeaTalk NG’s use of the NMEA 2000 data format, the E4 is a simple upgrade, gaining greater usability and connectivity. All exciting system sensors can be connected directly to the NMEA 2000 backbone. Calibration and configuration is all completed through... -
Page 48: Troubleshooting
In the event the system is up and running, but no data is visible on the displays check the NMEA bus has correct power The E4 does not power the NMEA 2000 backbone it will need a separate power connection Please see the image below to have a clear view of a test setup. -
Page 49: Nmea 2000 Details
5.2.2 NMEA 2000 details ● A drop cable,the cable that connects NMEA 2000 devices to the backbone ● Total of length of a drop cable longer than 6 meters (19.5 ft) ● On one NMEA 2000 backbone, there can be a maximum of 50 devices connected. ●... -
Page 50: Faq
General Q: My E4 is working but my displays say connecting to server. A: Make sure both displays, controlling device and E4 are connected to the same DHCP server. Q: They are connected to the same DHCP server but displays still say connecting to server. -
Page 51: Fastnet
Fastnet Q: I have installed the E4, and connected the fastnet cable but there is no signal nor is there a light. A: Ensure it has been cabled and setup correctly this includes red and black. Q: I have checked that the connection is right, but still no light, any ideas? A: Make sure port 2 is set to B&G Fastnet in the Sailmontool. -
Page 52: No Network Detected
No Network detected Q: My E4 is working. On board is a Pepwave (or other kind of router) which is used as a switch for the SAILethernet as well. I do not detect any network on smart devices. A: Take the router out of the network. Then connect the SAILethernet to the E4 and check if the displays work. -
Page 53: Windbox
Q: I cannot adjust the MHU offset with my instrument system (other than Sailmon) A: The Wind Box is designed to be integrated into a Sailmon system. It does not provide direct offset features since Sailmon uses advanced calibration which is done in other parts of the system.
Need help?
Do you have a question about the E4 and is the answer not in the manual?
Questions and answers