Table of Contents
Advertisement
Quick Links
Advertisement
Table of Contents

Related Manuals for ASP Sterrad 100NX


Summary of Contents for ASP Sterrad 100NX
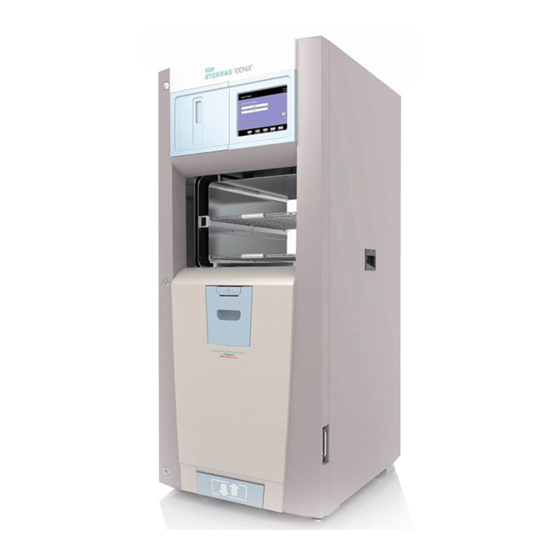
- Page 1 ® ® STERRAD 100NX Sterilization System User’s Guide Ref 99994 M-99994_03 May 2014...
- Page 2 Sterilization System User’s Guide 1-888-STERRAD ASP U.S.A. Professional Services ASP International 949-581-5799 Please visit www.aspjj.com For warranty information, please visit our website or contact ASP Professional Services. ASP International Customer Support; call your local ASP Representative ©. ® ® ®...
-
Page 3: Table Of Contents
Contents Chapter 1. Introduction ........5 How to Use This Guide . - Page 4 Call Your ASP Representative ........
- Page 5 Chapter 7. Maintenance ........63 Automatic Maintenance .
- Page 6 Alarm Volume ..........84 Backlight Conservation (Minutes) .
-
Page 7: Chapter 1. Introduction
Introduction Chapter 1. Introduction How to Use This Guide ® ® If you are a STERRAD 100NX Sterilizer operator, you must read the “Safety Information, “ the “Introduction,” “Load Preparation,” and “Operation” chapters prior to operating the sterilizer. This “Introduction” explains the features and parts of the sterilizer. -
Page 8: The Sterrad
If you have questions about the STERRAD 100NX Sterilizer or questions ® about which items may be safely sterilized by the STERRAD Process, please call your local Advanced Sterilization Products (ASP) Representative or visit our website at www.aspjj.com. STERRAD ® 100NX ®... -
Page 9: Chapter 2. Safety Information
Safety Information Chapter 2. Safety Information Your safety is of primary concern to Advanced Sterilization Products (ASP). ® ® This chapter provides information on safely using the STERRAD 100NX Sterilizer. You must read and understand the safety information in this chapter before operating the sterilizer. - Page 10 Safety Information WARNING! RISK OF SKIN INJURY Direct hydrogen peroxide contact with the skin can cause severe irritation. Wear chemical resistant latex, PVC (vinyl) or nitrile gloves when handling used cassettes or ejected cassettes, items from a cancelled cycle, or items that have moisture present after a completed cycle.
-
Page 11: Personal Protective Equipment
Safety Information WARNING! RISK OF BREATHING DIFFICULTIES On rare occasions, the outlet filter on the vacuum pump can prematurely fail. If this occurs, you may see mist or what some users have described as “haze” or “smoke” in the room where the sterilizer is operating. The chemical composition of the mist is primarily airborne mineral oil with trace amounts of other compounds. - Page 12 This guide is not intended to replace any medical device manufacturers’ instructions. If you have questions, or if you are in doubt about the materials in your devices, contact the medical device manufacturer or your ASP Customer Representative for more information.
- Page 13 Safety Information Guidance And Declaration-Electromagnetic Emissions ® ® The STERRAD 100NX Sterilizer is intended for use in the electromagnetic environment specified below. Assure that it is used in such an environment. Emissions Test Compliance Electromagnetic Environment - Guidance RF emissions CISPR 11 Group 1 ®...
- Page 14 Safety Information FCC Rules and Industry Canada (IC) Regulatory Information Compliance Statement (Part 15.19) The equipment device complies with Part 15 of the FCC Rules. Operation is subject to the following two conditions: (1) This device may not cause harmful interference, and (2) This device must accept any interference received including interference that may cause undesired operation.
-
Page 15: Warnings, Cautions, And Notes
Safety Information Warnings, Cautions, and Notes Warnings and cautions are accompanied by symbols surrounded by a triangle or a square and are printed in the text in bold. Warnings indicate events or conditions that can result in serious injury or death. Cautions indicate events or conditions that can result in severe damage to the equipment. -
Page 16: Symbols
Safety Information Symbols Hot surfaces present. Do not touch without protection. Hazardous chemical present. Use personal protective equipment. Corrosive chemical present. Use personal protective equipment. Oxidizing chemical present. Avoid exposure, contact, or ingestion. Use personal protective equipment. WEEE Symbol Toxic chemical present. Avoid exposure, contact, or ingestion. -
Page 17: Chapter 3. Load Preparation
If you have questions, or if you are in doubt about the materials in your devices, contact the medical device manufacturer or your ASP Customer Representative for more information. - Page 18 † or larger and a length of 500 mm or shorter. Processing Tubing ASP has validated the processing of non-reusable polyethylene and ® Teflon (polytetrafluoroethylene) medical grade tubing with the dimension and cycles listed below. (These tubing claims have not been reviewed by the Food and Drug Administration (FDA) as the FDA does not classify tubing as medical devices.):...
- Page 19 Load Preparation EXPRESS Cycle Processing The following types of medical devices can be sterilized in the EXPRESS Cycle: General medical devices requiring surface sterilization, or sterilization of mated titanium and stainless steel surfaces. ® Rigid or semi-rigid endoscopes without lumens; for example da Vinci ...
-
Page 20: Cycles And Materials Processing
Do not attempt to sterilize items or materials that do not comply with the guidelines specified in this user’s guide. Consult the medical device manufacturer’s instructions or call your ASP Representative to determine if an item can be sterilized by the ®... - Page 21 Load Preparation STERRAD ® 100NX ® User’s Guide...
- Page 22 Load Preparation STERRAD ® 100NX ® User’s Guide...
- Page 23 Load Preparation STERRAD ® 100NX ® User’s Guide...
-
Page 24: Recommended Materials
The items marked with an asterisk (*) may have limited life after repeated sterilization. Please contact your ASP Representative for more information. Information may also be obtained from the device manufacturer. Thermoplastics Ethylvinyl Acetate (EVA) ... -
Page 25: Thermosetting Elastomers
Load Preparation Thermosetting Elastomers Silicone Polyurethane Glass Glass Metal Aluminum Brass Gold Stainless steel Titanium Items Not To Be Processed Single use items for which the manufacturer does not recommend resterilization. -
Page 26: Do Not Process In The Express Cycle
Load Preparation Devices with internal parts, such as sealed bearings, that cannot be immersed, may present difficulties in cleaning and should not be ® ® processed in the STERRAD 100NX Sterilizer. Implants for which the manufacturer has not specifically recommended ... -
Page 27: Guidelines For Preparing Items To Be Sterilized
Load Preparation Guidelines for Preparing Items to Be Sterilized Note: All items must be cleaned, rinsed, and thoroughly ® ® dried before being placed in the STERRAD 100NX Sterilizer. Loads containing moisture may cause cycle cancellations. Cleaning, Rinsing, and Drying Cleaning and sterilization are two separate processes. - Page 28 Load Preparation Dry all items thoroughly. An acceptable method for drying is to blow compressed gas through the lumen until no moisture exits the distal end of the device. Please ensure that any method used to dry the devices is in accordance with the manufacturers' instructions for use or contact the device manufacturer to obtain appropriate and safe procedures.
-
Page 29: Packaging And Loading
Tyvek pouches.Tyvek Pouches and Rolls with STERRAD Chemical Indicators are the only pouches and rolls available on the market that are validated by ASP. They are the only pouches and rolls validated by ASP for efficacy and stability. STERRAD ®... -
Page 30: Loading
Do not use paper pouches or sterilization wraps containing cellulose or cotton. Do not use any wraps or packaging that are not approved by ASP or materials listed in the “Items Not To Be Processed” section. In the USA, use only FDA-cleared polypropylene wraps. -
Page 31: Chemical Indicators
Load Preparation EXPRESS Cycle Loading Preparation ® ® The STERRAD 100NX Sterilizer EXPRESS Cycle was validated using a load weight of 4.9 kg (10.7 lbs) on the bottom shelf only. When constructing your load, the total weight of the load to be sterilized should not exceed 4.9 kg (10.7 lbs). - Page 32 CAUTION: RISK OF DAMAGE TO LOAD ® ® Prior to processing flexible endoscopes in the STERRAD 100NX Sterilizer, please contact the medical device manufacturer, or your ASP Customer Representative. STERRAD ® 100NX ® User’s Guide...
-
Page 33: Chapter 4. Operation
Biological Indicators Biological indicators are an important method of confirming that sterilization ® was achieved during a cycle. ASP recommends using the STERRAD ® CYCLESURE 24 Biological Indicator (BI). Contact your ASP Representative regarding biological indicators specifically designed for use ®... -
Page 34: Login
Operation ® ® For the STERRAD 100NX DUO cycle in the United States, the ® STERRAD CYCLESURE 24 BI should only be used in a test pack configuration. Instructions for use are provided in the test pack. Login Note: If your sterilizer has been configured not to require operator login, the login screen will not appear. -
Page 35: Entering Load Information
Operation Entering Load Information Note: If your sterilizer has been configured not to require load item data, this screen will not appear. Skip to the subsection titled Cycle Notes. Enter Load Item Data The Load Item Data screen allows you to enter information about the contents of the load. -
Page 36: Cycle Notes
Operation Select From List If a database has been established containing frequently used load information, you can select that information using the following steps: 1. Touch Select From List. 2. Scroll up or down the load item menu list to the desired item. 3. - Page 37 Operation 2. Use the on-screen keyboard to type your notes. 3. When data entry is complete, touch the Done button. 4. If conditions exist which prevent a sterilization cycle from starting; e.g., no cassette, hydrogen peroxide monitor is blocked, etc., a message is displayed on the screen.
-
Page 38: Loading The Chamber
Operation Loading the Chamber Note: The door is equipped with a safety mechanism that prevents it from closing if it encounters an obstruction. If this occurs, the door stops immediately. You must use the touch screen to open the door. 1. - Page 39 Operation 2. When placing the load on the shelves, make certain that you do not block the ultraviolet lamp beam in the front right (your right) side of the chamber. Make sure the load is centered on the shelves and that the shelves are centered in the chamber.
- Page 40 Operation Figure 8. Load Correctly Placed for STANDARD Cycle Processing Figure 9. Load Correctly Placed for DUO and FLEX Cycle Processing 5. When you are finished loading the chamber, close the door by tapping the foot pad or pressing the Close Door button on the touch screen. 6.
- Page 41 Operation Loading Requirements for the EXPRESS Cycle ® ® Only the bottom shelf of the STERRAD 100NX Sterilizer should be used when processing loads in the EXPRESS Cycle. The following figure shows a correctly placed load. Figure 10. Load Correctly Placed for EXPRESS Cycle Processing STERRAD ®...
-
Page 42: Selecting And Starting A Cycle
Operation Selecting and Starting a Cycle When the load has been placed in the chamber, and the door has been closed, use the System Ready screen to start the cycle. The following display shows ® ® all the cycles available for the STERRAD 100NX Sterilizer. -
Page 43: System Ready Screen
Operation System Ready Screen The System Ready screen displays a number of buttons allowing you to select cycles based on the cycles that are loaded and enabled on your sterilizer. Cycle Types STANDARD cycle sterilizes the load in about 47 minutes. This cycle is ... -
Page 44: Cycle In Progress
Operation 5. Insert the cassette into the cassette slot until it stops moving. Do not use force to push the cassette into the machine. Figure 12. Inserting the Cassette into the Slot. 6. After a slight pause, the sterilizer pulls the cassette through the slot and the slot door closes. -
Page 45: Canceling A Cycle
Operation The clock displays the estimated number of minutes and seconds remaining before the cycle is finished. The “Time Remaining” field updates as the sterilization cycle progresses. As each sterilization cycle stage runs, the screen displays the name of the stage. A moving bar graph also displays the percent of the cycle that is complete. - Page 46 Operation 2. Touch No to continue with the cycle. Touch Yes to cancel the cycle. Once the cycle cancellation sequence begins, the screen turns red and the cancellation sequence cannot be interrupted. The cancellation sequence may take up to ten minutes to complete. Figure 15.
-
Page 47: Cycle Completed
Operation Cycle Completed When the cycle is complete, the Cycle Completed screen is displayed. The background of the screen is green to indicate a successfully completed cycle. The loudspeaker emits one long beep to indicate successful cycle completion. Figure 16. Successful STANDARD Cycle Completed. 1. -
Page 48: Processing A Sterilized Load
Operation WARNING! HYDROGEN PEROXIDE MAY BE PRESENT If white residue is visible on the load, this is residue from the hydrogen peroxide stabilizer. Wear chemical resistant latex, PVC (vinyl), or nitrile gloves when removing a load with visible white residue. White residue can be minimized by making sure regular Planned Maintenance procedures are performed on your system. - Page 49 Operation Cycle Completion Flowchart STERRAD ® 100NX ® User’s Guide...
- Page 50 Operation ® ® STERRAD CYCLESURE 24 Biological Indicator Flowchart STERRAD ® 100NX ® User’s Guide...
-
Page 51: Chapter 5. Troubleshooting
Temperature Tests. (See the section on “Access Levels and Supervisor Tasks” for information on how to navigate to the Diagnostics menu.) If you run Diagnostics and the tests show that there are errors, contact your ASP Representative and report the diagnostic results. If the diagnostic tests pass with no errors, you can run cycles with your normal load. -
Page 52: System Message Table
ASP Representative for further action. Messages Not In This Table If a displayed message is not found in the following table, there is no remedy available that you may safely perform. Call your ASP Representative for further action. If this message appears. . . - Page 53 Load is absorbing too much peroxide. Remove absorbing materials from the load, repackage, and restart the cycle. If the The Load Is Not Blocking The UV problem persists, call your ASP Representative. Light Path Monitor Failure bulb or detector malfunction. Remove the load and run diagnostics.
- Page 54 Wear chemical resistant latex, PVC (vinyl), or nitrile gloves whenever handling a load after a cycle cancellation. Hydrogen peroxide liquid may be present on the load or in the chamber. Rate Outside the Reboot the system. If the problem persists, call your ASP Representative. Calibrated Range Sensor Fault Reboot the system.
- Page 55 Pressure Check Failed Load is absorbing too much peroxide. Remove absorbing materials from the load, repackage, and restart the cycle. If the problem persists, call your ASP Representative. Pressure Out Of Range (High) Vacuum system malfunction. Remove the load and run diagnostics.
-
Page 56: Call Your Asp Representative
Unable to Evacuate Chamber . . . Remove the load and run diagnostics. Reboot the system. Ensure Load is Dry before Starting If the problem persists, call your ASP Representative. Cycle Unable to Open One Second Data File Replace the PCMCIA card with a new one. -
Page 57: Chapter 6. Sterilizer Overview
Sterilizer Overview Chapter 6. Sterilizer Overview Sterilizer Cycles ® The following display shows all the cycles available for the STERRAD ® 100NX Sterilizer. This guide contains detailed instructions for each cycle. Make sure you understand the differences in the cycles and what types of instruments can be sterilized in each cycle. -
Page 58: Sterilizer Features
Sterilizer Overview Sterilizer Features The cassette slot, the cassette drawer, the touch screen, PCMCIA slot (inside the access panel), the chamber door, the printer, and the foot pad are found on the input side of the sterilizer (the front of single-door units). On a two door unit the touch screen, chamber door, foot pad, and printer are found on both the input and output sides. -
Page 59: Cassette
Sterilizer Overview The items to be sterilized are placed on the shelves and the door is closed using either the close door button on the touch screen or by tapping the foot pad with your foot. The foot pad is located on the lower portion of the front panel. -
Page 60: Cassette Disposal Box
Sterilizer Overview Cassette Disposal Box After processing of the cassette, the sterilizer automatically discards it into the cassette disposal box. The cassette disposal box holds 2 used cassettes. When the box has the maximum number of cassettes, the sterilizer displays a message indicating that the box must be replaced. -
Page 61: Chamber
Sterilizer Overview Figure 21. Using the Touch Screen. An internal loudspeaker emits “beep” tones to call for user attention or indicate errors. A single long beep indicates a successfully completed cycle. A series of ten short beeps indicates a canceled cycle. Chamber The load is placed in the chamber for sterilization. -
Page 62: Printer
Sterilizer Overview Printer The sterilizer has an integrated internal printer located in the front panel. On two door units, a printer is located in the main panel on each side. The printer prints cycle reports and other information on a roll of thermal paper. -
Page 63: Touch Screen Data Entry
Sterilizer Overview Touch Screen Data Entry The following figure shows a typical data entry screen. The typewriter “keys” input the indicated character each time a key is touched. Touch the screen to move the cursor from place-to-place. The load list can be predefined and used repeatedly. - Page 64 Sterilizer Overview Function Buttons Most screens provide function buttons that display other screens or select sterilizer functions. Common function buttons are shown in the following table. Button Function Done. Touch this button to indicate that you are finished using the screen. Back.
-
Page 65: Chapter 7. Maintenance
Maintenance Chapter 7. Maintenance Note: Repairs and adjustments should only be attempted by experienced technicians who are fully trained to ® ® maintain and repair the STERRAD 100NX Sterilizer. Use of unauthorized parts for maintenance or repair could cause personal injury, result in costly damage, or sterilizer malfunction and voids the warranty. -
Page 66: Manual Maintenance
Maintenance Manual Maintenance The following maintenance procedures are performed by the user: Disposing of cassettes. Inserting a new cassette disposal box. Replacing the printer paper roll. Cleaning the sterilizer exterior. Cleaning the hydrogen peroxide monitor detector lens. ... -
Page 67: Removing A Cassette Disposal Box
Maintenance Removing a Cassette Disposal Box WARNING! HYDROGEN PEROXIDE MAY BE PRESENT. Wear chemical resistant latex, PVC (vinyl), or nitrile gloves. This will protect you from contact with any residual hydrogen peroxide that may be present in the cassettes. 1. Open the cassette access door. Pull the tab on the cassette disposal box to more easily slide it completely out. -
Page 68: Replacing The Printer Paper
Maintenance 4. Insert a new box making sure the lid is open and not caught in the opening, and the tab is facing you. Figure 27. Insert the New Cassette Box with the Lid Open so the Tab is on the Left. 5. - Page 69 Maintenance Figure 29. Remove the Empty Paper Roll. 3. Insert a new paper roll as shown in the following figure. The paper should feed from the top of the roll. Figure 30. Insert a New Paper Roll. 4. Pull a short length of paper over the top of the printer door. 5.
- Page 70 Maintenance 6. Push the door shut making sure the paper stays in place. Figure 31. Make sure the Printer Door Latches Securely and the Paper is in Place. 7. Press the paper advance button. Check the alignment of the paper and make certain it does not jam or misfeed.
-
Page 71: Cleaning The Sterilizer Exterior
4. If you have any questions about proper cleaning techniques, in the U.S.A. please call your local ASP Representative before proceeding. Failure to follow these guidelines may result in damage to the sterilizer and may void the warranty. -
Page 72: Cleaning The Hydrogen Peroxide Monitor Detector Lens
Maintenance Cleaning the Hydrogen Peroxide Monitor Detector Lens The hydrogen peroxide monitor lens is located on the input side of the sterilizer. The lens must be kept clean. Wipe off the lens once every three months or when an accumulation of debris is noted. This is shown in the following figure. -
Page 73: Pcmcia Card Handling And Replacement
Maintenance PCMCIA Card Handling and Replacement The PCMCIA card contains the flash memory used to store cycle data. It should not be removed arbitrarily. If you need to remove or replace it, use the following steps: 1. Turn off the sterilizer, or go to the “Additional Utilities” menu and press the PCMCIA button. -
Page 74: Data Transfer Using A Memory Stick
Maintenance 3. Insert the card into the PCMCIA card slot. 4. Press the end of the PCMCIA card until the card is firmly seated in the slot (you will feel a “click” as the card is seated in the connector). Figure 35. -
Page 75: Rebooting The System
(including batteries) are regulated in many countries; (e.g., by the US Environmental Protection Agency). Please ensure compliance with all International, Federal, State, and Local regulations before disposal. Contact your ASP Representative for additional information. STERRAD ®... - Page 76 Maintenance STERRAD ® 100NX ® User’s Guide...
-
Page 77: Chapter 8. Reports And Files
Reports and Files Chapter 8. Reports and Files Displayed Reports Users with Operator-level access can display the Cycle History files. Users with Supervisor-level access can display the Cycle History files, as well as Calibration files and Diagnostic files. All files that are displayed can be printed by touching the Print button on the file display screen. - Page 78 Reports and Files Touch the scroll bars to scroll through the list. Touch the line you wish to select. Figure 38. Select Cycle History File. Print List prints a list of all cycle history files stored in the sterilizer. View Cycle displays the selected Cycle History file on the screen. Print Cycle (Short) prints a short-format report of the selected cycle history file.
-
Page 79: Printed Reports
The long-format report is useful for detailed cycle quality control and contains valuable diagnostics information for ASP Service Representatives. STERRAD ® 100NX ®... - Page 80 Reports and Files STERRAD ® 100NX ® User’s Guide...
-
Page 81: Chapter 9. Access Levels And Supervisor Tasks
Access Levels and Supervisor Tasks Chapter 9. Access Levels and Supervisor Tasks Overview Users with Supervisor-level access privileges (see below) are permitted to perform a set of restricted sterilizer functions. These functions are not used in daily sterilizer operation and some of them are designed to control access, manage system records, and perform advanced diagnostic functions. -
Page 82: Additional Utilities Menu
Configure the network connection and upload data to the network. Service-level access is only for use by ASP Service Representatives. Additional Utilities Menu The Additional Utilities Menu is available only to users with Supervisor- or Service-level access privileges. If a user with Operator-level privileges touches an Additional Utilities button on any screen, the Login screen will be displayed with the message: “Supervisor- or Service-Level Login Required.”... -
Page 83: Date And Time Settings
Diagnostics starts a sequence of operator-assisted diagnostic tests and prints a diagnostic test report. Service Functions are reserved for use by ASP Service Representatives. File Management allows you to select, display, and print files. Upload file reads the load items database file from a USB memory stick. -
Page 84: Set Date
Access Levels and Supervisor Tasks Set Date Use the MM box to set the month (01-12), the DD box to set the day (01-31), and the YY box to set the year. Set Time Use the HH box to set the hour (01-12 if 12-hour format is selected, 00-23 if 24-hour format is selected). -
Page 85: System Configuration
Access Levels and Supervisor Tasks System Configuration Use the System Configuration screen to set sterilizer features. Selections on this screen allow you to set the volume of the alarm loudspeaker, the language used in displays and reports, and several access, report, and connection features. -
Page 86: Load Data Entry Option
Access Levels and Supervisor Tasks Load Data Entry Option Enabled causes the Enter Load Item Data screen to be displayed after login. This is the factory default setting. Disabled skips the Enter Load Item Data screen. Load Removal Option With Login requires that a user enter a user identification and password to open the sterilizer door when a cycle is complete. -
Page 87: Sterilizer Settings
Access Levels and Supervisor Tasks Sterilizer Settings Touch Sterilizer Settings to display the following screen. The information entered here is included in the printout, but its use is optional. Touch Done to save the settings and return to the previous screen. Figure 42. -
Page 88: Printer Settings
Access Levels and Supervisor Tasks Printer Settings Touch Printer Settings to display the following screen: Touch Done to save the changes. Figure 43. Printer Settings Internal Printer Input Side allows you to select the printer on the input side. This is the default. Internal Printer Output Side allows you to select the printer on the output side (2 door configuration). -
Page 89: Transfer Settings
Access Levels and Supervisor Tasks Transfer Settings When you touch Transfer Settings from the System Configuration menu, the following screen appears. This screen displays selectable report types that automatically transfer via a network to a remote PC upon cycle completion.Touch Done to save the settings. Touch Cancel to return to the previous screen. -
Page 90: User Administration
Access Levels and Supervisor Tasks User Administration Use the User Administration screen to add, modify, or delete user names, passwords, and access levels. A button on this screen allows you to upload user information to a USB memory stick. Supervisor-level access allows you to add, edit or delete a User or another Supervisor. -
Page 91: Add User
Access Levels and Supervisor Tasks Add User Use the Add User screen to enter a new user’s identification, password, and access level. Figure 46. Add User. Enter the user’s operator “identification” in the Operator field. The entry must be alpha-numeric and no more than 10 characters. ... -
Page 92: Modify User
Access Levels and Supervisor Tasks Modify User Use the Modify User screen to modify an existing user’s identification, password, and access level. Figure 47. Modify User. Touch the user’s name whose information you wish to edit or delete. 2. Touch Delete User to remove the user from the access list and revoke access to sterilizer operation. -
Page 93: Upload User Data
Access Levels and Supervisor Tasks 4. Touch Done to return to the previous screen. Figure 48. Edit User. To modify the selected user’s information, touch the Edit User button. To change the user’s operator name, make changes in the Operator ... -
Page 94: Steps To Upload A User Database
Access Levels and Supervisor Tasks Figure 49. Upload User Data. If the user data shown is acceptable, touch Confirm. The following section contains information on uploading user data. Steps to Upload a User Database To upload a list of user identifications and passwords, perform the following steps: Create an ASCII text file called “users.rec”... -
Page 95: Cassette Functions
Access Levels and Supervisor Tasks 3. On the sterilizer, touch the Upload User Data button. The information in the file will be displayed with the password concealed by “*” characters. ® ® You will receive an “INVALID STERRAD 100NX DATABASE FILE”... -
Page 96: Dispose Cassette
Access Levels and Supervisor Tasks Dispose Cassette The Dispose Cassette function moves the cassette from inside the sterilizer to the cassette box. The remaining volume of hydrogen peroxide is displayed on the screen. Touch Dispose Cassette to move the cassette into the cassette disposal box. Figure 51. -
Page 97: Peroxide Clearance
Access Levels and Supervisor Tasks Peroxide Clearance The DUO Cycle requires the sterilizer to hold peroxide in a reservoir to optimize sterilization. If this peroxide expires, you must dispose of the peroxide remaining in the system. “Peroxide Clearance,” must be performed when a message appears or no subsequent DUO cycles can be run. -
Page 98: Network
Access Levels and Supervisor Tasks Network ® STERRAD 100NX™ Sterilizer can be configured to communicate with a remote personal computer over a network. If you need to use this feature, please contact Advanced Sterilization Products for details on performing this setup. Diagnostics The diagnostics function prompts you to select one of two types of tests (either Temperature Test or Other Tests). -
Page 99: Diagnostic Tests
When the series of tests is complete, the sterilizer creates and stores a diagnostics file and prints a report. When printing is complete, the Additional Utilities menu is displayed. Service Functions The Service Functions button is reserved for use by ASP Service Representatives. STERRAD ®... -
Page 100: File Management
Access Levels and Supervisor Tasks File Management Use the File Management screen to select and display calibration files or diagnostic report files. Figure 55. File Management. Calibration Files Touch the Calibration Files button to display a list of calibration files created during a sterilizer calibration. -
Page 101: Upload File
Access Levels and Supervisor Tasks Upload File This screen allows you to upload item information from a separate database to the sterilizer using the USB memory port. Figure 56. Load Items Files Using Microsoft “Notepad,” create a list of load items similar to the example shown in the figure. -
Page 102: Input/Output Doors
Access Levels and Supervisor Tasks Input/Output Doors The doors can be opened or closed via the foot pad that you tap with your foot or by touching the Input or Output Door buttons. If the system has only one door, only the Input Close Door and Input Open Door buttons are available for use. - Page 103 Access Levels and Supervisor Tasks Install guides you to install any newly purchased features. Back returns you to the Additional Utilities Menu. Enabled displays any cycle in your sterilizer which can be selected (enabled). The choices appear on the Start Cycle display. Disabled removes the selected cycle buttons from the Start Cycle Screen.
- Page 104 Access Levels and Supervisor Tasks STERRAD ® 100NX ® User’s Guide...
-
Page 105: Appendix A. Sterilizer Specifications
Specifications Appendix A. Sterilizer Specifications Power The phase rotation is adjusted to match the system requirements at installation. 208V 60 Hz Power: For versions employing 208V, 60 Hz power, the sterilizer requires a NEMA L21-30 five-wire grounding twist lock outlet attached to a dedicated 30 Amp 3 phase 208 Volt circuit with separate neutral and ground conductors. - Page 106 Specifications Humidity Operating: 10% – 85% up to 30 linearly decreasing from 85% at 30 C to 70% at 40 C non-condensing Storage: 10% – 100% (rainfall will be permitted). Altitude/Pressure Operating altitude up to 3095 m (10,152 ft.). Atmospheric pressure 520-775 torr Cycle temperature 47°C –...
- Page 107 CAN/CSA C22.2 No. 61010-1. UL 61010-1. Medical Device US: FDA (Food and Drug Administration) Agencies EU: TUV Product Service (ASP’s Notified Body) Japan: MHLW (Ministry of Health, Labor and Welfare) Canada: TPP (Therapeutic Products Programme) Australia: TGA (Therapeutic Goods Administration) ®...
- Page 108 Specifications ® ® STERRAD 100NX User’s Guide...
-
Page 109: Appendix B. Consumables, Accessories, And Additional Parts
Placed inside instrument packages, the STERRAD Chemical Indicator Strips chemical indicator strips change color when exposed to hydrogen peroxide. ® Contact your ASP Representative for a Tyvek Pouches and Rolls with complete list of pouches, rolls, instrument ® STERRAD Chemical Indicator trays and accessories. - Page 110 Additional Parts Part Number Compact Flash Card and Adapter 04-53004-0-001 ASP offers a comprehensive line of consumables and accessories which have ® ® been fully tested and validated for use with the STERRAD 100NX Sterilizer. For more information on any of these products, contact your local ASP Representative.
Need help?
Do you have a question about the Sterrad 100NX and is the answer not in the manual?
Questions and answers