Advertisement
Quick Links
Part No. HWABN1 rev. 1
Hi-Gain
Start
Here
1
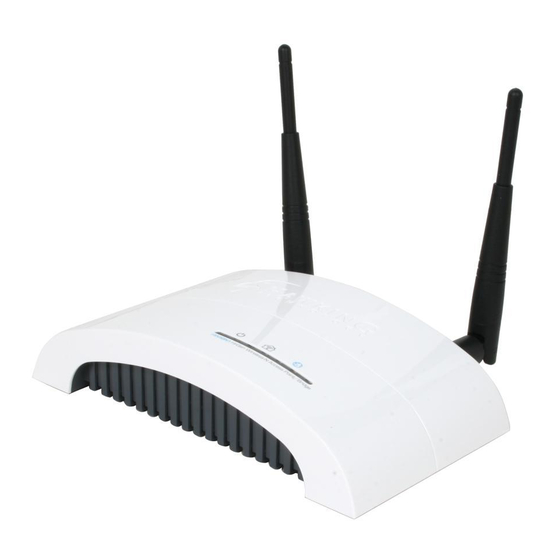
Overview
LED Description
Power/WPS - LED is on when the power adapter is connected
and plugged in to an outlet. In WPS mode, it will flash.
Wireless LAN - LED is blinking when wireless activity is detected.
LAN Connection - LED is on when there is a wired connection to your network
For Windows
2
Connecting the HWABN1 using a
-win
1.) Connect the A/C power adapter to an electrical source,
and then connect it to the 'Power' socket of the AP/Bridge.
3
Con guring the HWABN1 using a Windows laptop or desktop
-win
A.) Insert the Setup CD into the CD-ROM
drive of your computer. When the auto-load
page appears, click the Setup Wizard option
on the right and follow the Setup directions.
Operating in Access Point Mode
a.) Choose a name for
your AP/Bridge. You will
use this name to identify
and connect to the
network. Optionally, you
may change your login
username and password
to the web-user interface
at the IP address you
selected previously. Click
'Next'.
Operating in Bridge Mode (Client Mode)
a.) In Bridge Mode, you must scan for the
wireless network that you would like to
"bridge" to your wired network device. Select
the network and click 'Next.'
Technical Support
II
Tel: 1.888.202.3344
TM
Wireless-300N Access Point/Bridge
(2-Mac)
See the reverse side
for Mac Installation Instructions. Refer to the manual on the install CD for further assistance.
Windows
laptop or desktop
HWABN1
HWABN1
AP/Bridge
AP/Bridge
2.) Connect your AP/Bridge to your broadband router.
B.) Scan for your AP/Bridge by clicking the 'Search'
button. Once found, click the device to highlight it
and click 'Next.'
b.) In Access Point
Mode, it is optional
to setup an
encrypted network. If
you don't, your new
wireless network will
be open to any and
all users who can see
your network. Hawk-
ing suggests setting
up a basic WPA
security as shown
above.
b.) Here you are given the option to change
the password for log-in to the web-user inter-
face. If you wish to leave the log-in information
as the default settings (Username: admin,
Password: 1234) click 'Next' to move on.
II
Email: techsupport@hawkingtech.com
QUICK INSTALLATION GUIDE
Router/AP
Broadband Modem
"SOURCE"
C.) Here, you can adjust your LAN IP address for the
AP/Bridge. You can automatically assign an IP from
your network, or you may choose to set it manually.
Click 'Next.'
c.) If your network uses a security key, you will
be prompted here to enter your key. Just
enter it next to key #1 if using WEP or pre-
shared key if you are using WPA/WPA2. The
other values will be entered in automatically.
Please check with your network admin or
router manufacturer if you are not sure on
your key.
Package Contents
•1x Wireless-300N AP/Bridge
•1x Power Adapter
•1x Ethernet Cable
•1x Setup CD-ROM
•2x Dipole Antennas
Requirements
•Internet Access with a Wireless AP or Router
•Computer (for configuration only)
•Power Outlet
Broadband Modem
Router/AP
"SOURCE"
3.) Connect your PC to any of the LAN ports located on the back of your
router/AP.
D.) Select an Operation Mode. Choose either Access Point
Mode or Ethernet Bridge Mode. Click 'Next.' See below to
continue operating in Access Point Mode or to continue operat-
ing in Bridge Mode.
c.) The Setup Sum-
mary displays all
your recently config-
ured settings for the
HWABN1 AP/Bridge.
Please double check
all settings to make
sure they are correct
and remember the IP
address for logging
into the web-user
interface.
Click 'Set' to apply all settings. Continue to Step 4.
d.) The Setup Summary displays all your recently
configured settings for the HWABN1 AP/Bridge.
Please double check all settings to make sure
they are correct and remember the IP address
for logging into the web-user interface. Click
'Set' to apply all settings. Disconnect the
HWABN1 from your router. Connect your
computer/switch to the bridge via Ethernet
cable. Continue to Step 4 on the back page.
www.hawkingtech.com
PC Symbol for
Ethernet Port
Example PC Rear Ports
Advertisement

Related Manuals for Hawking HWABN1


Summary of Contents for Hawking HWABN1
- Page 1 3.) Connect your PC to any of the LAN ports located on the back of your and then connect it to the ‘Power’ socket of the AP/Bridge. router/AP. Con guring the HWABN1 using a Windows laptop or desktop -win A.) Insert the Setup CD into the CD-ROM B.) Scan for your AP/Bridge by clicking the ‘Search’...
- Page 2 Select your be prompted to enter your password. network, and click ‘Connect.’ HWABN1 rev. 1 - QIG v.2 (20101221) © 2011 Hawking Technologies, Inc. All rights reserved. All trademarks herein are the property of Technical Support Tel: 1.888.202.3344 Email: techsupport@hawkingtech.com their respective owners.
Need help?
Do you have a question about the HWABN1 and is the answer not in the manual?
Questions and answers