Advertisement
Quick Links
BM-ET100US
Authenticam
™
Operating Instructions
®
Iris Recognition Camera
with Private ID
Introduction
Thank you for purchasing the Authenticam
™
combines iris recognition technology with a videoconferencing camera to give you a versatile and
robust desktop tool.
The Authenticam is easy to connect to the USB port of any PC, and the Private ID software
is easy to install. Simply follow the step-by-step instructions below, and you'll be ready to enjoy a
whole new era of information security.
System Requirements
Software must be installed before hardware!
PC and system software must meet the following minimum requirements to use the Authenticam
video camera and Private ID on SecureSuite:
TABLE 1: SYSTEM REQUIREMENTS
Authenticam
SecureSuite 2.3*
with Private ID only
(minimum)
Intel Pentium
®
Intel Pentium
®
MMX-class, 333 MHz
MMX-class, 333 MHz
or higher
or higher
CD-ROM drive
CD-ROM drive
for installation
for installation
Windows
®
98 /
Windows
®
98 / ME
2000 / ME
64 MB of RAM
64 MB of RAM
30 MB of free
50 MB of free
hard disk space
hard disk space
USB interface
IE 4.0 or above
*SecureSuite will install either version 2.3 or 3.10 automatically depending upon your operating system.
Basic Description of Components
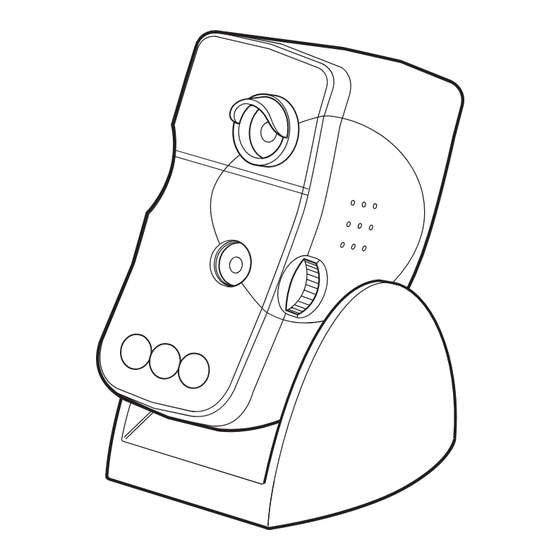
Iris Recognition Lens
w/ Guidance Light
Videoconferencing
Shutter, Lens &
Focus Ring
Iris Imaging Illuminators
Camera Base
For your records: The serial number for the Authenticam may be found on the back of the
camera. You should note the serial number in the space provided below and retain this guide
as a permanent record of your purchase to aid identification in the event of theft.
MODEL No. BM-ET100US SERIAL No. _________________________________________
™
Software
with Private ID
™
software. This compact camera
SecureSuite 3.10*
Intel Pentium
®
MMX-class, 333 MHz
or higher
CD-ROM drive
for installation
Windows
®
2000
64 MB of RAM (minimum)
128 MB of RAM (recommended)
40 MB of free hard disk space (minimum)
60 MB of free hard disk space (recommended)
Microsoft
Internet Explorer 4.x or higher to use
®
SecureSession (Explorer 5.5 recommended)
CD-ROM for Setup and
Application Software
USB Connector
STEP 1: Software Installation
Before you begin, please uninstall any prior versions of Iridian Technologies' Private ID
Windows 2000 Users
Software installation requires Administrator privileges.
Please contact your System Administrator if you require assistance.
Refer to the electronic Installation and Operation Guide to restore your original
desktop configuration.
Windows 98 Users
You may be prompted to insert your Windows 98 CD-ROM after installation is complete.
Installation Procedure
Insert the Private ID
™
CD into your CD-ROM drive and wait for the installation software to
automatically initiate. If the software does not auto-initiate, then run Setup, located in the root
directory of the CD. Follow instructions as they appear on your screen.
Product License Agreement: Note that there are two license agreements,
one for SecureSuite and one for Private ID.
Registration: When you open SecureSuite for the first time, the Registration tab
on the Welcome screen will guide you through the registration process.
The SecureSuite application program establishes a Default Administrator account
as part of the installation process. After rebooting the computer, the Default SecureSuite
Administrator Wizard appears. Follow the instructions as they appear on your screen.
STEP 2: Camera Installation
Software must be installed before hardware!
USB Communication Cable
Plug the flat connector of the USB cable
into any available USB port of your computer.
Please refer to the electronic Installation and
Operation Guide installed with the software for
further information and assistance.
Camera Placement
We recommend placing the Authenticam in its base on top of your monitor for optimal
performance, although the camera can be used on a desktop as well. Operating the Authenticam
is most convenient when it is placed slightly above eye level. The camera's operating distance
(capture zone) for iris enrollment and recognition is about 19 – 21 inches (48 – 53 cm). Adjust the
angle of the camera so that you can comfortably see the face of the unit while working.
about 19" – 21", 48 – 53 cm
Capture Zone
While using the camera, make sure that no bright lights or surface reflections are aimed at the
camera lens. Extra caution should be taken regarding lights and reflection when using the camera
sitting on a desk (pointing up). Iris registration and recognition may not work outdoors and in
places exposed to strong light.
Prevention of Blooming and Smear
When the camera is aimed at a bright light, such as a spotlight or
a surface that reflects bright light, smear or blooming may appear.
To avoid smear and blooming, position the camera to avoid extremely
bright objects.
Prevention of Backlighting
Avoid pointing the Authenticam directly into light sources such as lamps, bright windows, etc.
Any visual target in front of the light source will become "back lit", and will likely appear as a
shadow. See the example diagrams below.
Image with normal
ambient lighting
™
software.
Image spoiled
by backlighting
www.iridiantech.com
Advertisement

Summary of Contents for Panasonic Authenticam BM-ET100US
-
Page 1: System Requirements
BM-ET100US STEP 1: Software Installation Before you begin, please uninstall any prior versions of Iridian Technologies’ Private ID ™ software. Authenticam ™ Windows 2000 Users Operating Instructions Software installation requires Administrator privileges. Please contact your System Administrator if you require assistance. Refer to the electronic Installation and Operation Guide to restore your original desktop configuration. - Page 2 0° +30° Camera Adjustment Videoconferencing Horizontal Alignment (Pan): Turn the camera Authenticam can be used in conjunction with a telephone or an optional microphone accessory left/right until you can look comfortably in the for videoconferencing, as it incorporates a standard VGA videoconference type camera. iris recognition lens.


Need help?
Do you have a question about the Authenticam BM-ET100US and is the answer not in the manual?
Questions and answers