
Related Manuals for Candy OVG505/2N


Summary of Contents for Candy OVG505/2N
- Page 1 MOD. OVG505/2N MOD. OVG505/2W MOD. OVG505/2X USE AND MAINTENANCE INSTRUCTIONS FOR BUIL-IN GAS OVENS...
-
Page 3: Table Of Contents
Table of contents Instructions for the user Technical characteristics Installation Connection to the gas supply Gas regulation Oven functions Switching on the oven Switching the gas grill on Knob guard installation Cleaning and maintenance Removing the oven door Cleaning the side rails Replacing the bulb Troubleshooting guide Customer technical service... -
Page 5: Technical Characteristics
User instructions Thank you for choosing one of our products. We hope you will get the very best performance from this appliance. Therefore we would ask you to carefully comply with the the suggestions and instructions in this manual for proper use of our products. The manufacturer shall not be held liable for damage to persons and property which is due to poor or incorrect installation of the appliance. - Page 6 BEFORE USING THE OVEN - PRECAUTIONS AND GENERAL SUGGESTIONS Unplug the appliances before performing any maintenance and/or cleaning. Any repairs or other work on the appliances must be carried out by qualified technicians only. Make sure that the electrical cables of other appliances used near the cooktop or oven do not touch the hot parts or get stuck in the oven door.
- Page 7 During use, the internal glass of the oven door may steam up. The accessible parts of the oven may become hot during use. It is advised to keep toddlers, children and differently-abled persons away from the oven during and immediately after use. If this is not possible, an adult must be present during the entire oven operation and cooling period.
-
Page 9: Installation
INSTALLATION ATTENTION: This appliance can be installed and operated only in rooms that continuously ventilated according 7129/UNI 7131. IMPORTANT: The installation must be carried out by professionally qualified personnel following the manufacturer's instructions. Any maintenance on the appliance must be performed with the appliance disconnected from the electrical power supply and with the gas supply tap closed. - Page 10 Installation room (fig. 1) For proper operation of the gas appliance, it is essential that the room has a natural air flow from openings on the external walls providing sufficient air for combustion of the gas. These openings must have a free air -flow cross-section of at least 100 cm2 (realized with one or more openings).
- Page 11 Insertion into the furniture unit: The appliance can be inserted either under a worktop or into a column. In either case comply with the dimensions shown in figures 1 and 2. For column installation, in order to ensure proper ventilation, it is very important to provide an opening of at least 85-90mm as shown in figure 1.
- Page 12 Fig. 2.2...
-
Page 13: Connection To The Gas Supply
CONNECTION TO THE GAS SUPPLY The supply system must be compliant with the current standards in the country of use. The type of gas for which the oven has been regulated is indicated on the serial number plate located on one of the side edges of the cavity (visible with the door open) and on the packaging. - Page 14 Adaptation to the gas in use Other types of gas can be used by changing the burner s etting as follows: 1) Make sure that the oven is not connected to the electrical mains. 2) Open the oven door completely. 3) Extract the bottom of the oven after having removed the retaining screws (fig.
- Page 15 Setting of the minimum (fig. 7a-7b) The oven thermostat is equipped with a by-pass for the minimum; when changing the type of gas it is also necessary to adjust the setting in the following manner: Remove the thermostat knob; If the front panel is in glass, remove it by unscrewing the two locking ring nuts located under the other two knobs (fig.
-
Page 16: Oven Functions
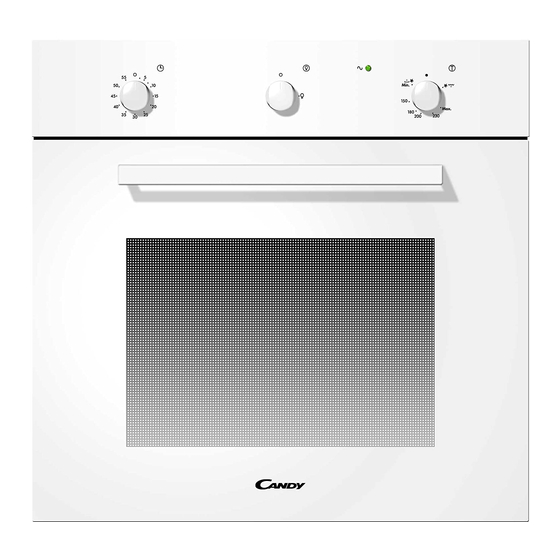
OVEN FUNCTIONS (fig. 8) 60' Timer Oven light Green light Selector knob Fig. 8 Green light The green light turns on when the selector knob is in any position different from switched off. Selector knob It allows to choose between the different cooking functions and set the desired temperature of the oven burner. -
Page 17: Switching On The Oven
SWITCHING ON THE OVEN The oven is equipped with electric ignition. To turn on the oven, open the door completely. If the door is just partially open, a safety system blocks the automatic ignition of burners. Press the thermostat knob and turn it counter-clockwise. Keep the knob pressed for a few seconds to trigger the electric ignition. -
Page 18: Switching The Gas Grill On
SWITCHING THE GAS GRILL ON The grill has an electronic ignition. To switch the gas grill on, proceed as follows: open the oven door; press the knob slightly and turn it clockwise to the grill position; the cooling fan starts; press the knob right in to trigger the electric ignition. - Page 19 How to use the grill Foods to be grilled Cooking time in minutes Over Under Cuts of thin meat Cuts of normal meat Fish (e.g. trout, salmon) Sausages Toast Depending on the type of food (e.g. meats, fish, poultry, etc.), you will need to turn the food to expose both sides to the infrared rays.
- Page 20 INSTRUCTIONS FOR INSTALLING KNOB GUARD OPEN OVEN DOOR INSTALL KNOB GUARD IN SLOTS OF FRONT FASTEN KNOB GUARD ONTO FRONT BY MOVING IT TO THE RIGHT MAKE SURE THE KNOB GUARD IS ATTACHED BY PULLING IT OUTWARDS CLOSE OVEN DOOR ATTENTION: During operation the knob guard gets very hot.
-
Page 21: Cleaning And Maintenance
CLEANING AND MAINTENANCE OF THE OVEN Important: Before performing any maintenance, you must either unplug the oven or disconnect the power supply via the omni -polar switch of the electrical system. Cleaning the oven: Let the oven cool after each use and clean it to keep burnt on residues from being repeatedly heated. - Page 22 How to remove the oven door (fig. 9) To make it easier to clean the oven, it is possible to remove the door from the hinges as follows: The hinges A are equipped with 2 mobile U -bolts B. When the U-bolts B are lifted, the hinges are disconnected from their housing. After this, lift the door up and pull it outwards, holding the door on both sides near the hinges.
-
Page 23: Cleaning The Side Rails
Cleaning the side rails - Fig. 10 The side rails are to be hooked onto the wall of the oven. Slide the racks and tray provided into the side rails. To remove the side rails press on part A as shown . Fig. -
Page 24: Troubleshooting Guide
TROUBLESHOOTING GUIDE The burner does not light Is the gas supply tap open? Is the gas supply obstructed? Is the gas cylinder empty? Are the burner openings blocked? The burner does not stay lit Repeat the ignition operation positioning the knob on the symbol representing the maximum temperature. - Page 28 12300089000...
Need help?
Do you have a question about the OVG505/2N and is the answer not in the manual?
Questions and answers