Table of Contents
Advertisement
Available languages
Available languages
Advertisement
Chapters
Table of Contents

Subscribe to Our Youtube Channel
Related Manuals for STERO ML-130232


Summary of Contents for STERO ML-130232
- Page 1 INSTRUCTION MANUAL STERO SD3 Door-Type Dishwasher MODEL: ML-130232 STERO, a division of Illinois Tool Works, Inc. 1758 Corporate Circle Petaluma, CA 94954 Phone: 800-762-7600 Fax: 707-762-5036 Website: Stero.com ST50408 (10/15)
-
Page 2: Table Of Contents
................. 17 Do's and Don'ts for Your Stero Dishwasher . -
Page 3: General
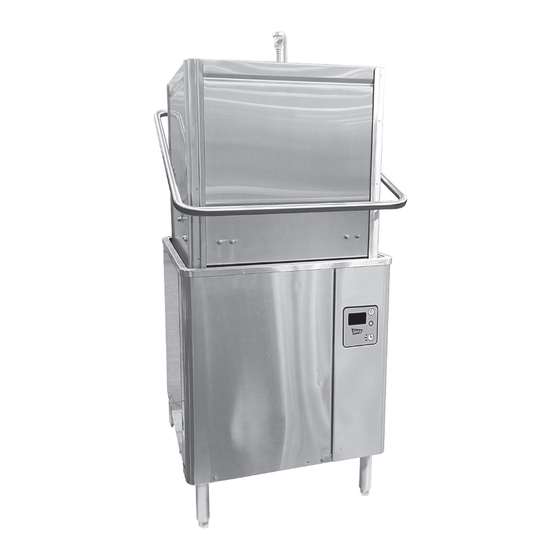
STERO SD3 DOOR-TYPE DISHWASHER PRESSURE GAUGE Installation, Operation and Care of DISHWASHER SAVE THESE INSTRUCTIONS Figure 1 GENERAL The SD3 dishwasher can be configured for both straight through or corner operation. SD3 dishwashers are shipped from the factory in straight-through configuration. Straight-through machines can easily be converted to corner operation. -
Page 4: Start-Up Checklist
STERO SD3 DOOR-TYPE DISHWASHER START-UP CHECKLIST BEFORE POWER IS APPLIED ____ 1. Check all utility service connections for tightness (electric, hot water and drain(s)). ____ 2. Verify drain is connected with air gap (per your local code) and properly draining. -
Page 5: Installation
STERO SD3 DOOR-TYPE DISHWASHER INSTALLATION UNPACKING Immediately after unpacking the dishwasher, check for possible shipping damage. If this machine is found to be damaged, save the packaging material and contact the carrier within 15 days of delivery. Prior to installation, test the electrical service to make sure it agrees with the specifications on the machine data plate;... -
Page 6: Corner Installation
STERO SD3 DOOR-TYPE DISHWASHER INSTALLATION (continued) CORNER INSTALLATION Before placing the dishwasher in its operating location, check machine configuration. If the machine is being installed in a corner (Figure 4), clearances of 20" out from the dishwasher under the left-hand tabling by 27"... -
Page 7: Water Requirements
STERO SD3 DOOR-TYPE DISHWASHER INSTALLATION (continued) WATER REQUIREMENTS Proper water quality can improve warewashing performance by reducing spotting, lowering chemical supply costs, improving productivity and extending equipment life. Local water conditions vary from one location to another. The recommended proper water treatment for effective and efficient use of this equipment will also vary depending on the local water conditions. -
Page 8: Without Electric Booster Water Heater
STERO SD3 DOOR-TYPE DISHWASHER INSTALLATION (continued) Without Electric Booster Water Heater The water supply line is connected to the line strainer (top rear, Figure 1) with ⁄ inch or ⁄ inch pipe. A manual shutoff valve and pipe union are required (customer supplied). -
Page 9: Venting Requirements
STERO SD3 DOOR-TYPE DISHWASHER INSTALLATION (continued) VENTING REQUIREMENTS NOTE: Any listed and labeled factory-built commercial exhaust hood tested in accordance with UL Standard 710 by a nationally recognized testing laboratory, must be installed according to the terms of its listing and the manufacturer’s installation instructions. -
Page 10: Electrical Connections
10 | STERO SD3 DOOR-TYPE DISHWASHER INSTALLATION (continued) ELECTRICAL CONNECTIONS Electrical and grounding connections must comply with the applicable portions of the National Electrical Code, NFPA 70 (latest edition) and / or other local electrical codes. Disconnect the electrical power to the machine (both dishwasher and booster if applicable) and follow lockout / tagout procedures. -
Page 11: Dishwasher With Electric Booster (Separately Connected)
STERO SD3 DOOR-TYPE DISHWASHER | 11 INSTALLATION (continued) Dishwasher With Electric Booster (Separately Connected) Single phase machines with an electric booster require two separate connections, one for the booster and the other for the dishwasher (including motor, controls and tank heat). For single-phase machines, all power sup- ply connections are made to terminal blocks (Figure 10). -
Page 12: Detergent, Rinse Aid, Sanitizer Dispensers - Tubing Installation
(continued) DETERGENT, RINSE AID, SANITIZER DISPENSERS – Tubing Installation Detergent, rinse aid and/or sanitizer dispensers (not provided by Stero) must have all connections sealed against leakage. The dishwasher uses .97 gallons of rinse water per rack at a flow rate DETERGENT SENSOR PORT of 5.8 gallons per minute at 20 psig flowing pressure. -
Page 13: Detergent, Rinse Aid, Sanitizer Dispensers - Equipment Connections
STERO SD3 DOOR-TYPE DISHWASHER | 13 INSTALLATION (continued) DETERGENT, RINSE AID, SANITIZER DISPENSERS – Equipment Connections Electrical and grounding connections must comply with the applicable portions of the National Electrical Code, NFPA 70 (latest edition) and / or other local electrical codes. -
Page 14: Setup
14 | STERO SD3 DOOR-TYPE DISHWASHER INSTALLATION (continued) SD3 SETUP Sanitizing Mode 1. With the machine OFF, press and hold the OFF key. °F °C 2. Press and release the ON key. The display initializes until 88 displays. 3. Release the OFF key. -
Page 15: Operation
STERO SD3 DOOR-TYPE DISHWASHER | 15 OPERATION PREPARATION The overflow tube must be in its proper location below the strainer pan (Figure 16). Place the strainer pan and the strainer bucket in their proper positions (Figure 17). STRAINER BUCKET OVERFLOW TUBE... -
Page 16: Dishwashing
16 | STERO SD3 DOOR-TYPE DISHWASHER OPERATION (continued) DISHWASHING Scrape the dishes to remove large particles of food and debris. Never use steel wool on ware to be loaded into the dishmachine. Figure 19 Arrange the dishes in a rack. Do not stack dishes one on top of another, as water must have free access to all sides of every dish. -
Page 17: Cleaning
STERO SD3 DOOR-TYPE DISHWASHER | 17 CLEANING The machine must be thoroughly cleaned at the end of each working shift or at least daily. Never use steel wool to clean warewasher surfaces. Use only products formulated to be safe on stainless steel. -
Page 18: Do's And Don'ts For Your Stero Dishwasher
DO NOT use steel wool to clean ware or warewasher surfaces. DO NOT allow foreign objects to enter the unit, especially metallic contaminants such as paper clips, retainers, etc. NOTE: Failure to follow use, care and maintenance instructions may void your Stero warewasher warranty. MAINTENANCE DELIME INSTRUCTIONS Check with your chemical provider for deliming procedures. -
Page 19: Troubleshooting
STERO SD3 DOOR-TYPE DISHWASHER | 19 TROUBLESHOOTING This section outlines various symptoms and possible causes that may be encountered in the event of abnormal machine operation. If symptoms persist after possible causes have been checked, service may be required. Symptom Possible Causes No machine operation. -
Page 20: Service
Possible E6 display. 1. Contact your local service provider. Wrench lights up and 1. Contact your local service provider. P1, P2 or P3 displays. SERVICE Contact your local Stero-authorized service office for any repairs or adjustments needed on this equipment. ST50408 (10/15) - Page 21 MODE D'EMPLOI ET D'INSTALLATION Lave-vaisselle à portes STERO SD3 MODÈLE: ML-130232 STERO, une entreprise d'Illinois Tool Works, Inc. 1758 Corporate Circle Petaluma, CA 94954 Téléphone: 800-762-7600 Fax: 707-762-5036 Site Web: Stero.com ST50408 (Oct. 2015)
- Page 22 LAVE-VAISSELLE À PORTES STERO SD3 TABLE DES MATIÈRES GÉNÉRAL ................. . . 3 CONTRÔLES AVANT LA MISE EN MARCHE...
-
Page 23: Général
LAVE-VAISSELLE À PORTES STERO SD3 MANOMÈTRE Installation, Opération et Entretien du LAVE-VAISSELLE CONSERVEZ CES INSTRUCTIONS Figure 1 GÉNÉRAL Le lave-vaisselle SD3 peut être configuré pour fonctionnement en ligne droite ou en coin. Ces lave-vaisselle sont livrés de l'usine pour opération en ligne droite. Les appareils en ligne droite peuvent facilement être modi- fiés pour fonctionner en coin. -
Page 24: Contrôles Avant La Mise En Marche
LAVE-VAISSELLE À PORTES STERO SD3 CONTRÔLES AVANT MISE EN MARCHE AVANT DE METTRE SOUS TENSION ____ 1. Assurez-vous que toutes les connexions et les raccordements aux services publics soient bien serrés (électriques, eau chaude et vidange). ____ 2. Vérifiez si la conduite de vidange est raccordée à un intervalle d'air (selon votre code local) et s'écoule correctement. -
Page 25: Installation
LAVE-VAISSELLE À PORTES STERO SD3 | 5 INSTALLATION DÉBALLAGE Aussitôt après le déballage du lave-vaisselle, assurez-vous qu'il n'a pas subi de dommages pendant le transport. Si tel est le cas, conservez le matériel d'emballage et contactez le transporteur dans les 15 jours de la livraison. -
Page 26: Installation En Coin
LAVE-VAISSELLE À PORTES STERO SD3 INSTALLATION (suite) INSTALLATION EN COIN Avant de placer le lave-vaisselle à sa position finale, vérifiez-en la configuration. Si la machine doit être instal- lée dans un coin (Figure 4), il faut prévoir, pour l'entretien, un dégagement de 20 po (508 mm) sous la table de gauche, à... -
Page 27: Besoins En Eau
LAVE-VAISSELLE À PORTES STERO SD3 INSTALLATION (suite) BESOINS EN EAU Une bonne qualité d'eau peut améliorer les résultats de lavage en réduisant les taches, en abaissant le coût des produits chimiques, en accroissant la productivité et en allongeant la vie utile de l'équipement. Les conditions de l'eau domestique varient d'un endroit à... -
Page 28: Sans Surchauffeur Électrique
LAVE-VAISSELLE À PORTES STERO SD3 INSTALLATION (suite) Sans surchauffeur électrique La conduite d'alimentation d'eau est raccordée au filtre (coin supérieur arrière, Figure 1) par un tuyau de ¾ ou de ½ po (19 ou 12,7 mm). Un robinet d'arrêt manuel et un raccord union sont requis (fournis par le client). -
Page 29: Exigences De Ventilation
LAVE-VAISSELLE À PORTES STERO SD3 INSTALLATION (suite) EXIGENCES DE VENTILATION REMARQUE: toute hotte de ventilation commerciale homologuée et étiquetée, construite en usine et testée en conformité avec la norme UL 710 par un laboratoire d'essais reconnu à l'échelon national, doit être installée selon les conditions de son homologation et selon les instructions d'installation de son fabricant. -
Page 30: Connexions Électriques
10 | LAVE-VAISSELLE À PORTES STERO SD3 INSTALLATION (suite) CONNEXIONS ÉLECTRIQUES Les connexions électriques et de mise à la terre doivent être conformes au Code électrique national, NFPA 70 (édition la plus récente) et/ou aux codes électriques locaux. Coupez l'alimentation électrique de la machine (lave-vaisselle et surchauffeur s'il y a lieu) et observez les procédures de verrouillage et d'étiquetage. -
Page 31: Connexions Aux Équipements
LAVE-VAISSELLE À PORTES STERO SD3 | 11 INSTALLATION (suite) réglage en vous servant de la méthode décrite ci-dessus. Lave-vaisselle avec surchauffeur électrique (connexion séparée) Les appareils monophasés avec surchauffeur électrique exigent deux connexions séparées, une pour le surchauf- feur et une autre pour le lave-vaisselle (moteur, commandes et chauffage de la cuve). Toutes les connexions d'alimentation des appareils monophasés se font à... -
Page 32: Doseurs De Détergent, Agent De Rinçage & Assainisseur Installation Des Tubes
Installation des tubes Tous les raccordements des doseurs de détergent, agent de rinçage et/ ou d'assainisseur (non livrés par Stero) doivent être scellés pour prévenir les fuites. Le lave-vaisselle consomme 0,97 gal US (3,7 l) d'eau par panier à un débit de 5,8 gal US/minute (22 l/min) et à... -
Page 33: Doseurs De Détergent, Agent De Rinçage, Assainisseur - Connexions De L'équipement
LAVE-VAISSELLE À PORTES STERO SD3 | 13 INSTALLATION (suite) DOSEURS DE DÉTERGENT, AGENT DE RINÇAGE & ASSAINISSEUR – Connexions des équipements Les connexions électriques et de mise à la terre doivent être conformes au Code électrique national, NFPA 70 (édition la plus récente) et/ou aux codes électriques locaux. -
Page 34: Configuration
14 | LAVE-VAISSELLE À PORTES STERO SD3 INSTALLATION (suite) de ½ po (13 mm). Des raccords anti-traction doivent accompagner tous les fils. CONFIGURATION SD3 Mode d'assainissement °F °C 1. L'appareil étant à l'ARRÊT, appuyez sur la touche "OFF" en la maintenant enfoncée. -
Page 35: Opération
LAVE-VAISSELLE À PORTES STERO SD3 | 15 OPÉRATION PRÉPARATION Le tube de trop-plein doit être à la bonne position sous le filtre (Figure 16). Placez le filtre et le panier filtre correctement à leurs positions respectives (Figure 17). PANIER FILTRE... -
Page 36: Lavage De La Vaisselle
16 | LAVE-VAISSELLE À PORTES STERO SD3 OPÉRATION (suite) LAVAGE DE LA VAISSELLE Raclez la vaisselle pour en retirer les gros restes d'aliment et les débris. Ne vous servez jamais de laine d'acier sur la vaisselle qui sera chargée dans la machine à laver. -
Page 37: Nettoyage
LAVE-VAISSELLE À PORTES STERO SD3 | 17 NETTOYAGE L'Appareil doit être nettoyé à fond à la fin de chaque quart de travail ou tout au moins quotidiennement. N'utilisez jamais de laine d'acier pour nettoyer les surfaces du lave-vaisselle mais uniquement des produits sans danger pour l'acier inoxydable. -
Page 38: Entretien
NETTOYAGE (suite) À FAIRE ET NE PAS FAIRE AVEC VOTRE NOUVEAU LAVE-VAISSELLE STERO FAITES EN SORTE que l'eau ne soit pas trop dure (3 grains gal US ou moins - 51,45 mg/l CaCO FAITE EN SORTE de bien pré-rincer la vaisselle. -
Page 39: Dépannage
LAVE-VAISSELLE À PORTES STERO SD3 | 19 DÉPANNAGE Cette section décrit certains symptômes et leurs causes possibles pouvant se rencontrer lorsque l'appareil ne fonctionne pas normalement. S'ils persistent après en avoir vérifiés les causes possibles, une intervention de service peut être nécessaire. -
Page 40: Service
Une clé à molettes 1. Contactez le service de l'entretien de votre localité. s'allume et l'affichage indique P1, P2 or P3. SERVICE Pour toute réparation ou réglage de cet équipement, contactez le bureau de service Stero autorisé dans votre région. ST50408 (Oct. 2015)
Need help?
Do you have a question about the ML-130232 and is the answer not in the manual?
Questions and answers