
Related Manuals for Panasonic NN-SD38HS


Summary of Contents for Panasonic NN-SD38HS
-
Page 1: Microwave Oven
Operating Instruction and Cook Book Microwave Oven Household Use Only Model No. NN-SD38HS Please read these instructions carefully before using this product, and save this manual for future use. - Page 2 We are glad you have chosen to purchase a PANASONIC microwave oven. Before operating this oven, please read these instructions carefully and completely, and keep them for further reference. If you have only used a microwave oven for reheating and defrosting, with Panasonic’s Inverter Technology you can be reassured of excellent results when cooking a variety of foods, as the ‘soft’...
-
Page 3: Table Of Contents
Fish and Shellfi sh ........................34-35 Poultry .............................36-37 Main Fare Meats ........................38-40 Vegetable Varieties ........................41-44 Rice, Pasta and Cereal ......................45-46 Desserts ............................47 Maintenance Before Requesting Service ......................48 Care of Your Microwave Oven ......................49 Technical Specifi cations .......................50 Panasonic Warranty ........................51 – 3 –... -
Page 4: Quick Guide To Operation
Quick Guide to Operation Feature How to Operate To Set Clock page 14) Press twice Set time of day Press once To set: To cancel: To Set / Cancel Child Safety Lock page 13) Press 3 times. Press 3 times. To Cook/Reheat/ Defrost by Micro Power and Time... - Page 5 Quick Guide to Operation (continued) To Cook using Quick 30 Button page 18) Press to set the Press once desired cooking time. To Use the Add Time Feature page 18) After cooking, turn dial Press once to select Add Time feature To Use as a Kitchen Timer...
-
Page 6: Important Safety Instructions
Important Safety Instructions READ CAREFULLY AND KEEP FOR FUTURE REFERENCE Precautions To Be Taken When Important Instructions Using Microwave Ovens For WARNING—To reduce the risk of burns, electric Heating Foodstuffs shock, fi re, injury to persons or excessive microwave energy: INSPECTION FOR DAMAGE: 1. -
Page 7: Installation And General Instructions
Important Safety Instructions (continued) Earthing Instructions (This statement applicable only to South Africa) WARNING This microwave oven must be earthed. In the event of an electrical short circuit, earthing reduces the risk of electric shock by providing an escape wire for the a) The door seals and door seal areas should be electric current. - Page 8 Installation and General Instructions (continued) 13. Do not leave the microwave unattended while beverages, in your microwave oven, overheating reheating or cooking food in disposable containers the liquid beyond boiling point can occur without made of plastic, paper or other combustible evidence of bubbling.
-
Page 9: Microwaves And How They Work
Microwaves and How They Work Reflection: Microwaves are a form of high frequency radio waves similar to those used by a radio, including AM, FM and Metal substances REFLECT microwave energy and CB. They are similar to a television where the radio because there is no absorption, there is no heating. - Page 10 Cookware and Utensils Guide (continued) Plastics Metal twist-ties, either paper or plastic coated, should NOT be used in the microwave oven. Frozen dinner Plastic dishes, cups and some freezer containers trays can be used in the microwave, if the container should be used with care in a microwave oven.
-
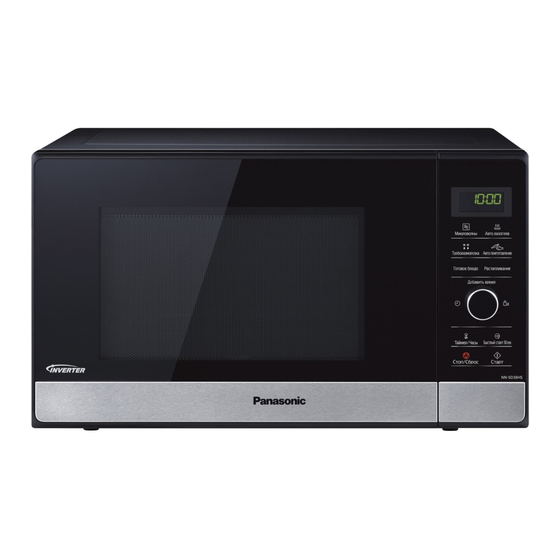
Page 11: Feature Diagram
Feature Diagram Oven Window Roller Ring Door Safety Lock System a. Roller Ring should be cleaned regularly to avoid ... -
Page 12: Control Panel
Control Panel CONTROL PANEL 10. Quick 30 Button (Pg.21) 1. Display Window 11. Stop/Reset Button 2. Mico Power Button (Pg.13, 15,16) Before cooking: One tap clears all your 3. -
Page 13: Let's Start To Use Your Oven
Let's Start To Use Your Oven! Plug in. After plugging in, “ ” will appears in the display window, then you can start to operate. Open Door. Open the door and place container with food in a dish on Glass Tray in the oven. Then close the door. Select Power Level. -
Page 14: To Set Clock
To Set Clock You can use the oven without setting the clock. Press twice. Colon will blink in the display window. Enter Time of Day. Enter time of day using the dial. Time appears in the display window; colon is blinking. Note: Turning the dial slowly will count up in 1 minute steps. -
Page 15: To Cook On Micro Power By Time Setting
Micro Power by Time Setting To Cook/Reheat/Defrost on Press to Select Micro Power Level. Press Micro Power button until your desired power level appears in the Display Window. (see chart below) Press Power Level Example Of Use once 1000 W (HIGH) Boil water. -
Page 16: To Defrost On Micro Power By Time Setting
To Defrost on Micro Power by Time Setting If you want to decide the defrost time by yourself, please select this button and operate the following. Press 5 times for 300W. Set Cooking Time. Set defrosting time by turning the dial. (up to 1 hour and 30 minutes) Press Press Start . - Page 17 To Defrost Using Turbo Defrost (continued) Food Maximum Weight Minced meat, Chicken Pieces, Chops 2 kg Beef roast, lamb, whole chickens 2 kg Whole fi sh, scallops, prawns, fi sh fi llets 1 kg Tips for Turbo defrost Meat, which is with bones. For example, if the meat with bones has the same weight as the pure meat, the meat in the former one is lighter than the latter one.
-
Page 18: To Cook Using The Quick 30 Feature
To Cook Using the Quick 30 Feature This feature allows you to quickly set cooking time in 30 second increments. 1. Press Quick 30 to set the desired 2. Press Start. cooking time (up to 5 minutes). The cooking will start and the time in the display will count down. -
Page 19: To Cook/Reheat Food Using Auto Menus
Auto Menus To Cook/Reheat Food Using This feature allows you to cook foods without selecting times and Power Level. Only set desired menu number and Serving/Weight, the oven will cook your food automatically. Select Desired Menu Number. Press to select the desired button until the desired menu number appears in the display window. Select Desired Serving/Weight. -
Page 20: Frozen Vegetables
Auto Menus To Cook/Reheat Food Using (continued) For best results on Auto Cook, follow these recommendations: 1. Reheat Meal 7. Fresh Pasta Suitable for casseroles, plated dinners, soups, stews, Suitable for cooking a variety of fresh pastas.Place pasta dishes (except lasagne), and canned food. All them into a suitable sized microwave safe casserole foods must be pre-cooked and reheated from room with boiling water. - Page 21 Auto Menus To Cook/Reheat Food Using (continued) 9. Casserole Rice 12. Curries Suitable for cooking white rice including short grain, The weight we suggested is only for meat. See chart below for quantities to use. long grain, Jasmine and Basmati. Place washed rice with recommended amount of cold water in a suitable Coconut milk Weight of hards...
-
Page 22: Melt & Soften Feature
Melt & Soften Feature This feature allows you to melt/soften food at the touch of a button. There is no need to select the power level or cooking time as the microwave does this for you. 3. Press Start. 2. Select the Weight of 1. -
Page 23: Ingredient Conversion Chart
3-Stages Setting This feature allows you to program 3 Stages of cooking continuously. E.g.: Continually set [1000 W] 2 minutes, [600 W] 3 minutes and [100 W] 2 minutes. 1. Press once to 2. Set as 2 minutes by 3. Press 3 times to 4. -
Page 24: To Use Timer
To Use Timer This feature allows you to use the oven as a kitchen timer. It can be also a stand time after cooking is completed or to program a delay start. To Use as a Kitchen Timer. Press Start. Press once. -
Page 25: Defrosting Chart
Defrosting Chart The times given below are a guideline only.Always check the progress of the food by opening the oven door and then re-starting. For larger quantities adjust times accordingly. Food should not be covered during defrosting. Food Weight/Quantity Time & Mode Method Beef/Lamb/Joint (1)(3) 450 g (1 lb) -
Page 26: Reheating Chart
Reheating Chart The times given in the charts below are a guideline only, and will vary depending on starting temperature, dish size etc. Weight/ Food Time & Mode Method Quantity Drinks-Coffee-Milk Coffee 1 mug 235 ml 1000 W 1 min 30 secs 1000 W 2 mins 30 secs- Coffee 2 mugs 470 ml... -
Page 27: Cooking Chart
Cooking Chart Food Weight/Quantity Time & Mode Method Beans & Pulses-should be pre-soaked (except lentils) 1000 W 8 mins then Chick peas 225 g 440 W 15-20 mins Use 600 ml (1 pt) boiling Lentils 225 g 440 W 35-40 mins water in a large bowl. -
Page 28: Microwave Recipe Techniques
Microwave Recipe Techniques Microwaves penetrate the surface of the food to a fast and even cooking. Some of these techniques depth of about two to three centimetres and then are similar to those used in conventional cooking, but the heat is gradually conducted in a random pattern. because microwaves produce heat very quickly the Some parts of food matter cook faster than others. -
Page 29: Standing Time
Microwave Recipe Techniques (continued) Covering Converting Your Favourite Conventional Covering food minimizes the microwave cooking time. Recipes for Microwave Cooking Because microwave cooking is done with time and not When adapting conventional recipes for microwave direct heat, the rate of evaporation cannot be easily cooking, times are reduced considerably. -
Page 30: Microwave Recipe Techniques
Microwave Recipe Techniques (continued) Menu Planning for Microwave Cooking Increasing & Decreasing Recipes How to Keep Everything Hot at The Same Time Increasing Plan your meals so that the food will not all need last • To increase a recipe from 4 to 6 servings, increase minute cooking or attention at the same time. -
Page 31: Basic Recipes
Basic Recipes RANOLA EREAL EMON ORDIAL Makes: approximately 4 cups Makes:approximately 1.5 litres of undiluted cordial Ingredients: Ingredients: large lemons 2 cups oats limes chopped nuts ⁄ 4 cups sugar wheat germ ⁄ 2 cups water brown sugar ⁄ 2 teaspoons citric acid honey ⁄... -
Page 32: Soups And Snacks
Soups and Snacks HICKEN AND RAWN AKSA ACHOS UPREME Serves: 4 Serves: 4 to 6 Ingredients: Ingredients: Soup: 500 g topside mince 2 tablespoons laksa paste 35 g packet taco seasoning mix 400 ml coconut milk tomato paste ⁄ 1 litre chicken stock 1 teaspoon Mexican chilli powder... -
Page 33: Soups And Snacks
Soups and Snacks (continued) UMPKIN EA AND Serves: 4 Serves: 6 Ingredients: Ingredients: 1 kg pumpkin diced cups green split peas ⁄ onion, diced 850 g smoked ham hock 2 cups chicken stock medium onion, chopped 1 teaspoon curry powder 1 tablespoon fresh thyme leaves pepper... -
Page 34: Fish And Shellfi Sh
Fish and Shellfi sh Directions for Cooking Fish and Shellfi sh by Micro Power Clean fi sh before starting the recipe. Arrange fi sh Cover dish with plastic wrap. Cook on the power level in a single layer, do not overlap edges. Prawns and and for the minimum time recommended in the chart scallops should be placed in a single layer. -
Page 35: Fish And Shellfi Sh
Fish and Shellfi sh (continued) PICED HOLE REAM ALMON TEAKS WITH UTTER Serves: 2 Serves: 4 Ingredients: Ingredients: 2 x 400 g whole bream 30 g butter 1 clove garlic clove garlic, crushed 3 stalks coriander 1 teaspoon grated fresh ginger red birds eye chilli 1 teaspoon grated lime rind... -
Page 36: Poultry
Poultry Cooking Whole Poultry by Micro Power Season as desired, but salt after cooking. Browning Multiply the weight of the poultry by the minimum sauce mixed with equal parts of butter will enhance recommended minutes per 500 g. Programme Micro the appearance. -
Page 37: Poultry
Poultry (continued) HICKEN HICKEN AND SPARAGUS ISOTTO Serves: 4 Serves: 4 Ingredients: Ingredients: 300 g fresh asparagus, chopped dried chinese mushrooms 2 tablespoons olive oil 2 teaspoons sesame oil cups arborio rice ⁄ clove garlic, chopped clove garlic, crushed 500 g minced chicken 4 cups boiling chicken stock... -
Page 38: Main Fare Meats
Main Fare Meats Cooking Tender Cuts of Meat by Micro Power For best results, select roasts that are uniform in beginning of cooking, remove foil halfway through shape. the cooking time. Beef and pork rib roasts should be Place meat on a microwave rack in a suitable dish. shielded around the bones. - Page 39 Main Fare Meats (continued) HILLI PAGHETTI AUCE Serves: 4 Serves: 4 Ingredients: Ingredients: 500 g 500 g minced beef minced beef onion, diced onion, diced clove garlic, crushed clove garlic, crushed 35 g 420 g packet chilli seasoning mix can tomatoes 410 g can tomato puree tomato paste...
- Page 40 Main Fare Meats (continued) USSAMAN URRY INGERED Serves: 4 Serves: 4 Ingredients: Ingredients: 500 g sliced lean pork 500 g round steak diced teriyaki sauce mussaman curry paste ⁄ ⁄ 1 tablespoon honey 400 g potato diced 2 teaspoons minced ginger 250 ml coconut milk 2 teaspoons...
-
Page 41: Vegetable Varieties
Vegetable Varieties Directions for Cooking Vegetables pouch should be placed on a dish and the top pierced. Cook on 1000 W according to directions given in chart. Vegetables should be cooked covered with a lid RESH EGETABLES BY ICRO OWER or plastic wrap. - Page 42 Vegetable Varieties (continued) Cooking Fresh Vegetables by Micro Power Vegetables should be covered and cooked on 1000 W for best results. Weights given are trimmed weights. APPROX. COOKING VEGETABLE QUANTITY COOKING PROCEDURE TIME (in minutes) on 1000 W Asparagus 250 g Covered dish with cup water 4 to 6...
- Page 43 Vegetable Varieties (continued) AULIFLOWER IN HITE AUCE RIENTAL EGETABLES Serves: 4 Serves: 4 to 6 Ingredients: Ingredients: 500 g caulifl ower fl owerets 1 tablespoon 2 tablespoons water 1 cup celery, sliced diagonally 2 tablespoons butter large onion, cut into petals 2 tablespoons fl...
-
Page 44: Vegetable Varieties
Vegetable Varieties (continued) TUFFED OMATOES RDENNIS TYLE OTATOES Serves: 2 Serves: 4 Ingredients: Ingredients: 2 (large) tomatoes medium sized potatoes fresh breadcrumbs 100 g ham, fi nely diced ⁄ grated cheese 3 tablespoons snipped chives ⁄ 50 g green onions, fi nely sliced butter 1 tablespoon fi... -
Page 45: Rice, Pasta And Cereal
Rice, Pasta and Cereal Cooking Rice and Other Grains by Micro Power Follow directions in chart for recommended dish in chart. Allow to stand, covered, before serving. For size, amounts of water and cooking time. Add grain special rice, substitute beef or chicken stock for water. to water. - Page 46 Rice, Pasta and Cereal (continued) ACON AND NION ORTELLINI ACARONI AND HEESE Serves: 4 Serves: 4 to 6 Ingredients: Ingredients: 40g butter 600 g fresh tortellini onion, fi nely chopped 6 cups boiling water 2 tablespoons fl our onion, diced 2 cups milk clove garlic, crushed...
-
Page 47: Desserts
Desserts UTTERSCOTCH UDDING USTARD Serves: 4 to 6 Serves: 6 Ingredients: Ingredients: 400 g 825 g sweetened condensed milk pear halves, drained 30 g butter 2 tablespoons plain fl our 1 teaspoon vanilla essence caster sugar ⁄ milk eggs ⁄ self raising fl... -
Page 48: Before Requesting Service
Before Requesting Service ALL THESE THINGS ARE NORMAL The oven causes Some radio, TV, Wi-Fi, cordless telephone, baby monitor, blue tooth or other wireless equipment interference might occur when you cook with the micro- interference with my TV. wave oven. This interference is similar to the interference caused by small appliances such as mixers, vacuums, hair dryers, etc. -
Page 49: Care Of Your Microwave Oven
3. Do not use harsh abrasive cleaners or sharp metal scrapers to clean the oven door glass, since they can scratch the surface, which may result in shattering of the glass. Technical Specifi cations Model NN-SD38HS Power Supply: 230 - 240 V, 50 Hz Power Consumption: 4.9 A 1,150 W... -
Page 50: Panasonic Warranty
Panasonic Warranty (for Australia) – 50 –... -
Page 51: Panasonic Warranty
Panasonic Warranty (for New Zealand) – 51 –... - Page 52 © Panasonic Appliances Microwave Oven (Shanghai) Co., Ltd. 2017 F0003BW40QP PA0817-0 Printed in China...
Need help?
Do you have a question about the NN-SD38HS and is the answer not in the manual?
Questions and answers