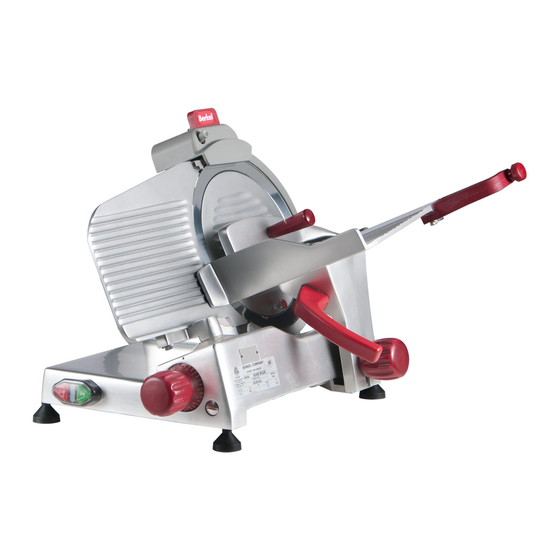
Download Print this page

Advertisement

O
/O
WNER
M
ANUAL
M
ODELS
823E-PLUS, 825E-PLUS,
825A-PLUS, 827E-PLUS,
827A-PLUS, & 829E-PLUS
S
LICERS
IMPORTANT NOTICE
This manual contains Important Safety
Instructions which must be strictly
followed when using this equipment.
PERATOR
BK45760 Rev. A (February 2015)

Advertisement

loading

Summary of Contents for Berkel 823E-PLUS

  • Page 1 WNER PERATOR ANUAL ODELS 823E-PLUS, 825E-PLUS, 825A-PLUS, 827E-PLUS, 827A-PLUS, & 829E-PLUS LICERS IMPORTANT NOTICE This manual contains Important Safety Instructions which must be strictly followed when using this equipment. BK45760 Rev. A (February 2015)
  • Page 2: General Safety Instructions

    SING QUIPMENT Berkel’s slicers are designed to slice meat and other food products safely and there is the possibility of a serious injury. It is the responsibility of the owner to ensure that this slicer is used properly and safely, strictly following the instructions contained in this manual and any requirements of local law.
  • Page 3: Table Of Contents

    Unpacking and Installation ......................... 6 Operation ..............................6 Cleaning and Sanitizing Instructions ......................7 Sharpening Instructions ..........................Gasket Inspection .................................................... Troubleshooting ............................Warranty ..............................The Berkel Company • World’s Leading Manufacturer of Slicers and Food Processing Equipment ERKEL OMPANY www.berkelequipment.com...
  • Page 4 WARNING SHARP KNIFE BLADE to avoid serious personal injury follow all the instructions in this manual GUARDS MUST BE in place before plugging in and turning on machine. replacement. 4 • O BK45760 Rev. A (02-15) WNER PERATOR ANUAL...
  • Page 5: Equipment Description

    Equipment Description WARNING To avoid serious personal injury, properly install slicer in adequate work area • • • • • • BK45760 Rev. A (02-15) O • 5 WNER PERATOR ANUAL...
  • Page 6: Unpacking And Installation

    Unpacking and Installation UNPACKING AND ASSEMBLY • • Carefully check all slicer components such as the product table, pusher, sharpener, thickness thickness control knob as far right as possible. Lubricate the pusher slide bar (on the product chine Oil. WARNING Use only USDA-authorized oil on this slicer.
  • Page 7: Cleaning And Sanitizing Instructions

    Cleaning And Sanitizing Instructions GENERAL INFORMATION health codes. We recommend that the machines should be properly cleaned at least once a day; if neces- PARTS THAT MUST BE REMOVED FOR CLEANING OTHER PARTS THAT MUST BE CLEANED BK45760 Rev. A (02-15) O •...
  • Page 8 DISASSEMBLING THE MACHINE FOR CLEANING Disconnect the plug from the electric mains supply. 2. Turn the regulating knob of the thickness plate to ‘0’. following paragraphs. Disassembling the Meat Pusher the tray. Disassembling the product table Turn the locking knob counter clockwise all the 2.
  • Page 9 Disassembling the Center Plate Unscrew the center plate locking knob. knife. knob. the main slicer body, as shown in the picture. Disassembling the Sharpener BK45760 Rev. A (02-15) O • 9 WNER PERATOR ANUAL...
  • Page 10 PRODUCTS TO BE USED FOR CLEANING food press. If a chemical sanitizer other than chlorine, iodine or quaternary ammonium is used, it shall be applied in accordance with the EPA-registered label use instructions. WARNING Rinse well with a lot of hot clean water and dry with a soft cloth or a spongy material. Do not clean the slicer with water or stream jets or similar methods.
  • Page 11 CLEANING THE BLADE WARNING Press a damp cloth on the surface of the blade and on the other side. 2. Sanitize and dry in the same way using a dry cloth. 3. Repeat cleaning both front and back of knife with clear water.
  • Page 12 REASSEMBLING THE SLICING MACHINE Reassembling the sharpener 2. Insert the sharpener as shown in the picture until it stops at its correct position and screw the knob. in the picture. Reassembling the Center Plate Replace the center plate as shown in the picture making sure the section joint is in its proper place.
  • Page 13 Reassembling the product table Insert the entire group on the carriage as shown in the picture. 2. Tighten the locking knob. Reassembling the meat pusher Insert the rod in the meat pusher and in the hole of the 2. Tighten the locking knob. BK45760 Rev.
  • Page 14: Sharpening Instructions

    Sharpening Instructions CAUTION The knife should be sharpened at a minimum on a daily basis. Do not sharpen a knife that is not 2. Unplug the slicer. 3. Turn the thickness control knob fully to the right to place the gauge plate in the fully closed position.
  • Page 15: Gasket Inspection

    Gasket Inspection detached for cleaning and sanitizing (all the gaskets in the images). WARNING agent if any gasket or seal is found to be damaged, or missing. BK45760 Rev. A (02-15) O • 15 WNER PERATOR ANUAL...
  • Page 16 Repair Parts/Repair Service/Exploded Views on the information category you want to read or download. Be sure to enter your product model num- ber.Additional information may be obtained from: Berkel Company 2006 Northwestern Parkway www.berkelequipment.com 16 • O BK45760 Rev. A (02-15)
  • Page 17: Troubleshooting

    Troubleshooting Should your slicer fail to function properly, here are a few things you can check before calling a Berkel Ser- Product not slicing properly; thick and thin or irregular slices • Is the knife sharp? If not, sharpen according to instructions in this manual. Remember, only sharpen a clean knife.
  • Page 18 This warranty does not apply to: periodic maintenance of equipment including but not limited normal wear. between the buyer and seller. Berkel neither assumes nor authorizes any persons to assume any other obligation or liability connection with said equipment. This warranty supersedes any and all prior warranties to the subject hereof.
  • Page 19 823E-PLUS, 825E-PLUS, 825A-PLUS, 827E-PLUS, 827A-PLUS, & 829E-PLUS AVIS IMPORTANT Ce manuel contient des directives de sécurité importantes qui doivent être suivies rigoureusement BK45760 Rév. A (Février 2015)
  • Page 20 correctement et de manière sécuritaire, et de faire en sorte que les utilisateurs suivent Personne ne devrait utiliser ou entretenir cette trancheuse sans une supervision peut prévoir toutes les situations ni tous les environnements dans lesquels ses des avertissements supplémentaires apparaissent à plusieurs endroits AVERTISSEMENTS CONCERNANT VOTRE...
  • Page 21 Inspection des joints Pièces de rechanges/Service de réparation Garantie La Société Berkel • Le leader mondial dans la fabrication de trancheuses et d'appareils pour la préparation alimentaire 2006 Northwestern Parkway • Louisville, KY 40201 Téléphone: (800) 348-0251 • Fax (888) 888-2838...
  • Page 22 AVERTISSEMENT Ne touchez JAMAIS à cet appareil sans formation et sans l’autorisation de votre 4 •...
  • Page 23 AVERTISSEMENT installez correctement la trancheuse dans une zone de travail appropriée • • • • • • Ne vous servez JAMAIS de la trancheuse sans que tous les autocollants d’avertissement et les • 5...
  • Page 24 DÉBALLAGE ET MONTAGE • pas le cordon d’alimentation et ne tentez pas d’utiliser la trancheuse avant d’avoir effectué cet • AVERTISSEMENT AVERTISSEMENT Fonctionnement Général 6 •...
  • Page 25 INFORMATION GÉNÉRALE Cet appareil devra être nettoyé et désinfecté à intervalles réguliers pour se conformer aux codes de PIÈCES QUI DOIVENT ÊTRE RETIRÉES POUR NETTOYAGE AUTRES PIÈCES QUI DOIVENT ÊTRE NETTOYÉES • 7...
  • Page 26 Retirez les différents éléments ainsi que décrits aux 8 •...
  • Page 27 caisson principal de la trancheuse tel qu’illustré • 9...
  • Page 28 PRODUITS À UTILISER POUR LE NETTOYAGE température égale ou plus élevée que 30°C ou 86°F; servez-vous d’un chiffon doux spongieux et d’une portant sur l’équipement de lavage de la vaisselle manuel et mécanique quant à la désinfection Si vous utilisez un produit autre que le chlore, l’iode ou l’ammonium quaternaire, il devra être manié en AVERTISSEMENT Pour le nettoyage des zones acérées des plaques, du poussoir et de la lame, nous recommandons le Nettoyez le couvercle de l’affûteuse avec de l’eau et du savon...
  • Page 29 de rechange (N NETTOYAGE DE LA LAME AVERTISSEMENT Appuyez un linge humide sur la surface de la lame et déplacez-le lentement du centre jusqu’au Répétez le nettoyage à l’eau claire sur le devant et Nettoyez le caisson de la machine avec un linge humide ou une éponge que vous rincerez souvent N’ouvrez pas la plaque d’épaisseur car vous risquez NETTOYAGE DES ÉLÉMENTS DU CAISSON...
  • Page 30 Replacez le couvre-lame tel qu’illustré sur la photo en prenant soin de correctement placer le 12 •...
  • Page 31 • 13...
  • Page 32 Instructi ATTENTION 14 •...
  • Page 33 L’intervalle recommandé entre les inspections ne devrait pas dépasser six mois pour les éléments qui se AVERTISSEMENT Si quelque joint d’étanchéité que ce soit devient endommagé ou manquant, la trancheuse doit être reti- rée du service jusqu’à ce qu’elle soit réparée par le manufacturier ou son agence de service d’entretien •...
  • Page 34 Resource Center La Société Berkel 2006 Northwestern Parkway Louisville, KY 40201 Téléphone: (800) 348-0251 Fax: (888) 888-2838 16 •...
  • Page 35 • • • • • • • • • Panne électrique • • • • Si l’alimentation électrique est correcte et que votre trancheuse ne fonctionne toujours pas, faites • • 17...
  • Page 36 Garantie En vigueur le 14 février 2002 La Société Berkel (Berkel) garantit à l’acheteur d’un appareil neuf que le dit appareil, s’il est installé selon nos instructions et utilisé normalement, est exempt de défauts de matériaux et de BERKEL REJETTE SPÉCIFIQUEMENT TOUTE GARANTIE TACITE DE QUALITÉ...

This manual is also suitable for:

825e-plus827e-plus825a-plus827a-plus829e-plus