Table of Contents
Advertisement
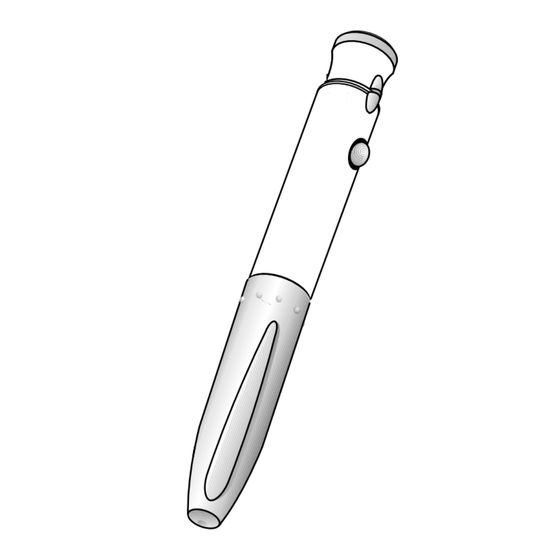
Disposable Insulin Delivery Device
Instructions for Use
Read and follow all of these instructions
carefully. If you do not follow these
instructions completely, you may get
too much or too little insulin.
Every time you inject:
• Use a new needle
• Prime to make sure the Pen is
ready to dose
• Make sure you got a full dose
(see page 18)
Also, read the Information for
the Patient insert enclosed in
your Pen box.
Pen Features
• A multiple dose, disposable insulin
delivery device ("insulin Pen")
containing 3 mL (300 units) of U-100 insulin
• Delivers up to 60 units per dose
• Doses can be dialed by single units
User Manual
PV 3734 AMP
Advertisement
Table of Contents

Subscribe to Our Youtube Channel
Related Manuals for Lilly HumaPen Savvio


Summary of Contents for Lilly HumaPen Savvio
- Page 1 PV 3734 AMP Disposable Insulin Delivery Device User Manual Instructions for Use Read and follow all of these instructions carefully. If you do not follow these instructions completely, you may get too much or too little insulin. Every time you inject: •...
-
Page 2: Table Of Contents
T able of Contents Pen Parts ............3 Important Notes ..........4 Preparing the Pen ..........6 Attaching the Needle .......... 8 Priming the Pen ............10 Setting a Dose ............14 Injecting a Dose............16 Following an Injection ..........18 Questions and Answers ........20... -
Page 3: Pen Parts
Pen Parts Injection Button Dose Knob Raised Notch Raised Notch Dose Window Label Pen Cap Insulin Cartridge Clear Cartridge Holder Rubber Seal Needle Paper Inner Needle Shield Outer Needle Shield... -
Page 4: Important Notes
Important Notes • Read and follow all of these instructions carefully. If you do not follow these instructions completely, you may get too much or too little insulin. • Use a new needle for each injection. • Be sure a needle is completely attached to the Pen before priming, setting (dialing) the dose and injecting your insulin. - Page 5 Important Notes (Continued) • Keep your Pen out of the reach of children. • Pens that have not been used should be stored in a refrigerator but not in a freezer. Do not use a Pen if it has been frozen. Refer to the Information for the Patient insert for complete storage instructions.
-
Page 6: Preparing The Pen
I. Preparing the Pen 1. Before proceeding, refer to the Information for the Patient insert for instructions on checking the appearance of your insulin. 2. Check the label on the Pen to be sure the Pen contains the type of insulin that has been prescribed for you. - Page 7 I. Preparing the Pen (Continued) 5. If your insulin is a suspension (cloudy): a. Roll the Pen back and forth 10 times then perform step b. b. Gently turn the Pen up Glass and down 10 times until Bead the insulin is evenly mixed.
-
Page 8: Attaching The Needle
II. Attaching the Needle This device is suitable for use with Becton Dickinson and Company’s insulin pen needles. 1. Always use a new needle for each injection. Do not push injection button without a needle attached. Storing the Pen with the needle attached may allow insulin to leak from the Pen and air bubbles to form in the cartridge. - Page 9 II. Attaching the Needle (Continued) 4. Hold the Pen with the needle Outer Needle pointing up and remove the Shield (Keep) outer needle shield. Keep it Inner Needle Shield to use during needle (Discard) removal. 5. Remove the inner needle shield and discard.
-
Page 10: Priming The Pen
III. Priming the Pen • The Pen must be primed before each injection to make sure the Pen is ready to dose. Performing the priming step is important to confirm that insulin comes out when you push the injection button, and to remove air that may collect in the insulin cartridge during normal use. - Page 11 III. Priming the Pen (Continued) 3. With the arrow in the center of the dose window, pull the dose knob out in the direction of the arrow until a “0” is seen in the dose window. 4. Turn the dose knob clockwise until the number “2”...
- Page 12 III. Priming the Pen (Continued) 5. Hold your Pen with the needle pointing up. Tap the clear cartridge holder gently with your finger so any air bubbles collect near the top. Using your thumb, if possible, push in the injection button completely. Keep pressing and continue to hold the injection button firmly while counting slowly to 5.
- Page 13 III. Priming the Pen (Continued) 6. At the completion of the priming step, a diamond (N) must be seen in the center of the dose window. If a diamond (N) is not seen in the center of the dose window, continue pushing on the injection button until you see a diamond (N)
-
Page 14: Setting A Dose
IV. Setting a Dose • Always use a new needle for each injection. Storing the Pen with the needle attached may allow insulin to leak from the Pen and air bubbles to form in the cartridge. • Caution: Do not push in the injection button while setting your dose. - Page 15 IV. Setting a Dose (Continued) 2. Turn the dose knob clockwise until the arrow (©) is seen in the center of the dose window and the notches on the Pen and dose knob are in line. 3. With the arrow (©) in the center of the dose window, pull the dose knob out in the direction of the arrow until a “0”...
-
Page 16: Injecting A Dose
V. Injecting a Dose Always use a new needle for each injection. • Storing the Pen with the needle attached may allow insulin to leak from the Pen and air bubbles to form in the cartridge. • Caution: Do not attempt to change the dose after you begin to push in the injection button. - Page 17 V. Injecting a Dose (Continued) Insert the needle into your skin. Inject the insulin by using your thumb, if possible, to push in the injection button completely. Keep pressing and continue to hold the injection button firmly while counting slowly to 5. 4.
-
Page 18: Following An Injection
VI. Following an Injection 1. Make sure you got a full dose by checking that the injection button has been completely pushed in and you can see a diamond (N) or arrow (©) in the center of the dose window. If you do not see the diamond (N) or arrow (©) in the center of the dose window, you have not received a full dose. - Page 19 VI. Following an Injection (Continued) 3. Remove the capped needle by turning it counterclockwise and throw it away. Place the used needle in a puncture- resistant disposable container and properly dispose of it as directed by your Health Care Professional. 4.
-
Page 20: Questions And Answers
Questions and Answers Problem Action 1. Dose dialed To obtain an accurate dose you and injection must: button 1) Attach a new needle. pushed in 2) Push in the injection button without a completely (even if a “0” is seen needle in the window) until a diamond attached. - Page 21 Questions and Answers (Continued) Problem Action 3. Wrong dose If you have not pushed in the (too high or injection button, simply turn the too low) dose knob backward or forward dialed. to correct the dose. 4. Not sure Hold the Pen with the needle end how much pointing down.
- Page 22 Questions and Answers (Continued) Problem Action 5. Full dose cannot The Pen will not allow you to dial a be dialed. dose greater than the number of insulin units remaining in the cartridge. For example, if you need 31 units and only 25 units remain in the Pen, you will not be able to dial past 25.
- Page 23 Questions and Answers (Continued) Problem Action 7. Cannot 1) Needle is not attached or is completely clogged. push in the a. Attach a new needle. injection b. Push in the injection button button when completely (even if a “0” is priming the seen in the window) until a Pen or...
- Page 24 For additional information call, 1-888-88-LILLY Literature revised May 2, 2005 Eli Lilly and Company Indianapolis, IN 46285, USA PRINTED IN USA...
Need help?
Do you have a question about the HumaPen Savvio and is the answer not in the manual?
Questions and answers