biodex 950-440 Operation & Service Manual
Balance system sd (with v4.x software)
Hide thumbs
Also See for 950-440:
- Instructions for use manual (76 pages) ,
- Operation & service manual (114 pages)

Related Manuals for biodex 950-440


Summary of Contents for biodex 950-440
- Page 1 BALANCE SYSTEM SD (with v4.X software) OPERATION/SERVICE MANUAL 950-440 950-441 950-444 FN: 17-100 Rev B 5/17...
- Page 2 BALANCE SYSTEM SD (with v4.X software) This manual covers installation and operation procedures for the following products: 950-440 System, Balance SD, 115 VAC 950-441 System, Balance SD, 230 VAC 950-444 System, Balance SD, 100 VAC Biodex Medical Systems, Inc. © 2017...
-
Page 3: Table Of Contents
Clinical Considerations ...................... 18 General Clinical Considerations ................... 18 Applications of Body Weight Support Devices ..............19 The Biodex NxStep Unweighing System ................ 19 The Biodex FreeStep SAS ..................... 20 Getting Started ........................21 ... - Page 4 E lectromagnetic Compatibility ..................115 Conformance to Standards ..................115 Accompanying EMC Documents ................. 115 List of Cable Accessories ................... 115 Declaration of Conformity ..................116 Recommended Separation Distances ................118 Biodex Medical Systems, Inc. © 2017...
- Page 5 Operating Temperature ..................... 118 P arts and Assembly Illustrations ..................119 Appendix A: Data Definitions and Interpretation ..............125 Appendix B: Interpretation of Reports ................... 128 Appendix C: CSV file export (Balance SD and BioSway) ............134 ...
-
Page 6: Definition Of Symbols
Earth (ground) Alternating Current Fuse USB Connector/Cable Waste in Electrical Equipment Date of Manufacture Manufactured By Type B Applied Part CE Mark CE Mark for products with EC Certificate Certified for Safety by ETL Intertek Biodex Medical Systems, Inc. © 2017... -
Page 7: Product Certifications And Classifications
Product Certifications and Classifications The Balance System SD has received the following certifications, and falls within the following classifications: ETL Listed Electrical Equipment, Laboratory Use; Part 1, General Requirements for Safety conforms to UL 60601-1, CAN/CSA C22.2 No: 601-1-M90, IEC 60601-1, IEC 60601-1-4 and IEC 60601-1-2 and CE Marked. -
Page 8: Before Proceeding
Follow the assembly and installation instructions document. Before using this device, read the entire operation manual carefully. Failure to read the manual may result in user error or inaccurate data. Be sure to save all provided documents for future reference. Biodex Medical Systems, Inc. © 2017... - Page 9 Make certain to understand all warning and caution labels as explained in the Before Proceeding section of this manual. This product should be used only as specified in the operation manual. The Balance System SD is designed for use in a patient environment. See Chapter 10 for Balance System SD specifications.
-
Page 10: Biodex Warranty
INC., against defects in materials and workmanship for a period of two years (2 years for parts, 1 year for labor) from the date of shipment from BIODEX MEDICAL SYSTEMS, INC. During the warranty period, BIODEX MEDICAL SYSTEMS, INC. will in its sole discretion, repair, recalibrate or replace the equipment found to have such defect, at no charge to the customer. - Page 11 7. After analyzing the problem, we will decide if the unit can be repaired on site, or replacement parts will be sent. 8. If the unit must be returned, Biodex will provide a return materials authorization number (R.M.A. #.) Pack the table in the carton that it was originally shipped in. It is the customer's responsibility for any damage that occurs during shipping.
-
Page 12: Contact Information
Contact information Manufactured by: Biodex Medical Systems, Inc. 20 Ramsey Road, Shirley, New York, 11967-4704 Tel: 800-224-6339 (Int’l 631-924-9000) Fax: 631-924-8355 email: supportservices@biodex.com www.biodex.com Biodex Medical Systems, Inc. © 2017... -
Page 13: Introduction
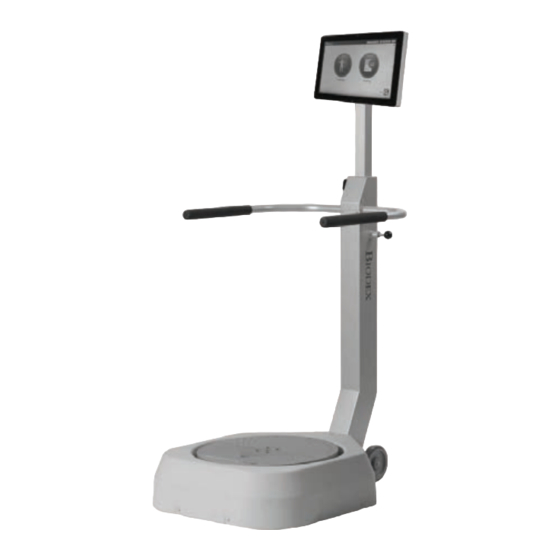
1. Introduction Intended Use Featuring seven test protocols, six training modes and intuitive touch-screen operation, the Balance System SD allows testing and training in both static and dynamic formats. Extremely versatile, it is the only system that provides a balance assessment tool for concussion management plus closed-chain, weight-bearing assessment, and training for lower extremity patients. -
Page 14: Assembly And Installation
Balance System. Do not connect any other equipment to this receptacle. 5. Locate the Biodex-provided USB cable that will be pre-installed in one of the USB ports on the Balance System display. Connect the other end of the cable to the port at the back of the printer. -
Page 15: Power-Up
accommodate any patient: Support Handle Position, Display Height, and Display Tilt. All other test and exercise functions are software controlled. To Adjust the Support Handle: 1. To position the Support Handle for patient use, hold the Support Handle while pulling out on the Support Handle Release Pin. -
Page 16: Connecting Components
Connecting Components In addition to the printer that is shipped with the Balance System SD, other printers may also be used with the device. Most Windows 7 printers should be compatible with the Balance System Biodex Medical Systems, Inc. © 2017... - Page 17 For help with this, please call Biodex Customer Support at 631-924-9000, Option 3. Similarly, any Windows 7 keyboard or mouse will also automatically connect using one of the USB connections.
-
Page 18: Clinical Considerations
For dynamic balance testing, the default settings are preselected with three trials per side. This should assist with the patient’s familiarization with the device and result in better data averaging. Biodex Medical Systems, Inc. © 2017... -
Page 19: Applications Of Body Weight Support Devices
The NxStep ready for use with the Biodex Balance System SD. The Biodex NxStep Unweighing System is ideal for use with the Biodex Balance System SD. The loss of the ability to ambulate can be one of the most debilitating aspects of many neurological and musculoskeletal disorders. -
Page 20: The Biodex Freestep Sas
Figure 4.2. The Biodex FreeStep SAS The Biodex FreeStep SAS is also ideal for use with the Biodex Balance System SD. Biodex FreeStep SAS is an overhead track and harness system that provides a safe ambulation environment for both therapist and patient. Without the fear of falling, patients can focus more fully on their tasks of gait and balance. -
Page 21: Getting Started
5. Getting Started The Biodex Balance System software program is easy to master. Follow the screen prompts as they lead from step-by-step through testing and training protocols or software utility options. Touch the desired screen icons to make a selection. Option choices progress logically based on the selections made. -
Page 22: Patient Setup Information Screen
Figure 5.2a. The steps for configuring the more advanced Patient Setup screen (Fig. 5.2b) is detailed in the System Utilities section of this manual. Figure 5.2a and b The Patient Setup information screen. Biodex Medical Systems, Inc. © 2017... -
Page 23: Patient Setup Information Screen Parameters
Patient Setup Information Screen Parameters NOTE: The parameter for Height is a mandatory field and must be completed before balance training can begin. First and Last Name: Optional, touch the pop-up keyboards to enter the first and last ● name. Touch <OK> to continue. ID#: Optional or required, depending on Configuration settings. -
Page 24: The Select Patient Screen
To return to the list of all patients, select the circular refresh arrow icon at the top, right of the screen. Figure 5.4. The Select/Edit Patient screen illustrating search results. To reset listing of all patients, select the circular refresh arrow in the upper right corner. Biodex Medical Systems, Inc. © 2017... -
Page 25: Patient Setup Screen With Optional Parameters
If the number of patient records on the device is relatively small, it may be easier to scroll through the records with the arrows. (The arrows will not scroll through individual records, but rather pages of records—ten per page.) Patient records can be edited on this screen, or a new patient can be added. Many of the same information fields that are in the Patient Setup screen will need to be entered. -
Page 26: The Additional Information Screen
Referred By, and four custom categories (referred to as <Tap to Edit> that can be defined by the user. Custom categories are named by touching the field and entering a name using the keypad or selecting a name from the drop-down menu (e.g., other1as illustrated in Figure 5.7). Biodex Medical Systems, Inc. © 2017... -
Page 27: The Diagnostic Information Screen
The Diagnostic Information Screen Figure 5.8. The Diagnostic Information screen. On the Diagnostic Information screen, users can manually enter an ICD code in one field, and more specific text in the larger field. Note that this screen does not necessarily have to feature an ICD Code field;... -
Page 28: Training Modes
Therapists and patients should find weight-bearing training to be an effective mode for communicating what, where, and how a patient’s body weight is located. Movement feedback can be limited to Medial Lateral, Anterior Posterior, or combined. Biodex Medical Systems, Inc. © 2017... - Page 29 Figure 6.2. The Percent Weight Bearing Training screen. Figure 6.3. If desired, the exercise orientation can be set to medial/lateral only. To Access the Percent Weight Bearing Training Mode: NOTE: Percent Weight Bearing training mode is used with the platform in static mode only. 1.
- Page 30 9. Touch <Next> to advance to the Percent Weight Bearing Training screen (see Figure 6.5). 10. On the Percent Weight Bearing Training screen, touch one of the three <Axis> icons to select an exercise orientation. Biodex Medical Systems, Inc. © 2017...
-
Page 31: Weight Shift Training
11. Explain the training protocol to the patient (i.e., that the patient should shift or maintain the moving zone back and forth from the two blue perimeter target bars). Press <Start> to begin the training session. The elapsed time from the start of the training session is shown at the top right of the display and a running patient score (i.e., the percentage of time spent on target) is provided in the upper right corner. - Page 32 NOTE: If the screen was enlarged by touching the <Magnifying Glass>, it must be returned to the normal viewing screen format before any changes to the platform setting can be made. Biodex Medical Systems, Inc. © 2017...
- Page 33 13. To reposition the target zone hit lines, touch the desired line (it will temporarily change from blue to green) and re-touch the screen where the line is to be relocated. 14. Scoring is percentage-based and equals net good hits divided by the total target hits. If a red boundary line is crossed, that counts against the good hit total.
- Page 34 The Score number charts the patient’s stability performance through the course of the training session. Touch the <Magnifying Glass> icon to enlarge the screen if desired. The elapsed time from the start of the training session is shown at the top right of Biodex Medical Systems, Inc. © 2017...
-
Page 35: Motor Control Training
the display while the platform setting is illustrated by the stack of numbered icons. Note that the platform setting can be changed at any time during the exercise session. NOTE: If the screen was enlarged by touching the <Magnifying Glass>, it must be returned to the normal viewing screen format before any changes to the platform setting can be made. - Page 36 Note that the platform setting can be changed at any time during the exercise session. NOTE: If the screen was enlarged by touching the <Magnifying Glass>, it must be returned to the normal viewing screen format before any changes to the platform setting can be made. Biodex Medical Systems, Inc. © 2017...
-
Page 37: Maze Control Training
13. To stop the training session at any time, press <Stop> on the display. The system will stop gathering data and the platform will return to the locked position. 14. When the training screen has been reviewed, touch <Print Results> to print the results of the session, or <Save Results>... - Page 38 Touch the <Magnifying Glass> icon to enlarge the screen if desired. Press <Start> to begin the training session. The elapsed time from the start of the training session Biodex Medical Systems, Inc. © 2017...
-
Page 39: Random Control Training
is shown at the top right of the display and a running patient score is provided in the upper right corner. NOTE: If the screen was enlarged by touching the <Magnifying Glass>, it must be returned to the normal viewing screen format before any changes to the platform setting can be made. - Page 40 The target is the red circle that will start off in the center of the grid. The larger the target, the easier it will be for the patient to keep the cursor inside its boundary as it randomly moves about the grid. Biodex Medical Systems, Inc. © 2017...
- Page 41 Figure 6.11. The Random Control Training Screen. 9. At any time during the training session, the tracing biofeedback can be turned on or off by touching the <Show Tracing> icon (the left-most icon under Tracing). Press the <Clear Tracing> eraser icon (the right-most icon under Tracing) to remove any tracing that is left from a previous exercise session.
-
Page 42: Testing Modes
7. Testing Modes The Biodex Balance System SD allows clinicians to assess a patient’s neuromuscular control in a closed-chain, multi-plane test by quantifying the ability of the patient to maintain dynamic unilateral or bilateral postural stability on either a static or unstable surface. The degree of surface instability is controlled by the system’s microprocessor-based actuator. -
Page 43: Sensory Integration Tests
Sensory Integration Tests Touching the Sensory Integration button displays a submenu where the user can select either a m-CTSIB or BESS test. If one or more Customized Sensory Integration tests have been created, a button (or buttons) for those tests are displayed on the Sensory Integration submenu. Custom Sensory protocols are based on either the m-CTSIB or BESS test. -
Page 44: Clinical Test Of Sensory Integration And Balance - Ctsib Or M-Ctsib (Modified Ctsib)
Another version of this test, called the modified CTSIB, or m-CTSIB, is often used. The m-CTSIB eliminates conditions 3 and 6. Biodex Balance products use the m-CTSIB format of four conditions (#’s 1, 2, 4, and 5) as the default with the option to include the other two if desired. - Page 45 Performing an m-CTSIB Test Prior to conducting an m-CTSIB test, check to ensure that the most desirable normative data set currently associated with the test is in place. For instance, if testing a high school athlete, the ‘M & F (male and female), Age 13-18, 20 sec trial’ normative data may be wanted. For instructions on configuring normative data, see the System Utilities section of this document.
- Page 46 9. With the patient ready to begin the test, touch <Start> and <Collect Data>. The screen will provide a three-second countdown before beginning each test trial. The display screen will include Test Trial Time, the Score (Sway Index), what number Trial is Biodex Medical Systems, Inc. © 2017...
- Page 47 occurring, and the Condition that is being tested. If desired, at this point, touch the <Magnifying Glass> icon to enlarge the grid circle. Touch <Practice Trial> to perform the whole test without recording the data. 10. If desired, touch the <Show Tracing> icon (the left-most icon under Tracing). Press the <Clear Tracing>...
-
Page 48: Bess Test
To have the patient record their foot position for the test, touch the checkbox next to • Record Foot Position. To manually note errors during each session (e.g., the patient grabs hold of the device • handrails), touch the checkbox next to Error Scoring. Biodex Medical Systems, Inc. © 2017... - Page 49 Figure 7.5. BESS Testing Options screen. 5. Touch <OK> to confirm the selections and return to the Patient Setup screen. 6. Press <Next> to advance to the BESS Testing screen. Or, if Record Foot Position was checked, it will advance to the Position Patient screen. 7.
-
Page 50: Limits Of Stability (Los) Test
During each test trial, patients must shift their weight to move the cursor from the center along a target path and back as quickly and with as little deviation as possible. The same process is repeated for each of the targets. Target paths activate in a random order. Biodex Medical Systems, Inc. © 2017... - Page 51 This test is a good indicator of dynamic control within a normalized sway envelope. Poor control, inconsistent, or increased times suggests further assessment for lower extremity strength, proprioception, vestibular, or visual deficiencies. The patient’s Limits of Stability is measured as how far from the center the patient can sway. This (sway) Angle (°) is displayed on the screen.
- Page 52 Test Options screen has elapsed. When the first trial is finished, the screen will display ‘Trial 1 Complete,’ and a ten-second rest countdown will begin for the second trial. Touch <Collect Data> to begin the second test trial and continue in the same manner to complete subsequent trials. Biodex Medical Systems, Inc. © 2017...
-
Page 53: Postural Stability Test
After completing all trials, a ‘Test Complete’ message is displayed. Touch <Results> to advance to the Limits of Stability Test Results screen. At the Limits of Stability Test Results screen, touch <Print> to automatically generate a printed report if desired. To save the test data from the Results screen, touch <Save Results>... - Page 54 Figure 7.9. The Patient Position screen with patient positions entered. Figure 7.10. The Postural Stability Testing Options screen. Biodex Medical Systems, Inc. © 2017...
- Page 55 Figure 7.11. The Postural Stability Testing screen. Performing a Postural Stability Test 1. Position the support handles and the display height and tilt for patient comfort. 2. At the Main Menu, touch <Testing>. 3. Touch <Postural Stability>. The Patient Setup information screen is displayed. If this is a new patient and the training session is to be saved after its completion, the patient’s name and height must be entered.
-
Page 56: Motor Control Test
This test is a good indicator of dynamic control within a normalized sway envelope. Poor control, inconsistent or increased times suggests further assessment for lower extremity strength, proprioception, vestibular or visual deficiencies. The default setting for the Motor Control test is the moderate still level. Biodex Medical Systems, Inc. © 2017... - Page 57 Figure 7.12. The Motor Control Testing screen. Performing a Motor Control Test 1. Position the support handles and the display height and tilt for patient comfort. 2. At the Main Menu, touch < Testing>. 3. Touch <Motor Control>. The Patient Setup Information screen is displayed. If this is a new patient and the training session is to be saved after its completion, the patient’s name and height must be entered.
- Page 58 <Stop>. When the first trial is finished, the screen will display ‘Trial 1 Complete,’ and a ten-second rest countdown will begin for the second trial. (ten seconds is the default time; this can be Biodex Medical Systems, Inc. © 2017...
-
Page 59: Bilateral Comparison Test
adjusted in the Test Options function.) Touch <Collect Data> to begin the second test trial and continue in the same manner to complete subsequent trials. After completing all trials, a ‘Test Complete’ message is displayed. Touch <Results> to advance to the Motor Control Test Results screen. At the Motor Control Test Results screen, touch <Print>... - Page 60 <Magnifying Glass> icon to enlarge the grid circle. Please note, directly under the grid circle is an indicator of which leg is being tested. There are two tests in each trial; one for each leg. Biodex Medical Systems, Inc. © 2017...
- Page 61 Figure 7.15. The Bilateral Comparison Testing screens--one for each leg. NOTE: To stop a test in progress at any time and return the platform to a locked position, touch <Stop>. When the first trial is finished, the screen will display ‘Trial 1 Complete,’ and a ten-second rest countdown will begin for the second trial.
-
Page 62: Fall Risk Test
The Fall Risk test protocol is based on research from the University of Dayton (Bigelow, et al and the University of Jyväskylä in Finland (Pajala, et al ). Once adopted into the Biodex Balance products as a test, a reliability study of this protocol was conducted by Bryan Riemann, PhD, and Kelsey Piersol, MSSM, of Armstrong State University . - Page 63 Performing a Fall Risk Test: 1. Position the support handles and the display height and tilt for patient comfort. 2. At the Main Menu, touch <Testing>, and <Fall Risk>. 3. The Patient Setup information screen is displayed. If this is a new patient and the training session is to be saved after its completion, the patient’s name and height must be entered.
- Page 64 CPT, ICD, G-Codes or comments regarding the test can be added at the conclusion of the test or at a future time. 16. To return to the Opening Menu from the Fall Risk Test Results screen touch the <Home> icon in the upper left corner. Biodex Medical Systems, Inc. © 2017...
-
Page 65: System Utilities
8. System Utilities Figure 8.1. The Utilities Screen The Utilities Menu allows access to the Reports, Configuration, Patient Management, and System Maintenance screens. To access the Utilities menu, touch <Utilities> on the Main screen. Note: <Lock Platform> allows the user to manually lock the platform if it is not locked in any previous operation/session. -
Page 66: View Test Results And Print Report
Progress Report. Figure 8.4. Reports – Test Results screens. 3. Click on a particular Test Date row and click on <View> to see the Stored Test Results for that particular test. Biodex Medical Systems, Inc. © 2017... - Page 67 Figure 8.5. Sample Stored Test Results screen for an m-CTSIB test. In this example, the DNC designation means that the patient did not complete the Eyes Open Firm Surface test condition. 4. Clicking on <Print Results> on the Stored Test Results screen will display a print preview for the report.
- Page 68 BioReports: The reports in PDF format. Sample reports: Biodex Balance System SD offers reports for each of the test modes. The data presented from balance testing is common on different reports. Reports can be generated to reflect single leg, both legs and bilateral comparison testing protocols. Report formats include Postural Stability, Bilateral comparison, Limits of Stability, Motor Control, Fall Risk, Sensory Integration which includes the CTSIB and BESS Test.
- Page 69 Figure 8.8. Example of a Postural Stability Test Balance System SD (with v4.X software)
- Page 70 Figure 8.9. Example of a Bilateral Comparison Test Biodex Medical Systems, Inc. © 2017...
- Page 71 Figure 8.10. Example of a Limit of Stability Test Balance System SD (with v4.X software)
- Page 72 Figure 8.11. Example of a Motor Control Test Biodex Medical Systems, Inc. © 2017...
- Page 73 Figure 8.12. Example of a Fall Risk Test Balance System SD (with v4.X software)
- Page 74 Figure 8.13. Example of a BESS Test Biodex Medical Systems, Inc. © 2017...
-
Page 75: View And Print Progress Report
View and Print Progress Report 1. If the patient has multiple tests, a progress report can be viewed. Select the <Progress Report> radio button under Select Report Type, and select <View>. Figure 8.14. The Reports – Test Results screen with the Progress Report radio button selected. 2. - Page 76 Selecting a specific set of normative data to be used in the Progress Report. 4. The resulting Progress Report screen illustrates the data points of the tests over time. Figure 8.18. A sample Progress Report for a series of CTSIB tests. Biodex Medical Systems, Inc. © 2017...
- Page 77 5. The user can touch <Print Report> on this screen to bring up the print options screen. The Progress Report print options screen can also be accessed at the Reports – Test Results screen (Figure 8.27) by touching <Print> on that screen. Figure 8.19.
- Page 78 A sample printed Progress Report. The report can be interpreted as: Baseline started on 01/02/2017. • There was an injury on 01/05/2017. • Gradual the improvements can be seen on both the 01/11/2017 and 01/17/2017 dates. • Biodex Medical Systems, Inc. © 2017...
-
Page 79: Configuration
Configuration To advance to the Configuration screen from the Utilities Menu, touch <Configuration>. A submenu is displayed featuring two icons; one for System Configuration and one for Balance System SD Configuration. Figure 8.21. Configuration Screen System Configuration The System Configuration screen allows the user to select between various display options and to set specific parameters for a variety of functions. - Page 80 ID code, select a New Access ID Code by entering the value using the displayed keypad. Press <OK> to save the New Access ID Code and return to the Default Settings screen. Biodex Medical Systems, Inc. © 2017...
-
Page 81: Balance System Sd Configuration
Balance System SD Configuration The Balance System SD Configuration screen allows the user to further configure the Balance System SD user settings for things like Clinical Codes and Facility Information. Descriptions of the Balance System SD Configuration screen options are detailed below. Once all parameters and values are set as desired, touch <Back>... - Page 82 Sensory Integration Defaults: The normative data in both sensory integration tests (m-CTSIB and BESS) can be specified to each facility’s needs, although only m-CTISB default data is provided; users must enter their own default BESS normative data. Biodex Medical Systems, Inc. © 2017...
- Page 83 Figure 8.27. m-CTSIB Defaults screen. For each type of test, select the Group and Age Range drop-down menu to make changes or add a new group, and select the keypad icons beside each row to edit the normative data for that group.
-
Page 84: Create, Save, And Recall Custom Protocols
Enable ‘Additional Information’ on Patient Setup: Touch this checkbox to enable the Additional Info icon at the bottom of the Patient Setup screen. Enable Vibro Tactile feedback: If the Biodex VibroTactile™ System was purchased to use with the Balance System SD, check this box. - Page 85 Figure 8.21. Custom Protocol List screen. 7. Depending on whether a training protocol or testing protocol is to be added, select either the <Training> or <Testing> button on the resulting screen. Protocol creation is same for both. 8. Proceed with configuring the training or testing session for the normal Training or Testing mode selected.
-
Page 86: Create, Save, And Recall Custom Sensory Tests
8. Touch the <Sensory Integration> button. Touch the <Custom Sensory Integration> button. Touch the Protocol Name field and use the keypad to name the protocol. Touch the Condition Name fields and use the keypad to add conditions. Biodex Medical Systems, Inc. © 2017... - Page 87 Touch the <Foot Position> icon next to each condition name to customize a foot position, regular stance, narrow base of support, single leg (left or right), or tandem straight. Touch the <Metronome> field to choose a metronome time if using a vestibular ocular reflex (head shake).
- Page 88 BESS test protocol. Note that the Custom Sensory Integration button will not be displayed on the Testing menu until a Custom Sensory Integration test has been created. Biodex Medical Systems, Inc. © 2017...
-
Page 89: Patient Management
Patient Management To advance to the Patient Management screen, select a Patient screen from the Utilities Menu, touch <Patient Management>. Enter 159 at the Access ID Code prompt and touch <OK>. The Patient Management screen is displayed. From this screen, new patients can be added with the <Add Patient> button. Touching this button displays screens similar to the Patient Setup screens that are available prior to any Training or Testing session. -
Page 90: Deleting Patient Files
The function will delete all test results associated with the patient. 3. Touch <OK>. The selected file is deleted and the system returns to the Patient Management screen. Biodex Medical Systems, Inc. © 2017... -
Page 91: Printing And Editing Stored Results
To Delete an Entire Range of Patient Files: Touch the <Delete Range> icon. A screen is displayed on which the user has the option to select a range of patient records to delete: All records, Records From a certain date to present time, records Prior To a certain date, or all records between certain dates (From/To). -
Page 92: Exporting Patient Data
BioCsv on an inserted USB flash drive. 2. The user can export multiple files from the Patient Management – Select a Patient screen. Touch <Export Multiple>. The following screen is displayed: Biodex Medical Systems, Inc. © 2017... -
Page 93: Importing Patient Data
Figure 8.36. The Multiple Patient Data Export screen. 3. On the Multiple Data Export screen, the user has the option to filter results by Type (whole patient records or particular test types), Time Frame (From, Prior To, From/To), and File Format (.csv or .biodata). -
Page 94: System Maintenance
(whole patient files as opposed to only certain types of tests) are presented. System Maintenance Figure 8.32. Utilities Screen The System Maintenance main menu contains icons for three configurations related to database maintenance: Backup to USB. Biodex Medical Systems, Inc. © 2017... - Page 95 Restore from USB. Database Cleanup. Figure 8.39. Database Maintenance main screen. Backup to USB The Backup to USB function creates a backup database of current patient records on a removable USB flash drive. After inserting a flash drive into one of the device’s USB ports, selecting the <Backup to USB>...
-
Page 96: Restore From Usb
The time it takes to reach the Database Restore Complete screen depends on the size of the database. The Balance System SD application restarts once <OK> is touched. The Backup operation makes a backup of the entire system—not just the database. All system selections Biodex Medical Systems, Inc. © 2017... - Page 97 and settings are backed up and the Restore operation restores all of these settings, in addition to the patient data. This includes the backup and restoration of the facility name. , for added safety/security, all backup data is encrypted. The Database Backup and Restore operation is USB drive dependent. If there is no USB drive application, the system will display an error message when the backup function is invoked.
-
Page 98: Software Updates
From time to time, it may be necessary to update the device’s software. Updating the Software: 1. Download the updated software from www.biodex.com to a portable flash drive. Be sure to save the file in the root directory of the drive. -
Page 99: Clinical Codes And Normative Data
● An ICD-10 discussion forum. ● CPT Codes The following codes may apply to treatments using Biodex products: 97110 Therapeutic procedure, one or more areas, each 15 minutes; therapeutic exercises to develop strength and endurance, range of motion, and flexibility. -
Page 100: G-Codes
Touch the <% Weight Bearing> button. On the Patient Setup screen, touch the <G-CODE> button. Figure 10.1. Patient Setup screen. The G-CODE button is present but red in color, meaning it has not been configured. Biodex Medical Systems, Inc. © 2017... - Page 101 Figure 10.2. The G-Code Calculator Options screen--G-Code Result Option. On this screen, G-Code data can be associated with the patient by making selections in the drop-down menus. The top drop-down menu allows selection of a G-Code Result Option. This means that the Report will feature the Impairment %, the Severity Modifier Code, or both.
- Page 102 8. After the test completes, select the test to be viewed from the Utilities> Patient Management >Select a Patient >Select a Test path. 9. Touch <Edit> to display the stored training results for the desired test. Biodex Medical Systems, Inc. © 2017...
- Page 103 Figure 10.6. Stored Percent Weight Bearing Training Results Screen G-Codes can be associated for the m-CTSIB test. The process is the same as for the Percent Weight Bearing Training described above. The Impairment Percentage numbers refer to the degree to which the patient is considered impaired;...
-
Page 104: Sample Reports With G-Code - Percent Weight Bearing Training
Sample Reports with G-Code – Percent Weight Bearing Training Figure 10.7. Additonal Column / information displayed for the Percent Weight Bearing Traning that was performed with G-Code option enabled. Biodex Medical Systems, Inc. © 2017... -
Page 105: Sample Reports With G-Code - Ctsib/M-Ctsib Test
Sample Reports with G-Code – CTSIB/m-CTSIB Test Figure 10.8. The G-Code Impair % and the Modifier Code on the Clinical Test of Sensory Integration of Balance Patient Record. To Alter the Impairment Percentage Numbers Manually: Select the patient’s name (row) on the Patient Management - Select a Patient screen in System Utilities and touch <Next>. - Page 106 On the resulting screen, touch the <Impair %> field to be adjusted. In this example, the Impairment percentage to be adjusted is for the third condition, ‘Eyes Open Foam Surface’, which is currently at 44%. Biodex Medical Systems, Inc. © 2017...
- Page 107 Figure 10.10. The Stored Test Results screen. The Impairment Percentages can be adjusted by clicking on the boxes with the numbers in them. When the box is touched, an external window is displayed, allowing the percentage number to be changed using either the arrows or the keypad. Use the drop-down menu to select a reason for making the change (e.g., Clinical Judgment).
- Page 108 Code category; from CK to CL) is displayed on the resultant screen. A red asterisk is displayed next to the data that has been changed. Figure 10.12. Stored Test Results, with updated Impair % number, Modifier code, and red ‘Amended’ asterisk. Biodex Medical Systems, Inc. © 2017...
-
Page 109: Normative Data
Normative Data The new Biodex Balance device comes equipped with several sets of normative data. Normative data for balance are typically noted as the average and standard deviation numbers derived from various scores in previous controlled studies. These data sets are separated into different population groups in order to give relevant norms for the population being tested. -
Page 110: Fall Risk Test Normative Data
(P<.05) differences between the testing sessions. The standard error of measurement ranged from 15.9% to 23.6%. Riemann, B.L., Piersol, K. Intersession reliability of self-selected and narrow stance balance testing in older adults. Aging Clinical and Experimental Research 2016 DOI: 10.1007/s40520- 016-0687-2. Biodex Medical Systems, Inc. © 2017... - Page 111 Table 9.2. Descriptive statistics and reliability results between the two testing sessions (1.9 ±.7 day separation) in thirty older adults In Table 9.3, note that the mean postural sway velocity of 338 subjects are broken into four Age Groups. The standard deviations from the mean are separated by three separate boundary ranges for 1, 2, and 3 SDs.
- Page 112 Figure 10.14. Fall Risk Defaults Screen Biodex Medical Systems, Inc. © 2017...
-
Page 113: System Specifications
11. System Specifications Dimensions: Base: 30" w x 44" depth x 8" h (76 x 112 x 20 cm) Platform: 21.5" dia (55 cm). Display Height: Adjustable from 53" to 68" h above platform (135 x 173 cm); 76" h (193 cm) maximum from floor. -
Page 114: Maintenance
Mild soap and water can be used to remove stains and scuff marks. As needed, inspect all locking and adjustment mechanisms for signs of wear or damage. If there are any questions or further assistance is required, contact the Biodex Customer Service Department. -
Page 115: Electromagnetic Compatibility
EN 60601-1-2 when used with the Balance System SD. Table 13.2 Balance System SD Cables Part No. Cable Description Cable Length Biodex # C12086 USB Printer Cable 15ft Balance System SD (with v4.X software) -
Page 116: Declaration Of Conformity
± 1 kV differential mode ± 1 kV diff. mode Mains power quality should be that of a IEC 61000-4-5 ± 2 kV common mode ± 2 kV com. mode typical commercial or hospital environment. Biodex Medical Systems, Inc. © 2017... - Page 117 Immunity test IEC 60601 Test IEC 60601-1-2 Electromagnetic environment – level Compliance level guidance Voltage dips, short < 5% UT (> < 5% UT (> 95% Mains power quality should be that of a interruptions and voltage 95% of dip in of dip in UT) for typical commercial or hospital variations on power...
-
Page 118: Recommended Separation Distances
Do not expose the equipment to a temperature change of more than 5° F (3° C) per hour. Limits of low and high operating temperature ranges are 59° to 86° F (15° C to 30° C). Biodex Medical Systems, Inc. © 2017... -
Page 119: Parts And Assembly Illustrations
14. Parts and Assembly Illustrations Balance System SD (with v4.X software) -
Page 120: Biodex Medical Systems, Inc
Biodex Medical Systems, Inc. © 2017... - Page 121 Balance System SD (with v4.X software)
- Page 122 Biodex Medical Systems, Inc. © 2017...
- Page 123 Balance System SD (with v4.X software)
- Page 124 Biodex Medical Systems, Inc. © 2017...
-
Page 125: Appendix A: Data Definitions And Interpretation
Appendix A: Data Definitions and Interpretation Calculation of Limits of Stability Direction Control In this Appendix, the terms and metrics used in both training and testing protocols are defined. Different tests within the Balance System SD use different scoring methods. It can be summarized as follows: 1. - Page 126 �� �� Angle: The sway angle, Angle (°), is derived from the position of the patient’s center of gravity (COG) from a center position of zero and the estimated height of the patient’s COG. Biodex Medical Systems, Inc. © 2017...
- Page 127 Direction Efficiency %: ������������ℎ�� �������� ���������������� �� 2 ������������������ ��������������������% = �� 100 ������������ ���������������� ���� ������ �������� Sway Velocity Index: A value based on Velocity (mm/s), which is the total distance the COP traveled in the medial lateral path/time. It is referred to an index because each patient’s score is first normalized by a natural log function (Ln) of the medial-lateral center of pressure velocity (CPV ), divided by the patient’s...
-
Page 128: Appendix B: Interpretation Of Reports
* Visual conflict conditions are not performed in m-CTSIB. The m-CTSIB eliminates conditions 3 and 6. Biodex Balance products use the m-CTSIB format of 4 conditions as the default with the ability to include the other 2 if desired. - Page 129 Sway Index is an objective quantification of what commonly is done with a time-based pass/fail for completing the CTSIB stage in 30 seconds without falling, or assigning a value of 1 to 4 to characterize the sway; 1= minimal sway, 4 = a fall. The score is indicated as on the graph relative to the mean.
- Page 130 Stability Index on this test assesses deviations from the center; thus a lower score is more desirable than a higher score. The stability index does not indicate how much the patient swayed; only the position. Biodex Medical Systems, Inc. © 2017...
- Page 131 Figure B.3. Sample Postural Stability Test Data. Where: Stability Index: is the average position from center. Sway Index: is the Root Mean Square distance for the X, Y coordinates over the course of the test. Note: Refer to for Appendix A for the equation for Stability and Sway Index. Percent Time In Zone/Quadrant: These values represent the percentage of test time the patient spends in each zone/quadrant during the test.
- Page 132 Composite Score: The average of all the eight targets for a Full pattern. For a Left or Right pattern, it is the average of five targets. !"#$"%&'(!!"#$% ! !"## Where = Number of Targets. Biodex Medical Systems, Inc. © 2017...
- Page 133 Fall Risk Test Data Interpretation With force platform technology, an objective quantification of the patient’s postural sway velocity can be used to predict risk. Velocity can be described as the speed of an individual's sway as balance is maintained. Higher velocities, when cues are given to specifically stand ‘as motionless as possible’, are suggestive of postural control deficits.
-
Page 134: Appendix C: Csv File Export (Balance Sd And Biosway)
35 FacilityID 0 36 SwayIndex_1 2.292760457 37 Goal_1 0.8 Biodex Medical Systems, Inc. © 2017... - Page 135 38 ImpairmentValue_1 34 39 ImpairmentAmended_1 FALSE 40 Data s tart 41 Number o f C onditions 1 ...
- Page 136 Figure C.2. Sample CSV File for Patient Shahidul Mahfuz. The file rows and columns are defined in Table C.1 below. Biodex Medical Systems, Inc. © 2017...
- Page 137 Table C.1. Sample CSV File for Patient Shahidul Mahfuz. Field Heading Description Username The patient’s name. This field is only present in USB exported records, not serial exported records (example above is from a serial export). Date of Birth of the Patient. GenderID Male = 1, Female = 2.
- Page 138 PercentTimeinQuad1 % Time in Quadrant (I through IV). … PercentTimeinQuad4 PlatformInitial Initial and Ending platform. PlatformEnding SwayOverall Sway Index for Overall, Anterior/Posterior and Medial Lateral. SwayAntPost SwayMedialLat Biodex Medical Systems, Inc. © 2017...
- Page 139 Segment B – X,Y Coordinate Data Points This segment describes the X,Y coordinate data points. It starts within the record containing the words ‘Data start’ (as illustrated in the left column of the following table) and ends with the record containing the words ‘Data end’. All test/exercise results have a Data Start and a Data end point.
- Page 140 Please note that some of the rows in following figures have been hidden for better representation. For an original calculation, it is not required to hide any of the rows. Biodex Medical Systems, Inc. © 2017...
- Page 141 How to Determine the Total Number of Data Points within a CSV File: Using row 851 of the Excel spreadsheet as the repository, determine the total of the individual data points starting from row 43 and ending with row 849 for cells A and B as follows: 1.
- Page 142 Using this formula, the resultant Sway Index value is equal to: 2.295. Figure C.9. CSV File Format Calculation – Calculate the Sum of all Sway Indices Where: 807 = the number of samples for this example. 1000 = the scale factor. Biodex Medical Systems, Inc. © 2017...
- Page 143 5. The value of the Sway Index contained in the exported CSV file matches the value calculated in the Excel spreadsheet after all of the formulas have been entered and applied (see Figure C.10 below). Figure C.10. CSV File Format Calculation – Final Results. Calculation Using Formula on Excel Sheet –...
- Page 144 850 for cells C and D as follows: a. In cell C, row 850, enter the following formula: =SUM(A43:A849) Figure C.13. Data Point Calculation b. In cell D, row 850, use the following formula: Biodex Medical Systems, Inc. © 2017...
- Page 145 =SUM(B43:B849) Figure C.13. Data Point Calculation 3. Determine the total of the individual data points starting from row 851 and ending with row 1659 for cells C and D as follows: a. In Cell C, row 1659, enter the following formula: =SUM(A851:A1657) Figure C.14.
- Page 146 43 to 850 and placing it into cell E: =((A43-$C$850/807)*(A43-$C$850/807))+((B43-$D$850/807)*(B43-$D$850/807)) Figure C.16. Sway Index Value for Condition 1, Trial 1 5. Repeat step 4 to determine the Sway Index value for each row from 851 to 1659: =((A851-$C$1659/807)*(A851-$C$1659/807))+((B851-$D$1659/807)*(B851- $D$1659/807)) Biodex Medical Systems, Inc. © 2017...
- Page 147 Figure C.17. Sway Index Value for Condition 1, Trial 2 6. To find the Sway Index value, enter the following formula taking the sum of all the data points on cell C and placing it into cell E: =SQRT(SUM(C43:C849)/807)/1000, using this formula output is 7.4092 Figure C.18.
- Page 148 Calculation Using the Formula on the Excel Sheet – Postural Stability Test The process to calculate the Stability Index from the sample Postural Stability Test exported csv file is similar to that used to calculate the CTSIB (/m-CTSIB) test. Biodex Medical Systems, Inc. © 2017...
- Page 149 Figure C.21. CSV file format calculation – Data point segment of the original exported csv file In the file displayed in C.21, it is evident that the data starts in the 48th row and ends in the 451th row. Therefore, the total number of records/rows of data is calculated as: [(451-48) + 1] = 404.
- Page 150 Where: 1000 = the scale factor 4. After all of the formulas have been entered and applied, the final output matches the value of the Stability Index displayed in the exported CSV file as illustrated in Figure C.25 below. Biodex Medical Systems, Inc. © 2017...
- Page 151 Figure C.25. CSV file format calculation- final results Multi Record Data Export for creating custom Normative Data The Balance SD system allows the user to export multiple records of any type of test in to a single CSV file. This exported file can be used to create normative data. The example in Figure C.26 is a snapshot of a previously exported CTSIB test-type CSV file.
- Page 152 CSV file. The Average and the Standard Deviation was calculated from Sway indexes (with Natural Logarithm applied on each score). This can be used as the normative value and can be entered into the Balance product software (BioSway and/or SD). Biodex Medical Systems, Inc. © 2017...
- Page 153 Tips for Excel users: A .CSV file that has been opened using Excel and modified using cell formatting will not retain any of the original formatting when saved. If it is necessary to retain the original formatting, the file can be saved as an Excel file (.xls file). Balance System SD (with v4.X software)
-
Page 154: Appendix D: Log Transformation
Figure D.1 is consistent with how units have always been traditionally provided by previous Biodex Balance Systems. On Figure D.2, the line graphs are drawn using the selected reference database that has undergone natural log transformation. The natural log transformation provides a more accurate method of interpreting the individual’s performance relative to the... - Page 155 A review of several large databases of Clinical Test of Sensory Integration and Balance (CTSIB) testing conducted on the Biodex Balance Systems revealed, similar to other human performance measures that have a minimum value, the existence of slight to moderate positive skewness.
- Page 156 (right) CTSIB conditions. Exploratory analysis of the five commonly used reference databases with CTSIB testing on the Biodex Balance Systems yielded varying degrees of positive skewness (range: 0.5 to 6.3), particularly for the less challenging CTSIB conditions (Figure D.3). Additionally, the exploratory analyses revealed the lower boundaries of two standard deviations from the mean to cross zero for two of the conditions (Table D.1).
- Page 157 Figure D.4. Example plot (Firm surface-eyes closed) following the Box-Cox transformational analyses on each of the reference databases (lines graphed). By examining the plot, the transformation (horizontal axes) that produces the minimal skewness value (vertical axes) could be identified. On the horizontal axes (!) zero corresponds to a natural logarithm transformation and one corresponds to the original data (no transformation).
- Page 158 Biodex Medical Systems, Inc. © 2017...
- Page 159 Balance System SD (with v4.X software)
- Page 160 Biodex Medical Systems, Inc. © 2017...
Need help?
Do you have a question about the 950-440 and is the answer not in the manual?
Questions and answers