Advertisement

Read and follow the operating instructions and safety information
before using for the first time.
Specifications subject to change without notice.
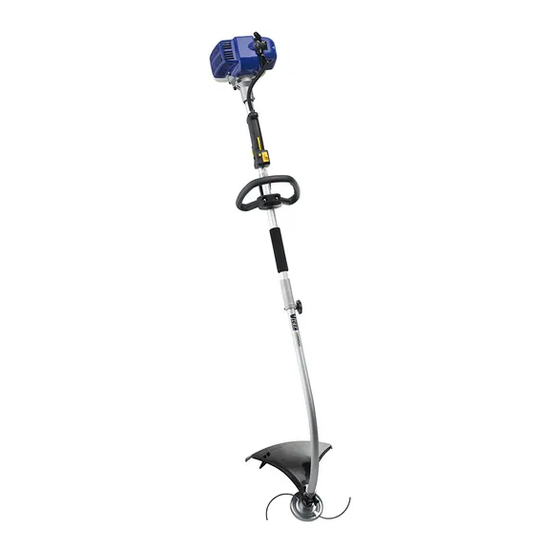
Trimmer
Instruction Manual
MODELS
STB2224
TTB2226
TTS2226
RTS1226

Advertisement

Table of Contents
loading
Need help?

Need help?

Do you have a question about the STB2224 and is the answer not in the manual?

Questions and answers

Summary of Contents for Victa STB2224

  • Page 1 Trimmer Instruction Manual MODELS STB2224 TTB2226 TTS2226 RTS1226 Read and follow the operating instructions and safety information before using for the first time. Specifications subject to change without notice.
  • Page 2 IMPORTANTNOTES Please read the following Thank you for purchasing your VICTA trimmer. VICTA prides itself in the quality and performance of all its products. This instruction manual will aid in the assembly, safe operation and maintenance of your trimmer. Please read the following warnings to ensure safety and the long life of your product.
  • Page 3: Table Of Contents

    Assembly Procedures Cast Trimmer Head Split Shaft & Connection Types Shoulder Strap Operating Instructions Fuelling Procedures Starting Instructions Stopping Instructions Cutting Techniques Maintenance & Care Routine Maintenance Maintenance Troubleshooting Troubleshooting Technical specifications Model Details VICTA Products Accessories & Spare Parts Warranty...
  • Page 4 Fuel Tank (Use 2-Stroke Fuel & Oil Mix, see pg.19) Cowling Fuel pump "primer" Shoulder strap Shaft split connection Spark plug wrench Allen key (4mm) Allen key (5mm) Spanner Do not operate the VICTA Trimmer before reading all Safety & Handling sections.
  • Page 5 Trimmer Parts Description straight shaft TTS2226...
  • Page 6 Machine Layout & Supplied Items bent shaft TTB2226/STB2224 Cast trimmer head 3mmØ Nylon line Bent shaft guard Lower bent shaft Universal handle (TTB2226) / Classic handle (STB2224) Engine stop switch Throttle lever "release" Throttle lever Throttle lever "lock" Choke lever...
  • Page 7 Trimmer Parts Description bent shaft TTB2226/STB2224 5 (STB2224) 5 (TTB2226) 5 (STB2224) 5 (TTB2226)
  • Page 8 Air filter housing cover Fuel Tank (Use 2-Stroke Fuel & Oil Mix, see pg.19) Cowling Fuel pump "primer" Shoulder strap Spark plug wrench Allen key (4mm) Allen key (5mm) Spanner Do not operate the VICTA Trimmer before reading all Safety & Handling sections.
  • Page 9 Trimmer Parts Description solid shaft RTS1226...
  • Page 10: Safety Instructions

    HANDLING Safety Instructions Do not operate the VICTA Trimmer before reading all Safety & Handling sections. Operator Safety • Wear the necessary safety equipment, as listed on page (12), in Personal Safety Equipment. • Always wear heavy, long pants. Do not wear loose clothing, jewellery, short pants, sandals or go barefoot.
  • Page 11 • Stop the engine, disconnect the spark plug and inspect the unit if it begins to vibrate abnormally or if it strikes a foreign object. • Use only genuine VICTA trimmer line. Never use wire, rope, string, etc. • Use only genuine VICTA replacement parts.
  • Page 12: Personal Safety Equipment

    HANDLING Hazards The following safety precautions must be strictly observed to avoid the risk of damage or personal injury. Prior to using the unit, clear the operating area of objects which may be thrown up by the cutting head, such as rocks, glass and other debris.
  • Page 13 ASSEMBLYPROCEDURES Fitting Trimmer Head Blade protector BENT SHAFT (Sabre & Tornado) 1. Replace blade protector. Line 2. Align hole in flange and housing. cutting 3. Insert Allen Key (supplied) into hole in blade flange and housing to prevent rotation. 4. Grip the cast head and rotate anti-clockwise to remove.
  • Page 14 (1) Cut a length of line to 44cm, or use Victa part number TR00200A. Bend it in half (equal ends). Use only 3mm diameter Nylon line (Fig: 1) (2) Push the bent end of the line under the lug of the trimmer head (3) Push one end of the line into the hole on the same side of the head as the line end.
  • Page 15 ASSEMBLYPROCEDURES Fitting Trimmer Line Only use genuine VICTA 3mm diameter nylon trimmer line. Always trim with the correct length of nylon line. Always ensure that all components are firmly fastened before starting any operation. Unequal lengths will cause vibration and damage to unit.
  • Page 16 Beware of pinch points Connection Types - Victa Trimmers have two types of split shaft connections; 1. Standard Connection (Fig 5) - Drive shafts may require alignment before sliding together. 2. “EASY LINK” Connection (Fig 6) - Drive shafts will automatically align when sliding together.
  • Page 17 ASSEMBLYPROCEDURES Classic Handle Fitting the handle 1 Slacken the wing nut on the fastening screw on the handle. 2 Remove the wing nut, washer and fastening screw from the handle. 3 Push the Classic handle onto the shaft. 4 Replace fastening screw and tighten with the wing nut. Not too loose or too tight.
  • Page 18: Shoulder Strap

    ASSEMBLYPROCEDURES Before Assembly Fitting the bent shaft guard • Slacken the fastening screw on the guard with the help of the Allen key provided and then remove. • Then clip the guard to the lower bent shaft. • Screw the guard hood tightly in position with the fastening screw. Make sure the guard is located on the housing before securing in position.
  • Page 19 Fuel and oil Recommended fuels Victa Trimmers require a mixture of petrol and oil in the fuel tank. Use only a mixture of normal unleaded petrol and 2-stroke engine oil. Mix the fuel mixture as indicated on the fuel mixing table.
  • Page 20 OPERATINGINSTRUCTIONS Operation A blade on the underside of the guard Blade hood automatically cuts the cutting protector line to the optimum length. This is covered by a guard. Remove the guard before you start working and replace it when you have finished working. Line cutting blade Starting the engine when cold...
  • Page 21 OPERATINGINSTRUCTIONS Operation Since the throttle lever is secured, the cutting tool starts to operate when the engine is started. Release the throttle lock by simply pressing the throttle lever (the engine then returns to running in idle mode). If the engine does not start up even after several attempts, read the section on Troubleshooting Always pull the starter cord out in a straight line.
  • Page 22 OPERATINGINSTRUCTIONS Switching Off the Engine Emergency Stop procedure • If it becomes necessary to stop the machine immediately. Let go of the throttle lever and move the stop switch to 'OFF'. Practical tips • Practice all operating techniques with the engine switched off before you start to use the machine.
  • Page 23 OPERATINGINSTRUCTIONS Trimming Procedures continued Be aware of the trimmer head rotation. Bent shaft = Clockwise. Straight shaft = Anti-Clockwise Fence / Foundation Trimming • Approach trimming around chain link fences, picket fences, rock walls and foundations slowly to cut close without whipping string against the barrier. If the string comes in contact with rock, brick walls, or foundations, it will break or fray.
  • Page 24: Maintenance Chart

    Maintenance Chart Maintenance • Always switch off the machine and pull off spark plug H.T. lead before carrying out any maintenance work. Maintenance of the air filter Tongue Location Dirty air filters reduce the engine output by restricting air to the carburettor. Regular checks are therefore essential.
  • Page 25 Maintenance Chart Maintenance of the spark plug (Victa HA25735A = NGK BMPR7A) Spark plug gap = 0.025 inch (0.7 mm). Tighten the spark plug with a torque of 12-15 Nm. Check the spark plug for dirt and grime after 10 hours of operation and if necessary clean.
  • Page 26 Storage If you fail to follow these instructions correctly, deposits may form on the interior of the carburettor which may result in the engine being more difficult to start or the machine suffering permanent damage. • Carry out all the maintenance work. •...
  • Page 27: Routine Maintenance

    Never repair cutting attachments by welding, straightening or changing the shape. This may result in serious injury. Never attempt maintenance that is not outlined in this manual. All repair work must be carried out by a VICTA Authorised Service Centre.
  • Page 28: Troubleshooting

    TROUBLESHOOTING If the unit does not start, or runs erratically, the problem may be solved by reference to the chart below. Engine will not start Electrode is wet or fouled Dry spark plug or replace Carbon deposit on electrode Clean spark plug Spark plug (no spark) Cracked insulator Replace spark plug...
  • Page 29 Contact Service Centre Loose gearhead Tighten bolt securely/Contact Service Centre running difficulties continue, contact your closest VICTA Authorised Service Centre in Australia and New Zealand. www.victa.com.au Please look up and locate your local Authorised Service Centre on or contact Victa Lawncare Customer Service (02 8778 5555).
  • Page 30: Model Details

    TECHNICALSPECIFICATIONS Model Details Features Sabre Tornado Tornado Plus Razor Code number STB2224 TTB2226 TTS2226 RTS1226 One cylinder, One cylinder, One cylinder, One cylinder, Engine air cooling air cooling air cooling air cooling Displacement (cc) Carburettor type Diaphragm Diaphragm Diaphragm Diaphragm...
  • Page 31: Accessories & Spare Parts

    VICTAPRODUCTS Accessories & Spare Parts VICTA provides a range of safety equipment and spare parts that may be purchased at any VICTA Authorised Service Centre. VICTA Trimmer Line VICTA Formula V, Spark plug and Filter VICTA recommends the use of its Formula V High Performance 2 Stroke Oil for your fuel mixture.
  • Page 32 Warranty Service Warranty Service under both the Express Warranty and the warranties implied by law is available at any VICTA Authorised Service Centre. These centres are staffed and equipped to provide expert service. Warranty Period Model...
  • Page 33 VICTA's liability for the goods is limited to any warranties issued in writing by VICTA and VICTA is excluded from any liability whether under this contract or otherwise to the buyer of any third party...
  • Page 34 NOTES...
  • Page 35 NOTES...
  • Page 36 ©2007 Victa Lawncare Pty Ltd Victa is a trademark of Victa Ltd. All rights reserved. No part of this booklet may be reproduced by any means without prior written permission. All information herein is subject to change without notice. LR00817A-C1...

This manual is also suitable for:

Ttb2226Tts2226Rts1226

Table of Contents

Save PDF