Table of Contents
Advertisement
Advertisement
Table of Contents

Related Manuals for Xplova X5 Evo


Summary of Contents for Xplova X5 Evo
- Page 1 Smart Video Cycling Computer User Manual...
-
Page 2: Table Of Contents
Settings ....35 Xplova Video ....36 Preparations . -
Page 3: Safety Laws And Regulations
If you are unsure of the policies that when you made the purchase. The apply to a particular organization or Xplova Repair and Maintenance Depart- environment (such as airport) ask for ment will provide the warranty service authorization before you turn on your according to the proof of purchase and wireless network. - Page 4 Safety Laws and Regulations * Note: If you do not bring or present a valid proof of purchase, and the warranty period only estimated unit manufacturing date from the serial number inquiry. This may result in the situation of outside the warranty period and need to pay for repair, therefore, please be sure to safe keep the proof of purchase.
-
Page 5: Important Safety Instructions
Important Safety Instructions MPORTANT AFETY NSTRUCTIONS • Please do not attempt to repair X5 Evo • For long-term storage, please store the by yourself. Opening the case or device within the specified temperature removing the back cover may result in range (-10 °... - Page 6 Conformity does not exceed the fuse rating. Xplova is here declared, this product is in • Do not overload a power outlet, strip or compliance with the essential requirements...
- Page 7 Important Safety Instructions • The power cord or plug is damaged, cut level in all frequency bands of the mobile or frayed. device. The highest SAR value reported under this standard during product • Liquid was spilled into the product. certification for use of the device at a •...
-
Page 8: Welcome
Welcome ELCOME X5 Evo is a versatile cycling computer with an integrated action camera. A compact, efficient and rigid design makes it well-suited for a variety of indoor and outdoor bike activities. Designed with both “touch” and “button” functionalities, X5 Evo enables you to operate it under various weather and sports conditions. -
Page 9: Meet Your X5 Evo
Meet your X5 Evo X5 E EET YOUR Package contents X5 Evo comes with the following items. Contact your authorized dealer or distributor if any item is missing or damaged. A. Smart Video Cycling Computer X5 Evo D. Extended out-front Bike Mount Kit B. -
Page 10: Getting To Know Your X5 Evo
Meet your X5 Evo Getting to know your X5 Evo • Front view POWER • Short press: suspend/wakeup screen Touchscreen • Long press: power on/off UP/DOWN • Zoom in/out in Map mode • Change datasheet in Data mode BACK/LAP • BACK: press to... -
Page 11: Setting Up
Installing X5 Evo on the bike 1. Select display language. To attach X5 Evo on your bike is quick and easy. Please follow the steps as below: 1. Attach the Extended out-front Bike Mount on the bike handlebar. Align it with the bike stem and tighten the screw. - Page 12 Setting Up After reading understanding 3. Select your preferred unit of measure- Warning message on the screen, select OK ment. to finish the initial setup. Then you'll be brought to the Home screen. 4. Create an Internet connection. NOTE • You can change these settings later in Settings menu.
-
Page 13: Home Screen Overview
Setting Up Home screen overview Status bar icon The Home screen is visually intuitive and Icon Description user-friendly, with large size tiles and icons to quickly access to features and settings. Status bar is full Paired with Heart Rate Monitor Paired with Speed/Cadence Combo Sensor Paired with Shimano Di2 Sensor... -
Page 14: Cycling With X5 Evo
In case of any abnormal positioning, such as health professional first. locating at an open area for more than five minutes, please select RESET GPS. NOTE 2. Pair your X5 Evo with optional ANT+ • The operating temperature range for Sensors (if available). (See ANT+ Sen- X5 Evo is from -10°C to 50°C. -
Page 15: Start A Free Ride
Cycling with X5 Evo Start a free ride 2. Tap [RIDE] button (or short press [START/STOP] button) to start riding. 1. From the Home screen, specifically tap on the bike icon on the [RIDE] but- ton* (or long press the [START/STOP] button) to bring up Bike Mode menu. -
Page 16: Page Introduction
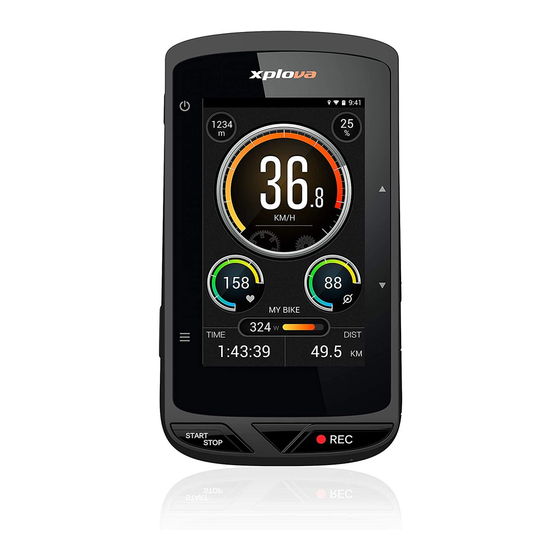
Cycling with X5 Evo 4. During riding, you can: Page introduction - tap on the touchscreen and select Dashboard STOP TIMER to pause timer or LAP to The Dashboard provides plenty of cycling start a new lap. data at a glance. -
Page 17: Map Page
Support offline maps, find your current Depending on your choice of Bike mode, location, obtain route-related details and X5 Evo provides a range of data on different etc. pages, including distance, speed, time and more. A. Toggle between (lock map) and (unlock map). -
Page 18: Quick Access Menu
- Two data fields under the Map can be customized according to your prefer- ence. Data field customization X5 Evo allows you to customize data fields on specific pages before starting the ride or on mid-ride to get important data and numbers. - Page 19 You can long press a data field directly to change it even if the timer is running. • Your X5 Evo can display up to: - 4 custom Data pages (3 - 11 fields of data for each). - 3 custom Chart pages (3 - 5 fields of...
-
Page 20: Alert Settings
1. Go to Settings > Device > Alert Settings. Alert settings 2. In Alerts page, select HR, Speed, Power or Cadence. X5 Evo allows you to set different alerts to 3. Turn HR, Speed, Power or Cadence notify you with an alert message when switch to ON. -
Page 21: Auto Pause
The local map is preloaded on your X5 Evo. What makes it even better is the free worldwide maps for offline use. If you plan to use X5 Evo in a foreign country, you may download the map correspondent with the country you visit. -
Page 22: Delete Maps
4. After downloading is completed, a NOTE remark of “Download Completed” will • Your X5 Evo is already preloaded with display next to the country name. local map which is unable to delete. 5. Select Settings > My Map > Offline Maps to view the list of your offline maps. -
Page 23: Activities
Select an activity, you will see the overview • Make sure Xplova Connect app is of the cycling data, including graphical launched and connected to X5 Evo. analyses with your speed, altitude and • Learn more on how to pair devices, temperature at different points. -
Page 24: Unfinished Activity
3. Once Challenge Mode ends, the result Upload activity based on the completion rate and time Once your X5 Evo has been paired and of this record will be displayed. connected to your smartphone, all activity 4. Tap DONE to save and read the recorded data will be synced automatically. -
Page 25: Video
Video IDEO X5 Evo is equipped with a video camera - Live video preview capable of recording HD 720p/30fps, with a Go to Settings > Record Settings > 120-degree wide-angle lens to capture Record mode settings > Manual exciting moments when riding. - Page 26 Video - Recording Duration • Loop Mode Specify the video recording length. If the Loop Mode is selected, X5 Evo will Available options: 3/6/9/15/30 sec- activate the looping record while you onds. start riding mode simultaneously. It allows a maximum of 10 videos looped recording.
-
Page 27: Mute Recording
Video Mute recording X5 Evo allows you to record with or without external sound in Record mode. 1. Turn Mute recording switch to ON to record your video without sound. 2. Turn Mute recording switch to OFF to record your video with sound. -
Page 28: Record Preview Mode
• Any changes you make to the Record preview mode do not affect the Record Settings in Settings menu. Upload video For more information on how to upload video files to your smartphone, please refer Xplova Video on page... -
Page 29: Training
Training RAINING Download a training plan Before you can start a training plan on your X5 Evo, you need to download a plan on your smartphone and sync with X5 Evo. For more information, please refer to chapter Tutorial. Start a training plan 1. -
Page 30: Stop A Training Plan
Training Stop a training plan 1. Short press [START/STOP] button, select SAVE to end and save the training plan into Activities. Or select DISCARD to cancel it. Alternatively, you can: 2. Tap on the touchscreen and select STOP TIMER and tap again to select SAVE or DISCARD the training plan. -
Page 31: Route
1. Short press [START/STOP] button, Before you can start a route on your X5 Evo, select SAVE to end and save the route you need to download a route on your into Activities. Or select DISCARD to smartphone and sync with X5 Evo. Please cancel the route. -
Page 32: Ant+ Sensors
ANT+ Sensors ANT+ S ENSORS X5 Evo has a built-in 2.4GHz ANT + digital action window will pop up. Select wireless receiver which supports standard REMAIN to stay connected or DELETE to ANT + wireless peripherals. The peripheral disconnect with the device you choose. -
Page 33: Shimano Di2
Select Settings > Bike > Wheel Size to set the wheel size. Shimano Di2 1. From X5 Evo, tap Settings > ANT+ sen- sors > Shimano Di2, tap Search Again. 2. Tap the desired device. 3. Wait until the pairing process is com- pleted, the screen will display the num- ber of the connected device. -
Page 34: App Tutorial
NOTE • Pair • Xplova Connect and Xplova Video apps Follow the steps below to pair X5 Evo with are specially designed to work with your smartphone. X5 Evo. Please download them on your smartphone either from the Google Play 1. -
Page 35: Route Planning
• Unpair 4. Tap icon at the bottom-right corner On X5 Evo, select Settings > Network > Data of the screen to save the route into My Sync. Then tap UNPAIR. Route. • My Route screen:... -
Page 36: Activity
Once your smartphone and X5 Evo have been paired, all recorded activities from NOTE X5 Evo will be uploaded to Xplova Connect • You can zoom in and out of the map by app on your smartphone and social using the pinch and zoom gesture, or by platforms. -
Page 37: Training
X5 Evo for step-by-step guidance Tap to view the training guidance Training screen Tap to upload plan to X5 Evo Training A training plan can be like a coach, it's a... -
Page 38: Xplova Video
D. Video thumbnails and secured. How to pair devices Follow the steps below to pair X5 Evo with your smartphone. 1. Launch the Xplova Video app on your smartphone. - tap icon at the upper-right corner of the screen to connect X5 Evo;... -
Page 39: Play A Video
3. Tap the scissors icon to crop the selected video. 2. Connect X5 Evo’s Wi-Fi to your smart- phone’s hotspot. Then tap Next. 3. Select X5 Evo from the Other devices list. 4. Once your smartphone and X5 Evo have 4. -
Page 40: Share A Video
Side menu. internal memory. Description of video overlay effects: Symbol Function Select multiple video clips from smartphone to combine with X5 Evo videos. (only 720p resolution is supported) Attach speed data. Add heart rate data. - Page 41 App Tutorial • Personal setting With this function, it's simple to create your own logo through inserting a picture from your smartphone's Gallery and adding texts. 1. Select Personal setting from the Side menu. 2. Tap Edit > + to select a photo. 3.
-
Page 42: General Settings
Display Bike mode You can adjust the theme, backlight time and backlight brightness. X5 Evo provides you 4 different bike modes Go to Settings > System > Display. that best suit various riding purposes. Please go to page 11 for more information •... -
Page 43: Hibernate
NOTE Hibernate Automatically set your X5 Evo to hibernate • This volume feature also controls the volume for the alerts and other sound after a specific period of time. effects. -
Page 44: Units
General Settings • Clear User Activities: Clear activities and videos saved on X5 Evo. • Restore Default Settings: Restore all settings to the default values. • Factory Reset: Reset all settings to the factory default. Units Set either Metric or Statute for the distance, altitude, temperature and other units of measurement. -
Page 45: Appendix
Appendix PPENDIX Descriptions of customized data fields Value Field Description Category: Navigation Direction Current ride direction Route Dist. Load route and ride with total distance of the route being Dist.to Dest. Load route and ride with an estimated distance between current location and destination being Time to Dest. - Page 46 Appendix "Grade your training intensity and estimate days for recovery in order to arrange the next training. Recommendation of score recovery: <150: Normal training may be resumed on the next day 150-300: Normal training may be resumed on the third day 300-450: Fatigue feeling still exists for the third day training >450: Fatigue lasts for more than three days * Formula: [(second * normalized power * intensity factor) / (FTP * 3600)]...
- Page 47 Appendix Avg. Lap Time Average time of each lap (timer time / total laps) Lap Time Timer time of the current lap Complete Laps Number of laps completed in this record L-Lap Time Timer time of the last lap Paused Time Accumulated time in pause conditions Category: Distance Distance...
- Page 48 Time of the sun rises above the horizon in current GPS positioning Sunset Time of the sun sets below the horizon in current GPS positioning Temperature Current temperature Battery level Battery level of X5 Evo currently Longitude Current GPS positioning latitude Latitude Current GPS positioning longitude GPS Strength...
-
Page 49: Specifications
Please cover with the weather cap when you are riding a motorcycle in the rain. If you would like to charge your X5 Evo after riding in the rain, please turn off your X5 Evo first and make sure to let it completely dry before charging. -
Page 50: Declaration Of Conformity
Product: Smart Video Cycling Computer Trade Name: Xplova Model Number: X5 Evo We, Acer Incorporated, hereby declare under our sole responsibility that the product described above is in conformity with the relevant Union harmonization legislation: Directive 2014/53/EU on Radio Equipment, RoHS Directive 2011/65/EU. The following harmonized stan-...
Need help?
Do you have a question about the X5 Evo and is the answer not in the manual?
Questions and answers