Table of Contents
Advertisement
Quick Links
Advertisement
Table of Contents

Related Manuals for Xplova X2


Summary of Contents for Xplova X2
- Page 1 Xplova X2 Smart Cycling Computer User Manual...
-
Page 2: Table Of Contents
Use Xplova Connect App ....................10 Smart Phone pairing ..................10 Upload riding activity ..................10 Delete riding activity ..................10 Advanced settings via Xplova Connect App ..............10 Page settings...................... 10 Sensors ......................11 Alarm setting ..................... 11 Fitness settings ....................12 Smart notification setting ................. -
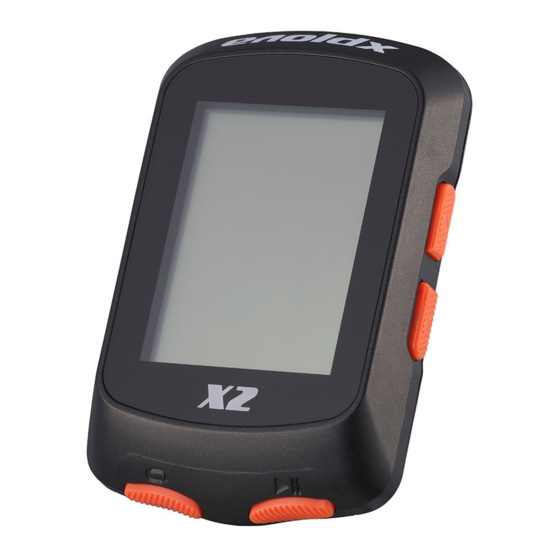
Page 3: Meet Your X2
Ensure the bike mount stays in place securely. 3.Align the latch on the back of X2 with the bike mount notch. Press downward slightly and turn X2 until it locks in place. -
Page 4: Charging Instructions
Setting before riding Tap the left button of X2 to enter the [Main Menu], in here you can make more customized settings. Setting page 1. Enter X2【Settings】>【Page】. X2 defaults 3 pages of customized riding data pages (race challenge, road cruise, extreme endurance), 1 page of altimeter, 1 page of route guidance, and 1 page of training. - Page 5 3. The following explains how to set page data Step 1: After pressing the lower right button to enter [Data], you can select this by using the two buttons on the right The number of grids displayed on the page (1-8 grids). After selecting, press the lower right button to set the data of each column.
-
Page 6: Backlight Setting
The following table lists all the data types and items that can be set for X2: Speed Heart Rate Power Speed Heart Rate Power Pwr % FTP Avg Speed Avg HR Avg Pwr Pwr IF Max Speed Max HR Max Pwr... -
Page 7: Others
X2's battery life by more than 40 hours. Auto Power If there is no operation on the X2 for 15 minutes and X2 is not in sleep mode, then X2 will automatically shut down with a 15- second countdown notification. During the 15 second countdown, press any button on X2 will cancel the automatic shutdown. -
Page 8: Start Riding
3. X2 is able to connect to: (1) Speed sensor, (2) Heart rate monitor, (3) Cadence sensor, (4) Speed/cadence sensor, (5) Power meter, (6) Smart trainer etc. 4. During the operation, press the left down button to return to previous page. -
Page 9: Lap Record
Back to the start During riding, press the left side button to open the menu and select [Back to Start]. X2 will open the route guidance screen and use your riding trajectory to guide you back to the starting point. -
Page 10: Use Xplova Connect App
Note 3: One X2 can only be paired with one mobile App. Upload riding activity When X2 is paired with the mobile app, click the button at the top right of the App screen to synchronize the riding record to the Xplova Connect App. You can enter the App【Riding activity】to view the upload progress of the riding... -
Page 11: Sensors
Sensors Enter [Sensors] in the App. You can connect to the sensors located by X2 through the App. You can also unpaired X2's connected sensors through the App. Alarm setting Enter [Alarm setting] in the App. You may set up the alarm categories... -
Page 12: Fitness Settings
The smart notification will automatically turn off after it is displayed for 30 seconds. You can also press any button in X2 to turn off the smart notification. If there is no smart notification on your X2, please make the following confirmation: 1. -
Page 13: Close Training Session
1. Enter X2【Route Guidance】mode, select the route you want to execute, and press the lower right button to open the route. Press the lower right button again, and after the recording symbol appears, X2 will starts to record the ride and execute route guidance. -
Page 14: Other
(Do not perform other operations during the updating process) 12.2 System Settings 1. Press the left side button of X2 to enter [Main Menu]> [Settings]> [System]. You can reset the X2 to the original factory settings or delete the records. -
Page 15: Product Specifications
English, Chinese (tradition), Chinese (simplified), Spanish, French, German, Dutch, Japanese, Languages Italian, Portuguese, Korean, Thai, Hungarian, Czech, Slovak, Polish Xplova X2 Cycle computer、Micro USB Cable x1, Quick Start Guide x1、Warranty Card x1、 Contents of package handlebar mounts x1、handlebar mounts pad x1、Rubber strap x2...
Need help?
Do you have a question about the X2 and is the answer not in the manual?
Questions and answers