Table of Contents
Advertisement
Applicable Country & Regions:
All Regions
Product Service Manual – Level 2
Service Manual for BenQ:
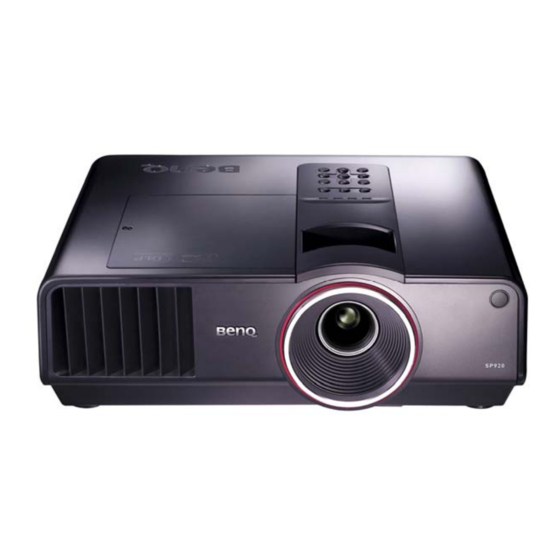
Projector/SP920
<9J.0C177.000>
Version: 00c
Date:2009/03/05
Notice:
For RO to input specific "Legal Requirement" in specific NS regarding to responsibility and liability
statements.
Please check BenQ's eSupport web site, http://esupport.benq.com, to ensure that you have the most
recent version of this manual.
First Edition (May 2008)
© Copyright BenQ Corporation 2007. All Right Reserved.
1
Advertisement
Table of Contents

Related Manuals for BenQ SP920


Summary of Contents for BenQ SP920
- Page 1 Notice: For RO to input specific “Legal Requirement” in specific NS regarding to responsibility and liability statements. Please check BenQ’s eSupport web site, http://esupport.benq.com, to ensure that you have the most recent version of this manual. First Edition (May 2008)
-
Page 2: Table Of Contents
Content Index Abbreviations & Acronyms………………………………………………………….…...3 About This Manual………………………………………………………………….…...4 Trademark…………………………………………………………………………...4 Introduction……………………………………………………………………………...4 Important Service Information………………………………………….………..4 RoHS (2002/95/EC) Requirements – Applied to all countries require RoHS………4 Safety Notice......................…...5 Compliance Statement……………………………………………………….……..5 General Descriptions…………………………………………………………………….5 Related Service Information……………………………………………………………..5 Service Web Site…………………………………………………………………….5 Product Overview………………………………………………………………………..6 Specifications……………………………………………………………………….6 Packing……………………………………………………………………………22 Customer Acceptance……………………………………………………………..30 Level 1 Cosmetic / Appearance / Alignment Service……..……………………..………33 Cosmetic/Appearance Inspection Criteria……………………………………….33 Operational Inspection Criteria.................34... -
Page 3: Abbreviations & Acronyms
Abbreviations & Acronyms Analog to Digital BenQ BenQ Corporation Color Wheel Concave Mirror Digital Light Processing / Texas Instruments® Digital Micro mirror Device Digital Video Interface DVI-I Digital Video Interface-Integrated Projection Lens Pond of Mirrors Interface Between Data terminal Equipment and... -
Page 4: About This Manual
About This Manual This manual contains information about maintenance and service of BenQ products. Use this manual to perform diagnostics tests, troubleshoot problems, and align the BenQ product. Important Only trained service personnel who are familiar with this BenQ Product shall perform service or maintenance to it. -
Page 5: Safety Notice
This Service Manual contains general information. There are 2 levels of service: Level 1: Cosmetic / Appearance / Alignment Service Level 2: Circuit Board or Standard Parts Replacement Related Service Information Service Web Site BenQ Global Service Website: http://support.benq.com/front/benqmain.asp eSupport Website: http://esupport.benq.com/v2... -
Page 6: Product Overview
Product Overview Specifications: 1.0 Optical Performance 2.0 Image Quality 3.0 Mechanical Specification 4.0 Packaging 5.0 Thermal Specification 6.0 Environmental 7.0 Regulatory 8.0 Reliability 9.0 Power Requirements 10.0 Panel Specification 11.0 Compatibility 12.0 Image Interface 13.0 Control Interface 14.0 User Interface 15.0 Audio 16.0 DC output 17.0 Lamp hour... - Page 7 1.4.2 Light Leakage out of Active <1.1 lux out of 60” (Diagonal at 2.02m, Wide) image size to 80’’ Area Diagonal area. (Reference TBD after PVD) Reference meter: BenQ YM5A/Measurement Center Integral 1.5 Color sphere 1.5.1 White 0.320±0.04 0.355±0.04...
- Page 8 2.5 Focus Range 2.5.1 Visible Range 1~8 m 2.5.2 Clearly Focus Range 1.5~6 m(Spec. defined as item 2.6) 2.6 Focus (1)If pattern can be uniformly focused, pass! 2.6.1 区 Pattern (2)If not, check 2.6.2 Defocus: R<=3.0; G<=2.5; B<=2.5 pixel Flare: R<=4.0; G<=3.5; B<=3.5 pixel 2.6.2 Defocus and Flare Slight flare is not counted as flare.
- Page 9 FCC Class B requirements, CE, VCCI, MIC, C-Tick 7.0 Regulatory Directive 73/23/EEC; Marks Directive 89/336/EEC BENQ ESD Specification 8.0 Reliability 40,000 hours except DMD chip, Color wheel, Lamp, Fan and 8.1 MTBF Ballast Normal : 2,000 hours (50% brightness maintenance) 8.2 Lamp Lifetime...
- Page 10 12.0 Image Interface Adhere to Appendix A2 15 pin D-Sub (Female) x 1 G(Y): Video amplitude 0.7/1.0 Vp-p : Impedance 75 12.1 Analog RGB Input RB(CbCr): Video amplitude 0.7 Vp-p : Impedance 75 HD/VD/CS: TTL Level RCA jack (Yellow) 12.2 Video Input Video amplitude 1.0 V : Impedance 75Ω...
- Page 11 Appendix A - Electrical Specification 1. Timing Table The Analog RGB Established timing is as following: Refresh rate H-frequency Clock Resolution Mode (Hz) (kHz) (MHz) 720 x 400 720x400_70 70.087 31.469 28.3221 VGA_60 59.940 31.469 25.175 VGA_72 72.809 37.861 31.500 640 x 480 VGA_75 75.000...
- Page 12 1280 x 800 WXGA_60 59.96 49.65 83.458 SXGA_60 60.020 63.981 108.000 1280 x 1024 SXGA_75 75.025 79.976 135.000 SXGA_85 85.024 91.146 157.500 1280 x 960_60 60.000 60.000 1280 x 960 1280 x 960_85 85.002 85.938 148.500 WXGA+_60 59.887 55.935 106.500 1440 x 900 WXGA+_75 74.984...
- Page 13 2. Characteristics of inputs/outputs Signal Parameter Type Impedance RDATA Amplitude Volts peak-to-peak GDATA Black pedestal Volts BDATA Pixel Clock M Hz Impedance Amplitude Volts peak-to-peak Video amplitude Volts peak-to-peak GDATA_SOG Sync amplitude Volts peak-to-peak Black pedestal Volts Pixel Clock M Hz Impedance K ohm Amplitude, low level...
- Page 14 Definition Definition Definition Definition Red Video Green Video Blue Video Red Video Green Video Blue Video Return Return Return Monitor ID Bi-directional Sync. Return bit 0 data (SDA) Horizontal Vertical Sync Data clock Sync (SCL) • Video & Component Input Composite input Definition Composite video input...
- Page 15 • HDMI Input...
- Page 16 Local Keyboard Description (Detailed description refer to SW Specification) Key Functions Description 1. Press this button to call out OSD 1. Menu/Exit 2. When it exist OSD, press this button to leave current page to main menu or to close OSD 1.
- Page 17 1. When Quick Auto Search is "on", user press this key to call out Source OSD and then press ▲▼ to select source. After pressing Enter key, system would search all signals from selected source and then project first detected source within 2~3 9.
- Page 18 Auto adjusts the most suitable frequency, phase, for the input source. User could get the optimal projection quality by pressing the button. Auto-Adjustment function will not influence the color or brightness setting by users. “Auto” will not 3. Auto be active under video input, including video, S-video and Y/BP/Pr. The current source info will be displayed at the upper left of the screen for 3 seconds after users press Auto (1)When there is OSD menu, user can press this key to move to the left item...
- Page 19 21. Page Up When USB is connected, press this button to page up power point 22. Page Down When USB is connected, press this button to page down power point By pressing “Zoom in” button, the center of the picture can be magnified gradually.
- Page 20 Blank Lamp Reset OSD Timer Source Scan Keystone Hold Mirror Hold Blank Time Information Reset External Message indicator (Detailed description refer to SW Specification) Message Occasion PC/Composite Video /S-Video /Analog The system does not detect the signal YPbPr/HDMI Searching Out of range The signal is over the specification Order replacement lamp Lamp Hour is over 2000 hours...
- Page 21 Appendix B - Power Supply Specification 1. Input Power Specification Specification Description Input Voltage Range The unit shall meet all the operating requirements with the range 90 ~ 264 VAC Frequency Range The unit shall meet all the operating requirements with an input frequency range 50 Hz ~ 60 Hz Power Consumption Normal operation: 805 W (Max)
-
Page 22: Packing
Packing 【NOTE】The updated Service BOM is on e-Support and SPO. Please check it to order service parts. - Page 23 CTN LBL PRINTING (For BQA, BQE, BQP):...
- Page 26 CTN LBL PRINTING (For BQC)
- Page 27 SPEC LBL PRINTING SPEC LBL PRINTING (For BQC)
- Page 28 LAMP LBL PRINTING (For BQA,BQE, BQP)
- Page 29 LAMP LBL PRINTING (For BQC)
-
Page 30: Customer Acceptance
Customer Acceptance 1.0 SCOPE This document establishes the general workmanship standards and functional acceptance criteria for PROJECTOR produced by QISDA. 2.0 PURPOSE The purpose of this publication is to define a procedure for inspection of the PROJECTOR by means of a customer acceptance test, the method of evaluation of defects and rules for specifying acceptance levels. - Page 31 6.1 Critical defective A critical defective contains one or more critical defects and may also contain major and/or minor defects. 6.2 Major defective A major defective contains one or more major defects and may also contain minor defects but contains no critical defect. 6.3 Minor defective A minor defective contains one or more minor defects but contains no critical and major defects.
- Page 32 9.4 Defects found in accessory packed with the product such as Cable, Connector, Manual, CD and the like, and being inspected as a part of the complete product, must be included in the evaluation. 9.5 The evaluation must be within the limits of the product specification and, for not specified characteristics, refer to the sample machine or the judgment of QISDA QA Engineer.
-
Page 33: Level 1 Cosmetic / Appearance / Alignment Service
Level 1 Cosmetic / Appearance / Alignment Service Cosmetic / Appearance Inspection Criteria 1.0 Inspection zone definition and inspection distance A-side: Up case - Up case surfaces except right / left / behind sides surface. Front cover - Front cover surface B-side: Side - Right/Left sides surfaces... -
Page 34: Operational Inspection Criteria
OPERATIONAL INSPECTION CRITERIA 1. TEST PATTERN PATTERN PATTERN TEST ITEM ANSI Brightness 、 Bright Uniformity 、 FOFO Full white Contrast Ratio 、 CIE white coordinate 、 Throw Ratio 、 Zoom Ratio 、 Distortion Chessboard ANSI Contrast Full Dark FOFO Contrast Ratio Full Red Impurity 、... - Page 35 256/32/16 Gray Check Gray Level Check the DDC information, including S/N, DDC check model, manufacturer name, product code. 2. TEST CONTENT: Test Condition TEST ITEM Input Equipment Chroma pattern 1024x768 / 800x600 Focus/ Focus range Timing VESA1024 / 256 gray scale Gray scale check D-SUB Chroma...
- Page 36 Out of 60” image size Light Leakage <1 lux (Diagonal at 2.02, wide) Full black pattern (Out of Active Area) image size. x=0.320+0.04 Contrast: Preset CIE white coordinate Full white y=0.355+0.04 Brightness: Preset x=0.645+0.04 Contrast: Preset CIE red coordinate Full Red y=0.340+0.04 Brightness: Preset x=0.340+0.04...
- Page 37 Description Class Noise 1.1 When power on or power off, fan or color wheel get abnormal noise. Major 1.2 When normal operation, noise exceed noise level (refer to C201 document) Major Display Quality (include input: Video, S-video, YPbPr, and D-sub or RGB) 2.1 Focus range out of specification Major 2.2 Focus fail (focus not clear or flare/ defocus/ lateral color out of specification)
-
Page 38: Software/Firmware Upgrade Process
Software/Firmware Upgrade Process (1) DLP Composer lite install procedure Installation (All Platforms) 1. Double click the Setup file for DLP Composer Lite to start to install program. 2. When the Installation Wizard appears, click “Next”. 3. Select to accept the License Agreement, than click “Next” 4. - Page 39 Note: The default installation directory is: C:\Program Files\DLP Composer Lite 7.2 If you want to install to a different directory (perhaps alongside a prior release of DLP Composer™ Lite), click the "Browse" button on the "Select Features" page.
- Page 40 5. When finishing installation, click “Finish”, and then restart your computer to complete the installation process. (2) Select Library 1. When start to use this program to download at first time, you need to check if the library folder is existed under the path of Library.
- Page 41 2. Check if there are library files in the assigned path. If not, unzip the file “library_20070830.zip” into the path. (3) Download Procedure (Method1—by RS232) How to download Hardware required Standard RS232 Download cable Personal computer or laptop computer Software required DLP Composer Lite program New version FW Download procedure...
- Page 42 Select the connection port between projector and your computer. Select “Flash Loader” and make sure to check on “Skip boot Loader Area”. (Select xxKB refers to below table).
- Page 43 Model MP510/610/611/611C/ MP511/612/622/612C/622C/ MP770 Name 620/620C/720/720P/721 723/730/771/512/522/512ST/ 522ST/513/623/624/CP270/SP 870/SP920 Skip 16Kbit 32Kbit 64Kbit area Caution: do not interrupt download like unplug power cable. If you skip boot loader Area and interrupt download, Projector would not turn on anymore. Click on “Flash Loader” and “Browse”->select file->”Open” to select the path of the image...
- Page 44 Click “Reset Bus” and then check the status that shows “Bus Reset”. Select “Start download” and three LED light orange color...
- Page 45 When FW is downloading, “Start Download” becomes disabled. After download complete, program will show “Download complete” message, and projector will reset to stand by mode. 10. If program pops out another error message after “Download complete” message appearing, it’s ok to skip the error message. 11.
- Page 46 (Method2---by USB) Need to install USB support file before using USB to download first time USB Support - Installation (All Platforms) This release includes support for a USB communications interface to DDPxxxx-based projectors. The setup program includes the files needed to install USB support (for not supported Win98/WinMe/Win2K/WinXP only -- Win95 and WinNT are After DLP Composer™...
- Page 47 Installation on Windows 98 or Windows Me may prompt "Please insert the disk labeled 'DLP Composer Installation Directory', and then click OK". This message may be safely ignored by clicking the OK button. Another prompt will then appear: "The file 'windrvr6.sys' on DLP Composer Installation Directory cannot be found".
- Page 48 Select “Flash Loader” and make sure to check on “Skip boot Loader Area” (select xxKB refers to below table).
- Page 49 Model MP510/610/611/611C/ MP511/612/622/612C/622C/ MP770 Name 620/620C/720/720P/7 723/730/771/512/522/512ST/ 522ST/513/623/624/CP270/SP 870/SP920 Skip 16Kbit 32Kbit 64Kbit area Caution : do not interrupt download like unplug power cable. If you skip boot loader Area and interrupt download, Projector would not turn on anymore. Click on “Flash Loader” and “Browse”->select file->”Open” to select the path of the image...
- Page 50 Select “Reset Bus” and check the status that shows “Bus Reset”. Select “Start download” and three LED light orange color...
- Page 51 When FW is downloading, “Start Download” is disabled. After download complete, program will show “Download complete” message, and projector will reset to stand by mode. 10. If program pops out another error message after “Download complete” message appearing, it’s ok to skip the error message. 11.
-
Page 52: Method To Enter Factory Menu
Method to enter factory menu: a) Press Menu on keypad than the main menu popup b) When showing main menu, press Source + Mode at the same time c) Factory menu popup at the top-left of display RS-232 connection: 1. Connection: Below shows the illustration of connection between PC and Projector. - Page 53 WIRE RUN LIST CONN1 COLOR CONN2 BLACK BROWN ORANGE YELLOW GREEN BLUE WHITE Shell SHIELD Shell <Pin assignment for this two end> Description Description Interface RS-232 protocol Baud Rate 115200 bps (default) Changeable(9600/19200/38400/57600/115200) Setting in OSD menu Data Length 8 bit Parity Check None Stop Bit...
-
Page 54: Adjustment / Alignment Procedure
Adjustment / Alignment Procedure Content 1. Color Wheel Delay Alignment 2. Overfill adjustment 3. PC Alignment Procedure 4. YUV Alignment Procedure... - Page 55 1. Color Wheel Delay Alignment Procedure: Enter Factory Mode 10. Enter Block 1 11. Change CW Delay by adjusting the following gray pattern to smooth 32 Gray pattern...
- Page 56 2. Overfill adjustment 1. “Full White Pattern” is suggested for this alignment. 2. Adjust 2 LP-alignment Screws (upper side / lower front side of Optical Engine) behind Color Wheel. 3. Alignment Criteria is to adjust these 2 screws until “No Dark Edges" and “ No Shadows"...
- Page 57 3. PC Alignment Procedure OSD Default value: Item Value Cal R Offset Cal G Offset Cal B Offset Cal R Gain Cal G Gain Cal B Gain YPbPr R Offset YPbPr B Offset Procedure: Gray Level: Connect power, D-sub, into projector. Change Timing and pattern of pattern generator: Timing: 1024*768 @60Hz (XGA) Pattern: As...
- Page 58 4. YUV Alignment Procedure OSD Default value: Item Value Cal R Offset Cal G Offset Cal B Offset Cal R Gain Cal G Gain Cal B Gain YPbPr R Offset YPbPr B Offset Procedure: 1. Connect power, YpbPr cable (only G cable from DVD player) into projector. 2.
-
Page 59: Level 2 Circuit Board And Standard Parts Replacement
Level 2 Circuit Board and Standard Parts Replacement Product Exploded View Module 1 – Total Exploded View... -
Page 61: Module 2 - Assy Upper Case
Module 2 – ASSY UPPER CASE... -
Page 62: Module 3 - Assy Lower Case
Module 3 – ASSY LOWER CASE... -
Page 63: Module 4 - Assy Front Case
Module 4 – ASSY FRONT CASE... -
Page 64: Product Disassembly/Assembly
Product Disassembly / Assembly Description Step lamp door and the rear case screw Figure 1 Figure 2 Disassembly the screw*1(8F.00564.9R5) and take off the lamp door, as Figure 1. Then dismantle screw*3 Figure 3 (screw 1-2 =8F.5A724.8R0, screw 3 = 8F.1A524.8R0) as Figure 2. - Page 65 MB shielding and all wires Figure 1 Dismantle screw*7(8F.1G524.6R0*6, 8F.1A554.6R0*1) and take off screw*7 the MB shielding, as Figure 1. Figure 2 3pin CW wire A blower wire Dismantle all wires on main board, as Figure 2. blower wire inlet fan wire ballast 10/5/5pin wire...
- Page 66 Power board and Fan module Figure 1 Dismantle the screws *5 (8F.1G524.6R0) on PowerBoard shielding. A thermal Then take off the shielding. wire B thermal wire Dismantle all wires on power Ballast 3/3pin wire board, as Figure 1. seitch wire*2 Dismantle the screws *2(8F.1G524.6R0) on Ballast 3/4pin wire...
- Page 67 Ballast、Engineand lamp module Figure 1 Disassembly the screw* 4(8F.1G524.6R0) and take off the ballast mylar*2, as Figure 1. Figure 2 Figure 3 the ballast- Lamp wire( Dismantle the ballast - lamp ballast wire short ) wire*2(long and short) and take off the ballast.
- Page 68 the blower、lamp box and speaker Figure 1 Dismantle screw*3 (8F.1G524.6R0) and take off the lamp box , as Figure 1. Figure 2 blower wire clip Dismantle screw*4 (screw 1-2 = 8F.1G523.5R0, screw 3-4 = 8F.1A524.8R0). Take off the A blower, blower wire clip and the blower sponge, as Figure 2.
- Page 69 adjust foot and lower ornament Figure 1 Dismantle screw*2 and take off the lower ornament, as Figure 1. Dismantle adjust foot pin*4,as Figure 2. Figure 2 Dismantle adjust foot*4,as Figure 3. adjust foot*4 Dismantle screw*2 and take off the blower cover. Figure 3...
-
Page 70: Module Assembly Key Point - Optical Engine
Module Assembly Key Point - Optical Engine 1. Assembly Lamp module: Lamp 1 & 2 Position (a) Assemble Lamp 1 perpendicular to Rod, and Lamp 2 align to Rod (Fig. 1-1) Fig.1-1 (b) Check each fin at the breach side of lamp plate (Fig. 1-2) Fig.1-2... - Page 71 2. BKT_link_lamp and CW Module Assembly 2.1 Holder_FG module (a) Clip_FG hook on holder; FG put on Clip_FG, UV face down (Fig. 2-1) (b) Rote FG and assemble on Holder by screw. Total 2 FG sets (c) Assemble FG module on Bracket_link_lamp (Fig. 2-2) Fig.2-1 Fig.2-2 2.2 Assemble Rod and relative parts...
- Page 72 Fig.2-3 Fig.2-4 Fig.2-5 Fig.2-6 2.3 Assemble Baffles and check gap status (a) Assemble Baffle_LP to fix LP (Fig. 2-7) (b) Check the overlap status between baffle and LP (Fig. 2-8) (c) Check the gap between baffle and Rod (Fig. 2-9) Fig.2-7...
- Page 73 Fig.2-8 Fig.2-9 2.4 Assemble CW Module (a) Assemble the CW module as below (Fig. 2-10) (1) BKT CW (2) Damper CW (3)CW (4) Fixed screw (5) M2 Screw (6) Sensor Board Fig.2-10 (b) Check FFC direction at right side (Fig. 2-11) (c) Arrange the FFC and Sensor wire into rectangular hole (Fig.
- Page 74 3. Assemble Sub HSG Module (a) Insert Clip CM Side and Clip CM Bottom first (Fig 3-1, Fig 3-2) (b) Assemble CM to HSG ILL and to make CM contact three datum on the HSG ILL Well. (Fig 3-3) (c) Assemble “CLIP of TOP” to the HSG ILL. (Fig 3-4) (d) Paste Sponge tube AL on cannelure of HSG ILL.
- Page 75 AL Sponge Fig 3-5 4. Assemble FM and Stop Baffle Module (a) Pre-assemble 2 springs on FM Holder. (Fig 4-1) (b) Pre-assemble FM Holder on HSG. (Fig 4-2) (c) Assemble two Overfill adjustment screw. (Fig 4-3) (d) Pre-assemble 1 spring on HSG. (Fig 4-4) (e) Assemble Pivot Screw on FM Holder.
- Page 76 Spring Adjustment Screw Fig 4-3 Fig 4-4 Pivot Screw Fig 4-5 Fig 4-6 FM Clip FM Clip Fig 4-7 Fig 4-8...
- Page 77 Screw HSG Hsink Stop Baffle Fig 4-9 Fig4-10 Glue Fig 4-11 5. AL, HSG ILL and HSG DMD Assembly: (a) Put AL on HSG. (Fig 5-1) (b) Assemble Sub HSG and HSG. (Fig 5-2) Sub HSG Module Fig 5-1 Fig5-2...
- Page 78 6. DMD, DMD Baffle and DMD Socket Assembly (a) Assembly DMD Baffle on DMD. (Fig 6-1) (b) Assembly DMD on DMD socket. (Fig 6-2) DMD Socket DMD Baffle Fig 6-1 Fig6-2 7. Assemble Optical Engine (a) Assembly DMD and DMD Socket on HSG. (Fig 7-1) (b) Assembly Chip BD on DMD Socket.
- Page 79 Hsink Backer Rubber Fig 7-3 Fig 7-4 Fig 7-5 8. Assemble Engine and BKT Module Assemble BKT_Lamp Module and Optical Engine. (Fig 8-1, 8-2) Screws Fig. 8-1 Fig. 8-2...
-
Page 80: Module Assembly Key Point - Mechanical
Module Assembly Key Point - Mechanical Contents: 1. Appearance Case assembly concern: 1-1. Lower Case module 1-2. Upper Case module 1-3. Front Case and Rear Case module 2. Fan BKT module assembly concern: 2-1. Fan 10538 inlet/outlet module 2-2. Fan 9225 (Dual) and Fan 6025module 3. - Page 81 1. Appearance Case assembly concern: 1-1. Lower Case module Adjust Foot x4 Cover Wall-System Plate Label Wall-Ballast Pre-Assembly: Mesh SP930 Adjust Foot: Follow W500 Assembly Concept Align Pin (back side) Screw Holes x2 Screw Holes x2...
- Page 82 MYLAR: Paste beside the wall Wall-System MYLAR: Paste align mark Pin Boss Screw Boss Support Bar: (1) Screw boos x4 (2) Pin boss x2 1-2. Upper Case module Upper Case Module Melt Nut DOOR LAMP LED LENS ZOOM LENS KEYPAD...
- Page 83 M4-Melt Nut x2 M4-Melt Nut x2 Side Louver- outlet MYLAR-inlet: Heat Melt Side Louver- inlet MYLAR-outlet: Heat Melt Assembly Hook x2 Align Boss x2 Keypad Module (Pre-Assembly) Screw Boss (with Melt Nut) SPONGE: Paste around zoom step SPONGE: Only paste Louver-outlet side...
- Page 84 1-3. Front Case and Rear Case module Front Case Module ASSY_SUB: Melt Nut ASSY_SUB: MYLAR_IR Align Pin Align Pin Align Pin Align Hole LOGO: Open adhesive tape and paste to F/C AL-ring: Follow 2 align pin and fasten by 2 surface (push until no gap).
- Page 85 SPONGE: paste alignment Pre-Assembly screw 前蓋必須推到底 不可 與下蓋也 gap MYLAR-connector Melt Nut MYLAR-connector: paste with uniform gap [EPR UPDATE] AC-SOCKET 3-PIN Alignment...
- Page 86 2. Fan BKT module assembly concern: 2-1. Fan 10538 inlet/outlet module Fan 9225- DUAL Fan 10538- INLET Fan 6025 Fan 10538- OUTLET 10538-inlet Wire Alignment EMI grounding...
- Page 87 9225 Dual Wire EMI grounding: (2 in 1) Wire Alignment: Near indent Blower Wire 2-2. Fan 9225 (Dual) and Fan 6025 module Rubber-Ring x2 MYLAR-Label: Paste cover fan label Same assembly concept: Same assembly concept: BKT-9225, BKT-6025, BKT-9225, BKT-10538-outlet, BKT-10538-inlet/outlet Sponge: Paste to tunnel top (align mark)
- Page 88 3. Blower, Nozzle, Thermal Breaker wire alignment and assembly concern Lamp Connector Module Clip-Cable Louver Lamp Wire Alignment (Lamp box bottom side view)
- Page 89 “WORD” side CU-plate side Clip-Cable Pre-Assembly: Thermal Breaker wire alignment Blower 1 Clip Blower Wire Clip-Cable Alignment...
- Page 90 4. Ballast wire alignment concern MYLAR: Signal Layer Heat Sink Screw x4 Heat Sink MYLAR: CU-Foil Ballast heat-sink align: face to face EE wire Lamp wire PWR wire Align Pin PWR wire Lamp wire EE wire Lamp wire (Long) Lamp wire (short)
- Page 91 Power Wire Screw Boss 4-pin connector Screw Boss Power-Wire-4pin Alignment Magnetic Core 5. Interlock wire alignment concern BKT-Interlock Hook x2 To avoid the line touching the fan, make sure the line between clip on lamp box and power board is tight Clip Pre-Assembly: BKT + Interlock...
- Page 92 6. Power Board and Main Board wire alignment 2-pin PWR wire L-Cut EE-wire PWR-wire 3-pin PWR wire RS232 port hole MYLAR: paste along edges BKT MAIN-BD GASKET: paste alignment Screw x6 Clip x4 (RCA-type)
- Page 93 7. Optical Engine and Lamp module assembly concern Lens Module Lamp Module C/W wire C/W sensor Heat Sink Lens Module Lamp Module Lamp connector Module M4 screw Guide-Bar x2 M4 screw Align Pin x2 Lamp connector Module...
- Page 94 Heat-Sink Module Heat-Sink Module Heat-Sink Screw 1/2 Heat-Sink Screw 2/2 Gasket Align Lines Gasket-OPE Alignment: Paste between 2 lines 8. Overall wire review...
- Page 95 Dual-speakers Wire Alignment...
- Page 97 9. EMI Assembly Notice Solution : Use gasket to contact lower plate and RS-232 connector. Solution : Use gasket to contact lower case and Optical Engine. Solution : Use gasket to contact lower plate and chip-board heat-sink.
- Page 98 Solution : Use grounding clip to lock fan Cable at fan Case. Solution : Use grounding clip to lock fan Cable at fan Case. Solution : Use grounding clip to lock fan Cable at fan Case.
- Page 99 Blower cable Front IR cable Solution : Fix the IR and Blower cable at bind Core by this way. Speaker cable Solution : Let speaker cable cross the Shielding wall by this way. Solution : Use Spring to contact YPbPr Connector and lower plate.
- Page 100 Solution : Add Two Gasket at OP heat-sink to Contact main-board lower plate. Add Core on speaker wire and change grounding position EMI concern.
- Page 101 Add core on Blower fan wire Add core on Door switch wire...
-
Page 102: Block Diagram
Block Diagram Hardware Architecture Thermal break Keypad Main sensor Circuit Circuit Operation Fan Driver Circuit Circuit Input CW Index Lamp Ballast sensor Source Module Door board switch Circuit From AC PFC Circuit To Lamp socket Filter Figure 1 Hardware Architecture Main Board Volume、Mute Audio... -
Page 103: Troubleshooting
Troubleshooting Chapter 1 System Analysis Chapter 2 Optical Trouble Shooting Guide Chapter 3 Power Supply Trouble Shooting Guide Chapter 4 LED Messages Definition... - Page 104 Chapter 1 - System Analysis Step: 1. Check Lamp Door 2. Check Power Board and Keypad LED OK Interlock 3. Check Connection between PWR BD and Main BD 1. Check Lampen wire , Lamp wire and Ballast wire 2. Check C/W and wire connection If Power On, Lamp 3.
- Page 105 Chapter 2 - Optical Trouble Shooting Guide Item Trouble Shooting Guide Brightness 1. Change lamp Uniformity 1. Change lamp 1. Check ADC calibration 2. Check user’s menu brightness & contrast are default or not FOFO Contrast 3. Clean DMD 4. Clean PL 5.
- Page 106 Chapter 3 - Power Trouble Shooting Guide...
- Page 109 Chapter 4 - LED Messages Definition Power Temp Lamp1 Lamp2 Status Note Stand-by Powering up Normal operation Normal power-down cooling First Lamp-Lit error cooling(single lamp) Lamp Error Messages Lamp 1 error in normal operation(dual lamp) Lamp 2 error in normal operation(dual lamp) Both lamp fail (dual lamp) Thermal Error Messages Fan 1 error (the actual fan speed is ±20% outside the...
- Page 110 Fan#2 Fan#1 Fan#6 Fan#4 Fan#7 Fan#5 Fan#3...
-
Page 111: Appendix 1 - Screw List / Torque
Appendix 1 – Screw List / Torque Model name : SP920 (MD) Screw P/N Description Torque Q'ty Where use Q’ty Part name Type Head Length Surface (kgf-cm) Unit BLOWER(1)(2) == LC 8F.1G523.5R0 SCRW MACH PH MACH PHW 3+/-0.5 FAN_6025,10538(1)(2),9225(1) == HOLDER(6K) W/FL M2.5*5L NI... - Page 112 SP920 OM Description Torque Size Item Where to use Q'ty Type Head Length Surf. Kgf-cm 8F.00319.9R0 MACH FLAT-P 3±0.5 FM Pivot screw 8F.00345.5R6 MACH 2.5±0.5 CW with Damper (S1.8) 8F.2G522.8R0 MACH EX-HEX FM Adj screw 2.5±0.5 Sensor BD 2.5±0.5 Clip & BFL of Rod/LP 1.5±0.5...
-
Page 113: Appendix 2 - Code List: Ir / Rs232 / Ddc Table
Appendix 2 - Code List: IR / RS232 / DDC Data Remote Control Code: 1. IR Code CUSTOMER CODE DATA CODE FUNCTION 0030 0x02 Power 0030 0x03 Freeze 0030 0x04 Source 0030 0x05 page up 0030 0x06 page down 0030 0x07 Blank 0030... - Page 114 >pow=on#ON# 3E 0 2A 70 6F 77 3D 6F 6E 23 D D A 0 2A 50 4F 57 3D 4F 4E 23 D A 0 Type Operation ASCII Write Power Off <CR>*pow=off#<CR> 0D 2A 70 6F 77 3D 6F 66 66 23 Echo (ASCII) Echo (Hex) >pow=off#*POW=OFF#...
- Page 115 Write YPbPr <CR>*sour=YPbr#<CR> 0D 2A 73 6F 75 72 3D 59 50 62 72 23 0D Echo (ASCII) Echo (Hex) >sour=YPbr#YPBR# 3E 00 2A 73 6F 75 72 3D 59 50 62 72 23 0D 0D 0A 00 2A 53 4F 55 52 3D 59 50 42 52 23 0D 0A 00 Type Operation...
- Page 116 Echo (ASCII) Echo (Hex) >sour=?#*SOUR=DVID# 3E 00 2A 73 6F 75 72 3D 3F 23 0D 0D 0A 00 2A 53 4F 55 52 3D 44 56 49 44 23 0D 0A 00 Note: This is an example for inquiry command with current source is DVI-D Audio Type Operation...
- Page 117 Write Volume - 0D 2A 76 6F 6C 3D 2D 23 0D <CR>*vol=-#<CR> Echo (ASCII) Echo (Hex) >vol=-#*VOL=-# 3E 00 2A 76 6F 6C 3D 2D 23 0D 0D 0A 00 2A 56 4F 4C 3D 2D 23 0D 0A 00 Type Operation ASCII...
- Page 118 42 52 49 3D 2B 23 0D 0A 00 Type Operation ASCII Write Brightness - 0D 2A 62 72 69 3D 2D 23 0D <CR>*bri=-#<CR> Echo (ASCII) Echo (Hex) >bri=-#*BRI=-# 3E 00 2A 62 72 69 3D 2D 23 0D 0D 0A 00 2A 42 52 49 3D 2D 23 0D 0A 00 Type Operation...
- Page 119 >*asp=WIDE#*ASP=WIDE# 3E 00 2A 61 73 70 3D 57 49 44 45 23 0D 0D 0A 00 2A 41 53 50 3D 57 49 44 45 23 0D 0A 00 Type Operation ASCII Write Auto 0D 2A 61 75 74 6F 23 0D <CR>*auto#<CR>...
- Page 120 DDC Table ________________________________________________________________ 0 | 00 FF FF FF FF FF FF 00 09 D1 01 A5 06 06 06 06 10 | 0E 11 01 03 80 00 00 78 2A 5F 9F A9 55 50 92 24 20 | 0D 4A 4B AD CF 00 61 59 81 40 81 59 81 80 90 40 30 | 95 00 A9 40 01 01 64 19 00 40 41 00 26 30 18 88 40 | 36 00 00 00 00 00 00 18 00 00 00 FD 00 30 55 1F 50 | 52 11 00 0A 20 20 20 20 20 20 00 00 00 FE 00 42...
- Page 121 ______________________________________________________________________ (6CH-7DH) Detailed Timing / Descriptor Block 4: Monitor Name: SP920 ________________________________________________________________ 0 | 00 FF FF FF FF FF FF 00 09 D1 01 A5 06 06 06 06 10 | 0E 11 01 03 80 00 00 78 2A 5F 9F A9 55 50 92 24...
- Page 122 60 | 45 4E 51 0A 20 20 20 20 20 20 20 20 00 00 00 FC 70 | 00 53 50 39 32 30 0A 20 20 20 20 20 20 20 01 00 ______________________________________________________________________ (08H-09H) ID Manufacturer Name _________________________ = BNQ (0AH-0BH) Product ID Code ______________________________ = A501...
- Page 123 ______________________________________________________________________ (5AH-6BH) Detailed Timing / Descriptor Block 3: ASCII Data: BENQ ______________________________________________________________________ (6CH-7DH) Detailed Timing / Descriptor Block 4: Monitor Name: SP920 (7EH) Block No: (01) Extension EDID Block(s) (7FH) CheckSum OK Time: 14:41:09 Date: Tue Jul 31, 2007 ______________________________________________________________________...
- Page 124 (03H) YCbCr (4:2:2) Video Short Block Description: (05H) 1920 x 1080 P 59.94/60Hz 16:9 (06H) 720 x 480 P 59.94/60Hz 16:9 (07H) 1280 x 720 P 59.94/60Hz 16:9 (08H) 1920 x 1080 I 59.94/60Hz 16:9 (09H) 720 x 576 P 50Hz 4:3 (0AH) 1280 x 720 P 50Hz 16:9 (0BH) 1920 x 1080 I 50Hz 16:9 (0CH) 720 x 480 P 59.94/60Hz 4:3...
- Page 125 Horizontal: Active Count: 37 pixels Blanking Count: 128 pixels Sync Offset: 0 pixels Sync Pulse Width: 158 pixels Border: 224 pixels Frequency: 683.64 kHz Vertical: Active Count: 0 lines Blanking Count: 0 lines Sync Offset: 40 lines Sync Pulse Width: 44 lines Border: 45 lines Frequency: 683636.36 Hz Digital Composite Composite Polarity (-)
-
Page 126: Appendix 3 - Ceiling Mount Drawing
Appendix 3 – Ceiling Mount Drawing...
Need help?
Do you have a question about the SP920 and is the answer not in the manual?
Questions and answers