LEAD-FREE SOLDER The PWB’s of this model employs lead-free solder. The “LF” marks indicated on the PWB’s and the Service Manual mean “Lead-Free” solder. The alphabet following the LF mark shows the kind of lead-free solder. <Solder composition code of lead-free solder> Solder composition Solder composition code Sn-Ag-Cu...
CHAPTER 1. SPECIFICATIONS 1. PRODUCTS OUTLINE [1] XE-A137 / XE-A147 1. BASIC SPECIFICATIONS The XE-A107, A137 and A147 are developed in accordance with following basic concepts. XE-A137-BK/WH XE-A147-BK/WH 1) The XE-A137 and XE-A147 are a mass-route popular class External dimension 335(W) x 360 (D) x 190 (H) mm ECR and low-class European Fiscal model.
2) PAPER 3. MODE SWITCH Paper type Thermal paper 1) MODE SWITCH OUTLINE 57.5 ±0.5mm Paper roll width Type Rotary switch type with Mode key φ80mm Paper roll diameter STEP Paper Thickness 72 to 78μm Paper weight 66 to 72g/m 2) LAYOUT 6.
Page 5
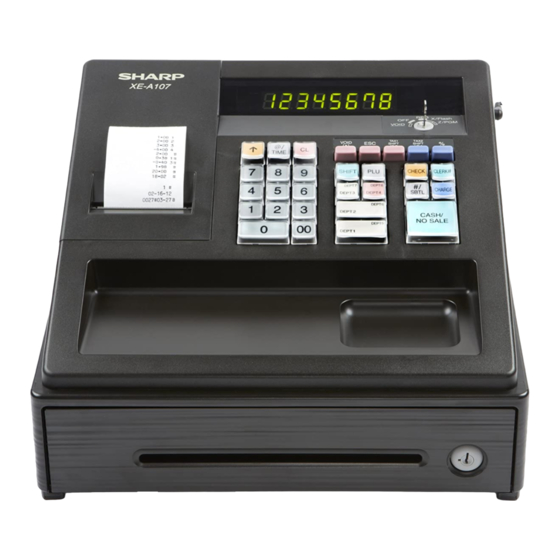
[2] XE-A107 3. MODE SWITCH 1) MODE SWUTCH OUTLINE 1. BASIC SPECIFICATIONS Type Rotary switch type with Mode key XE-A107-BK/WH STEP External dimension 335(W) x 360 (D) x 190 (H) mm (Including the drawer) Weight Approx 4.0kg 2) LAYOUT AC adapter Power source AC220 - 230V (±10%)
Page 6
2) PAPER [3] XE-A1BT Paper type Bond paper Installable model XE-A147 only 57.5 ±0.5mm Paper roll width Power consumption 7.2V / 1265mh φ80mm Paper roll diameter Type Nickel Metal Hydride (Ni-MH) battery Paper Thickness Re-chargeable 0.06 to 0.085mm Paper weight 47 to 64g/m 6.
1. OPTIONS 4. SPECIAL SERVICE TOOLS Price Product name Model Description Parts code Description rank Optional battery Optional battery XE-A1BT RS232C loop back test tool (for XE-A147) UKOG-2374RCZZ (For XE-A147) 2. SERVICE OPTIONS Price Parts code Description rank Fix angle A...
Page 8
1port (For Standard drawer only. There is no optional drawer port) RS232 None 1port ( for XE-A147) None POWER SUPPLY AC adapter for XE-A107 AC adapter for XE-A137or XE-A147 MEMORY BACK UP LR6 (AA size) BATTERY OPTIONAL None Option: XE-A1BT (XE-A147only) OPERATION BATTERY DRAWER Standard: 1 unit...
Page 10
3. Description ) Low battery: This symbol appears when the power of the installed batteries is 1) DISPLAY below a certain level or you need to replace the batteries with The display of these models is LED type. And there are 2 types new ones.
Page 11
Mode switch layout c. NO BATTERY If the user forgets to replace the battery and the battery voltage falls below a certain level, or if a power failure occurs with no batteries installed, the memory contents cannot be retained. The CPU judges it as no battery and performs the master reset.
CHAPTER 5. DIAGNOSTICS 1. XE-A137/XE-A147 3) Description 1) Diagnostic menu DIAG menu DESCRIPTION 3-1) MODE KEY SWITCH Test Procedure To check the mode key function 1 Mode switch test Keyboard check 2 Key test Change over the mode switch as follows. If the mode switch data in the proper sequence is not read with the above operation, an To check a display 3 Display test...
Page 13
3-3) DISPLAY TEST Test result print When a test results is OK, following result is printed out Test Procedure Check the continuous buzzer sound and the display state. MODE KEY SWITCH <Check points> The all segments are lighted up correctly. The brightness of all segments is same level.
Page 14
Shift display test Test result print The following pattern is displayed. When [TL] key pushed, When a test results is OK, following result is printed out the display pattern is changed to next. Finally, all segments are lighted on. < Display > DISPLAY&BUZZER When a test result is NG, following result is printed out.
Page 15
3-7) AD CONVERSION TEST Test result print When a test results is OK, following result is printed out Test Procedure With the above key operation, the AD conversion level is started. PRINTER The AD conversion reading data is displayed by real time. The displaying is done by following sequence: BBATTERY VOLTAGE Back up battery voltage...
Page 16
3-9) Destination display / ROM version check Test result print When the test completion, following result is printed out Test Procedure < XE-A147 > With the above key operation, the Destination display / ROM version check is started. 1 HEAD VOLTAGE X.XXV The CPU version and destination setting are read from CPU then 2 HEAD TEMP X.XXV displayed.
Page 17
3-10) SD card TEST 3-11) RS232C LOOP BACK TEST (XEA147 only) Test Procedure Test Procedure With the above key operation, the SD-card test is started. Before turn the power on, connect the loopback test jig: UKOG-6646RCZZ to RS232C port. And turn the power on then The status of SD card is displayed by real time.
Page 18
3-13) RAM Check Test result print Test Procedure When a test result is OK, following result is printed out With the above key operation, the RAM check is started. RAM CHECK At first, the address touch on address lines in all RAM area is checked.
Page 19
Mode switch operation 2. XE-A107 MODE: [Z/PGM] → [X/FLASH] → [REG] → [OFF] → [VOID] 1) Diagnostic menu DIAG MENU DESCRIPTION Display To check the mode key function 1 Mode switch test Keyboard check 2 Key test [Z/PGM] To check a display and buzzer 3 Display test To check a drawer opening 4 Drawer test...
Page 20
3-2) KEY TEST Test result print When pushed any key, the test mode is cancelled, and the Test Procedure completion print is performed. Perform the keyboard check with the sum check data of the key code. Enter the sum check data of each model in the four digits preceding the DIAG number 02, and compare the data with the key position code which is added until the [TL] key is pushed.
Page 21
3-9) DESTINATION DISPLAY 3-6) CPU version PRINT Test Procedure Test Procedure The following destination code in the firmware is displayed with The CPU version is printed with above key operation. above key operation. This mode is finished automatically when print completed. North America Japan Test result print...
CHAPTER 6. OTHERS 2) Journal paper removal procedure: [1] Installing the Fixing Angle Bracket Please release the platen unit before removing the journal To prevent the register from moving when the drawer opens, the paper. fixing angle bracket is provided with option. By attaching the bracket to the table where the register is installed, it is possible to 3) Paper removal procedure at the time of the paper jam hook the register on this bracket and secure the register to its...
Page 23
[2] Printer for XE-A107 series Since there are no service parts for this model printer, only the printer unit is supplied. Therefore, the printer component parts are not supplied and no service document is issued. For troubleshooting of the printer, refer to the table below: b.
CHAPTER 7. ERROR CODE When the following error codes are displayed, press the [CL] key and take a proper action according to the table below. Error Error status Action code Registration error Make a correct key entry. Miss operation error Make a correct key entry.
CHPTER 8. PARTS LIST PRICE PARTS CODE DESCRIPTION RANK MARK 0RDS1PSA19502 MODE SWITCH ASSY 107 0RDS1PSA19512 MODE SWITCH ASSY 137/147 0RDS1PSA19501 KEY UNIT ASSY 107 0RDS1PSA19529 KEY UNIT ASSY 137/147 0RDS1PSA19532 MONEY CASE UNIT (EA-BK) 0RDS1PSA19533 MONEY CASE UNIT (EA-WH) 0RDS1PSA19462 PRINTER COVER ASSY 107B 0RDS1PSA19541...
Page 26
AC-adaptor destination table XE-A107 XE-A137 XE-A147 Part Number Parts name B5 B6 B7 B8 B5 B6 B9 B5 B6 B7 B9 W5 W6 W7 W8 W9 W5 W6 W9 W5 W6 W7 W9 ○ ○ ○ 0RDDDCASST003 AC ADAPTOR 107B4 ○ 0RDDDCASST004 AC ADAPTOR 107B6 ○...
Page 27
PARTS OUTLOOK 1. Mode SW ASSY 2. KEY UNIT ASSY 3. MONEY CASE UNIT 4. PRINTER COVER ASSY 5. TOP CAB UNIT 6. ASSY DRAWER SERVICE 7. AC ADAPTER 8. MAIN PCB ASSY (137/147) 8. MAIN PCB ASSY (107) 9. PRINTER PCB ASSY (137/147) 9.
Page 28
COPYRIGHT○ 2012 BY SHARP CORPORATION All rights reserved. Printed in Japan. No part of this publication may be reproduced, stored in a retrieval system, or transmitted, in any form or by any means, electronic; mechanical; photocopying; recording or otherwise without prior written permission of the publisher.