Table of Contents
Advertisement
Advertisement
Table of Contents

Related Manuals for ero electronic MEMOCAL 2000


Summary of Contents for ero electronic MEMOCAL 2000
- Page 1 170.MAN.MEM.2D1 01/0 r USER MANUAL MEMOCAL 2000 M20-e-0.p65 7/9/01, 2:39 PM...
-
Page 2: Table Of Contents
CONTENTS SECTION 1 GENERAL INFORMATION 3.9 mA GENERATION ..............42 3.10 TX SIMULATION ..............46 1.1 INTRODUCTION ............Page 4 3.11 mV GENERATION ..............51 1.2 PRODUCT SPECIFICATIONS ..........4 3.12 OHM SIMULATION ..............56 1.3 SERIAL INTERFACE ............. 11 1.4 SEQUENTIAL FUNCTION ROUTINE ........ - Page 3 CAUTIONS: 1) The AC adapter is intended for indoor use only. 2) To avoid electric shock, do not use the AC adapter close to steam generator or water basin. 3) Before connecting the AC adapter to the power line, verify the integrity of the adapter case. If the case is dam- aged, replace it.
-
Page 4: Section 1 General Information
Programmable scaling for mA, mV and V measurement and 1.1 INTRODUCTION generation. The MEMOCAL 2000 is a versatile, portable, hand-held calibrator · Built in 24 V DC power supply for 2-wires transmitter excitation developed to solve two different and coexisting customer needs: and measurement. - Page 5 Battery life: 24 hours (average) with Ni-MH batteries. INPUTS 1.2.2 Recharging time: 12 hours A) THERMOCOUPLE MEASUREMENT AC/DC adapter: input: from 100 to 250 V AC, 47 to 73 Hz, 100 mA. Type : B, E, J, K, L, N, Ni/Ni-18%Mo, PLII, R, S,T, U, W, W3 and output: 7.5 V, 1.2 A DC.
- Page 6 TC type RANGE RESOL. Max. Error (CJ excl.) TC type RANGE RESOL. Max. Error (CJ excl.) °C °C -200 °C to 1000 °C °C 0 °C to 50 °C < 1 °C °C °C -50 °C to 0 °C < 0,3 °C 51 °C to 100 °C...
- Page 7 TC type RANGE RESOL. Max. Error (CJ excl.) TC type RANGE RESOL. Max. Error (CJ excl.) °F °F -328 °F to 1832 °F °F 32 °F to 1083 °F < 0,2 °F °F °F -58 °F to 32 °F < 0,5 °F 1084 °F to 2006 °F °F...
- Page 8 B) RTD (Resistance Temperature Detector) MEASUREMENT C) mA AND mV MEASUREMENT RTD type: - Pt 100 3 wire connection. Ranges: see table below - Ni 100 3 wire connection. Resolution: see table below Calibration: according to DIN 43760 Reference accuracy: the accuracy is shown as a percent of the Line resistance: Up to 20 W/wire with no measurable error.
- Page 9 D) TX MEASUREMENT OUTPUTS 1.2.3 The TX measurement is a mA measurement with a 24 V power supply generated by the instrument and is used to calibrate 2, 3 or A) THERMOCOUPLE SIMULATIONS 4-wire transmitters. Type : B, E, J, K, L, N, Ni/Ni-18%Mo, PLII, R, S,T, U, W, W3 and Power supply: 24 V DC (maximum current 24 mA) W5 keyboard programmable.
- Page 10 Read-out: keyboard programmable from -20000 to 20000. Decimal point: programmable in any position. The MEMOCAL 2000 is equipped with 2 logic inputs. They are mutually exclusive with serial interface. Reference accuracy: the accuracy is shown as a percent of the These 2 logic inputs have the following functions: specified span.
-
Page 11: Serial Interface
LOW BATTERY TEST 1.3 SERIAL INTERFACE (optional) A test is provided at 3 different levels: Types: 1) Level 1: the instrument is fully operative. - Built in: RS-232C. 2) Level 2: the instrument shows the message "BATTERY LOW" - External: RS-232 to RS 485 opto-isolated converter installed in on the upper display while the lower display shows the meas- the desk-top-stand. -
Page 12: Coding
It contains the following information: adapter, 4 Ni-Cd rechargeable batteries and leather bag. OPTIONAL EQUIPMENTS CODE Description 08M.024.000.000 Leather bag for MEMOCAL 2000 MEM.200.0DT.000 Desk-top-stand with RS-232/RS-485 converter (isolated) and battery fast recharge capability. MEM.200.0BA.TT1 Kit 4 Ni-Ca rechargeable batteries. -
Page 13: Section 2 Instrument Configuration
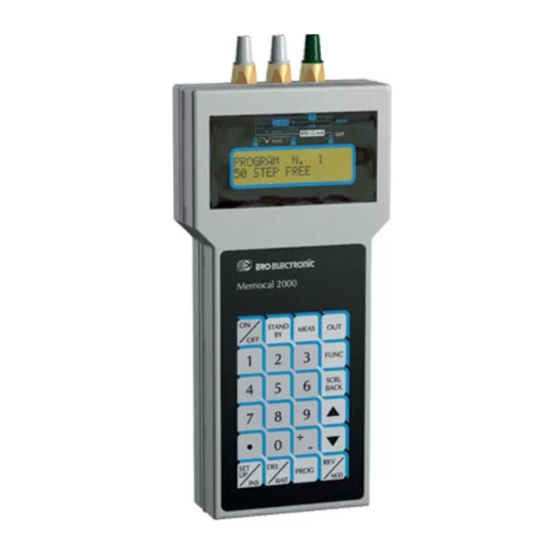
SECTION 2 INSTRUMENT CONFIGURATION FRONT PANEL DESCRIPTION M20-e-2.p65 7/9/01, 2:40 PM... -
Page 14: Keyboard Description
KEYBOARD DESCRIPTION Push-button from are used to set all the numerical values. It allows to turn ON or OFF the instrument. It sets the sign of the numerical value (for numeri- cal data entry in generation and for scalable values) It inserts the decimal point (for numerical data entry This key has 2 different functions: in generation and for scalable values). -
Page 15: Instrument Configuration
overimposes a ramp to the generated value with a Used to select the desired program for running, gradient of 1 LSD for each 1/2 second; by depress- editing or deleting ing it once, the generated output will increase of 1 LSD. - Page 16 Both options are disabled. At the first start up of the instrument or when it is desired to modify a configuration parameter proceed as follows. The instrument should be in STAND BY mode or in NORMAL 2.3.1 SERIAL LINK DISPLAY MODE. Depress the SET UP/INS push-button.
- Page 17 WARNING: to avoid damage to the instrument, pin 1, 6 and 9 must 2.3.2 DIGITAL INPUTS be ever disconnected (we suggest the use of the "connection cable for PC" supplied with the instrument) WARNING: to avoid damage to the instrument, pin 1, 6 and 9 must be ever disconnected.
- Page 18 NOTE: when the logic inputs are selected, the WAIT function can The configuration procedure is completed and the instrument will be enabled/disabled by logic input 2 only. memorize the new configuration parameters and goes automati- cally to the STAND BY mode. NOTE: It is possible to stop the configuration procedure in any 2.3.3 NONE moment by pushing SET UP/INS pushbutton.
-
Page 19: Section 3 Operating Instructions
1) During generation, when a new value is desired, it is sufficient to low power consumption) and the display will show: type directly the new value using the numerical keyboard and to MEMOCAL 2000 push the FUNC push-button. The instrument will start immedi- STAND BY ately to generate the new value. - Page 20 5) When a negative value is desired, it is possible to depress the [+/ GENERAL NOTES ON MEASUREMENTS -] push-button at any time during data entry procedure. 1) During a measurement, the maximum and minimum data hold 6) Setting a numerical value out of the selected range, the instru- functions are enabled.
-
Page 21: Tc Measurement
CONNECTION FOR TC MEASUREMENTS USING EXTERNAL 3.2 TC MEASUREMENTS NOTES: 1) to enable/disable the open input test, see the para- When a TC with external stable reference junction box is used, graph "2.3 INSTRUMENT CONFIGURATION". connect the copper cable of the stable reference junction box to the 2) The instrument will operate in accordance to the selected instrument and set the external reference junction compensation temperature standard (IPTS-68 or ITS-90) (see para-... - Page 22 HOW TO MEASURE A TEMPERATURE USING A TC SENSOR Push the FUNC push-button; the display will show the following: Depress the MEAS push-button, the display will show the following: CJ INT CJ EXT XXXXX MEAS TC RTD mA mV TX Depressing the s or t push-button, select the desired cold junction compensation type (external or internal) (e.g.
-
Page 23: Rtd Measurement
Push the FUNC push-button, the instrument will show the following: 3.3 RTD MEASUREMENTS NOTE: The instrument will operate in accordance to the selected MEAS 68J 25.0 temperature standard (IPTS-68 or ITS-90) (see paragraph XXXXXXX °C "2.3 INSTRUMENT CONFIGURATION"). CONNECTION FOR RTD MEASUREMENTS Where : MEAS shows that the instrument is performing a measurement. -
Page 24: Ma Measurement
Depressing s or t push-button, select the desired engineering unit (e.g. °C). Depress the FUNC push-button; the display will show the following: MEAS 68 Pt100 NOTE: The MEMOCAL 2000 Input impedance is equal to 10 W. XXXXXXX °C where: HOW TO MEASURE A mA SIGNAL... - Page 25 Pushing s or t push-button select the desired input type, that is Where : "mA". 20, 200 show the selectable 20mA, 200mA fix ranges. Push the FUNC push-button; the display will show the following: Note: the 200 mA is limited at 130 mA. When a fixed range is selected the instrument will use a fix NON - RANGEABLE decimal figures.
- Page 26 3.4.2 - RNG(L) linear mA measurement with read-out scaling. Push the FUNC push-button; the cursor will go automatically to the lower line. The RNG(L) selection allows to associate to an input range the By the numerical keyboard, set the desired read-out assigned to desired read-out range.
- Page 27 Push the FUNC push-button, the display will show the following: MEAS RNG(L)mA -3.000 EU L.RNG XXXXXX mA L.RNG XXXXXX EU NOTES: 1) The instrument will automatically select the input range contain- By the numerical keyboard, set the desired initial scale value (For ing the two programmed values ("L.RANGE mA"...
- Page 28 The display will show the following: NOTES: 1) The instrument will automatically select the input range contain- H.RNG XXXXXX mA ing the two programmed values ("L.RANGE mA" and "H.RANGE H.RNG XXXXXX EU mA") with the maximum resolution. 2) During mA measurement with programmable read-out scaling it is possible to enable/disable, by the REV/MOD push-button, the By the numerical keyboard, set the desired final scale value (For Example 2 it is equal to 20.000 mA).
-
Page 29: Tx Measurement
CONNECTION FOR TX MEASUREMENTS FROM 3 OR 4-WIRE 3.5 - TX MEASUREMENT TRANSMITTER WITH 24 V POWER SUPPLY. NOTE: we define as TX all the 2, 3 or 4 -wire transmitters with 20 mA output capability. The instrument generates a 24 V (max 25 mA) auxiliary power supply for the transmitters in subject. - Page 30 Pushing s or t push-button select the RNG(L) scaling type. HOW TO EXECUTE A TX MEASUREMENT. Push the MEAS push-button; the display will show: Push the FUNC push-button, the display will show the following: MEAS L.RNG XXXXXX mA TC RTD mA mV TX L.RNG XXXXXX EU Pushing s or t push-button, select the TX measurement.
- Page 31 The display will show the following: MEAS 20 mA 13.067 mA H.RNG XXXXXX mA H.RNG XXXXXX EU 2) During TX measurement, the instrument is able to measure and display up to 5 % more than the upper programmed value or 5% By the numerical keyboard, set the desired final scale value (From Example 1, this value is equal to 20.000 mA).
- Page 32 By the numerical keyboard, set the desired initial scale value (from By the numerical keyboard, set the desired final scale value (For Example 2, this value is equal to 4.000 mA). Example 2, this value is equal to 20.000 mA). NOTES: Push the FUNC push-button;...
-
Page 33: Mv Measurement
NOTE: The input impedance of the MEMOCAL 2000 is: - up to 2 V, the input imped. is > 10 MW - from 2 V to 20 V, the input imped. is = 500 kW. - Page 34 3.6.1 - NON RANGEABLE - mV measurement without scaling Where: Pushing s or t push-button, select the NON RANGEABLE input MEAS indicates that the instrument is performing a measurement. type. AUTO shows that the autoranging function is selected. The display will show: is the engineering unit.
- Page 35 When conditions 1 or 2 are not satisfied, the instrument will reject The instrument will start to measure and, for Example 1, if a 3 V the new value showing the "0" and it will maintain the cursor on the signal is applied to the input terminal the display will show: rejected parameter.
- Page 36 Pushing s or t push-button, select the RNG( ) function. The display will show the following: Push the FUNC push-button, the display will show the following: H.RNG XXXXXX mV L.RNG XXXXXX mV H.RNG XXXXXX EU L.RNG XXXXXX EU By the numerical keyboard, set the desired final scale value (For Example 2 it is equal to 5000 mV).
-
Page 37: Ohm Measurement
scaling function and to display the measured value in mV. 3.7 - OHM MEASUREMENTS 3) During mV measurement, the instrument is able to measure and display up to 5 % more than the upper programmed value or 5% CONNECTION FOR OHM MEASUREMENTS less than the lower programmed value. -
Page 38: Tc Simulation
HOW TO MEASURE A RESISTANCE 3.8 TC SIMULATION Push MEAS push-button; the display will show the following: NOTE: The instrument will operate in accordance to the selected temperature standard (IPTS-68 or ITS-90) (see paragraph MEAS "2.3 INSTRUMENT CONFIGURATION"). TC RTD mA mV TX CONNECTION FOR TC SIMULATION USING INTERNAL RJ By pushing s or t push-button, select the RTD input type. - Page 39 CONNECTION FOR TC SIMULATION USING EXTERNAL RJ HOW TO SIMULATE A TC SENSOR When it is desired to simulate a TC and an external stable refer- Depress the OUT push-button, the display will show the following: ence junction box is used, connect the copper cable of the stable reference junction box to the instrument and set the external reference junction compensation value as show below.
- Page 40 Push the FUNC push-button; the display will show the following: Push the FUNC push-button, the instrument will show the following: 25.0 CJ INT X °C CJ EXT XXXXX Depressing the s or t push-button, select the desired cold where: junction compensation type (external or internal) (e.g. INT). shows that the instrument is performing a generation shows that the selected standard is the IPTS-68 NOTE...
-
Page 41: Rtd Simulation
HOW TO SIMULATE AN RTD SENSOR 3.9 RTD SIMULATION Push OUT push-button; the display will show the following: NOTE: The instrument will operate in accordance to the selected temperature standard (IPTS-68 or ITS-90) (see paragraph "2.3 INSTRUMENT CONFIGURATION"). CONNECTION FOR RTD SIMULATION By pushing s or t push-button, select the "RTD"... -
Page 42: Ma Generation
Depress the FUNC push-button; the display will show the following: 3.9 - mA GENERATION. CONNECTION FOR mA GENERATION Ni100 XXXXX °C where: Maximum load 500 OHM shows that the instrument is performing a simulation shows that the selected standard is the IPTS-68 MEASURING Ni100 shows that the simulated sensor is an RTD Ni 100. - Page 43 HOW TO GENERATE A mA SIGNAL Where: Push the OUT push-button; the display will show: NON - RANGEABLE allows to select a mA generation without scaling (with a read-out in mA). RNG(L) allows to select a mA output with read-out scaling (the selection of Pushing s or t push-button select the "mA"...
- Page 44 is the engineering unit. When conditions 1 or 2 are not satisfied, the instrument will reject XXXXX shows the generated value. the new value showing the "0" and it will maintain the cursor on the NOTE: the OUT 20 mA NON RANGEABLE selection allows to rejected parameter.
- Page 45 Pushing s or t push-button, select the RNG(QUAD) function. NOTES: 1) For the read-out in eng. units, the number of decimal figures will Push the FUNC push-button, the display will show the following: be equal to the decimal figure programmed in "L.RANGE EU". L.RNG XXXXXX mA 2) During a mA generation with programmable read-out scaling, it is L.RNG XXXXXX EU...
-
Page 46: Tx Simulation
H.RNG XXXXXX mA 3.10 - TX SIMULATION H.RNG XXXXXX EU NOTE: we define as TX all the 2, 3 or 4 -wire transmitters with 20 mA output capability. By the numerical keyboard, set the desired final scale value (For CONNECTION FOR 2-WIRE TX SIMULATION. Example 2 it is equal to 20.000 mA). - Page 47 NOTE FOR 3 OR 4-WIRE TX SIMULATION RNG( ) When a 3 or 4 wire TX simulation is required, it is sufficient to allows to select a mA input with square root extraction on the ignore the power supply of the instrument under test and to connect measured value and programmable read-out scale in engineering and program the calibrator as for standard mA generation (see units.
- Page 48 "L.RANGE EU". under test in order to make the measuring current equal to the desired value while the MEMOCAL 2000 is used to measure, with When conditions 1 or 2 are not satisfied, the instrument will reject high accuracy, the current in subject.
- Page 49 H.RNG XXXXXX EU The two potentiometers allow to change the load of the instrument under test in order to make the measure of the MEMOCAL 2000 By the numerical keyboard, set the desired final scale value (For equal to the desired value and to verify the indication of the Example 2, this value is equal to 20.000 mA).
- Page 50 L.RNG XXXXXX mA H.RNG XXXXXX mA L.RNG XXXXXX EU H.RNG XXXXXX EU By the numerical keyboard, set the desired initial scale value (For Example 3 it is equal to 4.000 mA). By the numerical keyboard, set the desired final scale value (For Example 3 it is equal to 20.000 mA).
-
Page 51: Mv Generation
2) During mA measurement with programmable read-out scaling it is 3.11 - mV GENERATION. possible to enable/disable, by the REV/MOD push-button, the scaling function and to display the measured value in mA. CONNECTION FOR mV GENERATION 3) During mA measurement, the instrument is able to measure and display up to 5 % more than the upper programmed value or 5% less than the lower programmed value. - Page 52 HOW TO GENERATE A mV SIGNAL 3.11.1 - NON RANGEABLE - mV generation without scaling Pushing s or t push-button, select the NON RANGEABLE output Push the OUT push-button; the display will show: type. The display will show: 2000 20000 AUTO Pushing s or t push-button select the "mV"...
- Page 53 Where: NOTES: indicates that the instrument is performing a generation. 1) The value assigned to "H.RANGE mV" must be higher than the AUTO indicates the autoranging function. value assigned to "L.RANGE mV" parameter. 2) The value assigned to "H.RANGE EU" parameter must be XXXXX it shows the programmed value.
- Page 54 Push the FUNC push-button. 3.11.3 - RNG (QUAD) - mV generation with quadratic output and NOTE For the read-out in eng. units, the number of decimal figures will linear read-out scaling. be equal to the decimal figure programmed in "L.RNG EU". Selecting the RNG (QUAD) option, the value to be generated will be The instrument will show: set in engineering unit and it will be linear while the resulting output...
- Page 55 3) By keeping depressed the s and/or t push-button it Push the FUNC push-button; the cursor will go automatically on the lower line. overimposes a ramp up or down to the generated value with a By the numerical keyboard, set the desired read-out assigned to gradient of 2 LSD/second.
-
Page 56: Ohm Simulation
3-WIRE CONNECTION FOR OHM SIMULATION 3.12 - OHM SIMULATION 2-WIRE CONNECTION FOR OHM SIMULATION MEASURING MEASURING DEVICE DEVICE From 15 to 500 OHM From 15 to 500 OHM NOTE: for all ohm simulation, the measuring current must be higher than 100 mA, lower than 2 mA and having the polarity shown in the figure;... - Page 57 4-WIRE CONNECTION FOR OHM SIMULATION HOW TO SIMULATE A RESISTANCE Push OUT push-button; the display will show the following: By pushing s or t push-button, select the RTD input type. MEASURING DEVICE Push the FUNC push-button; the display will show: Pt 100 Ni 100 From 15 to 500 OHM...
-
Page 58: Section 4 Sequential Function Routine
SECTION 4 SEQUENTIAL FUNCTION ROUTINES a) If the selected routine does not exist, the instrument will switch Up to 50 program steps can be further divided in one or more routines automatically to the EDIT mode. of different length. b) If the selected routine exists, the display will show: PROGRAM N 15 4.1 - HOW TO CONSTRUCT AND STORE A NEW SEQUENTIAL EDIT... - Page 59 In any of the above listed possibilities, at the end of the program- programmed "TIME" frame. ming step, the display will show the programmed parameter set 1) When TIME = 00:00 the END VAL. cannot be modified therefore followed by the step number. the program step should be necessarily a soak segment.
-
Page 60: How To Modify A Routine
4.2 - HOW TO MODIFY A ROUTINE. Where: Depress the PROG push-button; the display will show the following: RUN enables the sequential function routine execution; EDIT enables the EDIT mode of the selected routine; PROGRAM N XX DEL delete the selected routine. YY FREE STEP(S) When it is desired to delete the selected routine, select the DEL option and push the FUNC push-button. -
Page 61: How To Run A Routine
Push the FUNC push-button; the display will show the following: 2) To end the EDIT mode of the sequential function routine, depress the PROG push-button. The instrument will memorize TIME XX:XX only the steps which have been properly completed and will END VAL. - Page 62 ously the selected routine (it is possible to stop the routine When the instrument is running a program it is possible: repetition pushing the ON/OFF push-button or the STAND 1) To go to the next step by pushing the FUNC push-button. BY push-button for more than 1.5 sec).
-
Page 63: Section 5 Error Messages
SECTION 5 ERROR MESSAGES During OHM simulation, a measuring current lower than 100 mA or higher than 2 mA can produce the following indication 5.1 LOAD ERRORS During OHM simulation, a reverse measuring current causes the ------ W "MISCON" indication on the display. MISCON W OHM meter OHM meter... -
Page 64: Error Messages
During TC and RTD measurement, if, during configuration indication by pushing the DEL pushbutton but the accuracy of the procedure the open input test has been selected and the instrument instrument is not assured. detects an open circuit condition, it will show the following indica- Fatal errors (code 6, 7 and 8) tion: When a fatal error is detected the instrument shows, on the lower... -
Page 65: Power Supply
SECTION 6 MAINTENANCE 6.1 POWER SUPPLY For instrument power supply it is possible to use 4 battery AA size and/or the standard AC adapter. Batteries can be rechargeable or non rechargeable types. The rechargeable type can be: - Ni/Cd (standard) 1,2 V cell with a capacity of 850 mA/h - Ni/MH 1,2 V cell with a capacity of 1200 mA/h. -
Page 66: Battery Recharge
The optional Desk-top-stand 6.2 BATTERY RECHARGE (see fig. 4) can provide a quick This instrument is equipped with an AC recharge mode. adapter (see fig. 3) usable to recharge The quick recharge current is the batteries. equal to 250 mA. When the AC adapter is connected In quick charge mode, a directly to the instrument (see fig. -
Page 67: Battery Maintenance
2) remove the battery cover FIED PERSONNEL. IF ANY PROBLEM IS DETECTED, SEND 3) pull out the old batteries THE INSTRUMENT TO LOCAL ERO ELECTRONIC BRANCH 4) insert the new batteries paying attention to the polarity. OFFICE OR REPRESENTATIVE. 5) set the battery type selector in accordance with the type of batteries inserted in the instrument. - Page 68 Ero Electronic s.r.l. Via E. Mattei, 21 28100 Novara Italy Tel. (+39) 0321-481111 Fax. (+39) 0321-481112 An Invensys Company M20-e-6.p65 7/9/01, 2:43 PM...
Need help?
Do you have a question about the MEMOCAL 2000 and is the answer not in the manual?
Questions and answers
Please give me your price with include shipping to thailand at zip code 10520