Table of Contents
Advertisement
Advertisement
Table of Contents

Related Manuals for Veon SRO3219LED


Summary of Contents for Veon SRO3219LED
- Page 1 32” HD LED/LCD TELEVISION SRO3219LED MODEL:...
-
Page 2: Important Information
Customer Service Line For assistance during normal working hours(9am-5pm,Mon-Fri,New Zealand local time) NZ call: 0800 883 301 IMPORTANT INFORMATION If a television is not positioned in a sufficiently stable location, it can be potentially hazardous due to falling. Many injuries, particularly to children, can be avoided by taking simple precautions such as: Using cabinets or stands recommended by the manufacturer of the televion. -
Page 3: Regulatory Information
REGULATORY INFORMATION This equipment generates and user can radiate radio frequency energy and, if not installed and used in accordance with the instructions, may cause harmful interference to radio communication. However, there is no guarantee that interference will not occur in a particular installation. If this equipment does cause harmful interference to radio or television reception,which can be determined by turning the equipment off and on,the user is encouraged to try to correct the interference by one or more of the following measures:... - Page 4 The device may malfunction when under electrostatic discharge. It can be manually resumed by power off and power on again. CAUTION Connecting the Power Cord. Most appliances recommend they be placed upon a dedicated circuit; that is, a single outlet circuit which powers only that appliance and has no additional outlets or branch circuits.
-
Page 5: Important Safety Instructions
IMPORTANT SAFETY INSTRUCTIONS 1.Read these instructions. 7.Do not block any of the ventilation 2.Keep these instructions. openings. Install in accordance 3.Heed all warnings. with the manufacturer’s instructions. 4.Follow all instructions. 5.Do not use this apparatus near water. 8.Do not install near any heat source such as radiators, heat registers, stoves, or other apparatus(including amplifiers)that produce heat. - Page 6 10. Protect the power cord from being 13. Unplug power cord and antenna walked on or prinched particularly during lightning storms or when at plugs, convenience receptacles, unused for long periods of time. and the point where they exit from the apparatus.
-
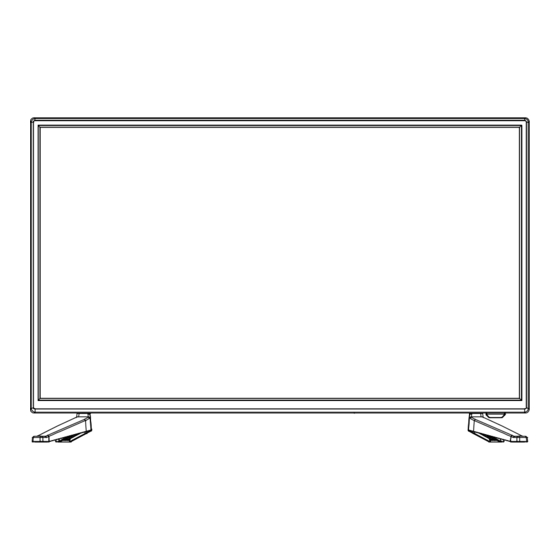
Page 7: Attaching The Stand
Your TV is packaged with the stand and the cabinet separated. Before using the TV, install the stand as described below, or if you want to mount it to wall, see page 6 for mounting advice; the wall mount itself is not supplied. IMPORTANT! Make sure the TV set is unplugged from the power supply before installing or removing the stand. - Page 8 Using the remote control When using the remote control, aim it at remote sensor on the television. If there is an object between the remote control and the remote sensor on the unit, the unit may not operate. Point the remote control at the REMOTE SENSOR located on the television. When using this television in a very brightly lit area, the infrared REMOTE CONTROL SENSOR may not work properly.
- Page 9 Cable Installation Please read the relevant content in “Notice for Maintenance and Safety” carefully before the installation and use. 1. Take out the TV frome the package and put it in a drafty and flat place. NOTE When you plug or unplug the TV, computer or other equipments, you must make sure that the AC power has been already shut down;...
- Page 10 The buttons of the original remote control are as following: Function STANDBY Enter or quit the standby mode STANDBY Mute or restore sound MUTE NUMBER Use to choose channels KEYS TEXT HOLD SUBTITLE - / -- Selecting channels above single digits INDEX REVEAL SUBPAGE...
- Page 11 Function SUBTITLE Enter subtitle mode STANDBY Go to index page INDEX Enter the Recorded list.(In PVR mode) SIZE No Function TEXT HOLD SUBTITLE REVEAL No Function INDEX REVEAL SUBPAGE No Function SUBPAGE SIZE Play/Pause Fast reverse Fast forward AUDIO IN MEDIA MODE Stop Previous Next...
- Page 12 Turning on and off TV Turn on the TV Connect the Power cable. At this time the TV will enter stand by mode. press the button on remote control to turn on TV from standby mode. Turn off the TV press the button on remote control to enter standby mode.
- Page 13 How to Navigate Menus Before using the TV follow the steps below to learn how to navigate the menu in order to select and adjust different functions. The access step may differ depending on the selected menu. 1. Press the MENU button to display the main menu. 2.
- Page 14 Program Edit Press the button select items. Press the red button to deleted the channel. Press the green button to rename the channel.(In ATV mode) Press the yellow button to move the channel.(Except DTV channels with LCN) Press the blue button to skip the channel. Press the FAV button to set the favorite channel.
- Page 15 Signal Information(In DTV mode) Display the current Signal Information. Configuring the Picture Menu Picture Mode You can select the type of picture which best corresponds to your viewing requirements. You can change the value of Contrast, Brightness, Colour, Tint and sharpness when the picture is in Personal mode.
- Page 16 Auto Volume Press button to select Auto Volume, then press OK button to select On or Off. This item used for reducing the difference between channel and program’s volume automatically. It made the overall level to be even. This function will also reduce the fluctuation of the sound. SPDIF Mode Press button to select SPDIF Mode, then press OK button to select Auto.
- Page 17 Configuring the Lock Menu Lock System The feature can prevent unauthorized operating the TV set, unless entering 4-digit, password. When Lock System is on and the system is locked, we must input the system password at Auto Tuning. Manual Tuning. Program Edit, or Reset. Press the right number buttons for the password.
- Page 18 1. Press button to select the option that you want to adjust in the SETUP menu. 2. Press button to adjust. 3. After finishing your adjustment, press MENU button to save and return back to the previous menu. OSD Language Press the button to select OSD Language, then press the OK button to enter sub-menu.Press button to select OSD language, default setting is English.
- Page 19 Recording Operation PVR settings 1. PVR File System Press the MENU button, select SETUP menu, and select “PVR File System” , then press OK button to enter the setting menu. Please check whether your USB device works or not before recording. Select Disc: Select the device for the Record files.
- Page 20 Recording Operation PVR settings Record and Time shift function buttons REC: Press to start recording. PAUSE: Press to OK the time shift mode, press play to play the recording. Stop: Press to stop recording or time shift. REC LIST: To display the recorder menu. 1)Record menu When you press REC button in DTV mode, the screen will display the recording menu as below:...
- Page 21 Timer Recording Operation 1. Press MENU button, select channel menu, and then select schedule list option, please see below picture for reference. 2. Then we enter the schedule setup list, here you can choose the program which you prefer to record. From the list you can know record start time and end time.
- Page 22 Timer Recording Operation 3. Once you selected the program you want to record, press OK button twice to confirm, then you will be noticed timer record successfully saved and will be working as scheduled. 4. You can have several programs in the timer record list, just press INDEX button and you can enter the recorded list.
- Page 23 Multimedia Operation Basic Operation 1) Press the SOURCE button on the remote control to display the input source menu, select Media source, and press OK button to enter the Multimedia menu seen below. Hints and information of USB device MAINS MENU: PHOTO MUSIC MOVIE TEXT 2) Select the file type (mains menu) you want to view, and insert USB device, you will find the name of the device display on the screen.
- Page 24 Multimedia Operation 1.Photo Photo viewing Press button to select the option on the menu, and press OK button to change. Play/Pause: Play/pause the photo view. Prev/Next: View the previous/next photo. Stop: Stop the photo view. Repeat ALL: Select the repeat mode from Repeat All, Repeat 1, Repeat None. Music: Play/Pause the music.
- Page 25 Multimedia Operation 3.Movie Play the movie Press button to select the option on the menu, and press OK button to change. Play/Pause: Play/pause the movie. FB/FF: Fast backward/fast forward. Prev/Next: View the previous/next file. Stop: Stop the movie. Repeat ALL: Select the repeat mode from Repeat All, Repeat 1, Repeat None. Set A-B: Select and play the preferable part of the file by setting A and B at the beginning and end.
- Page 26 EPG(Electronic Program Guide) EPG stands for Digital Electronic Program Guide. It is supplied by the program provides and offers information about the programs to be broadcast. You can access it in digital mode by pressing the EPG button on the remote control, the menu will appear on the screen, after loading, as show below: NOTE: Press the function button based on the information of EPG.
- Page 27 Troubleshooting Before contacting the service technician, perform the following simple checks. If any problem persists ,unplug the TV and call for service: PROBLEM POSSIBLE SOLUTION - Check whether the main plug has been connected to a wall outlet. No sound and picture - Check whether you have pressed the POWER button on the TV set.
- Page 28 PROBLEM POSSIBLE SOLUTION - Adjust resolution, horizontal frequency, or vertical frequence. The signal is out of range - Check whether the signal cable is connected or loose. - Check the input source. - Work the auto configure or adjust clock, phase, or H/V Vertical bar or stripe on back position.
Need help?
Do you have a question about the SRO3219LED and is the answer not in the manual?
Questions and answers
How do I can't play a usb
To play a USB on the Veon SRO3219LED:
1. Insert the USB device into the TV.
2. The device name will appear on the screen.
3. Use the / button to select the USB device and press the OK button to enter.
4. Use the / / / buttons to select a file or folder and press OK to open it.
5. Press OK again to play the file in full screen mode.
6. While playing, press OK to show the option menu or press STOP to return to the file list.
This answer is automatically generated
Where are the power buttons and channel buttons on the Veon model sro3219led tv