
Related Manuals for Axor Citterio 39133XX1


Summary of Contents for Axor Citterio 39133XX1
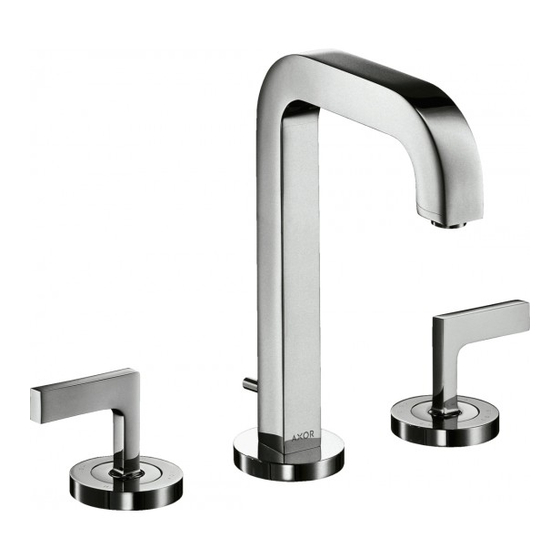
- Page 1 Installation Instructions / Warranty Axor Citterio 39133XX1 Axor Citterio 39233XX1 Axor Citterio 39135XX1 Axor Citterio 39235XX1...
-
Page 2: Technical Data
Axor Citterio Widespread Lavatory Faucet Axor Citterio Widespread Bidet Faucet 39133XX1 / 39135XX1 Technical data Hole size in mounting surface Spout Valve Max. thickness of mounting surface 1 3/16“ Max. flow rate Operating pressure: Recommended operating press.: Test pressure: Hot water temperature: Recommended hot water temp.:... -
Page 3: Installation
Installation Flush the supplies thoroughly before installation. Install the metal washer and friction washer on the valve. Push the valve up through the hole in the mounting surface. Install the mounting plate. Rest the valve assembly on the mounting sur- face. - Page 4 Sit the spout on the countertop. Install the mounting piece mounting collar. Attach the compression Y to the bottom of the spout fitting with the enclosed 10 mm compres- sion fitting. The metal side of the ferrule should point upwards. Tighten wrench tight. Screw the connection hoses to the Y.
-
Page 5: Install The Pop-Up Drain
Install the pop-up drain Remove the plunger assembly. Unscrew the drain outlet flange from the tee. plunger Unscrew the tailpiece from the tee. Wrap height adjuster the threads with two layers of Teflon tape and replace. flange Install the white, flexible sealing gasket to the flange. -
Page 6: Replacement Parts
Replacement parts 1 cold handle, cross 2 hot handle, cross 3 lever handle, cold 4 lever handle, hot 5 cold cartridge 6 hot cartridge 7 aerator 8 aerator 9 spout 10 spout 11 lift rod 12 fixation set 13 connection hose 14 10 mm compression ftg 15 3/8“... -
Page 7: Limited Lifetime Consumer Warranty
Cleaning Recommendation for Hansgrohe Products Modern lavatory faucets, kitchen faucets, and showers consist of very different materials to comply with the needs of the market with regard to design and functionality. To avoid damage and returns, it is necessary to consider certain criteria when cleaning. - Page 8 (i) for 1 year, with respect to Hansgrohe and Commercial products, and (ii) for 5 years, with respect to AXOR products. THIS WARRANTY DOES NOT COVER, AND HANSGROHE WILL NOT PAY FOR: Conditions, malfunctions or damage not resulting from defects in material or workmanship.