Table of Contents
Advertisement
Quick Links
Advertisement
Table of Contents

Related Manuals for Datalogic Rhino II


Summary of Contents for Datalogic Rhino II
- Page 1 Rhino™ II Rugged Vehicle Mount Computer User’s Manual...
- Page 2 Datalogic publications, please let us know via the "Contact Datalogic" page Disclaimer Datalogic has taken reasonable measures to provide information in this manual that is complete and accurate, however, Datalogic reserves the right to change any specification at any time without prior notice. Datalogic and the Datalogic logo are registered trademarks of Datalogic S.p.A.
-
Page 3: Table Of Contents
Using a Barcode Scanner ..........13 Resetting the Terminal ............. 15 Warm Boot ................. 15 Clean Boot (WEC7 Only) ............ 15 LED Indicators (WES7/Win10IoT) ..........16 LED Indicators (WEC7) .............. 16 Rhino II Configuration............ 17 Startup/Shutdown Modes ............17 User’s Manual... - Page 4 Password Keyboard ............38 SysAdmin-Menu Keyboard ..........41 Virtual Keycodes ................44 Special Function Codes .............44 General Keyboard Codes ...........46 Upgrading the Rhino II WEC7 Firmware ........49 Datalogic Applications............ 51 Desktop Configuration Utility (DXU) .........51 How DXU Works ..............52 Installation ................53 Controls ................55 Simplified Deploy ...............61...
- Page 5 Wireless and Radio Frequencies Warnings ......131 Technical Features ............135 Technical Data ................. 135 Troubleshooting the Rhino II ........139 Problems While Operating the Rhino II ........ 139 Problems with Wireless Connectivity ........140 Maintenance ..............143 Cleaning the Device ..............143 Ergonomic Recommendations ..........
- Page 6 Support Through the Website ..........155 Technical Support through email or phone......155 Warranty Terms and Conditions ........... 155 Glossary................. 157 Rhino™ II...
-
Page 7: Introduction
Conventions This manual uses the following conventions: "Mobile computer", "Vehicle Mount Computer", "VMC" and "Rhino II" refer to Rhino II vehicle mount computer. WEC7 refers to the Windows Embedded Compact 7 operating system. WES7 refers to the Windows Embedded Standard 7 Pro operatingy system. -
Page 8: Product Presentation
Introduction Product Presentation The Rhino II vehicle mount computers, available in both 10" and 12" display sizes, set the standard for ruggedness in the warehouse. A sealed design tested to IP65/IP67 ensures operation in the toughest environments. A dedicated freezer-rated model with integrated display heater allows use in and out of cold storage. -
Page 9: Available Models
Operating Systems: Windows Embedded Compact 7, Windows Embedded 7 Pro, Windows 10 IoT and Android 6 • Freezer Model (WEC7 10" only) For further details about the Rhino II models refer to the web site: http://www.datalogic.com. The currently available models are: •... -
Page 10: Out Of The Box
Introduction Out of the Box The Rhino II package contains: • Rhino II vehicle mount computer • Installation guide • Power cable length = 2.9m (9.5') • Bag - 4 mounting screws and washers for use with RAM mounts •... -
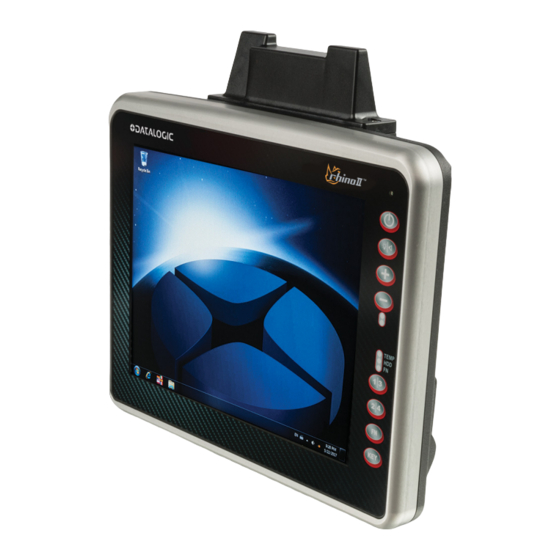
Page 11: General View
Introduction General View Front View User’s Manual... -
Page 12: Back View
Introduction Back View Rhino™ II... -
Page 13: Bottom View
Introduction Bottom View User’s Manual... -
Page 14: Accessories
94ACC0165 DC Power Cable, 2.9M 94ACC0041 External 72-80 VDC Voltage Converter Use only a Datalogic approved power supply and cables. Use of an alternative power supply will invalidate any approval given to this device and may be dangerous. CAUTION Rhino™ II... -
Page 15: Getting Started
Getting Started Power On The Rhino II turns on based on its current startup mode settings (see Startup/Shutdown Modes on page 17). As soon as the VMC is on, the desktop will appear on the screen. Wait a few seconds before starting any activity so that the mobile computer completes its startup procedure. -
Page 16: Desktop Window
Getting Started Desktop Window As soon as the mobile computer is on, the WEC7, Win10 IoT or WES7 desktop appears on the screen. Wait a few seconds before starting any activity so that the mobile computer completes its startup procedure. WEC7 Desktop WES7 Desktop Rhino™... - Page 17 Getting Started Win10 IoT Desktop User’s Manual...
-
Page 18: Adjusting The Screen Brightness
Getting Started Adjusting the Screen Brightness To adjust the screen brightness: • Press the + button to increase the brightness. • Press the - button to decrease the brightness. Adjusting the Volume To adjust the volume, press the FN button first •... -
Page 19: Using The Accessories
For information on installing the rugged keyboard and its mount, see the Rhino II Installation manual. Using a Barcode Scanner Your can use either a USB or serial scanner with the Rhino II computer. Be sure to order your scanner with the ap-propriate cable. - Page 20 Getting Started 5. The scanner should now be ready for use. To test, run any program that accepts keyboard input and perform a scan. If the data does not display in the application, consult the user manual for the scanner. Connecting a Serial Scanner COM1 provides 5VDC on pin 9, COM2 provides 12 VDC.
-
Page 21: Resetting The Terminal
RAM, but preserves the file system. The Registry is restored from persistent memory if available or returned to factory default. A clean boot restores the Rhino II to a clean configuration: both the Registry and the file system returns to a clean status that conforms to factory default (WEC7 only). -
Page 22: Led Indicators (Wes7/Win10Iot)
Getting Started LED Indicators (WES7/Win10IoT) The LEDs illuminate to indicate various functions or errors on the reader. The following tables list these indications. Status Description Top Blue (Top) Solid Wi-Fi connected Blue (Center) Not used Blue (Bottom) Solid FN toggled on Solid High Temperature Warning Yellow... -
Page 23: Rhino Ii Configuration
Rhino II Configuration Startup/Shutdown Modes The Rhino II has 3 modes of controlling Startup and Shutdown. The mode is set by commands in the "\Utilities\UtilConfig.cfg" file. Each mode controls how the Ignition Sense power connector wire (IGN) and the Rhino II’s front panel Power button (PWR) work together. In... - Page 24 Rhino II Configuration When the VMC is being powered down by IGN, it will typically display a countdown screen advising the user the remaining time before the terminal shuts down. The shutdown time as well as whether the countdown is displayed are both controlled by the configuration file.
-
Page 25: Front Panel Keys
Rhino II Configuration Front Panel Keys There are four programmable buttons on the right side of the terminal. The programming is set by command lines in the "\Utilities\UtilConfig.cfg" file. The buttons are PWR, 1/3, 2/4 and KEY. The 1/3 and 2/4 buttons are actually programmable as two keys each, giving a total of six available keys. - Page 26 Frontkey_S1=\Windows\pword.exe will launch the WordPad program when the 1 key is pressed. The Rhino II also provides the ability to lock the individual front panel keys. There are two keywords to control the state of the keys when the function mode is off (HWKeyLockFNOff) and when the function mode is on (HWKeyLockFNOn).
- Page 27 Be aware that if you are attempting to control the PWR button, you can lock the Rhino II. Disabling the PWR button at the same time you have the startup mode set to IGN and PWR will block the Rhino II from being able to be powered NOTE User’s Manual...
-
Page 28: Screen Blanking
Rhino II Configuration Screen Blanking The Rhino II has the ability to blank the screen when positive voltage is applied to a designated COM port pin. This is typically used to blank the screen when a vehicle is in motion, a requirement is some countries. -
Page 29: Keyboard Configuration File
Rhino II Configuration Keyboard Configuration File The Configuration file is a text file built in sections to provide the definitions for the keyboard layouts. Comments can be marked at beginning of a line with a semicolon (;). Section [Common] In this section general settings will be defined. - Page 30 Rhino II Configuration Keyname Parameter – Info With this you can specify the angle of rotation which is set by the key function VKX_KB_SCRROTATE. A maximum four values possible (0=Default-Systemstartup, 1=90°, 2=180°, 3=270°). For RotateScreen rotation minimum 2 values must be defined. For example RotateScreen=0,1 is defined, it will be toggled between these two angles.
- Page 31 Rhino II Configuration Keyname Parameter – Info 0 (=Default – no Transparency) AlphaValue Here values of 10 (almost completely transparent / invisible) to 250 (almost opaque) are accepted. 0 (=Default – not transparent respectively invisible color) Here, a color can be set that is completely invisible in the output, i.e.
-
Page 32: Section [Volumetouchctrl]
Rhino II Configuration Keyname Parameter – Info 0=Off, 1=On (Default), the Snap function – means the snapping on the screen corners and if there is enough space also centred on the edges – only works in conjunction with the option AutoMove=1. To trigger the automatic snapping,... - Page 33 Rhino II Configuration The various fields can be assigned as follows: For this keyname any name can be given, according to the Fontname use of fonts. If the font definition will be used later for the keys, the font must be specified in this section.
-
Page 34: Section [Keys]
Rhino II Configuration Section [Keys] In this section the general and for all keyboards valid definition for the layouts of the single keys will be specified. Max. 40 individual Key-Layouts can be created. Keyname Parameter FontName, BMPNormal, BMPActive, TxtMode, IconMode,... - Page 35 Rhino II Configuration Position frame for the text output in normal keys. With values L=Left,T=Top,R=Right,B=Bottom substituting the distances of the text output to the side FrmTxtNormL,T,R,B edge. This is necessary so that the text will not be written over the 3D-Frame of a key by left-aligned output.
-
Page 36: Section [Keyboard_Xx]
Rhino II Configuration Section [Keyboard_XX] This section provides the actual definition of the keyboards. Max. 20 Keyboards (XX = 01-20) are possible for each Cfg-File. A Keyboard Definition is only recognized as valid if at least the line "L01_Norm" is defined in the section (see description below). - Page 37 Rhino II Configuration Keyname Parameter – Info 0=Off (Default), 1=On, an open keyboard with this mode, CloseToggle by a repeated call (e.g. carry out by a key or a HW-Key) can be closed again. 0=Off, Value >= 1000 specifies a timeout value in milliseconds for this keyboard.
- Page 38 Rhino II Configuration Syntax of a Key Definition syntax constructed "#Command;VK_CODE;Text¦" Single Fields and Commands will be separated through a Semicolon (;). Each Key must be finished with the vertical bar character ("¦" Ascii-Code=124). Special Commands will be introduced with the Character "#".
- Page 39 Rhino II Configuration Set Bitmap-Icon for this Key. This icon can also be used for different color designed keyboards, it should be #ICON=<file> drawn on transparent background. If <file> has no file ending automatically ".bmp" is appended. Enables a new Key-layout <key> (from Section [Key]) for this and all subsequent keys of that row.
- Page 40 Rhino II Configuration Executing of Windows-Shell-Commands. In <exedef> defined Name must indicate a definition from the #EXEC=<exedef> Section [Execute]. In the Execute section all commands must be defined and grouped together to perform. #KUSE2 for Creative Inscriptions With #KUSE2 a complete 2nd Layout for a key from the section [Keys] can be set.
- Page 41 Rhino II Configuration To assign a keyboard key with Ctrl-Alt-Delete, the following definition must be specified: DefName=#CTRL_ALT_DEL Before releasing a Key sequence, all other Keys will be "released" to prevent problems with mixing of keystates like Shift, Control and Alt.
-
Page 42: Section [Execute]
Rhino II Configuration Section [Execute] In this Section programs for availability with Soft Keys can be defined. Using a key definition with EXEC# = <ExecDefineName>, the key can launch the defined program. Execute Assignments are only allowed for normal user keyboards. In... -
Page 43: System-Admin And Password-Keyboard
Rhino II Configuration System-Admin and Password-Keyboard The system admin menu or keyboard is always linked with the upstream password entry. The behaviour is defined as follows: • If the SysAdmin-Menu is not active at pressing the KEY-Button, always the entry password dialog appear. -
Page 44: Password Keyboard
Rhino II Configuration Password Keyboard The Password-Keyboard can be configured like any other Keyboard. A complete Keyboard (incl. Letters) can be configured below the entry field. Password-Keyboard appears after pressing onto KEY-Button, if the SysAdmin-Menu is not open. Another push on the KEY-Button deletes the password keyboard from the screen. - Page 45 Rhino II Configuration Special Settings Password Keyboard Special Keys for configuration of password keyboards in the [Keyboard_XX] Section: Default Info To enable the Password entry, this key KeyDialog=DlgInputLine is mandatory with the assigned registry. For X any password can be defined. It...
- Page 46 Rhino II Configuration Default Info For X any number can be specified. This gives a fixed waiting time in minutes. If a wrong password is KeyDlgPwdBlock=X entered 3 times the Password-Dialog cannot be called up for the duration of the specified waiting period.
-
Page 47: Sysadmin-Menu Keyboard
Rhino II Configuration SysAdmin-Menu Keyboard The Admin Menu Keyboard displays after successful password entry through the above password keyboard. For proper function this menu keyboard is configured according to the following section. This Menu-Keyboard contains always a special Key to Exit. This Key must be defined with the Keycode VKX_KB_HIDE. - Page 48 Rhino II Configuration Special Settings SysAdmin-Menu Keyboard Special Keys to configure System-Admin Keyboards in the [Keyboard_XX] Section: Default Info With 1 this Keyboard will not be considered at ExcludeChain=1 fading in/out of normal Input-Keyboards. When 1 this Keyboard will be prevented from StartupHide=1 being shown at start –...
- Page 49 Rhino II Configuration Otherwise, the keyboard can be configured as a normal keyboard with any buttons. This keyboard has the opportunity to create Keys with executable programs or batch jobs. User’s Manual...
-
Page 50: Virtual Keycodes
Rhino II Configuration Virtual Keycodes Special Function Codes The following Function codes can be used to define Keys for special functions. VKX_KB_MOVEBUT Moving function for the Keyboard. Zoom function for the keyboard. By pressing this key, the next Zoom level will... - Page 51 Rhino II Configuration Blocks the HW-Toolbar completely (default). VKX_KB_HWKEYLOCK This changing will not stored. Turns the whole HW-Toolbar for scanning VKX_KB_HWKEYSCAN on. This changing will not stored. VKX_KB_HWKEY_NORM Release the HW-Toolbar for normal use. User’s Manual...
-
Page 52: General Keyboard Codes
Rhino II Configuration General Keyboard Codes VK_SEPARATOR VK_F2 VK_BACK VK_F3 VK_TAB VK_F4 VK_CLEAR VK_F5 VK_RETURN VK_F6 VK_SHIFT VK_F7 VK_CONTROL VK_F8 VK_MENU VK_F9 VK_PAUSE VK_F10 VK_CAPITAL VK_F11 VK_ESCAPE VK_F12 VK_F13 VK_SPACE VK_F14 VK_PRIOR VK_F15 VK_NEXT VK_F16 VK_END VK_F17 VK_HOME VK_F18 VK_LEFT... - Page 53 Rhino II Configuration VK_PRINT VK_F24 VK_EXECUTE VK_SNAPSHOT VK_NUMLOCK VK_INSERT VK_SCROLL VK_DELETE VK_HELP VK_LSHIFT VK_RSHIFT VK_LWIN VK_LCONTROL VK_RWIN VK_RCONTROL VK_APPS VK_LMENU VK_RMENU VK_NUMPAD0 VK_NUMPAD1 VK_NUMRET VK_NUMPAD2 VK_CIRCUMFLEX VK_NUMPAD3 VK_SHARP_S VK_NUMPAD4 VK_ACCENT VK_NUMPAD5 VK_PLUS VK_NUMPAD6 VK_GER_UE VK_NUMPAD7 VK_GER_OE VK_NUMPAD8 VK_GER_AE VK_NUMPAD9 VK_NUMSIGN...
- Page 54 Rhino II Configuration VK_SUBTRACT VK_MINUS VK_DECIMAL VK_ALTGR VK_DIVIDE VK_F1 Rhino™ II...
-
Page 55: Upgrading The Rhino Ii Wec7 Firmware
There are three steps involved to upgrade your Rhino II computer: 1. Download the upgrade cab file from the Datalogic website. 2. Make the upgrade file accessible to the Rhino II computer. This can be done by; a. Attaching a USB External storage device, such as a USB Memory Drive, USB External Hard Disk, or USB External Card reader. - Page 56 Rhino II Configuration NOTES Rhino™ II...
-
Page 57: Datalogic Applications
Desktop Configuration Utility (DXU) Datalogic DXU is a unified device configuration utility and firmware update utility. DXU can connect directly to the Rhino II that connects either directly to a PC via USB or remotely over a network, either via Ethernet or Wi-Fi. -
Page 58: How Dxu Works
PC and the client applications that run on the device. DXU offers a method to print out barcodes that Rhino II users can scan to quickly connect to DXU, called Scan2Deploy. DXU also offers... -
Page 59: Installation
Datalogic Applications DXU configurations are stored as configuration files on the PC, and are transmitted to and from the Rhino II as XML web pages. XML is a standard data format that is widely used for a variety of applications on the internet. Some data is encrypted in the XML file... - Page 60 DXU is supported on both 32-bit and 64-bit versions of Windows 10. Unsupported Windows Versions DXU may run on older, unsupported Windows versions, but Datalogic technical support will not support users who have problems if they install DXU on Windows versions no longer supported by Microsoft.
-
Page 61: Controls
Windows operating systems, but it can be disabled by default. If you do not see this prompt, UAC may have been disabled.) 4. Follow on-screen prompts to finish installing DXU. 5. Follow on-screen prompts to finish installing Datalogic Device Support drivers. Controls DXU Agent Controls DXU settings on the device can be configured with the DXU control panel. - Page 62 Datalogic Applications The following options are available in the DXU control panel: 1. Desktop Port number – needs to match setting on DXU Desktop. Requires warm boot for change to take effect. 2. Pair – Button to broad case UDP packets to automatic discovery of device by DXU Desktop.
- Page 63 By default, No Devices Available will display when no devices announce themselves to DXU either when they connect via USB or when they connect over a network. Simply connecting the Rhino II to a network, even on the same subnet as the PC running DXU, will not automatically display as being available.
- Page 64 Datalogic Applications To return to the DXU main window, click the Back button (generally, a leftward pointing arrow in a circle). Refresh This button manually refreshes the display of currently connected devices. This can overcome problems with the automatic display of devices as they connect, and it can remove devices from the list that are not currently connected.
- Page 65 Datalogic Applications the last number of your device’s IP address if it is in the same subnet as your PC. This dialog box allows you to manually connect to devices running DXU Agent that are either inside your PC’s subnet or outside it. The limitation is that devices on other subnets must be on a subnet that is routable from your PC’s subnet.
- Page 66 Datalogic Applications To load a configuration: 1. Click the Load Configuration button. 2. Explore to any folder where DXU configuration files are located, then select any configuration file you wish. You can double-click it to streamline opening it. 3. Click the Open button.
-
Page 67: Simplified Deploy
Datalogic Applications Simplified Deploy DXU desktop can be configured to enable the Datalogic out-of-box experience Simplified Deploy, using Scan2Deploy. With Simplified Deploy you can automatically connect your device to the network and provision it. The Scan2Deploy button on DXU desktop can be... - Page 68 Datalogic Applications Manifest File Format [update] <name of firmware file with full path on DXU Server PC> [install] <name of app1 to install file with full path on DXU Server PC> <name of app2 to install file with full path on DXU Server PC>...
- Page 69 Datalogic Applications Scan2Deploy Scan2Deploy allows the Rhino II running DXU Agent to connect using DXU Agent’s Scan2Deploy functionality by scanning a barcode. There are two different Scan2Deploy buttons in DXU, and they have different intentions and different scopes of functionality.
- Page 70 Datalogic Applications 2. Enter the Wi-Fi Configuration information so that the device can connect to the network, including SSID and password. 3. Enter the Pairing Configuration, including the IP Address of the PC which has DXU desktop installed, and the name of the manifest file to be used.
- Page 71 Printing Custom Configuration Barcodes Outside of Simplified Deploy, the Scan2Deploy button located in the Datalogic Configuration Utility window can also automatically connect devices to Wi-Fi access points and to DXU. This window also has another tab which controls the ability to include configuration data in the printed barcodes.
- Page 72 Datalogic Applications While it is possible to generate a Simplified Deploy barcode using this window, it has the additional flexibility presented in the Device Configuration tab, which allows printing barcodes to configure the device without the need of the PC with DXU desktop being accessible from the Wi-Fi network.
- Page 73 Datalogic Applications QR Code, Aztec Code, and Data Matrix are 2D barcodes that offer high data density and larger capacity, but require 2D scanners to scan them. PDF417 is a stacked linear barcode that offers moderate data density and larger capacity than linear symbologies. Code 128...
- Page 74 Datalogic Applications Pairing Configuration Controls These fields let you configure your connection to the PC you are running DXU on. These fields are filled in automatically, but you can change them to deliberately connect to another IP address where another instance of DXU is running, for example.
- Page 75 Datalogic Applications Language Tab The Language tab allows to switch the language that strings in DXU are displayed in. The default language is US English, but you may choose Italian, Chinese Simplified, or Chinese Traditional. Additional languages may be added later without notice.
- Page 76 Datalogic Applications About Tab The About tab displays DXU’s version. This is likely the first question that Datalogic technical support may ask you if you call in with a question. Desktop Configuration Utility View This is the view you see when you click on a device’s button in the Available Device list.
- Page 77 Datalogic Applications Remote Control Button Clicking this button opens a Remote Control window that displays what is visible on the screen of the device you are currently connected to. This window also includes buttons to remotely activate the devices external buttons, and to capture a screen shot of what is visible on its screen.
- Page 78 Datalogic Applications Scan2Deploy Button Clicking this button opens the Scan2Deploy dialog box (see see “Printing Custom Configuration Barcodes” on page -65). Use it to create Scan2Deploy barcode sets that can fully configure a device without network access to DXU on your PC, containing all configuration settings in one set of barcodes and applying them by scanning the labels - all without the need to use Simplified Deploy.
-
Page 79: Tasks
Datalogic Applications Tasks Connect to a Device via Network Manually If DXU Agent on the device has its Enable Discovery Manager feature enabled and DXU has Automatic Discovery of Devices enabled under Advanced Settings, then clicking Refresh should display it in the Available Device list if it is in the same subnet. - Page 80 Datalogic Applications 3. Click OK to complete. The added device will display on the left side of the console under Available Device. You can also directly connect the device to DXU using USB. NOTE Connect to a Device via Network Using Scan2Pair These steps assume you already have your network set up, and you already have your printer set up.
- Page 81 Datalogic Applications Scan to Configure, also under Device Tools, allows you to configure a Wavelink Avalanche barcode to configure. NOTE 8. Scan the barcode. Your device should appear in the Available Device list of the DXU main window. Click Available Device to continue configuring your device.
- Page 82 Datalogic Applications Configuration Files DXU configuration files end with the *.dxu file extension. They are XML files that can contain binary data for some configuration items, such as wallpaper images. Save a Configuration File To save a configuration file, follow the steps below: 1.
- Page 83 Datalogic Applications Open a Configuration File To load a configuration file previously saved, do this: 1. Launch DXU. 2. Click the Load Configuration file. This will open a standard file dialog box. 3. Explore to your configuration file, select it, and click Open.
- Page 84 Datalogic Applications Open a Configuration File Which is Authenticated DXU displays a login prompt when you open a configuration file that requires authentication and when you connect to a device with a password set in the DXU Agent. To open a configuration or to connect to a device which requires authentication: 1.
- Page 85 Datalogic Applications Add Comments to Configuration Settings Comments can be added to any tab, node, or parameter in the Device Configuration window. Comments are indicated with a small text balloon icon. To add a comment: 1. Open a configuration file or load the configuration from a connected device.
- Page 86 Datalogic Applications 4. Click OK to save. Show Comments You can show all comments in a configuration file in one handy table by doing this: 1. Open a configuration file or load the configuration from a connected device. 2. Click Configure This Device.
- Page 87 Datalogic Applications User’s Manual...
- Page 88 Datalogic Applications Configure a Device Off-line via Scan2Deploy DXU’s Desktop Configuration Utility window allows to generate a Scan2Deploy barcode set for device configuration. The device settings modified using the console can be saved, printed and scanned by a remote user of a device to configure it.
- Page 89 Datalogic Applications 3. Include Binary Data: DXU configuration files can contain some data in binary formats, like wallpaper images. The Include Binary Data option allows you to include all binary data in the barcode set. Note that excluding binary data can significantly reduce the...
- Page 90 Datalogic Applications 11. Click Save to save your barcode label set as a graphic image file. 12. Click Print Preview, then click the Print button in the button bar and complete using your printer’s Print dialog box. To apply the configuration by scanning the Scan2Deploy barcodes: 1.
- Page 91 Configure DXU Communication Settings You can configure the TCP/IP ports used by DXU to communicate with the DXU Agent on the Rhino II. Configure these settings only if you understand how these changes affect your network. Consult your network expert for more information.
- Page 92 Datalogic Applications To configure DXU’s UDP and TCP ports: 1. From the DXU main window, click Settings. 2. Click the Advanced Settings tab. 3. Edit the port values to match the ports used by the DXU Agent on your devices: a.
- Page 93 Datalogic Applications 4. Click the Back button (a leftward pointing arrow in a circle to return to the DXU main window). Enable Automatic Discovery of Devices You can enable the automatic discovery of your device by the DXU. This is not enabled by default.
- Page 94 DXU main window. Create Scan2Deploy Labels to Fully Configure Remote Devices The Scan2Deploy button in the Datalogic Configuration Utility window can automatically connect devices to Wi-Fi access points and to DXU. Also, the Scan2Deploy window has a further tab which allows you to include configuration data in the printed barcodes.
- Page 95 Datalogic Applications configuration items will be included in the barcode set. This option results in several barcodes being generated as true Scan2Deploy labels. After scanning the first label in this set, the DXU Agent’s Scan2Deploy window on your device will display how many barcode labels must be scanned, and your progress in scanning them all.
- Page 96 Datalogic Applications This option will increase the number of barcode labels in the Scan2Deploy label set. NOTE 9. (Optional) Select the Include Binary Data check box to include binary data such as the desktop wallpaper image in the configuration barcodes.
- Page 97 Wi-Fi radio, the type of barcode scanner it has, the OS version, the battery type and state of charge, the firmware version and the version of the Datalogic Enterprise SDK. To view information about the device from which a configuration file was extracted: 1.
- Page 98 Datalogic Applications Remote Control Remote Control allows to see what is displayed on the screen of a connected device. This window also includes buttons to remotely activate the device’s external buttons, and to capture a screen shot of what is visible on its screen. Note that clicking a button on screen...
- Page 99 Datalogic Applications Unlock the Screen Using Remote Control You can unlock the screen by dragging your mouse on the Remote Control screen. To start Remote Control and unlock a device’s screen: 1. Launch DXU. 2. Connect the device to DXU either directly using USB or through the network via Wi-Fi or Ethernet, or scan a Scan2Deploy label.
- Page 100 Datalogic Applications Set a VNC Password VNC is a standard protocol for remotely controlling PCs and other computers, and it allows the use of a password to prevent unwanted remote access to computers. The VNC password must match between the DXU console and the DXU Agent on the device.
- Page 101 Datalogic Applications 9. Select the Enable Service check box. 10. Tap Home to exit. To authenticate Remote Control when a password is set on the device: 1. Launch DXU. 2. Connect the device to DXU either directly using USB or through the network via Wi-Fi or Ethernet, or scan a Scan2Pair label.
- Page 102 6. Click the Back button (a leftward pointing arrow in a circle) to return to the DXU main window). Update Firmware You can update the Rhino II’s firmware from DXU. DXU provides the following options: • a Silent Install where no user interaction is required on the device;...
- Page 103 Datalogic Applications Silent Install This option allows to perform an image update that does not require any user interaction on the device. If cleared, the user will be prompted to perform the update, but has the option to cancel the update.
- Page 104 Datalogic Applications Update Firmware on a Connected Device You must first connect to a device to update its firmware with DXU. The connection can be either with USB, or over a network using Wi-Fi or Ethernet. To perform a firmware update with DXU: 1.
-
Page 105: Configuring Surelock And Surefox
Datalogic Applications Configuring SureLock and SureFox Device and browsing lockdown can occur using SureLock and SureFox. These lockdown settings can be set via the DXU desktop. There are two important prerequisites to configuring these settings when creating a DXU configuration file: 1. - Page 106 Datalogic Applications SureFox Rhino™ II...
- Page 107 Datalogic Applications Change the SureLock and/or SureFox Password After completing the above steps, you can enter the new password in the Change Password field. SureLock SureFox User’s Manual...
-
Page 108: Command Line Dxu Execution
Datalogic Applications Command Line DXU Execution DXU allows for command line execution, i.e. via a .bat batch file. This is a convenient method for configuring multiple devices without the need to launch the UI or the DXU desktop, or to configure Simplified Deploy. -
Page 109: Datalogic Desktop Utility
Datalogic Applications Datalogic Desktop Utility Datalogic Desktop Utility (DDU) allows administrators to configure Windows® devices to control individual user access. This includes the ability to: • Prevent users from changing your device OS settings. • Use the Application Selector to replace the desktop with a selection of authorized applications. -
Page 110: Administrative Options (Admin Tab)
Datalogic Applications Administrative Options (Admin tab) Command Description Enable Datalogic Select to activate the DDU functions such as Windows Desktop Access Restrictions and Application Selector. Enter password Allows to specify a password when this utility is launched. Re-enter password Re-enter the password for confirmation. - Page 111 Datalogic Applications Set a Password To set a password, follow the steps below: 1. Enter a password in the Enter password text box. By default the password is "1234". A password can consist of all standard keyboard characters. 2. Re-enter the password in the second text box.
- Page 112 NOTE Tap "Set Password" before exiting DDU in order to store and activate your new password. It is not necessary to select Enable Datalogic Desktop. NOTE Set Defaults removes all custom settings and restore all the factory default settings, except a previously set password.
- Page 113 Datalogic Applications Password Request Dialog Box Once the password is set, the next time you launch the Datalogic Desktop Utility, the DDU password dialog box opens: 1. Type in your password using either the keypad on the unit, or using the stylus on the soft input panel (SIP). If you enter an incorrect password, the system will prompt you to input the correct one.
-
Page 114: Locked Web Browser Options (Lockedweb Tab)
Datalogic Applications Locked Web Browser Options (LockedWeb Tab) Tap the LockedWeb tab to access the Locked Web Browser configuration. Locked Web Browser is disabled by default. To enable, use Advanced Settings tab. NOTE For further information about Locked Web Browser commands and... - Page 115 Datalogic Applications Error Redirection Options The Error Type drop-down list displays available Error Types: (400) Invalid Syntax, (403) Request Forbidden, (404) Object Not Error Type Found, (406) No Response Format, (410) Page Doesn' t Exist, (500) Internal Server Error, (501) Server Can' t Do That, Generic Error, Network Disconnected.
- Page 116 Datalogic Applications Other Options When selected, you are prompted for a password to exit the Locked Web Browser. This password is different than the DDU Exit password password, with a default value of "0000", and can be changed in the Advanced settings.
- Page 117 Datalogic Applications Advanced Locked Web Browser Options Restricts browsing only to files and URLs in the Allowed Website List (accessed by the button). The following dialog box appears: Allowed Website List Tap Add to add allowed URLs to the white list. Other sites will be restricted when the option is enabled.
- Page 118 Datalogic Applications Advanced Locked Web Browser Options Adds a Home item to the Locked Web Browser context menu. Home Selecting the item allows to navigate to the IE home page. Adds a Minimize item to the Locked Web Browser context Minimize menu.
-
Page 119: Status Icons Options (Status Tab)
Datalogic Applications Status Icons Options (Status Tab) Tap the Status tab to access the Status Icons option. You can configure the view of some status icons that are used in LockedWeb and in Application Selector to display the status of Wi-Fi radio and battery. -
Page 120: Windows Controls (Win Tab)
Datalogic Applications Windows Controls (Win Tab) Tap the Win tab to allow or restrict access to Windows system functions. You can disable normal Windows functions such as the taskbar, leaving nothing but a blank workspace. This allows to run applications in full screen mode and prevents users from accidental or unauthorized use of the taskbar, Internet Explorer, and any other resident applications. - Page 121 Datalogic Applications Changes require a device reboot. NOTE User’s Manual...
-
Page 122: Appselector Options (Appselect Tab)
Datalogic Applications AppSelector Options (AppSelect Tab) The Application Selector replaces the desktop and allows only authorized use of applications. Tap the Application Selector tab (AppSelect) to edit, add, or delete applications for the application selector. Application Selector Options Enable Application Select to enable the application selector. - Page 123 Datalogic Applications Add Application The Add Application dialog opens when you tap either New or Edit. Use it to configure and/or add/change a new application entry in the list. Applications with the Run Application at Startup option enabled will start automatically when the Application Selector starts up.
- Page 124 Datalogic Applications Command Description to browse for the desired icon file. The results of Browse this search are displayed in the Icon file textbox. Select to force the application to auto start when the Run Application at Application Selector starts up. Applications will be started Startup in the order listed in the authorized application list.
-
Page 125: App Selector (Application Selector)
116. Additionally, the page template can be modified to display a different background. Contact your Datalogic representative for more information on this feature. To run an application, tap its name. To exit the Application Selector, press "ALT + 6", deselect the Enable Application Selector check box on the AppSelect Tab and press OK to exit DDU. -
Page 126: Locked Web Browser
Datalogic Applications Locked Web Browser The Locked Web Browser is a browser helper object for Internet Explorer. It allows an administrator to define a restricted internet usage environment. Once in the restricted environment, a password is required to exit. This means users can only access web applications and websites set by the administrator. -
Page 127: Locked Web Browser Special Metatags
Also, the head tag set must be complete within the first 15K of the web page. The Datalogic Locked Web Browser defines some special metatags that allow the web application to interact with the device: In particular, the special metatags allow it to: •... - Page 128 Datalogic Applications GetSerialNumber Meta-tag DL_GetSerialNumber – Obtains the device serial number and sends it as an argument to a customer’s javascript function. Content – name of function to pass serial number to. Example: <meta http-equiv="DL_GetSerialNumber" content= "Javascript:CustomerFunction"> When a page with this metatag is loaded, the content should be a javascript function that receives one parameter, the serial number.
- Page 129 Datalogic Applications Decoding Metatags Each decoding metatag has a possible content of "Enable" or "Disable". settings valid entire page (enables/disables each symbology). DL_Code_39 DL_Code_128 DL_Code_I25 DL_Code_S25 DL_Code_M25 DL_Code_CODABAR DL_Code_93 DL_Code_UPCA DL_Code_UPCE DL_Code_EAN13 DL_Code_EAN8 DL_Code_MSI DL_Code_MSR DL_Code_GS1_14 DL_Code_GS1_LIMIT DL_Code_GS1_EXP DL_Code_PDF417 DL_Code_DATAMATIX...
- Page 130 Datalogic Applications Key Press Metatags The key press metatags can be used to call JavaScript functions. They have the name structure: "DL_Key_xxx" where xxx is the VKey code. Example: <meta http-equiv="DL_Key_13" content="Javascript:CheckEnter();"> Assigning a key press via a DL_Key metatag overrides its use on the page.
- Page 131 Datalogic Applications Scanning Metatags DL_Scan – Captures scan results and sends barcode/tag value to a javascript function on the web page. If the "content=" value is a javascript function the device will be taken out of keyboard wedge mode and start listening for scan events.
-
Page 132: Pal And Pal Communicator
Datalogic Applications PAL and PAL Communicator Pal is an easily customizable program that is ready-to-use for data entry needs. Pal Communicator is a PC application that allows you to manage the data transfer between a host computer and mobile devices. -
Page 133: Setting Up Serial Scanning
Datalogic Applications Setting Up Serial Scanning To use a serial scanner with the Rhino II, a wedge utility must be executed to convey the serial input to the keyboard input. By doing this, the scanner data will be presented to the application as if it had been typed on the keyboard. - Page 134 Datalogic Applications Prefix REG_SZ Decimal value of the character to be added to the beginning of the scanned data. For example, to add a ‘s’ to the beginning of the scan set the prefix to 115. By default no prefix is set.
-
Page 135: Communications
Communications There is more than one way to connect the Rhino II to a host PC running Windows. Each requires specific connections in order to function properly. Setting Up Ethernet Communications Ethernet communications usually require special configuration. The Rhino II default settings are configured to use DHCP to automatically get an IP address from a DHCP server. -
Page 136: Setting Up 802.11 Radio Communications
Communications Setting Up 802.11 Radio Communications The Rhino II has an internal 802.11 a/b/g radio from Laird. Under WEC7 and WES7, the Rhino II uses the Laird Connection Manager to configure the radio. Go to http://www.lairdtech.com for latest version of the Laird Manager guide. Running Windows 10 IoT, the radio is managed by the standard built in Microsoft wireless manager. -
Page 137: Wireless And Radio Frequencies Warnings
WARNING Most modern electronic equipment is shielded from RF signals. However, certain electronic equipment may not be shielded against the RF signals generated by Rhino II. Datalogic recommends persons with pacemakers or other medical devices follow same... - Page 138 Communications In case of doubt concerning the use of wireless devices with an implanted medical device, contact your doctor. Turn this device OFF in health care facilities when any WARNING regulations posted in these areas instruct you to do so. Hospitals or health care facilities may use equipment that could be sensitive to external RF energy.
- Page 139 Communications Do not store or carry flammable liquids, explosive gases or materials with the device or its parts or accessories. Areas with a potentially explosive atmosphere are WARNING often, but not always, clearly marked or shown. Sparks in such areas could cause an explosion or fire, resulting in injury or even death.
- Page 140 Communications NOTES Rhino™ II...
-
Page 141: Technical Features
Technical Features Technical Data Physical Characteristics Construction Coated aluminum, no fan design Dimensions 27.8 x 22.3 x 6.4 cm / 10.9 x 8.8 x 2.5 in 3.4 Kg / 7.5 lb (10 inch Freezer Models) Weight 3.6 Kg / 7.9 lb (10 inch Standard Models) 4.7 Kg / 10.4 lb (12 inch Standard Models) Resistive/Freezer Model: 10.4 inch SVGA 800x600, 400 NITS;... - Page 142 Technical Features Environmental Humidity 10 to 90% at 40 ºC / 104 ºF; non-condensing Operating: -20 to 55 ºC / -4 to 131 ºF (without heater, Capacitive models); Temperature -30 to 55 ºC / -22 to 131 ºF (with heater, minimal condensation using freezer-rated model - 10”...
- Page 143 WEC7: 1 GB RAM; Win7/10: 4 GB RAM Storage WEC7: 32 GB SDHC; Win7/10: 32 GB CFast SSD Software WEC7: Datalogic DXU, DDU, SDK, SureFox Locked Browser; Configuration WEC7: Wavelink Avalanche pre-installed and pre-licensed; & Maintenance Win7/10: Datalogic Aladdin™ pre-loaded Development Datalogic Windows CE SDK™...
- Page 144 Technical Features Safety & Regulatory The product meets necessary safety and regulatory Agency Approvals approvals for its intended use. Certifications Certified for CE/FCC; RoHS compliant Regulatory US, Canada, EU countries Warranty Warranty 1-Year Factory Warranty. Rhino™ II...
-
Page 145: Troubleshooting The Rhino Ii
Troubleshooting the Rhino II If you send the Rhino II in for service, it is your responsibility to save the computer data and configuration. Datalogic is responsible only for ensuring that the hardware matches the original configuration when repairing or replacing the computer. -
Page 146: Problems With Wireless Connectivity
• Press and hold Power to turn off the Rhino II and then turn it back on. The Rhino II appears to be locked • If the Rhino II will not reboot, contact up and you cannot enter data. Datalogic or your local Datalogic service representative for help. - Page 147 Troubleshooting the Rhino II Problem Solution • The Rhino II is not connected to the access point. Make sure the access point is turned on and operating. You may also be using the Rhino II out of range of an access point (no green bars).
- Page 148 Troubleshooting the Rhino II NOTES Rhino™ II...
-
Page 149: Maintenance
Maintenance Cleaning the Device Periodically clean the Rhino II device using a soft cloth slightly dampened with only water or Isopropyl Alcohol (70%). Do not use any other cleaning agents (e.g. different alcohol, abrasive or corrosive products, solvents) or abrasive pads to clean the device. - Page 150 Maintenance • Reduce or eliminate direct pressure • Provide adjustable workstations • Provide adequate clearance • Provide a suitable working environment • Improve work procedures. Rhino™ II...
-
Page 151: Safety And Regulatory Information
Use only the components and accessories supplied by the manufacturer for the specific Rhino II being used. • Do not attempt to disassemble the Rhino II, as it does not contain parts that can be repaired by the user. Any tampering will invalidate the warranty. -
Page 152: Power Supply
UL Listed/CSA Certified Power Unit LPS/SELV power source which supplies power directly to the unit via the attached power connector. Any changes or modifications to equipment, not expressly approved by Datalogic could void the user's authority to operate the equipment. Rhino™ II... -
Page 153: Marking And European Economic Area (Eea)
II is in compliance with Directive 2014/53/EU. The full text of the EU declaration of conformity is available at the following internet address: www.datalogic.com. Statement of Compliance Datalogic S.r.l. tímto prohlašuje, že tento Rhino II je ve shodě se Česky základními požadavky a dalšími příslušnými ustanoveními [Czech] směrnice 2014/53/EU - 2011/65/EU. - Page 154 Ελληνική ΣΥΜΜΟΡΦΩΝΕΤΑΙ ΠΡΟΣ ΤΙΣ ΟΥΣΙΩΔΕΙΣ ΑΠΑΙΤΗΣΕΙΣ ΚΑΙ ΤΙΣ ΛΟΙΠΕΣ ΣΧΕΤΙΚΕΣ ΔΙΑΤΑΞΕΙΣ ΤΗΣ ΟΔΗΓΙΑΣ 2014/53/EU - 2011/65/EU. [Greek] Par la présente Datalogic S.r.l. déclare que l' a ppareil Rhino II est Français conforme aux exigences essentielles et aux autres dispositions [French] pertinentes de la directive 2014/53/EU - 2011/65/EU.
-
Page 155: Information For The User
Datalogic S.r.l. declara que este Rhino II está conforme com os Português requisitos essenciais e outras disposições da Directiva [Portuguese 2014/53/EU - 2011/65/EU. Datalogic S.r.l. izjavlja, da je ta Rhino II v skladu z bistvenimi Slovensko zahtevami in ostalimi relevantnimi določili direktive 2014/53/EU [Slovenian] - 2011/65/EU. -
Page 156: Fcc Id/Ic Warning
Safety and Regulatory Information FCC ID/IC Warning FCC Label Compliance Statement: This device complies with Part 15 of the FCC Rules. Operation is subject to the following two conditions: (1) this device may not cause harmful interference, and (2) this device must accept any interference received, including interference that may cause undesired operation. -
Page 157: Exposure To Radio Frequency Radiation
Safety and Regulatory Information Exposure to Radio Frequency Radiation This equipment complies with FCC radiation exposure limits set forth for an uncontrolled environment. This equipment should be installed and operated with minimum distance 20cm between the radiator & your body. This equipment complies with IC radiation exposure limits set forth for an uncontrolled environment. -
Page 158: Radio Technologies And Frequency Bands
Safety and Regulatory Information Radio Technologies and Frequency Bands Rhino II incorporates the following radio technologies and supports the corresponding Frequencies and Radio-Frequency transmitted power, as specified below: Max Transmission RF Module Frequency Bands Power BT/SRD 2400 - 2479 MHz... -
Page 159: Weee Compliance
For more detailed information about disposal, contact the supplier that provided you with the product in question or consult the dedicated section at the website http://www.datalogic.com. Informazione per gli utenti L’apparecchiatura che riporta il simbolo del bidone barrato deve essere smaltita, alla fine della sua vita utile, separatamente dai rifiuti urbani. - Page 160 Am Ende des Gerätelebenszyklus darf das Produkt nicht über den städtischen Hausmüll entsorgt werden. Eine entsprechende Mülltrennung ist erforderlich. Weitere Informationen zu dieser Richtlinie erhalten sie von ihrem Lieferanten über den sie das Produkt erworben haben, oder besuchen sie unsere Hompage unter http://www.datalogic.com. Rhino™ II...
-
Page 161: Reference Documentation
Reference Documentation For further information regarding Rhino II refer to the SDK Help on-line. Support Through the Website Datalogic provides several services as well as technical support through its website. Log on to www.datalogic.com and click on the SUPPORT link which... - Page 162 Reference Documentation NOTES Rhino™ II...
-
Page 163: Glossary
Glossary Access Point A device that provides transparent access between Ethernet wired networks and IEEE 802.11 interoperable radio-equipped mobile units. Hand-held mobile computers, PDAs or other devices equipped with radio cards, communicate with wired networks using Access Points (AP). The mobile unit (mobile computer) may roam among the APs in the same subnet while maintaining a continuous, seamless connection to the wired network. - Page 164 Glossary Binary digit. One bit is the basic unit of binary information. Generally, eight consecutive bits compose one byte of data. The pattern of 0 and 1 values within the byte determines its meaning. Bluetooth® A standard radio technology using a proprietary protocol. The onboard Bluetooth®...
- Page 165 Glossary is typically stored in the flash ROM of a hardware device. While ROM is "read-only memory," flash ROM can be erased and rewritten because it is actually a type of flash memory. Flash Memory Non-volatile memory for storing application and configuration files. Host A computer that serves other mobile computers in a network, providing services such as network control, database access, special...
- Page 166 Glossary Scanner An electronic device used to scan barcode symbols and produce a digitized pattern that corresponds to the bars and spaces of the symbol. Its three main components are: • Light source (laser or photoelectric cell) - illuminates a barcode. •...
- Page 167 Glossary internet. This gives users the mobility to move around within a local coverage area and still be connected to the network. WPAN A Wireless Personal Area Network is a personal area network - a network for interconnecting devices centered around an individual person's workspace - in which the connections are wireless.
- Page 168 ©2017 Datalogic S.p.A. and/or its affiliates. All rights reserved. Datalogic and the Datalogic logo are registered trademarks of Datalogic S.p.A. in many countries, including the U.S. and the E.U. Datalogic S.r.l. Via S. Vitalino, 13 Calderara di Reno 40012 Italy Tel.
Need help?
Do you have a question about the Rhino II and is the answer not in the manual?
Questions and answers