
Related Manuals for Struers Tegramin-25


Summary of Contents for Struers Tegramin-25
- Page 1 Tegramin-25/-30 Instruction Manual Manual No.: 16037001 Date of Release 11.03.2013...
- Page 2 The manual may mention accessories or parts not included in the present version of the equipment. Original instructions. The content of this manual are the property of Struers. Reproduction of any part of this manual without the written permission of Struers is not allowed.
-
Page 3: Before Use
Connect only to cold water. Make sure that the water connections are leak-proof and that the water outlet is working. Struers recommend that the mains water supply is shut off or disconnected if the machine is to be left unattended. - Page 4 The equipment should only be used for its intended purpose and as detailed in the Instruction Manual. The equipment is designed for use with consumables supplied by Struers. If subjected to misuse, improper installation, alteration, neglect, accident or improper repair, Struers will accept no responsibility for damage(s) to the user or the equipment.
- Page 5 Tegramin-25/ -30 Instruction Manual Disposal Equipment marked with a WEEE symbol contain electrical and electronic components and must not be disposed of as general waste. Please contact your local authorities for information on the correct method of disposal in accordance with national legislation.
-
Page 7: Table Of Contents
Tegramin-25/ -30 Instruction Manual Table of Contents Page Getting Started Checking the Contents ............... 3 Unpacking Tegramin ................3 Placing Tegramin ................3 Getting Acquainted with Tegramin ............. 4 Rear of Tegramin ..............5 Supplying Water ................. 7 ... - Page 8 Tegramin-25/ -30 Instruction Manual Operating Tegramin Inserting Specimen Holders or Specimen Mover Plates ....41 Inserting a Specimen Holder ........... 41 Inserting a Specimen Mover Plate .......... 41 Manual Preparation ................42 Recommendations for Grinding Single Specimens ....43 ...
-
Page 9: Getting Started
1. Getting Started Checking the Contents In the packing box you should find the following parts: Tegramin-25/ -30 Tegramin-25 or Tegramin-30 (Microprocessor controlled table top machine for automatic grinding, lapping and polishing of all materials) Mains cables Water inlet hose 19mm/ ¾" (2 Filter gasket Reduction ring with gasket ¾"... -
Page 10: Getting Acquainted With Tegramin
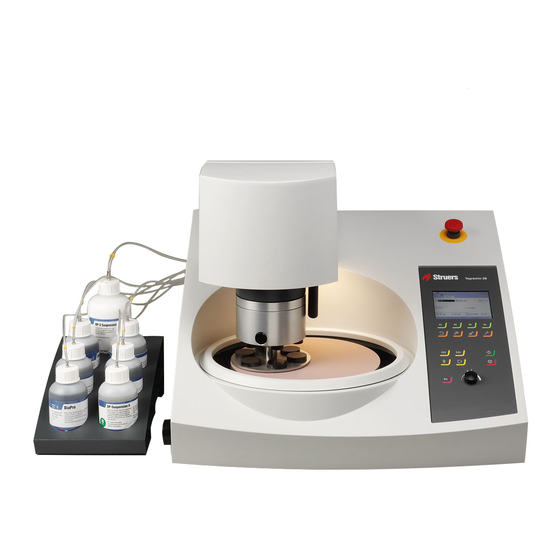
Tegramin-25/ -30 Instruction Manual Getting Acquainted with Take a moment to familiarise yourself with the location and names of Tegramin all the Tegramin components: Please Note, The following illustrations are of Tegramin versions without a cover. Installation and operation of Tegramin versions with or without a cover will be identical. -
Page 11: Rear Of Tegramin
Tegramin-25/ -30 Instruction Manual Rear of Tegramin Air outlet for shift valve Compressed air inlet Release outlet valve from water/oil filter for compressed air ... - Page 12 Tegramin-25/ -30 Instruction Manual Holders for dosing tubes (3 rows on the rear of Tegramin) Socket for cover Connection for shift valve) Cooli unit connection RS 232 socket for LAN module USB connection, for service purposes...
-
Page 13: Supplying Water
Tegramin-25/ -30 Instruction Manual Supplying Water Water for wet grinding may be supplied from the water mains or a Recirculation Cooling Unit (instructions on the next page). Connection to Water Mains IMPORTANT The cold water supply must have a head pressure in the range 1 –... -
Page 14: Adjusting The Water Flow
Tegramin-25/ -30 Instruction Manual Adjusting the Water Flow The flow of water can be adjusted using the manual water valve. Water flow for disc cooling and flushing after OP can be adjusted using the throttle valves. Throttle valve, flushing water for OP... -
Page 15: Connecting A Recirculation Cooling Unit
Tegramin-25/ -30 Instruction Manual Connecting a Recirculation To ensure optimal cooling, Tegramin can be fitted with a Struers Cooling Unit Recirculation Cooling Unit. Oxide Polishing: A Shift Valve is REQUIRED when using a Recirculation Cooling Unit with Tegramin units running methods that include the dosing of oxide polishing suspensions -OP. -
Page 16: Connecting The Communication Cable
Shift valve. Note: The Shift Valve for Tegramin set includes some extra pieces not used for Tegramin-25/-30 (1 short piece of hose, 1 reduction piece and 2 hose clamps) REMEMBER Make sure that the hoses slope downward throughout their length, from Tegramin to the shift valve and from shift valve to Cooli (or drain). -
Page 17: Compressed Air Connections
Tegramin-25/ -30 Instruction Manual Compressed Air Connections The quality of the air in the compressed air system used with this machine must meet the standards stated in ISO 8573-1. To connect compressed air: Mount the quick coupling on the compressed air hose and secure it with the hose clamp supplied. -
Page 18: Supplying Power
Tegramin-25/ -30 Instruction Manual Supplying Power Always remember to switch the power off when installing electrical equipment. DANGER! The machine must be earthed IMPORTANT Check that the mains voltage corresponds to the voltage stated on the type plate on the back of the machine. -
Page 19: Mounting The Dosing Modules
Tegramin-25/ -30 Instruction Manual Mounting the Dosing Modules Remove the cover plates. Slide the dosing module(s) into the correct position at the back of Tegramin. Secure the module(s) with the attached screws. Connect the short piece of tube with the 90° angle and the clear tube to the connectors at the back of the Tegramin. -
Page 20: Basic Operation Of Tegramin
Tegramin-25/ -30 Instruction Manual 2. Basic Operation of Tegramin Front Panel... -
Page 21: Front Panel Controls
Tegramin-25/ -30 Instruction Manual Front Panel Controls Function Function Controls for various purposes. See the bottom line of the FUNCTION F1-F4 individual screens. Starts rotation of the disc. Manual override - push button to apply water (applies water when DISC no process is running). -
Page 22: Reading The Display
Tegramin-25/ -30 Instruction Manual Reading the Display The display on the front panel provides different levels of status information. For example, when the machine is switched on using the Mains switch located at the rear of the machine, the display informs... -
Page 23: Manoeuvring In The Menu Structure
Tegramin-25/ -30 Instruction Manual The display is primarily divided into 2 areas. The position of these areas and the information they contain are explained in the illustration below, which uses the Options menu as an example: Heading: this is a navigational aid, telling you where you are in the software’s hierarchy. -
Page 24: Software Settings
Tegramin-25/ -30 Instruction Manual Software Settings When switching Tegramin on for the first time, the Select language screen will appear (to change the language after this, refer to “Changing the Language)”. Turn knob to select the language you prefer. - Page 25 Tegramin-25/ -30 Instruction Manual During normal operation, immediately after start up, where the splash screen is displayed, the software goes to the screen that was used before the machine was switched off. Thus you can continue exactly where you left last time the machine was used.
-
Page 26: Changing The Language
Tegramin-25/ -30 Instruction Manual Changing the Language Turn the knob to select Configuration. Push knob to activate the Configuration Menu. Turn the knob to select Options Push knob to activate the Options Menu. - Page 27 Tegramin-25/ -30 Instruction Manual Push knob to activate the Select language pop-up menu. Turn knob to select the language you prefer. Push knob to accept the language. The Configuration menu now appears in the language you ...
-
Page 28: Editing Numeric Values
Tegramin-25/ -30 Instruction Manual Check if there are any other settings that need changing in the Options menu. If not, Push ESC to return to the Configuration menu. Otherwise use the Turn/Push knob to select and change the required parameters. -
Page 29: Editing Alphanumeric Values
Tegramin-25/ -30 Instruction Manual Note: If there are only two options, the popup box is not displayed. Pressing the knob (Enter) will toggle between the 2 options. Turn knob to increase or decrease the numeric value (or to ... - Page 30 Tegramin-25/ -30 Instruction Manual Note: If there are more than two options, a popup box is displayed. Turn knob to select the correct option. Press Esc to accept the option and return to the previous ...
-
Page 31: Operation Mode
Tegramin-25/ -30 Instruction Manual Operation Mode In Operation mode 3 different user levels can be set. Production: Methods can be selected and viewed but no editing is possible. Development: Methods can be selected, viewed and edited Configuration: Methods can be selected, viewed and edited and bottles can be configured. -
Page 32: New Pass Code
Tegramin-25/ -30 Instruction Manual Select the desired operation mode and push knob to confirm. A New pass code can also be selected from the Operation mode New Pass Code menu. Please Note When a pass code is set the operator has 5 attempts to enter the correct pass code after which the Tegramin will be locked. -
Page 33: Preparation Process Setup
Tegramin-25/ -30 Instruction Manual Preparation Process Setup Tegramin-25 and -30 are designed for the preparation of most materials. In Struers Metalog Guide™ you will find a detailed description of grinding/polishing for automated mechanical specimen preparation. Struers Metalog Guide™ offers preparation methods for the most common materials, based on a simple analysis of two key properties: hardness and ductility. -
Page 34: Selecting A Preparation Mode
Select the appropriate preparation mode by turning the knob and activate the selection by pushing the knob. The first screen displays the Method groups. On a new machine only the Struers Metalog Guide Methods, Group 01 and New Group are shown. -
Page 35: Selecting A Preparation Method
Tegramin-25/ -30 Instruction Manual The contents of the Method Groups are identical, no matter if Specimen holder methods or Single specimen methods is selected. A method group or method created in one selection is automatically created in the other selection as well. -
Page 36: Tegramin-25
Tegramin-25/ -30 Instruction Manual Turn knob to select a Method group. Push knob to open the method view. Turn knob to select a Method. Push knob to open the step view. -
Page 37: Instruction Manual
Tegramin-25/ -30 Instruction Manual ... -
Page 38: Creating A Preparation Method
Tegramin-25/ -30 Instruction Manual Creating a Preparation Method All parameters can be changed to optimise the preparation method. Use the knob to select a New method. Push knob to open the step and display the parameter view. -
Page 39: Instruction Manual
Tegramin-25/ -30 Instruction Manual Default settings for a typical preparation process are already selected. e.g.: Step No. 1 is designed to be a plane grinding step. Step No. 2 is designed to be a fine grinding step. -
Page 40: Instruction Manual
Tegramin-25/ -30 Instruction Manual Use the knob to select the parameter to be edited e.g Force & Time/ Removal. Use the knob to edit the parameter/ value and push the knob to confirm the new value. (Pressing Esc, aborts the changes, preserving the original value.) -
Page 41: Instruction Manual
Tegramin-25/ -30 Instruction Manual After the step has been modified, Press F3 New step and step 2 is displayed – Step No. 2. Important! F3 New step is only available after at least one modification of the current preparation step. -
Page 42: Instruction Manual
Tegramin-25/ -30 Instruction Manual Select Save method to save the method, with the current name and current method group. OR select Save method as and specify a New Method group and a New method name. An entire preparation method can be created step by step. However, an easier way would be to modify an existing preparation method. -
Page 43: Modifying An Existing Preparation Method
Tegramin-25/ -30 Instruction Manual Modifying an existing preparation Select the preparation method to be modified, go through the method different preparation steps and make the necessary adjustments. Then press F4 Save and select Save method as to save the method... -
Page 44: Locking A Preparation Method
Tegramin-25/ -30 Instruction Manual Locking a preparation method To avoid accidental changes or deletion of a preparation method, a method can be locked. In the Method view screen, select the method to be locked, e.g Method 01. Press F1 Change status ... -
Page 45: Unlocking A Preparation Method
Tegramin-25/ -30 Instruction Manual The lock symbol in front of the method name has now changed status and shows the locked method. This method can still be modified, but when saving any changes it is only possible to select Save method as. -
Page 46: Starting The Preparation Process
Tegramin-25/ -30 Instruction Manual Starting the Preparation Once the desired method has been selected, Process Press Start to start the preparation. Stopping the Process The process stops automatically when the set preparation time has expired To stop the process before the set preparation time has expired, ... -
Page 47: Operating Tegramin
Tegramin-25/ -30 Instruction Manual 3. Operating Tegramin Inserting Specimen Holders or The Tegramin can be operated with either specimen mover plates for Specimen Mover Plates single specimens or specimen holders. Inserting a Specimen Holder Press the Raise/Lower button to ensure that the head is fully raised. -
Page 48: Manual Preparation
Tegramin-25/ -30 Instruction Manual Manual Preparation Warning! While grinding manually, be careful not to touch the grinding disc. Do not attempt to collect a specimen from the tray while the disc is running. Whilst the disc is rotating, ensure hands are kept well clear of its periphery and out of the splash bowl. -
Page 49: Recommendations For Grinding Single Specimens
Tegramin-25/ -30 Instruction Manual The disc and dosing will stop automatically when the pre-set time expires. To stop both the disc and the dosing before the time has expired, press Stop Do not use plane grinding with coarse abrasives when preparing... -
Page 50: Accessories And Consumables
Specimen Holders Please refer to the Struers Specimen Holders brochure for details of the range available. Attaching a Cover Struers recommended using a cover when working with alcohol (optional/accessory) based consumables. A Cover kit is available as an accessory. -
Page 51: Trouble-Shooting
Restart the machine. If the error the holder has failed. persists, contact a Struers service technician. #28 Specimen holder cannot be The specimen holder cannot be Press Enter to acknowledge the moved down. - Page 52 The pressure system is not Press Enter to acknowledge the calibrated correctly. message. Restart the machine. If the error persists, contact a Struers service technician. #64 Disc motor not stopped! After pressing stop or when the Press Enter to acknowledge the preparation time expired, the message.
- Page 53 Press Enter to acknowledge the missing! range. The PCB might be damaged. message. Restart the machine. If the error persists, contact a Struers service technician. #74 5V DC supply out of range or 5 V DC supply voltage out of 10%...
- Page 54 Action required Physical Observations/Problems Noise when the machine starts or The belt is not tight enough. Call a Struers service technician. the machine will not pull. The belt must be tightened. Functions are not carried out. Fuse at the rear of Tegramin blown.
-
Page 55: Maintenance
Tegramin-25/ -30 Instruction Manual 6. Maintenance Daily Service Clean all accessible surfaces with a moist cloth. Check and refill the dosing bottles. Check the bowl liner frequently and clean or dispose of when filled with debris. ... -
Page 56: Cleaning Of Tubes
Tegramin-25/ -30 Instruction Manual Cleaning of Tubes Tegramin is equipped with an automatic cleaning function for flushing the tubes between the bottles and the dosing nozzles. To clean the tubes: Go to the Maintenance menu and select Cleaning of tubes then follow the on screen instructions. -
Page 57: Cleaning The Bowl
Tegramin-25/ -30 Instruction Manual Cleaning the Bowl Tegramin is equipped with an automatic bowl cleaning function. To clean the bowl: Go to the Maintenance menu and select Cleaning of bowl. Set the cleaning time, the speed of the disc and select additional water if requested. -
Page 58: Cleaning Of Specimen Mover Head
This is mainly to check its function and to remove dirt or particles that may obstruct its movement and the locking function. IMPORTANT! Never try to force any of the movements. If the components do not move as they should always contact the Struers technical service. -
Page 59: Calibration Of Pump Capacity
Tegramin-25/ -30 Instruction Manual Calibration of Pump Capacity The amount of liquid delivered onto the preparation surface can change over time. To be able to keep a constant dosing level, every pump can be calibrated individually. To calibrate the pumps: ... - Page 60 Tegramin-25/ -30 Instruction Manual Enter the amount of water measured and confirm the new value by selecting Save & Exit. Based on the new calibration value, Tegramin will now recalculate the dosing levels to ensure the best possible accuracy.
-
Page 61: Adjustment Of Tube Cleaning Time
Tegramin-25/ -30 Instruction Manual Adjustment of Tube Cleaning Tegramin is also equipped with a function to specify the length of Time time needed to clean certain parts of the tube. These values are also used when refilling the tube with suspension or lubricant after a tube cleaning. - Page 62 Tegramin-25/ -30 Instruction Manual Time from empty to filled tube Pumps 1-6 Increase the time if: the diamond suspensions or lubricants do not reach the dosing nozzles after a cleaning process before a preparation step starts. Decrease the time if:...
-
Page 63: Aligning The Specimen Holder/Mover Plate
Tegramin-25/ -30 Instruction Manual Aligning the specimen Tegramin is equipped with an alignment mechanism to adjust the holder/mover plate specimen holder or specimen mover disc relative to the preparation disc. To change the alignment: Go to the Maintenance menu, select Calibration and adjustments and then select: Adj. -
Page 64: Reset Functions
Tegramin-25/ -30 Instruction Manual Reset Functions It can become necessary to reset certain functions to the factory settings using the Reset functions menu. For example when exchanging dosing modules which have a different pump configuration (e.g. mounting a dosing module with 1 DP pump in place of a 2 DP dosing module). -
Page 65: Service Information
Various topics can be selected for information on the condition of the different components. Service information can also be used in cooperation with a Struers service technician for remote diagnostics of the equipment. Service information is read-only information, machine settings cannot... - Page 66 Tegramin-25/ -30 Instruction Manual Service Check Struers recommends that a regular service check be carried out after every 1500 hours of use. Information on total operation time and servicing of the machine is displayed on the screen at start-up: A pop-up message will appear after 1,000 hours operation time to remind the user that a service check should be scheduled.
-
Page 67: Changing Tubes
Tegramin-25/ -30 Instruction Manual Changing Tubes When working with alcohol based lubricants, the Novoprene tubes mounted in the pumps supplied with Tegramin will harden over time. Therefore a piece of silicone tubing is supplied with the Tegramin dosing modules as Silicone has a better resistance against alcohol. - Page 68 Tegramin-25/ -30 Instruction Manual Remove the 3 rollers. Remove the Novoprene tube and transfer the white clips and the connector to the new silicone tube (Note:- the two clips must be the same distance apart as on the original tube).
-
Page 69: Technical Data
Tegramin-25/ -30 Instruction Manual 7. Technical Data Subject Specifications Tegramin-25 Tegramin-30 Disc Diameter 250 mm / 10" 300 mm / 12” Speed 40-600 rpm, variable Rotational direction Counter-clockwise Disc motor 750 W / 1.0 HP 750 W / 1.0 HP Torque at disc Cont. - Page 70 Tegramin-25/ -30 Instruction Manual Subject Specifications Tegramin-25 Tegramin-30 Supply Voltage / frequency 200-240 V / 50-60 Hz Power inlet 1-phase (N+L1+PE) or 2-phase (L1+L2+PE) The electrical installation must comply with “Installation Category II”. Power, nominal load 1060W 1060W Power, idle Current, nom.
Need help?
Do you have a question about the Tegramin-25 and is the answer not in the manual?
Questions and answers