Advertisement
Quick Links
Advertisement

Related Manuals for Raiscube A8R


Summary of Contents for Raiscube A8R
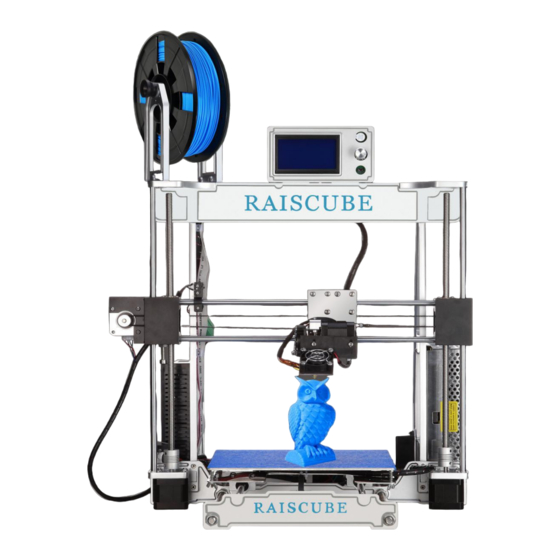
- Page 1 USER MANUAL --Raiscube A8R 3D Printer...
-
Page 2: Legal Notice
Raiscube assumes no responsibility, nor will be liable, for any damages to, or any viruses or malware that may infect, your computer, telecommunication equipment, or other property caused by or arising from your downloading of any information or materials related to this Manual. -
Page 3: Safety And Compliance
USER MANUAL --Raiscube A8R 3D Printer SAFETY AND COMPLIANCE MANUFACTURER Shenzhen Ruisizhizao Technology CO.,LTD Floor 3, NO.18, Yaohui Industrial Park, Dakan Industry Second Road, Xili Street, Nanshan District, Shenzhen, China. 518000. RADIO AND TELEVISION INTERFERENCE This equipment has been tested and found to comply with the limits for a Class B digital device, pursuant to Part 15 of the Federal Communications Commission (FCC) rules. - Page 4 Warning: The printer can only be used with original power supply, or the product may be damaged, with a risk of fire. Warning: The RAISCUBE A8R generates high temperatures. To avoid burning, or model deformation, do not touch the model, nozzle, or the platform by hand, or any other part of the body, while the printer is working or immediately after it has finished printing.
-
Page 5: Build Instruction Of Raiscube A8R 3D Printer
Build Instruction of Raiscube A8R 3D Printer Simply we can divide A8R into four segments – Frame, Build Platform, X&Z Motion, and circuit. We are going to build it one by one in order. Therefore, four major steps to go completing it, taking 1-3 hours from package to make it on in right way. - Page 6 USER MANUAL --Raiscube A8R 3D Printer STEP 1-1 Connect Z Axis Stepper (R&L) middle bottom plate, please differentiate Left stepper from right stepper by the sideway hole as in Fig.b02, and we will get as in Fig.b03. Here we we need 4 pcs of M3*10 Socket Cap Screws, 2pcs each side.
- Page 7 USER MANUAL --Raiscube A8R 3D Printer STEP 1-2 Connect “Left Frame Module” & “Right Frame Module” & what done in Step 1-1 (Fig.b03) together by 4 pcs of M3*10 Socket Cap Screws, 2pcs each side. Please check Fig.b04, and we got what as in Fig.b05.
- Page 8 Socket Cap Screws, connect it to main frame as in Fig.b10 and Fig.b11. Now we have finished building A8R frame. Double check it again to make sure everything in the right way as in pictures. Afterwards, time to move to next major step – Build Platform assembly.
- Page 9 USER MANUAL --Raiscube A8R 3D Printer “Build Platform” includes three layers, first layer is at the bottom made by two pcs of 420mm threaded rod along with 6 pairs of nut sets, which across back plate, middle plate, and front plate, and each plate is locked by two pairs of M8 Nut set along the threaded rods, each pair of nuts set on both sides of each plate.
- Page 10 USER MANUAL --Raiscube A8R 3D Printer STEP 2-2: Complete installation of second layer of “build platform”. To make sure it move smoothly, we need to insert rods through four linear bearings, and test if “H” module runs well on 390mm rod rail. If not, adjust screws which fasten linear bearings and “H” plate until it is.
- Page 11 USER MANUAL --Raiscube A8R 3D Printer Fig.b21 STEP 2-3: Add Hotbed. We need hotbed plate(1pc), M3*25 screw (4pcs), M3 nut (4pcs) as in Fig.b21. M3*25 screws insert from upper side and lock it with M3 nut from the other side. We get in Fig.b22 when done here.
- Page 12 USER MANUAL --Raiscube A8R 3D Printer STEP 2-4: Connect 2pcs of 350mm threaded rods to “Flexible Couple” on Z steppers and tighten them by driving set screws. (Fig.b25 to Fig.b26) Please note that there shall be 1-3mm free space between motor shaft and 350 threaded rods. (Fig.b27) Fig.b25...
- Page 13 USER MANUAL --Raiscube A8R 3D Printer STEP THREE. X&Z motion part installation. Now in this step, time to enable motion function of X Axis and Z Axis. Here is a part list required to complete this step and there are as in Fig.b28, please pick out them all from packing box.
- Page 14 USER MANUAL --Raiscube A8R 3D Printer Fig.b30 Fig.b31 STEP.3-2. Add “X Axis module” to machine body. Please note there is threaded hole in each link block, please target this over onto threaded rods which are with Z motors. And then turn “flexible couplings”...
- Page 15 USER MANUAL --Raiscube A8R 3D Printer Fig.b34 Fig.35 STEP 3-4 Add Control Panel. We need panel control, allen key, two M3*12 Screw (Fig.b36). Connect it to Crossbeam behind (Fig.b37). Fig.b36 Fig.b37 STEP 3-5 X Axis Belt, X end-stop, M8*15 Set screws.
- Page 16 USER MANUAL --Raiscube A8R 3D Printer Fig.b38 Fig. b39 Fig.b40 So far, we have done the build structure of RAISCUBE A8R 3D Printer. One thing remaining before printing -- Circuit Installation. Let’s go for step 4.
- Page 17 Nozzle just reaches left margin of hotbed. A8R wire is pre-assembled, thus to connect circuit, need to read marks on each cord, and match one with the other of same mark. For example, “Y Axis End-stop” with “Y Axis En-stop”...
- Page 18 USER MANUAL --Raiscube A8R 3D Printer Panel Cable Connection. There are two panel cable, to connect ports of panel control with corresponding ports on motherboard, that is, “EXP1 to EXP1”, “EXP2 to EXP2”. Please refer to Fig.w04, Fig.w05 and Fig.w06 for this.
- Page 19 Thus, it is worthwhile of spending time and patience on leveling. And you will also enjoy the benefits brought by A8R printer. Bed Leveling includes two points -- the bottom surface of link blocks shall be parallel with hotbed surface, and the distances of nozzle summit to each point of bed shall be same under certain tolerance.
-
Page 20: Print Test
USER MANUAL --Raiscube A8R 3D Printer STEP TWO: Even bed. We aim to make same distance of it between nozzle and bed in different positions. In our case, we make point of four corners to stand for all other positions. (It makes sense since bed is absolutely even made). - Page 21 USER MANUAL --Raiscube A8R 3D Printer Sample Print Show. Since we have get A8R ready for printing after leveling, now go further steps to our first print. Let’s say steps are 1. Source file Acquirement 2. Slicing origin file with Cura, Simplied 3D or other slicing software.
- Page 22 USER MANUAL --Raiscube A8R 3D Printer Transfer file to Print: “save GCode..” to SD Card. (Fig.s03) Fig.s03 Print: In 3D control panel, press and turn the control button to print from SD Card. “Main Menu” --- Print From SD Card --- xyzCalibration_cube.stl, choose this and printing screen on with info of current print.
- Page 23 USER MANUAL --Raiscube A8R 3D Printer Remove print: When print done, Extruder will lift and go back to its origin (front left most point of hotbed). Use a spatula (enclosed in package) to move the cube. (Fig.s05) Fig.s05 Evaluate print quality: In our cases, warping happens due to leveling issue, adjust hotbed and solved.
- Page 24 USER MANUAL --Raiscube A8R 3D Printer Resource List for you may help Reprap Facebook Group: https://www.facebook.com/groups/1068531466501015 Youtube Installation Demo: https://youtu.be/oJS6ODX52ng Youtube Build Video: https://youtu.be/OweEknLShZ0 Raiscube A8R Live Build: https://youtu.be/C2OinymgcIg Designed in UK&US, Manufactured By Shenzhen Rise Technology CO.,LTD...
Need help?
Do you have a question about the A8R and is the answer not in the manual?
Questions and answers