Table of Contents
Advertisement
Advertisement
Table of Contents

Summary of Contents for Eachine M80
- Page 1 INSTRUCTION MANUAL...
-
Page 2: Safety Precautions And Warnings
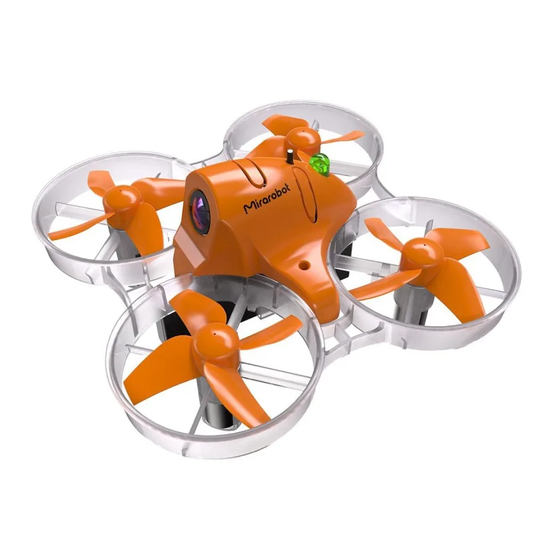
WARNING Please read the ENTIRE instruction manual to become familiar with the features of the product before operating. Failure to operate the product correctly can result in damage to the product, personal property and cause serious injury. This is a sophisticated hobby product. It must be operated with caution and common sense and requires some basic mechanical ability. - Page 3 Never touch moving parts. If you are operating this product in North America, you are required to have an Amateur Radio (HAM) license. Visit www.arrl.org for more information. CONTENTS M80 Frame kit x1 Motor-8.5mm Brushed x 4 44mm propeller x4...
-
Page 4: Specifications
Battery-500mAh 1S 3.8V 25C LiHV x1 Charger-1S USB Li-Po Charger x1 Transmitter x1 25MW VTX 600TVL FPV Camera x1 SPECIFICATIONS Length: 100mm (3.94in) Width : 100mm ( 3.94in ) Height: 50mm (1.97in) Propeller Diameter: 40mm (1.57in) ... -
Page 5: Charge The Flight Battery
NEVER LEAVE CHARGING BATTERIES UNATTENDED. NEVER CHARGE BATTERIES OVERNIGHT. Never charge damaged batteries. If the battery begins to swell during charging or use, discontinue immediately. Always use the included battery and charger. Disconnect the battery after charging. -
Page 6: Installing The Propellers
Installing the Propellers Refer to the illustration for the proper motor rotation and propeller location. The propellers are press fit onto the motor shafts. Remove the propellers by pulling the center hub straight up away from the motor. Install the propellers by pressing the center hub over the motor shaft, being careful not to press it too far down on the shaft. -
Page 7: Transmitter And Receiver Binding
Batteries discharged to a voltage lower than the lowest approved voltage may become damaged, resulting in loss of performance and potential fire when the batteries are charged. Transmitter and Receiver Binding Place the drone flat on the floor and then plug in the battery. Green light will briefly flash. -
Page 8: Transmitter Control (Rtf)
normally. Note: You do not need to do it again once the binding is successful. Power on the remote controller then connected to the battery. Transmitter Control (RTF) Mode Pitch Throttle Throttle ( Front/Back ) Trim (Up/Down) Pith Trim /Yaw /Root /Roll /YAW Trim... -
Page 9: Understanding The Primary Flight Controls
Rotate the two sticks along its inner wall. The LED will turn solid and quit calibration mode after recording the maximum and minimum data of sticks successfully. Understanding the Primary Flight Controls If you are not familiar with the controls of your quadcopter, take a few minutes to familiarize yourself with them before attempting your first flight. -
Page 10: Flight Mode Selection
Flight Mode Selection Change flight modes by pressing different buttons on the transmitter. The quadcopter is in stability mode when first powered on. The active flight mode is indicated by the LEDs at bottom of the quadcopter. Mode LEDs Agility (button D with one click) Solid Red LED Stability (button D with two clicks) Solid Red and Green LEDs... - Page 11 altitude. In some cases, you may need to make a few short “hops” to an altitude of just a few inches until you become familiar with the control inputs and trim settings required to maintain a steady hover and altitude. Hovering The quadcopter requires minor throttle adjustments to maintain its altitude in hover.
-
Page 12: Low Voltage Cutoff (Lvc)
NOTICE: Crash damage is not covered under warranty. Low Voltage Cutoff(LVC) Once the battery reaches 3V under load, the ESC will continuously lower power supplied to the motor until complete shutdown occurs. This helps prevent over- discharge of the Li-Po battery. Land immediately once the ESC activates LVC. Continuing to fly after LVC can damage the battery, cause a crash or both. -
Page 13: Troubleshooting Guide
chair. If you start to suffer from motion sickness while flying, lower your chin against your chest. Fly in open areas, away from people, trees, cars, and buildings. The range of the system can be impacted by any obstructions blocking your signal. It is normal to see break up in the video going behind trees and other obstacles. - Page 14 Does not function and Replace the 3-in-1 board. smells burnt after Flight battery connected Connect the flight battery connecting the flight with the wrong polarity noting proper polarity battery Power off the transmitter. Move the transmitter a larger distance from the Transmitter too near aircraft.
- Page 15 quadcopter Flight battery or Replace or recharge transmitter battery batteries charge is too low Aircraft or transmitter is Move aircraft and too close to large metal transmitter to another object, wireless source location and attempt or another transmitter connecting again Crashes immediately upon Propellers in wrong Make necessary...
-
Page 16: Handling And Storage
Failure to exercise care while using this product and comply with the following conditions and guidelines could result in product malfunction, excessive heat, fire, property damage, and ultimately injury. Lithium Ion batteries are not toys. For the purposes of this document Li-Ion, Li-Po or Li-Fe batteries will be described as "Batteries".


Need help?
Do you have a question about the M80 and is the answer not in the manual?
Questions and answers