
Subscribe to Our Youtube Channel
Related Manuals for Jensen JCR-231

Summary of Contents for Jensen JCR-231
- Page 1 DIGITAL AM/FM DUAL ALARM CLOCK RADIO WITH WAVE SENSOR JCR-231 USER MANUAL PLEASE READ THIS USER MANUAL COMPLETELY BEFORE OPERATING THIS UNIT AND RETAIN THIS BOOKLET FOR FUTURE REFERENCE.
-
Page 2: Important Safety Instructions
WARNING TO PREVENT FIRE OR SHOCK HAZARD, DO NOT USE THIS PLUG WITH AN EXTENSION CORD, RECEPTACLE OR OTHER OUTLET UNLESS THE BLADES CAN BE FULLY INSERTED TO PREVENT BLADE EXPOSURE. TO PREVENT FIRE OR SHOCK HAZARD, DO NOT EXPOSE THIS APPLIANCE TO RAIN OR MOISTURE. WARNING To reduce the risk of fire or electric shock, do not expose this apparatus to rain or moisture. -
Page 3: Compliance With Fcc Regulations
15. This apparatus shall not be exposed to dripping or splashing water and that no object filled with liquids such as vases shall be placed on the apparatus. 16. Main plug is used as disconnect device and it should remain readily operable during intended use. In order to disconnect the apparatus completely, the main plug should be disconnected from the main socket outlet completely. -
Page 4: Dear Jensen® Customer
The serial number of this product is found on its bottom cover. You should note the serial number of this unit in the space provided as a permanent record of your purchase to aid in identification in the event of theft of loss. Model Number: JCR-231 Serial Number: ________________ PROTECT YOUR FURNITURE!! This system is equipped with non-skid rubber ‘feet’... -
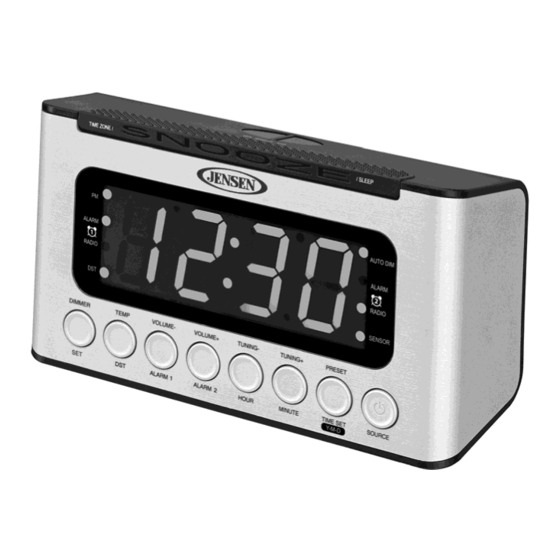
Page 5: Location Of Controls
LOCATION OF CONTROLS Controls and Functions of Unit 1. On/Off/Source Button 2. Preset /Time Set / Y-M-D Button 3. Tuning + / Minute Button 4. Tuning - / Hour Button 5. Volume + / Alarm2 Button 6. Volume - / Alarm1 Button 7.Temp / DST Button 8.Dimmer/SET Button 9.Snooze / Time Zone/Sleep Button... -
Page 6: Getting Started
WARNING DO NOT INGEST BATTERY, CHEMICAL BURN HAZARD This product contains a coin/button cell battery. If the coin/button cell battery is swallowed, it can cause severe internal burns in just 2 hours and can lead to death. Keep new and used batteries away from children. If the battery compartment does not close securely, stop using the product and keep it away from children. -
Page 7: Setting Up The Time Zone
SETTING THE CALENDAR AND CLOCK Note: The radio and AUX must be OFF to set TIME/DATE. To turn off, press and hold the SOURCE (#1) button for 2 seconds. The time will then be displayed. IMPORTANT: Digits will flash during setup and time-out after 5 seconds if no buttons are pressed. -
Page 8: Setting Up The Alarms
During the Snooze delay, the alarm icon RADIO or ALARM will flash. The Snooze function can be repeated within the alarm duration. If you set the JCR-231 to the Auto Dim Mode, the LED DISPLAY (#10) will keep on turn on automatically when the snooze function is activated. -
Page 9: Listening To Radio
LISTENING TO RADIO 1. Press the ON/OFF/SOURCE BUTTON (#1) to turn on the JCR-231. 2. Tap ON/OFF/SOURCE BUTTON (#1) to select AM or FM band. 3. To manual tune the radio station, tap the TUNING-/HOUR BUTTON (#4) or TUNING+/MINUTE BUTTON (#3) repeatedly to your desired radio station. - Page 10 Press and hold the ON/OFF/SOURCE BUTTON (#1) to turn off the JCR-231 when you have finished listening. Don't forget to switch off the power of your external device as well.
- Page 11 In radio off mode, to display indoor temperature and alarm time settings: Wave your hand over the IR Wave your hand over the IR Wave your hand over the IR SENSOR (#11) once to show the SENSOR (#11) again within 1 SENSOR (#11) again within 1 indoor temperature.
-
Page 12: Dimmer Control
Wave your hand over the IR SENSOR (#11) Wave your hand over the IR SENSOR (#11) again within 1 second to show the ALARM1 again within 1 second to show the ALARM 2 time time In radio off mode, and with the Display Dimmer Switch set to “AUTO OFF”, the time display will automatically turn off in 15 seconds. -
Page 13: Care And Maintenance
3. Tap the PRESET/TIME SET/Y-M-D BUTTON (#2) once to turn the AUTO DIM FUNCTION ON. The AUTO DIM LED indicator will light. 4. Tap the PRESET/TIME SET/Y-M-D BUTTON (#2) twice to turn the AUTO DIM FUNCTION OFFN. The AUTO DIM LED indicator will turn off. Note: The AUTO DIM FUNCTION allows the LED DISPLAY (#10) to automatically turn off after 15 seconds to conserve energy. -
Page 14: Troubleshooting Guide
TROUBLESHOOTING GUIDE If you experience difficulties in the use of this clock radio, please check the following or call 1-800-777- 5331 for Customer Service. Symptom Possible Cause Solution The Sensor has been The unit is too close to a wall or Relocate the clock radio to keep it a accidentally triggered there is a barrier (e.g. - Page 15 The warranty applies to the SPECTRA product only while: It remains in the possession of the original purchaser and proof of purchase is demonstrated. It has not been subjected to accident, misuse, abuse, improper service, usage outside the descriptions and warnings covered within the user manual or non-SPECTRA approved modifications.
Need help?
Do you have a question about the JCR-231 and is the answer not in the manual?
Questions and answers