Table of Contents
Advertisement
Quick Links
Owner's Manual
Manuel de l'utilisateur
•
Please thoroughly read the owners manual
before beginning assembly.
All stated sizes are nominal.
Veuillez lire attentivement le manuel de l'utilisateur
avant de commencer le montage de la remise.
Toutes les tailles indiquées sont nominales.
Por favor, lea con atención el manual del
usuario antes de comenzar el montaje.
Todos los tamaños indicados son nominales.
FOR QUESTIONS, WARRANTY ISSUES,
OR REPLACEMENT PARTS:
Please contact Keter Customer Service at:
POUR TOUTE QUESTION, TOUT PROBLÈME
CONCERNANT LA GARANTIE, OU LES PIÈCES DE
REMPLACEMENT:
Veuillez contacter le service clientèle de Keter au :
POR PREGUNTAS, TEMAS RELACIONADOS CON LA
GARANTÍA O REPUESTOS, (No válido en México)
comuníquese con el Servicio al Cliente de Keter, llamando al:
Manual del usuario
Anwenderhandbuch
•
•
English
Français
Español
Handleiding
Manuale dell'utente
•
•
www.outstanding-keter.com
US: # 1-888-374-4262
Canada: # 1-800-661-6721
UK: # 0121-5060008
Other European Countries:
# 31-1612-28301
Manual do utilizador
•
Advertisement
Table of Contents

Related Manuals for Keter Bellevue


Summary of Contents for Keter Bellevue
- Page 1 UK: # 0121-5060008 Veuillez contacter le service clientèle de Keter au : Other European Countries: POR PREGUNTAS, TEMAS RELACIONADOS CON LA # 31-1612-28301 GARANTÍA O REPUESTOS, (No válido en México) comuníquese con el Servicio al Cliente de Keter, llamando al:...
- Page 2 KLANTENSERVICE • SERVIZIO CLIENTI • ASSISTÊNCIA AO CLIENTE IMPORTANT: For assistance with assembly or to request missing parts, please log onto our web site at www.outstanding-keter.com or contact Customer Service. IMPORTANT : Pour toute assistance lors du montage ou pour obtenir des pièces manquantes, veuillez visiter notre site Internet : www.outstanding-keter.com ou contacter notre Service Clientèle.
- Page 3 LEVEL THE GROUND • NIVELLEMENT DU SOL • NIVELE EL SUELO • SORGEN SIE FÜR EINE EBENE GRUNDFLÄCHE MAAK DE GROND WATERPAS • METTERE IL TERRENO A LIVELLO • NIVELAR O SOLO • Clear area of stones • Verwijder stenen •...
- Page 4 LEVEL THE GROUND • NIVELLEMENT DU SOL • NIVELE EL SUELO • SORGEN SIE FÜR EINE EBENE GRUNDFLÄCHE MAAK DE GROND WATERPAS • METTERE IL TERRENO A LIVELLO • NIVELAR O SOLO • In order to properly assemble some parts of the shed, it should be kept 27 inches / 70 cm from any fence or wall until fully assembled. •...
- Page 5 CAUTION • AVERTISSEMENT • ADVERTENCIA • WICHTIG • WAARSCHUWING • ATTENZIONE • ATENÇÃO Some parts have steel edges. Please be careful when handling components. Always wear work gloves, eye protection and long sleeves when assembling or performing any maintenance on your shed. Do not attempt assembly on days with strong winds or low temperatures.
- Page 6 BEFORE STARTING ASSEMBLY • AVANT DE COMMENCER LE MONTAGE ANTES DE EMPEZAR EL ARMADO • VOR MONTAGEBEGINN • VOORDAT U BEGINT TE MONTEREN PRIMA DI INIZIARE IL MONTAGGIO • ANTES DE INICIAR A MONTAGEM • Entnehmen Sie alle Teile aus beiden Verpackungen und legen Sie diese auf dem Boden aus. •...
- Page 7 ASSEMBLY PARTS • PIÈCES À ASSEMBLER • PIEZAS DE ENSAMBLE MONTAGETEILE • MONTAGESTUKKEN • PARTI DA MONTARE • PEÇAS DE MONTAGEM • For easy identification of the parts, code letters are imprinted on them. • Pour une identification plus aisée, des lettres sont imprimées au dos de chaque pièce. •...
- Page 8 ASSEMBLY PARTS • PIÈCES À ASSEMBLER • PIEZAS DE ENSAMBLE MONTAGETEILE • MONTAGESTUKKEN • PARTI DA MONTARE • PEÇAS DE MONTAGEM Roof Parts • Pièces du toit • Partes del techo Dachelemente • Dakonderdelen • Parti del tetto • Peças do telhado (x2) (x2) (x4)
- Page 9 ASSEMBLY PARTS • PIÈCES À ASSEMBLER • PIEZAS DE ENSAMBLE MONTAGETEILE • MONTAGESTUKKEN • PARTI DA MONTARE • PEÇAS DE MONTAGEM Window parts • Pièces de la fenêtre • Partes de la ventana Fensterelemente • Vensteronderdelen • Parti della finestra • Peças da janela WB (x 7) K (x 1) WT (x 1)
- Page 10 ASSEMBLY PARTS • PIÈCES À ASSEMBLER • PIEZAS DE ENSAMBLE MONTAGETEILE • MONTAGESTUKKEN • PARTI DA MONTARE • PEÇAS DE MONTAGEM Screws • Vis • Tornillos • Schrauben • Schroeven • Viti • Parafusos • Please refer to the screw index below to find the actual screw size •...
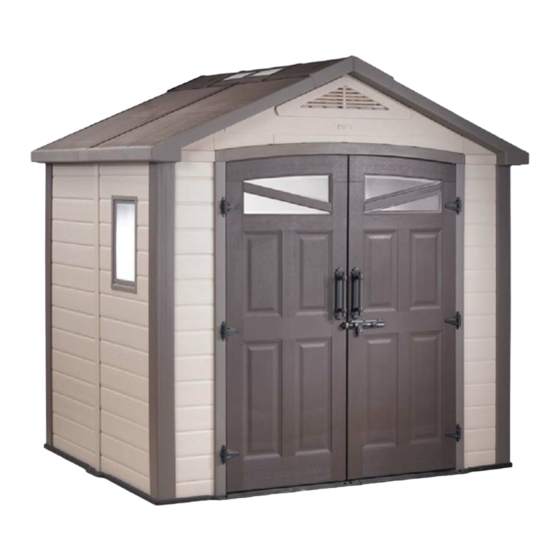
- Page 11 General overview of the Bellevue Vue générale du Bellevue Vista general del Bellevue Gesamtansicht des Bellevue Algemeen overzicht van de Bellevue Panoramica generale della casetta Bellevue Vista geral do Bellevue • Front view • Vue frontale • Vista frontal • Vorderansicht •...
- Page 12 FLOOR ASSEMBLY • MONTAGE DU SOL • ARMADO DEL PISO MONTAGE DER BODENPLATTE • VLOERMONTAGE • MONTAGGIO DEL PAVIMENTO • MONTAGEM DO PISO C1(x4) (x2) (x2) C1(x4)
- Page 13 C1(x6) C1(x6)
- Page 14 In order to properly assemble some parts of the shed, it should be kept 27inches / 70 cm from any fence or wall until fully assembled. Pour monter correctement les parties de l'abri, vous devez garder 27 pouces / 70 cm de distances d'un obstacle ou d'un mur jusqu'à...
- Page 15 YCC(x8) • Beware of the corner connectors (YCC) • Soyez prudent avec les raccords d'angle (YCC) • Sea precavido con los esquineros (YCC) • Vorsicht bei den Eckverbindungen (YCC) • Voorzichtig voor de hoekaansluitingen (YCC) • Prestare attenzione ai connettori ad angolo (YCC) •...
- Page 16 s s i T h i té r ie à l’ i n ô té a c ia C e c v a h la d o n tr o E s te a d e (x1) YM22(x1) METAL e in s id T h is té...
- Page 17 WALL ASSEMBLY • MONTAGE DU MUR • ARMADO DE PAREDES MONTAGE DER WÄNDE • MONTAGE VAN DE MUREN • ASSEMBLAGGIO DELLE PARETI • MONTAGEM DA PAREDE YCO(x1) 35B(x2) click click 35B(x2)
- Page 18 YP/YP-window(x1) • This side out • Côté Extérieur • Cara exterior • Diese Seite nach aussen • Deze kant buiten • Lato rivolto verso l'esterno • Este lado para fora...
- Page 19 s s i T h i té r ie NO METAL à l’ i n a c ia ô té C e c v a h la d o n tr o E s te a d e (x1) NO METAL e in s id T h is...
- Page 20 YP/YP-window(x1) s s i e in T h i s id té r ie T h is té ri e à l’ i n à l’ i n a c ia ô té a c ia ô té C e c v a h C e c v a h...
- Page 21 s s i METAL T h i té r ie à l’ i n ô té a c ia C e c v a h la d o n tr o E s te a d e (x1) (x1) METAL METAL click e in...
- Page 22 YCO(x1) (x1) (x2) 35B(x2) click NO METAL s s i T h i té r ie à l’ i n a c ia ô té C e c v a h la d o n tr o E s te a d e YP-window(x1) (x1)
- Page 23 YP-window(x1) YCO(x1) (x2) click 35B(x2) s i d i e u t é r i o r t e r t é C ô (x2) (x2) click...
- Page 24 ROOF ASSEMBLY • MONTAGE DU TOIT • ARMADO DEL TECHO DACHMONTAGE • DAKMONTAGE • MONTAGGIO DEL TETTO • MONTAGEM DO TELHADO (x2) (x2) (x2) click click (x2) YCC(x4) click click click click...
- Page 25 click click click click (x1) (x1) (x1) click click click...
- Page 26 (x2) (x1) C1(x1) C15(x2) (x2) (x2) C15(x2)
- Page 27 (x1) (x1) (x1) click click click YM24 (x2) (x1) (x1) (x1) C15(x2)
- Page 28 35B(x1) YM25 PA (x 1) (x2) (x1) (x2) 35B(x1) PA (x 1)
- Page 29 Logo click click click click click...
- Page 30 (x2) (x1) click click click click (x1) (x2) • Be careful when connecting the steel profiles. • Soyez prudent lorsque vous connectez les profils en acier. • Tenga cuidado cuando conecte los perfiles de acero. • Seien Sie vorsichtig, wenn Sie die Stahlprofile verbinden. •...
- Page 31 YAA(x1) (x1) (x4) (x4)
- Page 32 (x2) (x2) (x2)
- Page 33 (x4) C15(x2) click C15(x2)
- Page 34 (x2) YSC(x2) (x2) (x2) C4(x2) click...
- Page 35 YSQ(x2) click click YSQ(x2) click click...
- Page 36 (x1) (x3) (x3) click...
- Page 37 (x1) (x3) click click (x3)
- Page 38 (x1) (x1) (x6) click click (x6) click...
- Page 39 DOOR ASSEMBLY • MONTAGE DE LA PORTE • ARMADO DE LA PUERTA • MONTAGE DER TÜR • DEURMONTAGE • MONTAGGIO DELLA PORTA • MONTAGEM DA PORTA (x6) YH(x6) (x12) (x18) YDAL (x1) (x6) (x6) YDAR (x1) click (x12) (x12)
- Page 40 YHS(x2) (x4) (x4) click (x4) (x4) YHLL(x1) YHLB(x1) (x4) click (x4)
- Page 41 YHV(x2) click click YDPx1 (x1) (x1) click...
- Page 42 YM32(x8) 32B(x8) 2 ” • Check the doors to make sure they are level at the top. • Vérifier les portes, pour vous assurer qu'elle sont droites dans la partie supérieure. • Revise las puertas, para asegurarse de que estén parejas en la parte superior. •...
- Page 43 35B(x14)
- Page 44 (x4) (x4)
- Page 45 (x12) (x12)
- Page 46 (x4) (x4) (x34) (x34)
- Page 47 (x8) • Assemble from outside the shed • Monter l'abri du côté extérieur • Arme el cobertizo desde afuera. • Von außerhalb des Schuppens montieren • Montage buiten de schuur • Effettuare l'assemblaggio rimanendo all’esterno della casetta • Efectue a montagem a partir do exterior do abrigo de jardim (x8)
- Page 48 WINDOW ASSEMBLY • MONTAGE DE LA FENÊTRE • VENTANA DEL TECHO • FENSTERHMONTAGE RAAMMONTAGE • MONTAGGIO DE LA FINESTRA • MONTAGEM DO JANELA W-Out (x 1) WT (x1) • Assembly requires two people • Le montage doit être effectué par deux personnes •...
- Page 49 W-In(x1) W-B(x1) W-K(x1) OPEN CLOSE W-In W-In(x1) W-B(x6) W-K(x1) OPEN CLOSE...
- Page 50 CP(x39) CP(x39) (x4)
- Page 51 Option • Opción • Optie • Opzion • Opçãoe Securing the shed to a foundation Use the holes in the floor panels as indicated in the picture to attach the shed to the foundation. The screws (10 units) should be 4 inches/10cm long and suitable for the type of material the foundation is constructed from. Screws are not included, but can usually be purchased at your local hardware store.
- Page 52 Shelf kit available through Costco.com (USA) or Costco.ca (Canada) Les kit d'étagères sont disponibles via Costco.com (USA) ou Costco.ca (Canada) Kit de estantes disponibles en Costco.com (USA) o Costco.ca (Canada) Tools and accessories in picture not included. Les outils et les accessoires figurant sur l'image ne sont pas inclus. No se incluyen las herramientas ni los accesorios de la imagen.
- Page 53 Keter's storage buildings (the Product) are warranted to the original purchaser to be free from defects in material or workmanship for a period of 10 years from the original date of purchase. Keter's renowned reputation for fine products is a result of its dedication and commitment to quality, design and innovation.
- Page 54 Keter se réserve le droit de modifier ou de changer n’importe lequel de ses produits, y compris les couleurs, sans notification préalable. Si un produit couvert par cette garantie venait à être indisponible, Keter se réserve le droi t de le substituer à sa seule discrétion par un produit de valeur égale ou de rembourser un montant correspondant à...
- Page 55 TODOS LOS RECLAMOS REFERIDOS A LA GARANTÍA REQUERIRÁN UN COMPROBANTE FECHADO DE COMPRA. Keter, a su propia discreción, enviará la o las partes reparadas o reemplazadas sin cargo alguno, lo cual incluye los costos de flete, según la presente garantía. Una vez que el reclamo se haya resuelto, el período de garantía seguirá contándose desde la fecha de compra original.
- Page 56 10 JAHRES-GARANTIE MIT BESCHRÄNKTER HAFTUNG Mit den Lagerschuppen (das Produkt) von Keter erhält der ursprüngliche Käufer für einen Zeitraum von 10 Jahren eine Gewährleistung bei Material- oder Verarbeitungsfehlern. Der gute Ruf von Keter‘s Produkten begründet sich auf die Verpflichtung zu Qualität, Design und Innovation.
- Page 57 Als het Product in zijn geheel vervangen moet worden, kan Keter een pro rata deel van de aankoopprijs restitueren zoals hieronder bepaald, of van de geadverteerde verkoopprijs van vergelijkbare Producten ten tijde van de aanpassing. De pro rata basis van de prijs wordt bepaald door de volgende berekening: 0-2 jaar in bezit, 100% restitutie van de originele aankoopprijs.
- Page 58 Keter garantisce all’acquirente originario che i fabbricati a uso deposito (il Prodotto) realizzati dalla stessa sono esenti da difetti di manodopera o nei materiali per un periodo di 10 anni dalla data originaria di acquisto. Keter è famosa per l’eccellenza dei propri prodotti, e si è...
- Page 59 GARANTIA LIMITADA DE 10 ANOS É garantido ao comprador original que os abrigos da Keter (o Produto) estão livres de defeitos de material e de fabrico por um período de 10 anos desde a data de compra. A célebre reputação da Keter pelos seus produtos distintos é resultante da sua dedicação e compromisso com a qualidade, o design e a inovação.
- Page 60 CARE & SAFETY • It is of utmost importance to assemble all of the parts according to the directions. Do not skip any step. • Please consult your local authorities if any permits are required to erect shed. • Periodically check shed to assure that it remains stable and that the site remains level. •...
- Page 61 PFLEGE- UND SICHERHEITSHINWEISE • Es ist äußerst wichtig, dass alle Teil der Anleitung zufolge montiert werden. Bitte lassen Sie keine Schritte aus. • Falls Sie eine Baugenehmigung für den Gartenschuppen benötigen, wenden Sie sich bitte an die örtlichen Behörden. • Überprüfen Sie den Gartenschuppen in regelmäßigen Abständen, um so sicherzustellen, dass seine Stabilität sowie die Ebenheit seines Standortes noch gewährleistet sind.
- Page 62 CUIDADO E SEGURANÇA • É de extrema importância que monte todas as partes de acordo com as instruções. Não omita nenhum passo. • Contacte as autoridades se necessitar de licença para montar o abrigo de jardim. • Verifique periodicamente o abrigo de jardim para se certificar que se encontra estável e o local nivelado. •...
Need help?
Do you have a question about the Bellevue and is the answer not in the manual?
Questions and answers