Advertisement
Advertisement

Related Manuals for Westfield Aries 350


Summary of Contents for Westfield Aries 350
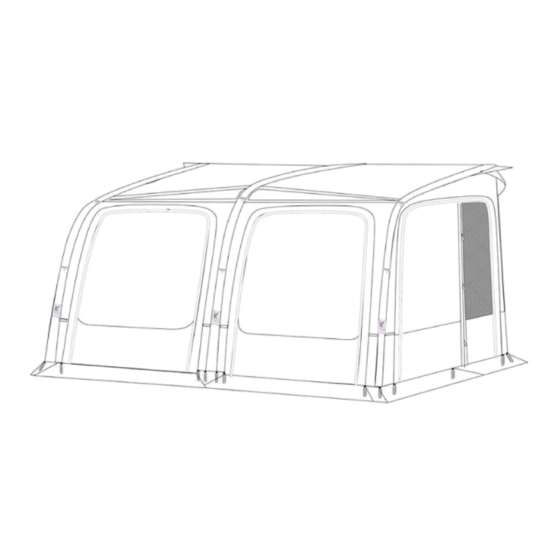
- Page 1 PERFORMANCE SERIES » Aries 350 « Model No. 12020323500000 Top Quality Camping...
-
Page 2: Table Of Contents
WELCOME Thank you for purchasing this Westfield Outdoors awning. Please read these instructions for use fully and carefully before using your awning. Please observe the care and safety instructions. SUMMARY GENERAL RECOMMENDATIONS AND USAGE THE AIR TUBES INFLATING/DEFLATING REPLACING AN TPU AIR TUBE... -
Page 3: Assembly Parts List
Model No. 12020323500000 ASSEMBLY PARTS LIST x 38 Draft Skirt & Pump & Safety Metal Peg Plastic spanner Carry Bag Wheel Cover Pressure Valve 1.Clean repair area thoroughly 2.Press patch fiemly over puncture 3.Do not inflate for four(4)hours to allow repair to set Storm Strap Elastic Ring Plastic Peg... -
Page 4: General Recommendations And Usage
GENERAL RECOMMENDATIONS AND USAGE • We recommend the use of an additional groundsheet or covering to avoid any damage to your awning whilst fitting it to your caravan, motorhome or vehicle. • Please familiarize yourself with the awning before you go on your first trip. We recommend a test set-up before your trip. -
Page 5: Inflating/Deflating
INFLATING/DEFLATING Inflation The included pump is equipped with an overpressure valve. This Safety Pressure prevents you from overfilling the air tube. The ideal air pressure is Valve 7 PSI (0.48 bar). To inflate your awning: Pressure Gauge • Ensure that the valves on the awning are screwed in correctly. •... -
Page 6: Replacing An Tpu Air Tube
REPLACING AN TPU AIR TUBE Replacing or Repairing an Air Tube Deflate the air tube fully. NEVER replace or repair a tube before defla Break the plas ve of the air tube and unzip the sleeve. Then remove the prot e cover and air tube from inside the sleeve. - Page 7 PITCHING INSTRUCTIONS the bottom of your caravan, motorhome or vehicle. The wheel cover either slides into the rail on the wheel arch or uses the figure of eight tubing and connects to the top of the draft skirt. the floor strap is attached. and pull the awning along the rail to the desired position.
- Page 8 PITCHING INSTRUCTIONS read and understood the pump and inflation section of these instructions. You must follow these instructions to ensure proper inflation of your awning. ensuring the safety pressure valve is connected to the pump at all times. strap as shown in the diagram. pumped up and sprung into place.
-
Page 9: Pitching Instructions
PITCHING INSTRUCTIONS Window Blinds Set Fixed by the toggles on the corner of main tube. Aluminum Roof Pole Take the roof pole and place the head and end into the pocket in the corner of the air tube. Do not over tension the pole. - Page 10 PITCHING INSTRUCTIONS Rear Pole Kit side panel and extend the leg until it touches the ground. This creates the seal against your caravan. it could cause damage if over tensioned. rear of the panel.
- Page 11 PITCHING INSTRUCTIONS (OPTIONAL) Assemble the AAS air tubes as shown in the diagrams above. Install the sleeves and zip up as shown in the diagrams above. OPTIONAL Do not over tension the poles Veranda Pole Assemble the veranda pole (1pcs) into one of the front door, to get a great view and better ventilation.
- Page 12 PITCHING INSTRUCTIONS (OPTIONAL) Annex Connected with awning by zip OPTIONAL Annex Inner Tent Fixed by the toggles on the annex.
- Page 13 PITCHING INSTRUCTIONS (OPTIONAL) Optional roof lining Fixed by the toggles on the air tubes sleeve OPTIONAL Optional mesh door panels set Connected with front door by zip.
-
Page 14: General Care And Usage Instructions
GENERAL CARE AND USAGE INSTRUCTIONS Canvas Seams The main seams of this awning are taped to ensure water protection. These can become damaged over time but can be repaired and re-sealed by using seam sealer. For the best results, we recommend contacting your dealer to find out which products to use. - Page 16 Top Quality Camping Westfield Outdoors GmbH Siemesdyk 60 47807 Krefeld Germany Drawings in this manual are for illustration purposes only, actual product may vary. Manufacturer reserves the right to change any specification or features without prior notice. Should you have any questions about your product or experience any difficulties, please contact the retailer from which you purchased the product.
Need help?
Do you have a question about the Aries 350 and is the answer not in the manual?
Questions and answers