Table of Contents

Subscribe to Our Youtube Channel
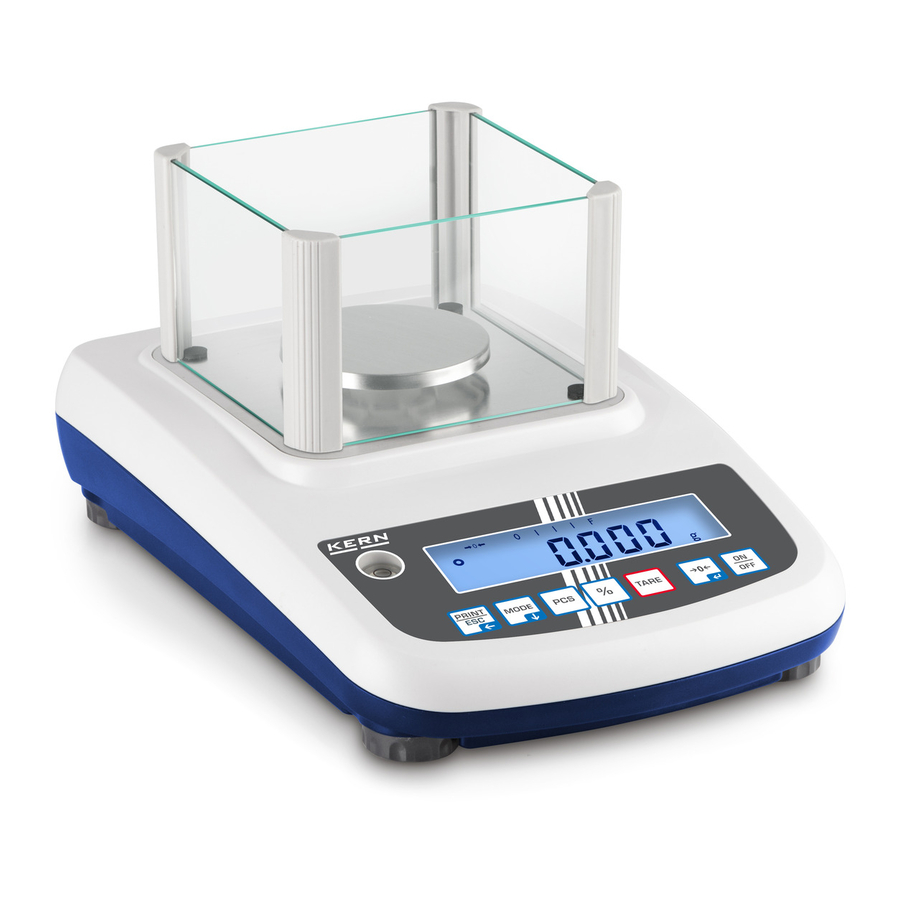
Related Manuals for KERN PFB 120-3A

Summary of Contents for KERN PFB 120-3A
- Page 1 KERN & Sohn GmbH Ziegelei 1 Phone: +49-[0]7433- 9933-0 D-72336 Balingen Fax: +49-[0]7433-9933-149 E-Mail: info@kern-sohn.com Internet: www.kern-sohn.com Operating manual Precision balances KERN PFB Type PFB_A Version 4.1 2017-10 PFB-BA-e-1741...
-
Page 2: Table Of Contents
KERN PFB Type PFB_A Version 4.1 2017-10 Operating manual Precision balance Contents Technical data ....................4 Declaration of conformity ................7 Appliance overview ..................8 Keyboard overview ........................8 Overview of display ........................9 Basic Information (General) ................ 10 Proper use ..........................10 Improper Use .......................... - Page 3 Menu ......................29 10.1 Navigation in the menu ......................29 10.2 Access to technology menu...................... 30 10.3 Overview ........................... 31 Interfaces ...................... 33 11.1 RS232 ............................33 11.1.1 Technical data ........................33 11.1.2 Printer operation (RS 232) ....................34 11.1.3 Output log (continuous output) .....................
-
Page 4: Technical Data
1 Technical data KERN (Type) PFB 120-3A PFB 200-3A PFB 300-3A Trademark PFB 120-3 PFB 200-3 PFB 300-3 Readability (d) 0,001 g 0,001 g 0,001 g Weighing range (max) 120 g 200 g 300 g Reproducibility 0,001 g 0,002 g... - Page 5 PFB 2000-2A KERN (Type) PFB 600-2A PFB 1200-2A Trademark PFB 600-3 PFB 1200-2 PFB 2000-2 Readability (d) 0,01 g 0,01 g 0,01 g Weighing range (max) 600 g 1200 g 2000 g Reproducibility 0,01g 0,01 g 0,02 g Linearity ±0,03 g ±0,03 g...
- Page 6 PFB 3000-2A PFB 6000-1A PFB 6000-2A KERN (Type) Trademark PFB 3000-2 PFB 6000-1 PFB 6000-2 Readability (d) 0,01 g 0,1 g 0,05 g Weighing range (max) 3000 g 6000 g 6000 g Reproducibility 0,02 g 0,1 g 0,05 g Linearity ±0,05 g...
-
Page 7: Declaration Of Conformity
2 Declaration of conformity The current EC/EU Conformity declaration can be found online in: www.kern-sohn.com/ce PFB-BA-e-1741... -
Page 8: Appliance Overview
3 Appliance overview 3.1 Keyboard overview Button Function designation Turn on/off ON/OFF Zeroing ZERO Taring TARE Enable calculation of percentage Returning to weighing mode from calculation of percentage mode Enable parts counting In the piece count mode back to weighing mode ... -
Page 9: Overview Of Display
3.2 Overview of display Display Description Zero indicator Net weight value display ο Stability display Parts counting application Calculation of percentage application Tolerance weighing application Capacity display The capacity display moves from the left to the right and proceeds equally to the weight loaded onto the weighing balance. Its full width is reached at maximum load. -
Page 10: Basic Information (General)
The balance may only be used according to the described conditions. Other areas of use must be released by KERN in writing. 4.3 Warranty Warranty claims shall be voided in case •... -
Page 11: Monitoring Of Test Resources
In KERN's accredited DKD calibration laboratory test weights and balances may be calibrated (return to the national standard) fast and at moderate cost. 5 Basic Safety Precautions 5.1 Pay attention to the instructions in the Operation Manual... -
Page 12: Unpacking, Setup And Commissioning
Scope of delivery / serial accessories: • Balance • Weighing pan • Mains adapter • Operating manual • Wind shield (only models PFB 120-3A, PFB 200-3 A, PFB 300-3 A, PFB 1200-2A, PFB 2000-2A, PFB 3000-2A) PFB-BA-e-1741... -
Page 13: Placing
The balance must be installed in a way that the weighing plate is exactly in horizontal position. Install wind shield (only models PFB 120-3A, PFB 200-3 A, PFB 300-3 A, PFB 1200-2A, PFB 2000-2A, PFB 3000-2A) Levelling Exact alignment and stable installation are an essential requirement for repeatable results. -
Page 14: Mains Connection
Before connecting or disconnecting of additional devices (printer, PC) to the data interface, always disconnect the balance from the power supply. With your balance, only use accessories and peripheral devices by KERN, as they are ideally tuned to your balance. -
Page 15: Adjustment
The adjustment weight you use is dependent on the capacity of the balance. Perform adjustment as close as possible to the maximum load. Info about test weights can be found on the Internet at: http://www.kern- sohn.com • Ensure that there are no objects on the weighing pan. -
Page 16: Linearization
7.7 Linearization Linearity shows the greatest deviation of a weight display on the scale to the value of the respective test weight according to plus and minus over the entire weighing range. If linearity deviation is discovered during a monitoring of test resources, you can improve this by means of linearization. - Page 17 Procedure: Switch on weighing scales and press and hold the MODE key during the self-test until “F1 Unt“ is shown on the screen. Press the MODE key repeatedly until “tECH“ is shown on the screen. Confirm with ZERO button. ...
- Page 18 Put on the third adjustment weight. An audio sound will follow after stability control and „LoAd 4“ will be shown. Take away adjustment weight. Place the fourth adjustment weight (max). An audio sound will follow after stability control and „LoAd 0“ will be shown. Take away adjustment weight. ...
-
Page 19: Basic Operation
8 Basic Operation 8.1 Start-up Press the ON/OFF key to light up the display. The balance will carry out a display test. As soon as the weight display appears, the balance is ready for weighing. 8.2 Switching Off Press ON/OFF button, the display disappears 8.3 Zeroing Resetting to zero corrects the influence of light soiling on the weighing plate. -
Page 20: Switch-Over Weighing Unit
8.5 Switch-over weighing unit How to enable weighing units: Switch on weighing scales and press and hold the MODE key during the self-test until “F1 Unt“ is shown on the screen. Press the ZERO key, the first weighing unit with the current setting will be displayed. - Page 21 8.6 Weighing with tare Deposit weighing vessel. After successful stability control press the TARE button. Zero display and indicator appear. The weight of the container is now internally saved. Weigh the material, the net weight will be indicated. •...
-
Page 22: Applications
9 Applications 9.1 Percent determination Percent weighing allows to display weight in percent, in relation to a reference weight. Put the nominal weight Place the nominal weight (reference weight which corresponds to 100 %). Wait for stability display, then press the % button 100% is displayed. Percent weighing /commutation ... -
Page 23: Parts Counting
9.2 Parts counting Before the balance can count parts, it must know the average part weight (i.e. reference). Proceed by putting on a certain number of the parts to be counted. The balance determines the total weight and divides it by the number of parts, the so- called reference quantity. -
Page 24: Totalization
9.3 Totalization 9.3.1 Manual totalizing With this function the individual weighing values are added into the summation memory by pressing the PRINT key and edited when an optional printer is connected. • For menu settings, see chapter 10.3: „F3 COM“ „S 232“ „P Prt“ „F4 Acc“... - Page 25 Place item to be weighed B, e.g. 200 g. Wait for stability display, then press the PRINT key. The weight value will be added to the summation memory and edited. Number of weighings, followed by the total weight will be displayed for 2 sec. After that the current weighing value is displayed.
- Page 26 With the weighing scales unloaded (zero display) press the PRINT key, wait for display of “total weight” and press the PCS key. The data in the summation memory are deleted. Printout example (KERN YKB-01N): 100.00 g N First weighing 200.00 g N...
-
Page 27: Automatic Adding-Up
9.3.2 Automatic adding-up With this function the individual weighing values are automatically added into the summation memory when the balance is unloaded without pressing and edited, when an optional printer is connected. • Menu settings, chap. 10.3: „F3 COM“ „S 232 „P AUto“ „F4 Acc“... -
Page 28: Pfb-Ba-E
Remove the weighed good. The weighing value is added to the summation memory and printed if an optional printer is connected. Number of weighings, followed by the total weight will be displayed for 2 sec. Add more weighed goods as described before. Please note that the weighing system must be unloaded between the individual weighing procedures. -
Page 29: Menu
10 Menu 10.1 Navigation in the menu Call up menu Switch-on balance and during the selftest press The first menu item „F1 Unt„ is displayed. Select menu item With help of , the individual menu items can be selected one after the other. -
Page 30: Access To Technology Menu
10.2 Access to technology menu The access to the technology menu „tECH“ is locked by the key combination PFB-BA-e-1741... -
Page 31: Overview
10.3 Overview Factory settings are marked by *. Menu block Menu item Available settings / explanation F1 Unt g, ct, lb, oz, d, yn, ozt, dwt, mom, tl h, tl c, tl t, t, bt, n Weighing Units Automatic background illumination on when EL AU* F2 bl weighing pate is loaded or key pressed. - Page 32 P ASK Remote control instructions Acknowledge selection by b600 Available Baudrate: 600, 1200, 2400, 4800, 9600* b 9600* Acknowledge selection by Standard printer setting LP 50 Not documented Acknowledge selection by Eng* Standard stetting English. only displayed for setting „LP 50“ Not documented Acc on Summation function enabled...
-
Page 33: Interfaces
• Connect balance using a suitable cable with the interface of the peripheral device. Faultless operation requires an adequate KERN interface cable. • Communication parameters (baud rate, bits and parity) of balance and peripheral device must match. -
Page 34: Printer Operation (Rs 232)
11.1.2 Printer operation (RS 232) Printout examples (KERN YKB-01N): 1. Menu settings F3 COM <P Prt> / F4 <Acc of> Weighing mode 300.00 g Percent determination 50.01 % Parts counting 20 PCS 5.00027g /P 100 g 100.00 g N Totalization 200.00 g N... -
Page 35: Output Log (Continuous Output)
11.1.3 Output log (continuous output) HEADER1: ST = stable, US = instable HEADER2: N = net, G = gross 11.2 Remote control instructions Comman Function Stable weighing value for the weight is sent via the interface Weighing value for the weight (stable or unstable) is sent via the interface No data are sent, the balance carries out the tare function. -
Page 36: Bluetooth (Factory Option)
® The wordmark and logos are the property of Bluetooth SIG,Inc. ® The use of such trademarks is licensed by KERN. Other trademarks and brand names are the property of their respective owners. 11.3.1 Add device Switch on balance ... - Page 37 Click on "Enter pairing code of the device" Enter code 1234 Click on „Close“ PFB-BA-e-1741...
-
Page 38: Determine Com Port Number
11.3.2 Determine COM Port number Display Bluetooth network appliances Double-click to display the COM Port PFB-BA-e-1741... -
Page 39: Servicing, Maintenance, Disposal
Spilled weighing goods must be removed immediately. 12.2 Servicing, maintenance The appliance may only be opened by trained service technicians who are authorized by KERN. Before opening, disconnect from power supply. 12.3 Disposal Disposal of packaging and appliance must be carried out by operator according to valid national or regional law of the location where the appliance is used. -
Page 40: Instant Help
14 Instant help In case of an error in the program process, briefly turn off the balance and disconnect from power supply. The weighing process must then be restarted from the beginning. Help: Fault Possible cause The displayed weight does not glow.
Need help?
Do you have a question about the PFB 120-3A and is the answer not in the manual?
Questions and answers